474217
10
Zoom out
Zoom in
Previous page
1/27
Next page
Installation
9
Gate Wing Fittings
1. Close gate.
2. Mount hinge plate at the push rod of the drive.
Insert screws but do not tighten.
3. Clamp the hinge plate to the gate wing and complete a programming run
to ensure that the limit switch settings are correct.
4. At three different positions, inspect drive and ensure that it is in a hori-
zontal position:
A. Gate “CLOSE”
B. Gate “OPEN”
C. Gate at 45° angle
5. Check position of hinge plate; if ok, secure hinge plate to wing.
6. Tighten nut at screw, ensuring that the drive can still be easily moved.
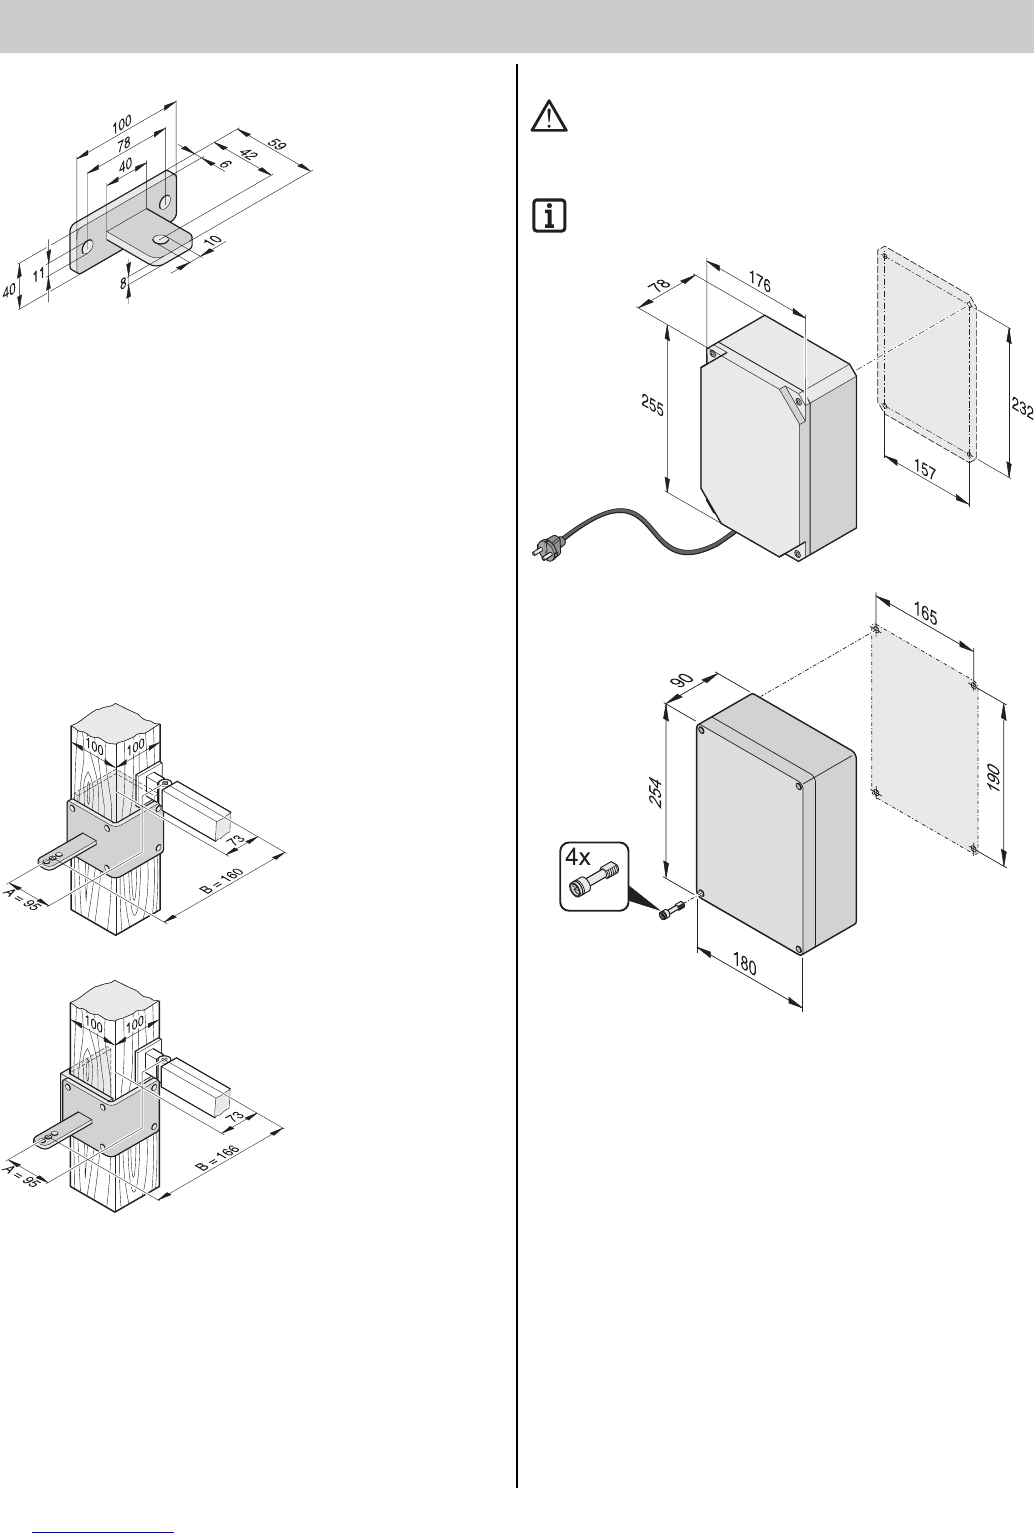
Timber post fittings
Available as optional accessories.
Installation of Control Unit
The power cable supplied with the control unit may only be
used for the installation of the drive systems. After completion
of the installation, disconnect the cable and replace it with a
duct-laid cable. It is forbidden to use the supplied power cable
for standard operation of the gate.
Establish power connection according to EN 12453 (all-pole
disconnecting switch).
Prior to carrying out any work at the control unit, disconnect it from the
power supply.
If there is humidity inside the housing, dry it with a blower.
The control unit may only be connected to the power supply by a
qualified electrician.
Install control unit in upright position (cable ducts at base) and without
applying any strain. The cover must fully close to prevent water from
penetrating the housing.
The cable ducts are designed for 1.5 mm² to 2.5 mm² cables.
Do not use any other cables.
Attach the housing at the intended fixing points; do not drill through the
rear wall of the housing, as it might otherwise not be waterproof.
Downloaded from www.Manualslib.com manuals search engine
10


Need help? Post your question in this forum.

Forumrules


Report abuse

Libble takes abuse of its services very seriously. We're committed to dealing with such abuse according to the laws in your country of residence. When you submit a report, we'll investigate it and take the appropriate action. We'll get back to you only if we require additional details or have more information to share.

Product:

For example, Anti-Semitic content, racist content, or material that could result in a violent physical act.

For example, a credit card number, a personal identification number, or an unlisted home address. Note that email addresses and full names are not considered private information.

Forumrules

To achieve meaningful questions, we apply the following rules:

Register

Register getting emails for Sommer Twist 200 at:


You will receive an email to register for one or both of the options.


Get your user manual by e-mail

Enter your email address to receive the manual of Sommer Twist 200 in the language / languages: English as an attachment in your email.

The manual is 1,94 mb in size.


You will receive the manual in your email within minutes. If you have not received an email, then probably have entered the wrong email address or your mailbox is too full. In addition, it may be that your ISP may have a maximum size for emails to receive.

Others manual(s) of Sommer Twist 200

Sommer Twist 200 User Manual - German - 29 pages

Sommer Twist 200 User Manual - Dutch - 28 pages


The manual is sent by email. Check your email

If you have not received an email with the manual within fifteen minutes, it may be that you have a entered a wrong email address or that your ISP has set a maximum size to receive email that is smaller than the size of the manual.

The email address you have provided is not correct.

Please check the email address and correct it.

Your question is posted on this page

Would you like to receive an email when new answers and questions are posted? Please enter your email address.


Info