13
10.4 Creating and Uploading Movie Clips
Create your very own digital movies using Digital Camera Manager. Low resolution supports 80 frames of
video. High Resolution supports 20 frames of video.
• When the Micro C@m is full, attach it to your PC via USB and run the Digital Camera Manager.
• You can now start to create your own movie clips by following these steps:
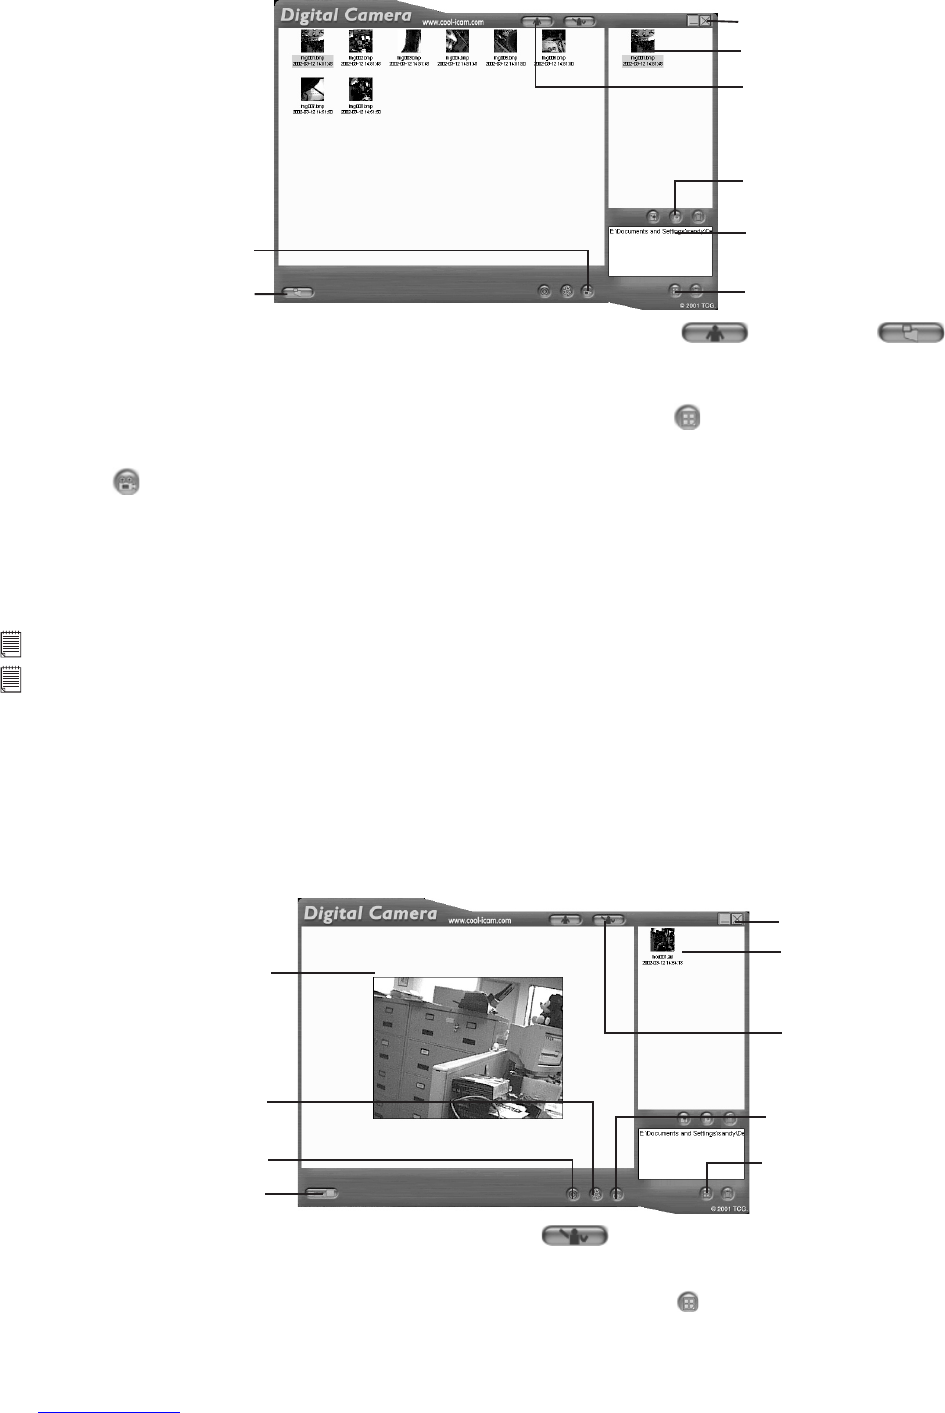
1a. Switch to DSC Mode
saved .avi le
4. Create movie clip
1b. Capture all stored
Close
2. Create New Album
E-mail saved .avi le
3. Select Album
1. Switch the interface to DSC (Digital Still Camera) Mode by clicking the button. Click to capture
all images stored in your Micro C@m. All uploaded images will be shown on the left panel.
2. During your Digital Camera Manager installation a folder called “Album” has been automatically created
in the bottom right section of the Digital Camera Manager. Highlight the le called “C:/Windows/Desktop/
Album” in the bottom right hand corner. You can alternatively click to create a new album to hold your
images. Name the album and save it to wherever you want in your PC.
3. If you have already created an album and you want to save image(s) in, double click the album.
4. Click the button to create a movie clip (.avi le) with all the selected images by holding the CTRL key on
your keyboard with the mouse click on each image.
5. Select the video compression format. “Full Frames (Uncompressed)” format is recommended.
6. The movie clip created will appear on the right panel and it will be saved to the album you created and
highlighted.
7. To retrieve movie clips saved in an album, simply double-click the album and the movie clips stored in the
album will be shown on the top right panel.
Important Notes:
Your images are also now retrievable from your desktop by clicking on the folder called “Album”.
Tips:
To quickly highlight all images hold down the CTRL and SHIFT key together and with the mouse click on the end images
of every row of images. This will quickly highlight every image in every row. Creating movie clip with both low and high
resolution will causes error.
10.5 Creating Live Movie Clips
You can now create live digital movies using Digital Camera Manager.
• Make sure your Micro C@m is connected to your PC via USB and run the Digital Camera Manager.
• Warning! Live Video Mode will erase all images stored in your Micro C@m. Make sure you upload all
wanted images before you switch the Digital Camera Manager to Live Video Mode.
• You can now start to create your live movie clips by following these steps:
1. Switch to Live
Video Mode
Close
Saved .avi
2. Create New Album
4. Adjust frame rate
Live Image
Adjust Resolution
5. Take snap shot
during recording
5. Start/Stop recording
live mode
1. Switch the interface to Live video Mode by clicking the button.
2. During your Digital Camera Manager installation a folder called “Album” has been automatically created
in the bottom right section of the Digital Camera Manager. Highlight the le called “C:/Windows/Desktop/
Album” in the bottom right hand corner. You can alternatively click to create a new album to hold your
images. Name the album and save it to wherever you want in your PC.
3. If you have already created an album and you want to save image(s) in, double click the album.