11
9. Connecting your Micro C@m to Your Computer
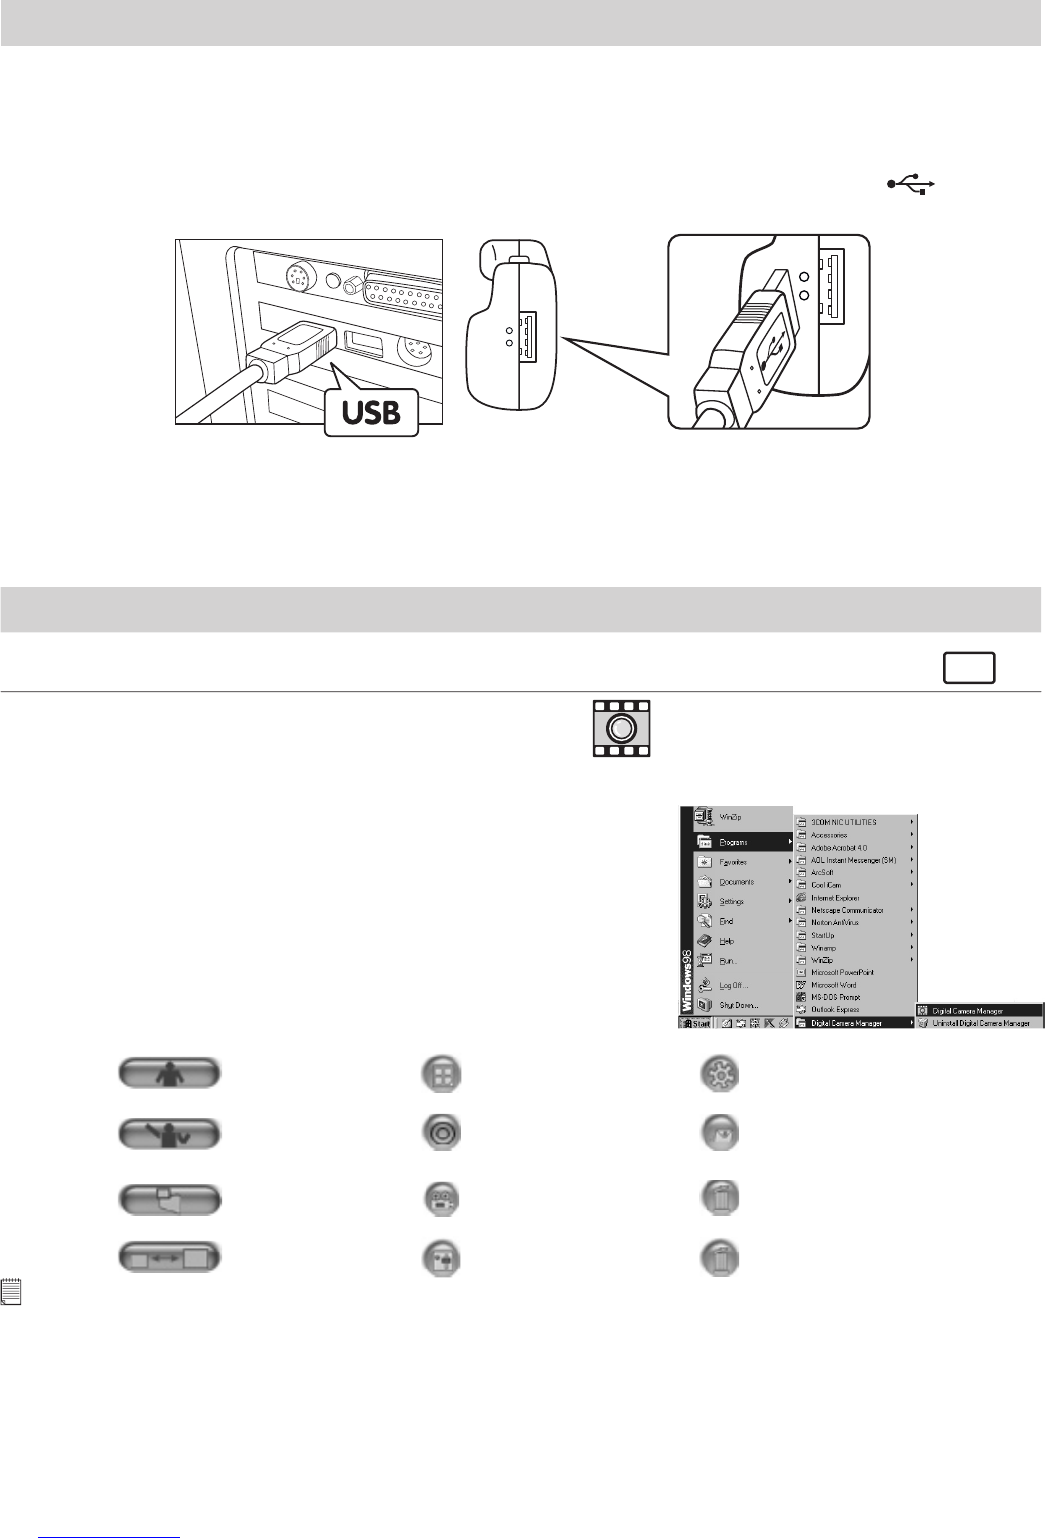
The USB cable allows you to upload images from the Micro C@m to your PC or Mac. One end of the cable
connects to the USB port on the side of the Micro C@m and the other end connects to your PC’s or Mac’s USB
port. When your Micro C@m is connected to your PC or Mac, it will draw power from the PC in order to preserve
your battery life.
The USB port can be found on the front or back panel of your PC or Mac. Look for this symbol next to the
connection port. (Also see your PC or Mac operating manual for the location of your USB connection port.)
USB Series “A” Plug connects to
your PC or Mac
USB Series “A” Plug connects to
your Micro C@m
When you rst connect your Micro C@m to your PC, a message appears on screen saying “New Hardware
Found” and “Building Driver Information Database”. After this, you can start to upload images!
10. Uploading Images to your Computer
For Windows® Users:
PC
10.1 Running the Digital Camera Manager
shortcut icon on
desktop
Digital Camera Manager
• Select the Digital Camera Manager icon from
the Digital Camera Manager program group
on the Windows Start Menu or double-click the
Digital Camera Manager short-cut icon on the
desktop.
• You can now start to upload your images from your Micro C@m by
following these steps in section 10.3:
10.2 Quick Reference
DSC Mode
(Digital Still Camera)
Capture Still Image(s)
(In DSC Mode)
Live Video Mode
Adjust Resolution
(In Live Video Mode)
Create New Folder
Save Still Image(s)/
Capture snap shot
(In Live Video Mode)
Save Video/
Start or Stop Recording
(In Live Video Mode)
Adjust Color
Delete Album
Send E-mail
Adjust Frame Rate
Delete Image(s)/
Movie Clips(s)
Important Notes:
You can use the Digital Camera Manager to upload images captured by your Micro C@m at any time whether or not the
Micro C@m is full. Connect your Micro C@m to your PC via the USB cable. Plugging the USB connector into the Micro C@m
will cause it to reset and issue a double beep but all stored images will remain.