The Sampling Job mode contains a comprehensive set of editing tools and functions you can use to change the sound of the sample you’ve
created and edited in the Sampling Edit mode. It also includes a variety of convenient operations, such as copying or erasing data.
After setting parameters as required in the selected display, press the [ENTER] button to execute the Job.
nUnlike in the Sampling Record mode, all parameters and functions of the Sampling Job mode are the same, no matter which mode was previously selected.
The only exception to this is the Slice Job ([F1] →12 below), which varies depending on whether the previously selected mode was Voice/Performance or
Song/Pattern.
nAll Sampling Job operations apply to the Waveform (actual sample), not the Voice.
PlayModeDetermines how the selected sample is to be played back.
Settings:oneshot, reverse, loop
oneshot............The Sample plays back one time from Start point to End point.
reverse.............The Sample plays back one time in reverse from End point to Start point.
loop..................Sample playback begins from the Start point, continues to the Loop point, then repeats indefinitely between the Loop
point and End point.
nFor details on the above settings, see page 176.
OriginalKeyDetermines the base key for the sample. Since the sample will be pitched shifted for keys played around this base
key, this should be set as close as possible to the original pitch or note value of the actual sample.
Settings:C - 2 ~ G8
FineTuneDetermines the fine tuning for the pitch of the sample.
Settings:-100 cent ~ 0 cent ~ 99 cent
[SF1] AUDITIONYou can hear (audition) the selected sample by pressing the [SF1] button.
[SF2] SELECTPress the [SF2] button to call up in order the Samples assigned to the selected Key Bank.
[F4] RANGE
From this display you can set the Key Range and the Velocity Range for the sample assigned to the selected Key Bank. Note that both the Key range and Velocity
range values are graphically indicated in the display.
nWhen the cursor is at one of the Key Range values, you can directly set the Key Range parameter from the keyboard. (Simultaneously hold down the [INFORMATION] button and
press the appropriate key on the keyboard.)
[SF1] AUDITIONYou can hear (audition) the selected sample by pressing the [SF1] button.
[SF2] SELECTPress the [SF2] button to call up in order the Samples assigned to the selected Key Bank.
Sampling Job mode[INTEGRATED SAMPLING] → [JOB]
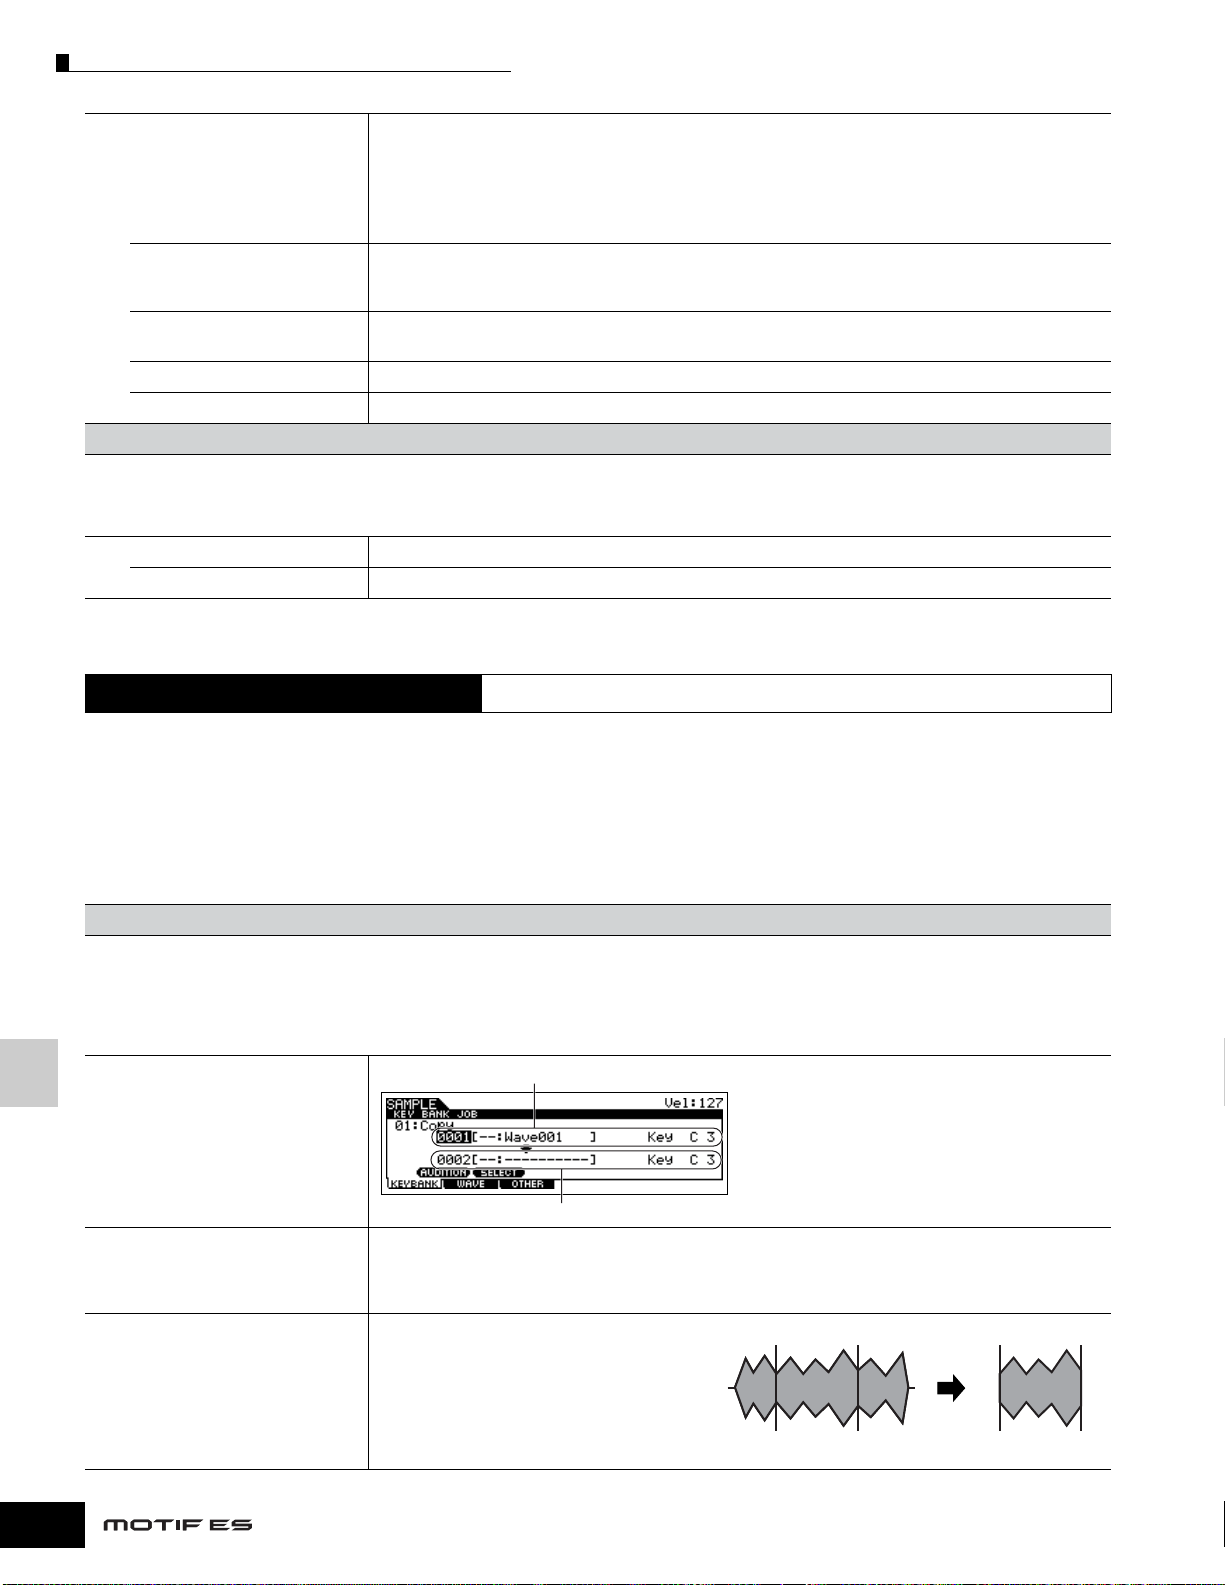
[F1] KEYBANK (Key Bank Job)
Before executing the Key Bank Job by pressing the [ENTER] button, you’ll need to specify the Waveform and Key Bank.
First, select the desired Waveform by moving the cursor to the 4-digit number in the display and change it by using the [INC/YES] and [DEC/NO] buttons or the
data dial. Second, move the cursor to the Key value, select the desired key by using the [INC/YES] and [DEC/NO] buttons or the data dial, then use the [SF2]
SELECT button to select in order the Key Bank (sample) assigned to the selected key. You can select the desired key also by pressing the note on the keyboard
directly while holding the [INFORMATION] button. As in the Sampling Edit mode, the [SF1] AUDITION button lets you hear the sample assigned to the selected
Key Bank.
01: CopyThis Job copies the data of a sample contained in a
specified Key Bank to another Key Bank. After
specifying the source Waveform and Key Bank as well
as the destination Waveform and Key Bank, press the
[ENTER] button to execute the Copy Job.
02: DeleteThis Job deletes the specified Key Bank and its sample. After specifying the Waveform and Key Bank, press the
[ENTER] button to execute the Delete Job. If the Key Bank is set to “all” and the Job is executed, all the samples of
the selected Waveform are deleted.
nIf all the samples of the specified Waveform are deleted, the Waveform itself is deleted.
03: ExtractThis Job deletes all unnecessary sample data
(located ahead of the Start point and located after the
End point). In effect, it extracts only the sample data
you want to use, trimming all unneeded sound from
the start and end of the sample.
After specifying the Waveform and Key Bank, press
the [ENTER] button to execute the Extract Job. If the
Key Bank is set to “all” and the Job is executed, this Job is applied to all the samples of the selected Waveform.
Libble takes abuse of its services very seriously. We're committed to dealing with such abuse according to the laws in your country of residence. When you submit a report, we'll investigate it and take the appropriate action. We'll get back to you only if we require additional details or have more information to share.
Product:
Forumrules
To achieve meaningful questions, we apply the following rules:
First, read the manual;
Check if your question has been asked previously;
Try to ask your question as clearly as possible;
Did you already try to solve the problem? Please mention this;
Is your problem solved by a visitor then let him/her know in this forum;
To give a response to a question or answer, do not use this form but click on the button 'reply to this question';
Your question will be posted here and emailed to our subscribers. Therefore, avoid filling in personal details.
Register
Register getting emails for Yamaha MOTIF ES7 at:
new questions and answers
new manuals
You will receive an email to register for one or both of the options.
Get your user manual by e-mail
Enter your email address to receive the manual of Yamaha MOTIF ES7 in the language / languages: English as an attachment in your email.
The manual is 8,4 mb in size.
You will receive the manual in your email within minutes. If you have not received an email, then probably have entered the wrong email address or your mailbox is too full. In addition, it may be that your ISP may have a maximum size for emails to receive.
If you have not received an email with the manual within fifteen minutes, it may be that you have a entered a wrong email address or that your ISP has set a maximum size to receive email that is smaller than the size of the manual.
The email address you have provided is not correct.
Please check the email address and correct it.
Your question is posted on this page
Would you like to receive an email when new answers and questions are posted? Please enter your email address.