KK
Ø 10 mm
65 mm
LL
MM
NN
OO
D
GB
F
NL
S
N
DK
SF
I
E
RU
PL
14
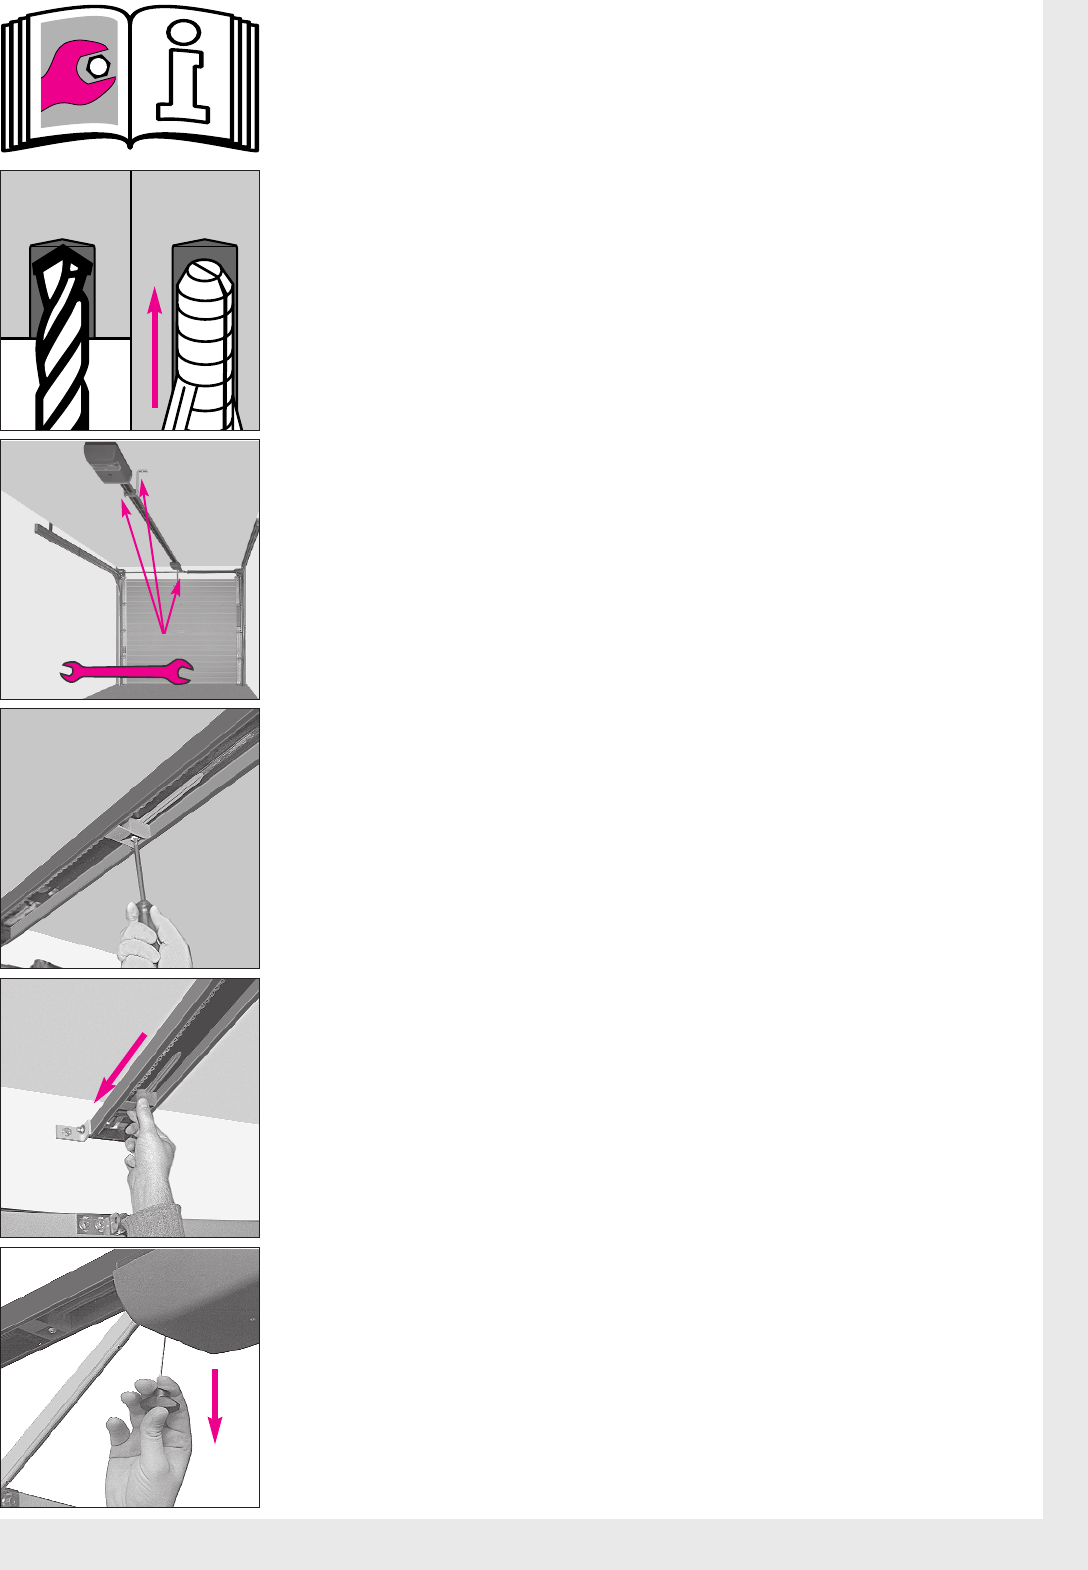
K: Bohrungen (Ø 10 x 65 mm) anzeichnen, bohren, Dübel einsetzen
Achtung ! Deckenstärke beachten !
L: Schrauben eindrehen, alle Schrauben festziehen
M: Schaltschieber lösen
N: Schaltschieber ganz nach vorne schieben
O: Laufwagen durch einmaliges Ziehen entriegeln
K: Mark and drill holes for support (Ø 10 x 65 mm) and insert dowls.
IMPORTANT, NOTE THICKNESS OF CEILING MATERIAL !
L: Insert screws, tighten all screws fully.
M: Loosen end- switch plunger.
N: Push end- switch plunger fully forward.
O: Free drive unit by means of single pull on cable.
K: Pointer les trous (diam. 10 x 65 mm), les percer et introduire des chevilles
Attention : tenir compte de l’épaisseur du plafond !
L: Mettre en place les vis et les serrer à fond
M: Desserrer le curseur de commutation
N: Le repousser complètement vers l’avant
O:Déverrouiller le chariot par une traction unique
K: Boringen (Ø 10 x 65 mm) aantekenen, boren, pluggen aanbrengen.
Attentie ! Plafonddikte in acht nemen !
L: Schroeven erin draaien, alle schroeven vastdraaien
M: Schakelschuif losmaken
N: Schakelschuif geheel naar voren schuiven
O: Loopwagen door één keer te trekken ontgrendelen
K: Markera och borra hål (Ø 10 x 65 mm) och sätt i pluggar.
OBS ! Kontrollera först takets tjocklek !
L: Skruva i och dra åt alla skruvar ordentligt.
M: Lossa brytstiftet.
N: Skjut fram brytstiftet så långt det går.
O: Lossa löpvagnens spärr genom att dra löpvagnen en gång.
K: Hullene (Ø 10 x 65 mm) tegnes opp og bores, skruehylser settes inn
OBS ! Vær oppmerksom på takets tykkelse !
L: Skruene skrues inn, alle skruene trekkes til
M: Styresleiden løsnes
N: Styresleiden skyves helt frem
O: Glidevognforriglingen oppheves ved å dra en gang
K: Huller (Ø 10 x 65 mm) afmærkes, bores, raw plugs isættes
OBS ! Vær opmærksom på loftets tykkelse !
L: Skruer isættes, alle skrues fastspændes
M: Kontaktglider løsnes
N: Kontaktglider skydes helt frem
O:Kørevognen frigøres ved at trække i den én gang
K: Merkitse ja poraa reiät (Ø 10 x 65 mm), aseta ankkurit reikiin
Huom. ! Huomioi katon vahvuus !
L: Kierrä ruuvit paikoilleen ja kiristä ne
M:Löysää kytkinluistia
N:Työnnää luisti eteen kiskon päähän saakka
O: Irrota liukuvaunu lukituksesta vetäisemällä sitä kerran
K: Marcare i fori (Ø 10 x 65 mm), avvitare e inserire i tasselli
Attenzione ! Tener conto dello spessore del soffitto !
L: Avvitare le viti e stringere tutte le viti
M: Allentare il finecorsa
N: Spostare il finecorsa tutto in avanti
O: Sbloccare il carrello con un solo movimento di trazione
K: Marcar y perforar los orificios (Ø 10 x 65 mm), colocar los tacos.
¡Atención ! Tomar en cuenta el grosor del techo.
L: Atornillar y apretar todos los tornillos.
M: Aflojar el tope fin de carrera.
N: Desplazar el tope fin de carrera hacia adelante hasta el herraje del dintel.
O: Desembragar el carro tirando del cable s/figura.