1
/
2
1
/
2
FF
GG
HH
II
JJ
0 - 600 mm
Ø 10 mm
65 mm
D
GB
F
NL
S
N
DK
SF
I
E
RU
PL
13
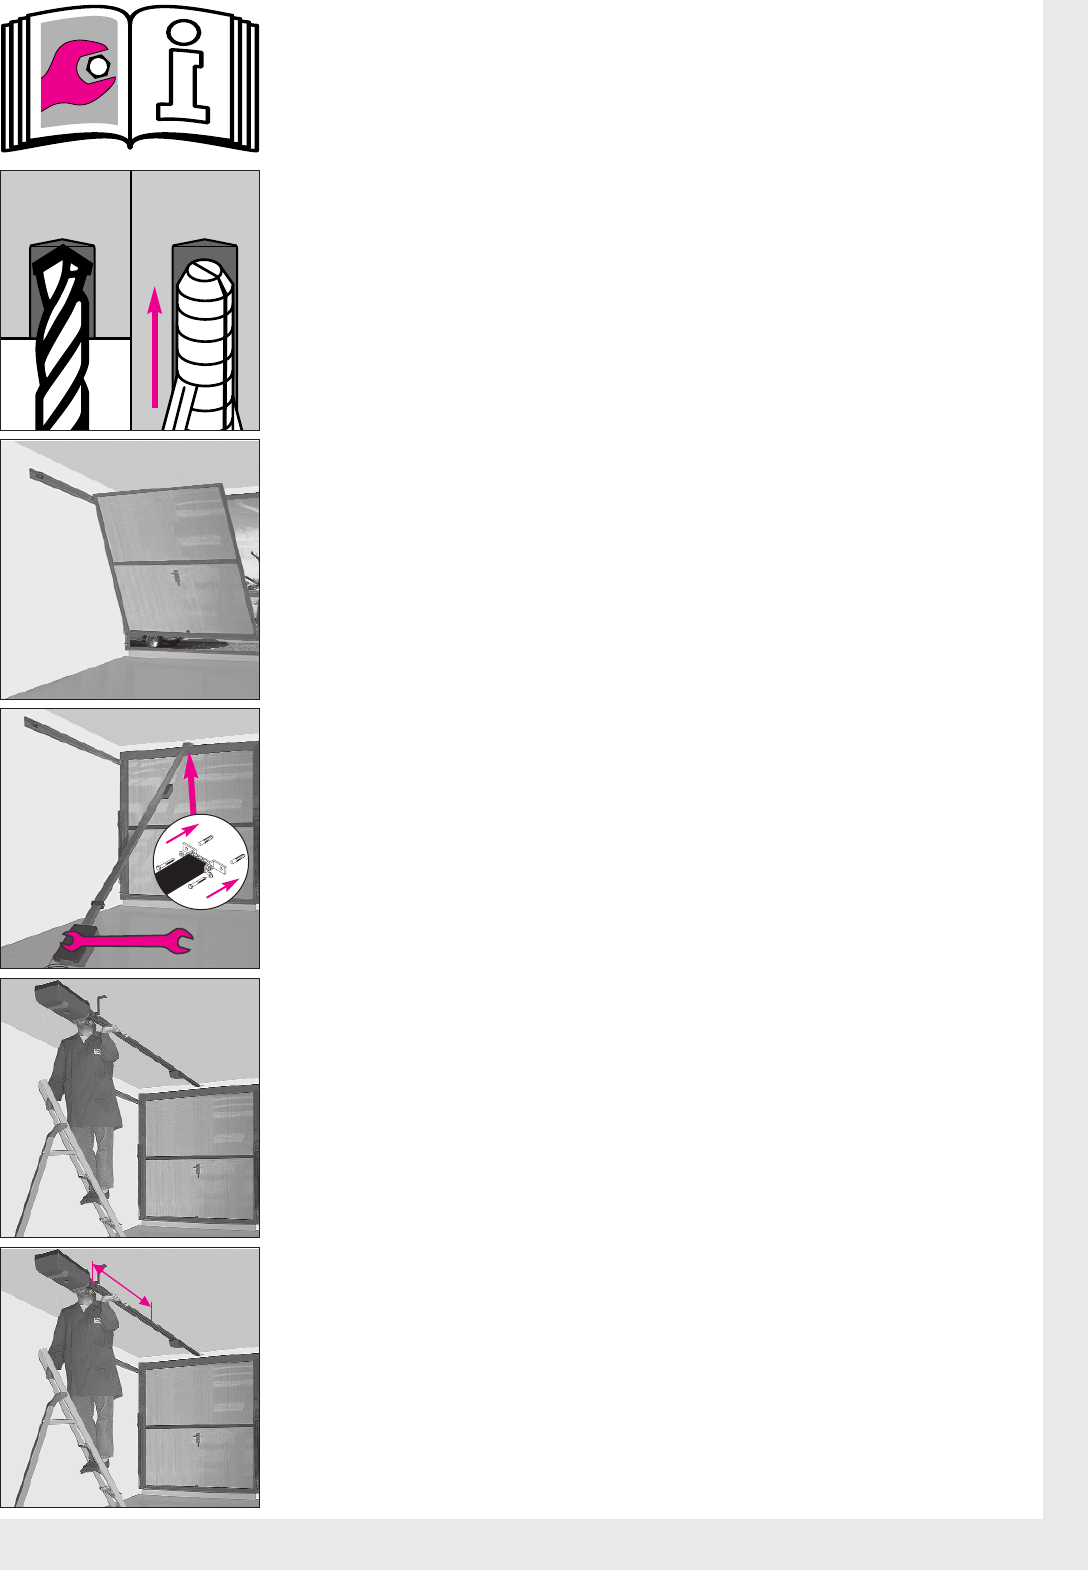
F:Löcher (Ø 10 x 65 mm) bohren und Dübel einsetzen
Achtung ! Deckenstärke beachten !
G: Tor öffnen, Tormitte hinten ausmessen und anzeichnen
H: Antrieb vorne lose in den eingesetzten Dübeln festschrauben
I: Antrieb hinten hochheben und mittig ausrichten
J: Deckenhalterung einstellen (0 - 600 mm, je nach Garagendecke)
F: Drill holes (Ø 10 x 65 mm). Insert dowels.
IMPORTANT, NOTE THICKNESS OF THE CEILING MATERIAL.
G: Open door fully, measure top edge centre and mark on ceiling.
H: Attach boom with end- support at front of garage by inserting screws into dowels, do not tighten.
I: Swing up rear of boom and mark centre on ceiling.
J: Adjust ceiling support position (0-600 mm depending on garage ceiling).
F: Percer des trous (diam. 10 x 65 mm) et introduire des chevilles
Attention : tenir compte de l’épaisseur du plafond !
G: Ouvrir la porte, mesurer à l’arrière le milieu de la porte et le tracer
H: Visser la motorisation dans les chevilles, sans serrer à fond les vis de l’avant
I: Soulever l’arrière de la motorisation et le centrer
J:Régler le support de plafond (0 - 600 mm, selon la dalle du garage)
F: Gaten (Ø 10 x 65 mm) boren en pluggen aanbrengen
Attentie ! Plafonddikte in acht nemen !
G: Deur openen, midden van de deur achteraan opmeten en aantekenen
H: Aandrijving vooraan losjes in de aangebrachte pluggen vastschroeven
I: Aandrijving achteraan omhoog tillen en centreren
J: Plafondhouder instellen (0-600 mm, afhankelijk van het garageplafond)
F:: Borra hål (Ø 10 x 65 mm) och sätt i pluggar.
OBS ! Kontrollera först takets tjocklek !
G: Öppna porten och markera portens mitt bak.
H: Montera motorn löst i pluggarna.
I: Lyft motorn bak rikta in den i mitten.
J:Ställ in takfästet (0-600 mm beroende på garagetak).
F: Hull (Ø 10 x 65 mm) bores og skruehylser settes inn
OBS ! Vær oppmerksom på takets tykkelse !
G: Porten åpnes, portens bakre midtpunkt måles ut og markeres
H: Foran skrues driften løst fast i de innsatte hylsene
I: Bak løftes driften opp og posisjoneres i midten
J: Takholderen stilles inn (0-600 mm, avhengig av garasjetaket)
F: Huller (Ø 10 x 65 mm) bores og raw plugs isættes
OBS ! Vær opmærksom på loftets tykkelse !
G: Porten åbnes, portmidte bagtil opmåles og afmærkes
H:Trækket fastgøres fortil (strammes ikke) i de isatte dybler
I:Træk loftes op bagtil og centreres
J: Loftholder indstilles (0 - 600 mm, afhængigt af garageloft)
F: Poraa reiät (Ø 10 x 65 mm) ja aseta ankkurit reikiin
Huom. ! Huomioi katon vahvuus !
G: Avaa ovi, mittaa ja merkitse oven keskikohta takaa päin
H: Kiinnitä moottori ruuveilla edestä löysästi ankkureihin
I: Kohota moottoria takaa päin ja kohdista se suoraan
J:Säädä kattopidike (0 - 600 mm, katon vahvuudesta riippuen)
F: Trapanare i fori (Ø 10 x 65 mm) e inserire i tasselli
Attenzione ! Tener conto dello spessore della parete !
G: Aprire la porta, misurare e marcare il centro porta posteriore.
H: Inserire e avvitare l’attuatore anteriormente nei tasselli applicati
I: Sollevare posteriormente l’attuatore e centrarlo
J: Regolare il supporto a parete (= 0 - 600 mm in funzione del soffitto del garage)
F: Perforar los orificios (Ø 10 x 65 mm), colocar los tacos.
¡Atención ! Tomar en cuenta el grosor del techo.
G: Abrir la puerta. Medir y marcar el centro de la puerta en la parte posterior.
H: Atornillar sin apretar la parte delantera del accionamiento.
I: Elevar la parte trasera del accionamiento y centrarla.
J: Ajustar el soporte del techo (0 - 600 mm, según el grosor del techo del garaje).