646164
30
Zoom out
Zoom in
Previous page
1/136
Next page
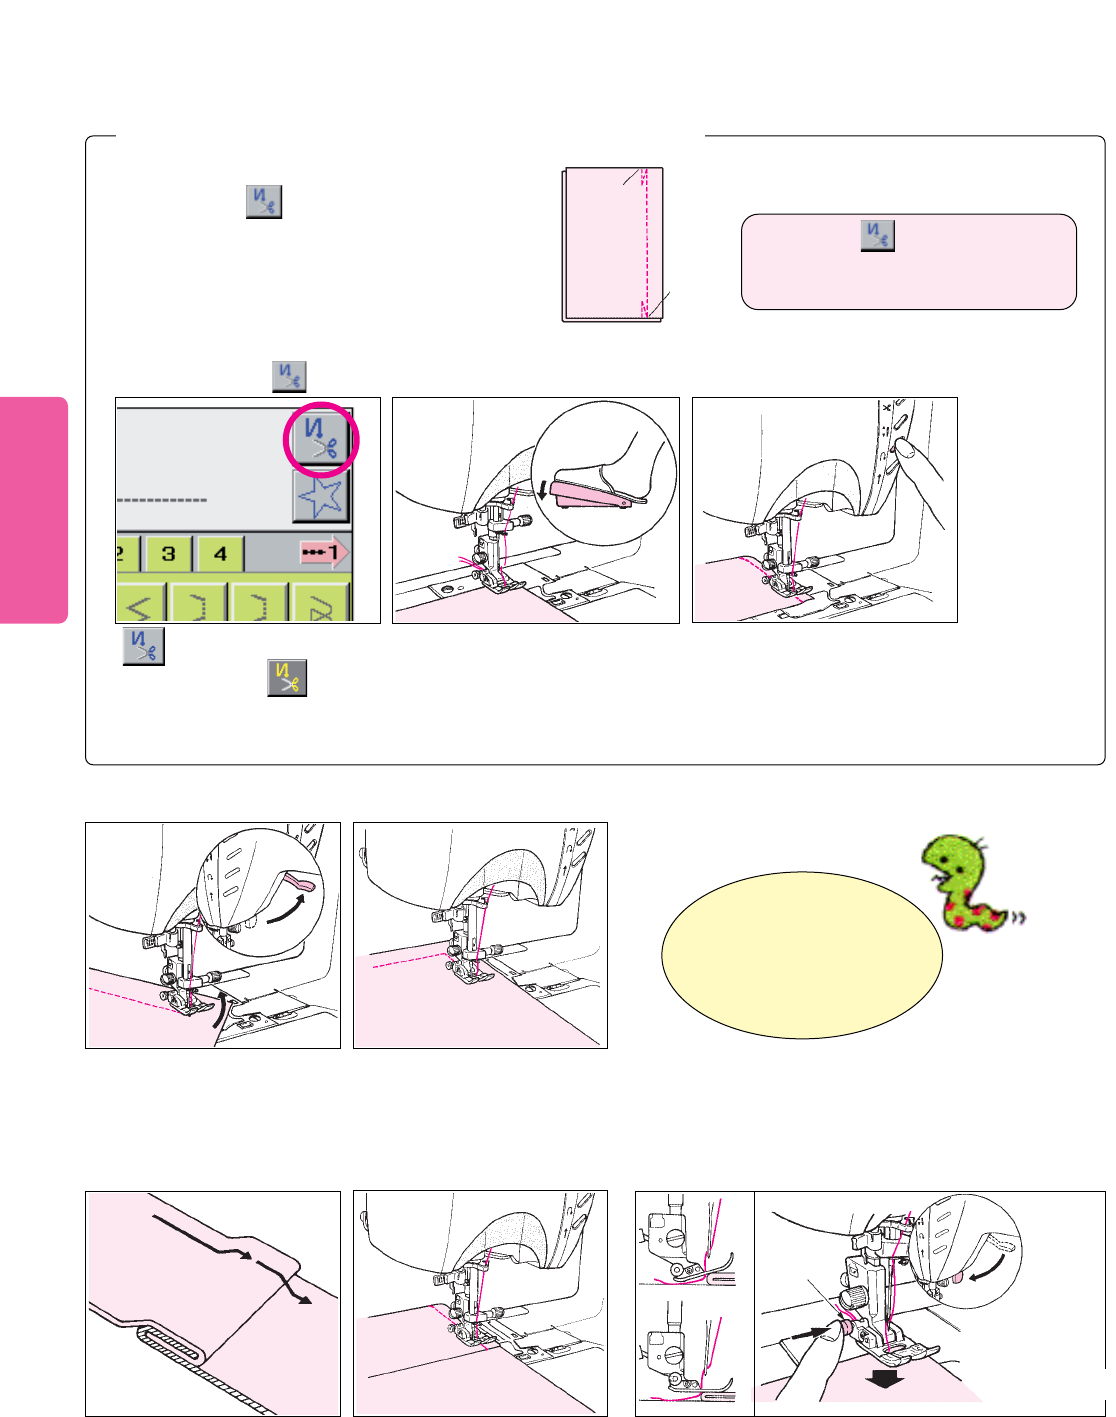
[1] Select a stitch pattern to be
sewn. Then, press picto.
[2] Place fabric at beginning
position of sewing and start
sewing machine. [3] Press reverse stitch button.
Sewing machine will sew three
reverse stitches and will continue
sewing in normal direction.
Press reverse stitch button when machine reaches
predetermined position of fabric. Machine will sew
three reverse stitches. Then, machine will
automatically stop at predetermined position to trim
both needle thread and bobbin thread.
Changing sewing direction
Sewing overlapping seam allowances
Stop machine in desired position.
Lower needle into fabric.
Lift presser foot, and turn fabric
in desired sewing direction.
Carefully sew overlapping seam
allowances while helping fabric
feed with hands.
* For a light-weight fabric,
carefully sew beginning of seam
while gently pulling needle thread
and bobbin thread in direction of
feed.
Overlapping seam allowances
or a part that has a significant
difference in height should be
sewn in direction illustrated to
avoid the foot catching in the
fold of the fabric.
Lower presser foot and
start sewing.
Example:
Straight stitch
Automatic back tacking ( reverse stitching )
29
Starting sewing of heavy-weight fabric
To sew overlapping seam allowances from fabric edge, use
the lock button on Presser Foot A. When you press the lock
button, presser foot will be temporarily locked parallel to the
fabric to ensure smooth sewing.
Select first stitch pattern to
be sewn. Press pictogram.
Sewing machine will sew three reverse
stitches (back tack stitches) both at beginning
and end of seam, perform thread trimming of
both needle thread and bobbin thread at end
of seam and stop.
*Automatic back tacking can be reset
in three different procedures:
(1) Re-press pictogram.
(2) Select another stitch pattern.
(3) Turn off, then on power to machine.
pictogram will be shown
in reverse video as .
[2]
[3]
Fabric
Button
Lower presser foot
while fitting button
(spring) attached on
presser foot into slit on
presser foot holder.
Note: Use of the Knee Lifter
Accessory is very useful for
raising and lowering the
presser foot when changing
direction.
30


Need help? Post your question in this forum.

Forumrules
1

Forum

singer-quantum-xl-6000

Reset search

  • How do you transfer a design from the computer to the XL6000? Submitted on 4-10-2023 at 23:38

    Reply Report abuse


Report abuse

Libble takes abuse of its services very seriously. We're committed to dealing with such abuse according to the laws in your country of residence. When you submit a report, we'll investigate it and take the appropriate action. We'll get back to you only if we require additional details or have more information to share.

Product:

For example, Anti-Semitic content, racist content, or material that could result in a violent physical act.

For example, a credit card number, a personal identification number, or an unlisted home address. Note that email addresses and full names are not considered private information.

Forumrules

To achieve meaningful questions, we apply the following rules:

Register

Register getting emails for Singer Quantum XL-6000 at:


You will receive an email to register for one or both of the options.


Get your user manual by e-mail

Enter your email address to receive the manual of Singer Quantum XL-6000 in the language / languages: English as an attachment in your email.

The manual is 8,09 mb in size.


You will receive the manual in your email within minutes. If you have not received an email, then probably have entered the wrong email address or your mailbox is too full. In addition, it may be that your ISP may have a maximum size for emails to receive.

Others manual(s) of Singer Quantum XL-6000

Singer Quantum XL-6000 User Manual - English - 57 pages


The manual is sent by email. Check your email

If you have not received an email with the manual within fifteen minutes, it may be that you have a entered a wrong email address or that your ISP has set a maximum size to receive email that is smaller than the size of the manual.

The email address you have provided is not correct.

Please check the email address and correct it.

Your question is posted on this page

Would you like to receive an email when new answers and questions are posted? Please enter your email address.


Info