657865
24
Zoom out
Zoom in
Previous page
1/32
Next page
IS12 Wind Speed/Angle
24
E04054
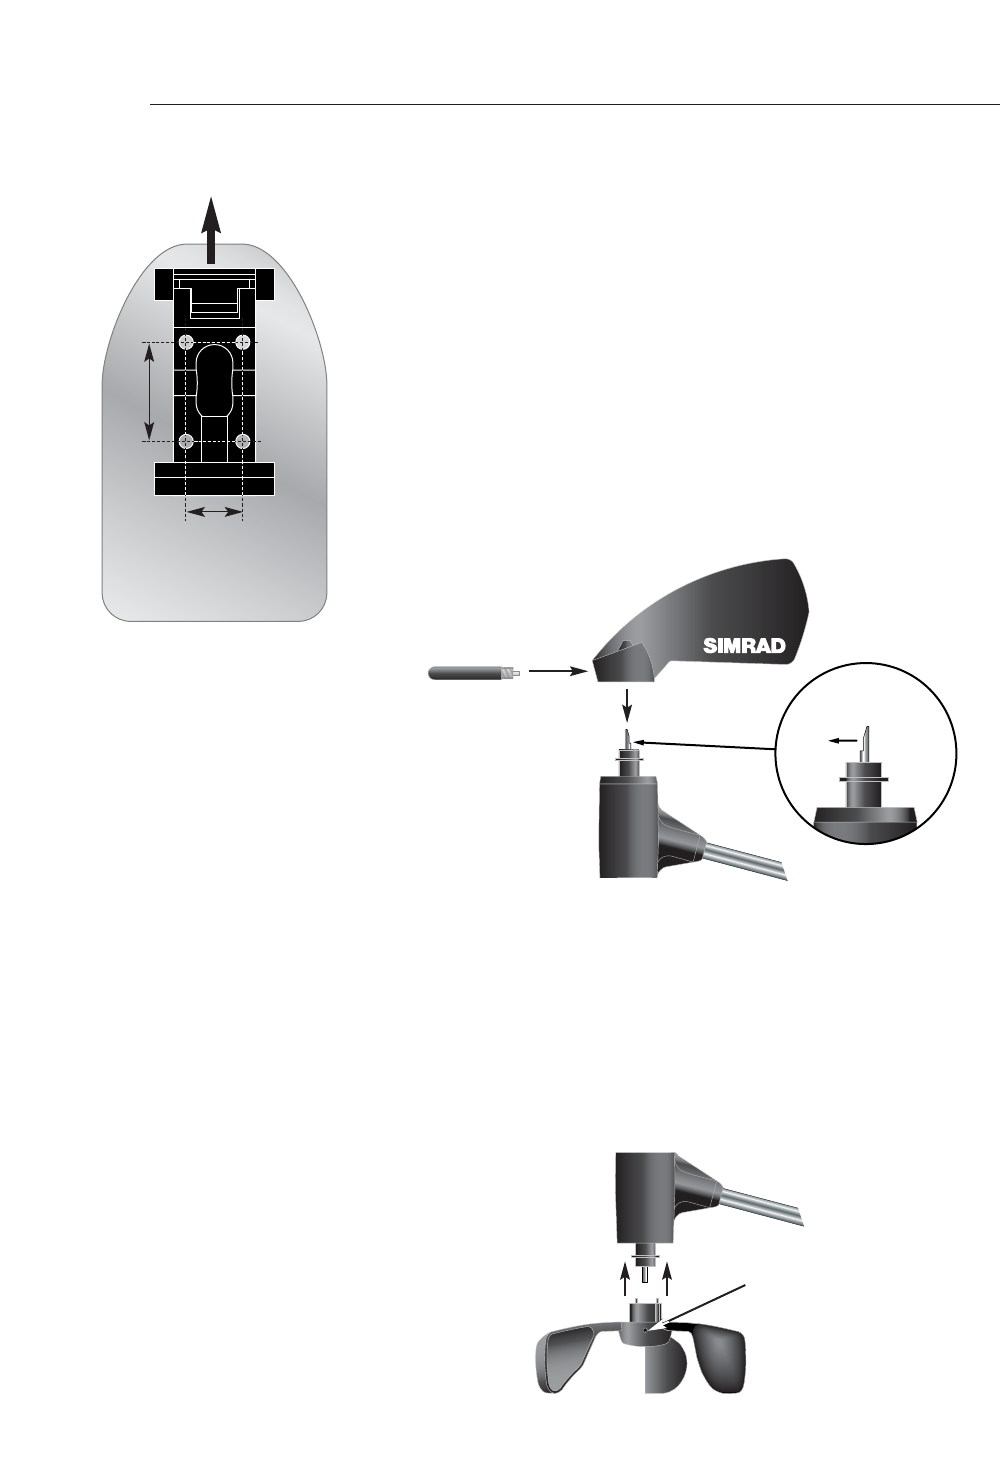
Attach the masthead bracket with the screws provided. Ensure
the bracket is mounted the right way round, so that the wand
will be pointing in the correct direction (Fig 4.9). The transduc-
er can be mounted facing aft if required, but it will be neces-
sary to set the transducer orientation to AFT in the calibration
menu (see Section 3.2 for more details).
4.2.3 Assembling the Transducer
The vane and cups assemblies are packed separately - fit the
vane to the transducer so that the shaft on the top of the trans-
ducer fits correctly into the vane (the shaft is keyed so that it
will be aligned correctly). Screw the counterweight in just far
enough to lock the vane into place (Fig 4.10) -
NOTE Check that the vane rotates freely - do not overtighten the
counterweight or it may restrict the vane’s movement.
The anemometer cups fit to the base of the transducer body in
a similar way (Fig 4.11). Once fitted, they are held in place by
a grub screw, which should be tightened (using the allen key
supplied) enough to hold the cups in place without restricting
their movement.
Fig 4.10 - Attaching Wind Vane
1) Fit the vane
2) Screw in counterweight
(do not overtighten)
Fig 4.11 - Attaching Anemometer Cups
1) Fit the cups
2) Tighten Grubscrew
NOTE Check that the cups rotate freely.
Fig 4.9 - Fitting Masthead
Bracket
35mm (1.38”)
20mm (0.78”)
BOW
Ensure the shaft
is oriented correctly
24


Need help? Post your question in this forum.

Forumrules


Report abuse

Libble takes abuse of its services very seriously. We're committed to dealing with such abuse according to the laws in your country of residence. When you submit a report, we'll investigate it and take the appropriate action. We'll get back to you only if we require additional details or have more information to share.

Product:

For example, Anti-Semitic content, racist content, or material that could result in a violent physical act.

For example, a credit card number, a personal identification number, or an unlisted home address. Note that email addresses and full names are not considered private information.

Forumrules

To achieve meaningful questions, we apply the following rules:

Register

Register getting emails for Simrad IS12 at:


You will receive an email to register for one or both of the options.


Get your user manual by e-mail

Enter your email address to receive the manual of Simrad IS12 in the language / languages: English as an attachment in your email.

The manual is 2,05 mb in size.


You will receive the manual in your email within minutes. If you have not received an email, then probably have entered the wrong email address or your mailbox is too full. In addition, it may be that your ISP may have a maximum size for emails to receive.

Others manual(s) of Simrad IS12

Simrad IS12 User Manual - German - 102 pages


The manual is sent by email. Check your email

If you have not received an email with the manual within fifteen minutes, it may be that you have a entered a wrong email address or that your ISP has set a maximum size to receive email that is smaller than the size of the manual.

The email address you have provided is not correct.

Please check the email address and correct it.

Your question is posted on this page

Would you like to receive an email when new answers and questions are posted? Please enter your email address.


Info