IS12 Wind Speed/Angle
22
E04054
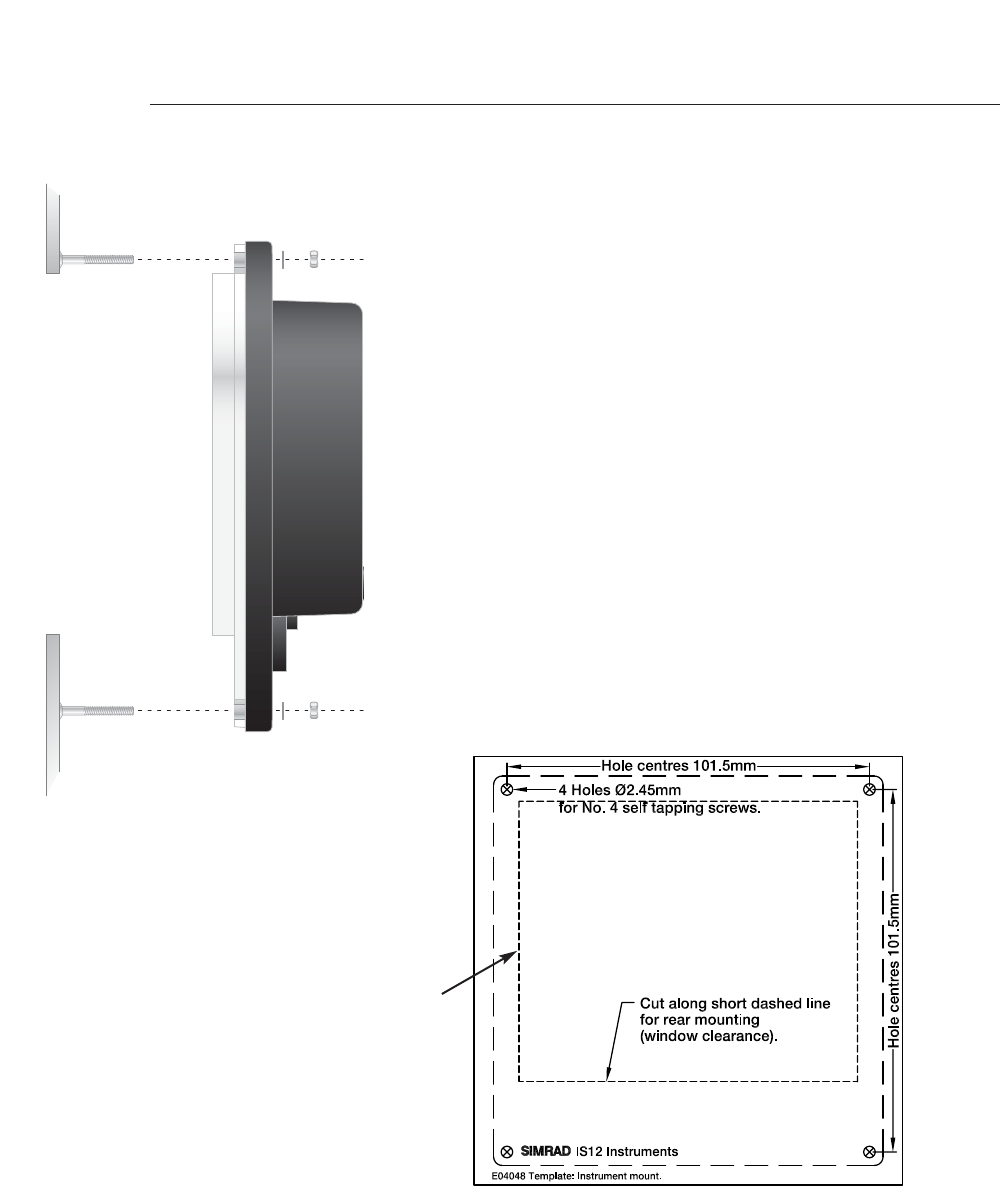
4.1.2 Rear Mounting
When the instrument is rear mounted, only the display can be
seen - the main body of the instrument, including the keypad is
hidden behind the panel. This is a more elegant method of
installation, but does require precise cutting of the apertures into
the bulkhead or dashboard. Therefore, it is recommended that
installation is done by a professional marine installer.
The instrument can be fixed to the panel using either the self
tapping screws supplied (if the panel is thick enough), or using
2mm studs fixed to the rear of the panel which align with the
four fixing holes (Fig 4.5).
Tools required for installation -
- Drill
- 5mm (0.2in) drill bit
- Fretsaw
- A fine toothed file.
To assist in cutting a precise aperture for the display, a self
adhesive template is supplied with the unit (Fig 4.6) -
Fix the template in the correct position and drill four 5mm
holes on the waste side of the four corners of the aperture.
Starting from one of these holes, carefully cut along the dotted
line around the four edges. To ensure the hole is a good fit, cut
slightly inside the line (on the waste side) and then use the file
to smooth the edges until the display fits precisely.
NOTE Because the keypad is not accessible with this method of mount-
ing, the Remote Control unit (see Section 2.7) will be required
to enable control of instrument functions.
Fig 4.5 - Rear Mounting
Fig 4.6 - Cutting Aperture
Cut on
waste side
of template