775511
3
Zoom out
Zoom in
Previous page
1/16
Next page
A cooperative adventure game for 2 to 6 brave Heroes ages 10 and up
Designed by Michael Palm and Lukas Zach, based upon the bestselling novels by Markus Heitz
RULES
Notes for use of the insert tray:
The card storage area is in the lower right. The individual card compartments are laid out as follows - from left to right:
The rst large compartment is for all of the Scenario, Adventure, and Threat cards from Book 1 as well as for the cards for
the Élfar and Combined Might expansions. Use the divider cards to separate the two expansions from the other cards in Book
1. The next 4 compartments, in order, are for Books 2–5. Use the next compartment to the right for Andokai’s Spell cards,
followed by the compartment for the Threat cards for Books 2–4. The last compartment is reserved for the Equipment cards.
This does not include the special Equipment cards from Book 5.
In the lower left area, you can store all of the Perished Land tiles along with the remaining 7 hex tiles.
There is also space for the 2 new Hero gures (available separately from your friendly neighborhood game store or online) in
the Hero insert tray.
2
1 large Game board:
Map of Girdlegard
1 small Game board:
The Dwarven Council
6 Health markers
7 Number dice 3 Recruitment dice
75 Army of Evil Troops:
30 Orcs 25 Trolls 20 Élfar
12 Hero boards 12 Hero gures
30 Attribute Value
Modication tiles
36 Perished Land tiles
15 Scenario
markers
V V
I
V
IV
V
VV I
IV IV I IV VVI I II II
II IV V I II IV V
IV IVV VI
I
IV
4
+
6
+
5
+
2 2 2 2
22
Toboribor
WEYURN
URGON
GAURAGAR
RÂN RIBASTUR
Porista
Dsôn Balsur
Mifurdania
T
U
N
N
E
L
T
U
N
N
E
L
T
U
N
N
E
L
T
U
N
N
E
L
Toboribor
Lot-Ionans Vaults
Blacksaddle
Porista
Dsôn Balsur
Green Haven
Elven Kingdom
of Âlandur
Dragonsfire
Roodacre
Mifurdania
Queen Xamtys II
1.
Advance the Hero Marker
2.
Reveal New Cards
3.
Perform 2 Actions
Dragonsfire
Roodacre
Elven Kingdom
of Âlandur
Green Haven
Queen
Xamtys II
SANGREÎN
IDOSLÂN
Lot-Ionans
Vaults
Blacksaddle
3+3+4+4+5+5+6+6+
D
W
A
R
V
E
N
C
O
U
N
C
I
L
At the beginning of your turn,
advance the Doom marker 1 space
towards the Hero marker.
Aer rolling the Recruitment
dice, re-roll any dice showing
a blank side. e new result
counts.
Aer rolling Number dice, re-roll
one die with the highest number
showing. e new result counts.
Aer revealing a new reat
card, decide which Hero must
lose 1 Health point.
Aer revealing a new reat
card, decide which Hero gains
1 Health point.
Aer completing an Adventure
card, you may discard 1 faceup
reat card without consequence.
Aer rolling the Number dice,
you may re-roll 1 die of your
choice. e new result counts.
As an action, you may make
a Cra check 4+. If successful,
you may draw 1 Equipment card
and then decide which Hero will
keep it.
B
I
S
L
I
P
U
R
B
A
L
E
N
D
I
L
Í
N
1 Hero
marker
1 Council
marker
1 Doom
marker
6 Increased Health tiles
1 Council tile
for Books 2–4
11 Diamond tiles (with
values 0, 1, 1, 1, 1, 1, 2,
2, 2, 2, 3) for Book 3
Diamond
tiles (with
Diamond
tiles (with
Diamond tiles (with Diamond
1 Élf bearing Keenre
tile for Book 2
Élf
bearing
Keenre
2 Dragon tiles for Book 4:
Lohasbrand & Kordrion
2 Dragon tiles for Book 4:
1 Portal tile for the Élfar
expansion for Book 1
3
2
1
0
THE TRUE TUNGDIL
WARRIOR & SAGE
FOR THE THIRDLINGS
OTHER HEROES GAIN +1
ON ALL ATTRIBUTE VALUES
AS LONG AS THEY ARE IN
THE SAME HEX WITH
TUNGDIL.
432
1 Tunnel tile
5 Ramparts tiles
for Book 4
1 Hammer tile
for Book 2
5 Catapult tiles
for Book 4
Catapult
tiles
Catapult tiles Catapult
1 Mine Cart tile
for Book 3
3 Leader tiles for book 4:
Orc, Troll, Élfar
3 Leader tiles for book 4:
COMPONENTS
104 tiles
All Inclusive Components
3
All Élfar expansion
cards will have an A
on the bottom right
of the faceup side.
All Combined Might
expansion cards will
have a B.
1 Adventure card
1 Adventure card
1 Adventure card
1 Adventure card
A
Recue the Unicorn
Place 3
Élfar
on this card.
Travel to the
Portal
to defeat the
Portal
to defeat the
Portal
troops on this card.
hooe 1 uiet car fro
the uiet ec a ecie
hich Hero i tae it e
rehue the uiet ec
1 Scenario card
1 Scenario card
C
1 Scenario card
1 Scenario card
C
A
Seal the Élfar Portal
Condition:
ere are at eat
Élfar
o the a
Setup:
Setup:
Place 1
Élf
u the troo fro the
Élf u the troo fro the Élf
Portal
a a aacet hexe o thi car ao ith
ceario arer
Quest:
Quest:
Travel to the
Portal
to defeat the troops on this
Portal
to defeat the troops on this
Portal
card. Once there are no troops left on this card, a Hero
ut ae a raft chec
 hie ithe
 hie ithe
Portal
hex to reove 1 ceario areror a faie chec
ro 1 ecruitet ie of your choice a ace the
recruited troops on this card.
ce you have reove aof the ceario
arer youve o the ae
2 Equipment cards
2 Equipment cards
2 Equipment cards
2 Equipment cards
BA
Schädel des Infamen
Du darfst dir jederzeit
1 Lebenspunkt abziehen, um
1 Rekrutierungswürfel deiner
Wahl zu werfen. Entferne
entsprechend die gewürfelte
Anzahl an Armeen von der
Landkarte.
5 Threat cards
A
Tödliches Gift
Bestimmt die Spielfigur, die am
nächsten zum Portal steht (bei
Gleichstand entscheidet gemeinsam).
Dieser Spieler verliert zu Beginn jedes
eigenen Spielzugs 1 Lebenspunkt.
Die Bedrohung ist abgewendet, wenn er
ins Elbenreich Âlandur gereist ist.
Der vergiftete Spieler verliert
2 Lebenspunkte.
9 Élfar expansion cards for Book 1
10 Divider cards
10 Divider cards
BOOK 1
SCENARIO CARDS
ADVENTURE CARDS
THREAT CARDS
15 Threat cards
15 Threat cards
15 Threat cards
15 Threat cards

Assassination
He fell silent as he realized he’d been found! At
the end of the alley with his cloak blowing in the
stinking-gutter wind was the Élf who had almost
slit his throat in Mifurdania.
Place 1 Élfar fro the uy o thi car
hooe a Hero i Hero caot eave their
hex uti the threat ha ee averte y
defeating this Élfar i the choe Hero hex
hooe 1 Hero ith the feet curret
Health points to lose 1 Health point.
12 Scenario cards
12 Scenario cards
A
12 Scenario cards
12 Scenario cards
A
Conquer Dsôn Balsur
Place 2
Élfar
and 2
Trolls
on this card.
Travel to Dsôn Balsur
,
to defeat these troops.
i uet i coete he
there are o ore troo
on this card.
30 Adventure cards
30 Adventure cards
30 Adventure cards
30 Adventure cards
Abandoned Tunnel
Tunnels allow us to travel unseen.
 Hero ut trave throuh the
ue yte a ae a raft
chec  o the ae tur
Add or relocate the
Tunnel
tile
to a hex ithout text or
Perished Land
.
57 Cards for Book 1
1 High King card
A
A
A
L
Mae a raft chec
 to ace 1 aart
arer
ithe hex ith your Hero oy 1 er hex
and never on
Perished Land
 e ta icoete
Perished Land
 e ta icoete
Perished Land
oce there are aart o the a


he troo eter a hex ith aart
reove 1 of thee troo efore you eterie
hether the hex covert ito
Perished Land
. Hexes
Perished Land
. Hexes
Perished Land
ith aart oy covert ito
Perished Land
he
Perished Land
he
Perished Land
High King
ace 1 ceario arer o each
coete coitio
e Hih i ha
full Health points.
1 or ore troo have
been collected on this
card after their defeat
o the a
o the a
o the a
e Hih i efeat
or ore troo i a
ie tur o the a
e ouci arer
is on the furthest
space to the right next
to Balendilín.
e Hih i
is in 1 of the 4 Gates
a ae a raft
chec
5+.
5+.
13 Cards for Book 4
13 Scenario cards 8 Special
Equipment cards

of Balyndis
creae your raft ttriute vaue y 1
ou ay icar the
raccaiu i of
ayi
at ay tie to rethe ie
ayi
at ay tie to rethe ie
ayi
arer o the curret eve ceario
card to their initial value.
+1
A
A


5

a actio each Hero ay
ae 1 raft chec
5+ to gain
5+ to gain
1 Health point for another Hero
occuyi the ae hex
Quest:
Quest:
Place 4
Élfar
on this card.
rave to the ourthi ate
to defeat these troops.
Reward:
Chariot Figurine
21 Cards for Book 5
1 Blacksmith card 12 Saga cards
A
A
A


Fifthlings
1 Hero ut trave to the ifthi ate
e
ae 1 raft chec
4+ there to place 1 Scenario
arer o thi car ach ceario arer o thi
car iae the ext raft chec
in this hex
in this hex
ore iicut y 1 to  the  i uet i
coete oce there are ceario arer
on this card.
etur troo of your choice fro the a a
or car acto their uy r ra 1 uiet
car a ecie hich Hero i tae it

he your Hero i o the
Haer
tile
you ca chooe the fooi
actio Mae 1 raft chec
4+ to
ra uiet car a the
ecie hich Hero i tae
each card.
13 Cards for Book 2
1 Dispatches card 1 Hidden Shortcut card 12 Saga cards
Hidden Shortcut
or the ret of the ae Heroe ca
chooe the fooi actio he o
the
Mie art
tile
Mie art
tile
Mie art
chooe the fooi actio he o
Select another Hero and decide on a
ie hex to ace oth of your Heroe
Dispatches
rave to a ate ithout a ceario
arera actio ace 1 ceario
arer there
other Hero ay tae
Dispatches
fro you ithout ei a actio
or iterruti their oveet if they
are o the ae or a aacet hex
Dispatches
oe ot cout a uiet
Dispatches
oe ot cout a uiet
Dispatches
A
A
Save the Son
Save the Son
e uet ifue oce a Hero trave
to a hex ith a ae a ithout
Perished
Land
a ae ee chec
Land
a ae ee chec
Land
4+
4+
there in a single turn.
ecie hich Hero ieiatey reai
Heath oit or hich Heroe reai
1 Heath oit each rra 1 uiet
car a ecie hich Hero i tae it
14 Cards for Book 3
8 Adventure cards
8 Adventure cards
8 Adventure cards
8 Adventure cards
BB
Klärung der ronfolge
Ein einfacher Zwerg kann von heute auf morgen
die Krone tragen, denn alles, was er benötigt, ist die
Unterstützung seines Clans und seiner Freunde.
Reise zum Tor der Zweiten . Reise
anschließend zu Lot-Ionans Stollen
und triff dort 1 andere Spielfigur.
Legt diese Karte neben den Spielplan.
Alle Spieler können ab sofort in ihrem Zug
als Aktion auch folgende Möglichkeit
wählen: Ziehe dir 1 Lebenspunkt ab und
bewege dich um bis zu 7 Felder.
14 Scenario cards
14 Scenario cards
A
14 Scenario cards
14 Scenario cards
A
A
B
Opferung der Famuli
Die Aufgabe ist erfüllt, wenn sich
1 Spielfigur in Porista befindet
und sich alle Spieler anschließend
1 Lebenspunkt abziehen. Das
Abziehen des Lebenspunkts kostet
keine Aktion.
2 Equipment cards
2 Equipment cards
2 Equipment cards
2 Equipment cards
BB
Crossbow
ou ay ue your croo if
another Hero is engaged in a Battle
ithe hex ith your Hero or a
aacet hex o 1 uer ie
e reut cout a if that
Hero had rolled it.
5 Threat cards
BB
Sabotage
"Someone has gone to great lengths to make
our departure as difficult as possible..."
IMMEDIATE
icar ay veture car that ere
ace ext to the ae oar a a
rear ithout ay eect
29 Combined Might expansion cards for Book 1
Black Water

ou ut o efeat
Orcs
ith 
Quest:
Quest:
e threat i averte oce
1 Hero efeat a rc a the ithout
tai a actio ae a raft
chec
6+.
6+.
15 Threat cards
for Books 2-4
Move 1 Hero of your
choice to a hex of your
choice.
L
e
v
i
t
a
t
i
o
n
9 Spell cards for
Andôkai the Tempestuous
COMPONENTS
212 Cards
22 Equipment cards
for Books 1-5
22 Equipment cards
22 Equipment cards
22 Equipment cards
 a creae Heath tie to your
Hero oar to raie your Heath iit
y 1 eiatey reaia of your
Heath oit a a 1 tie eect

Masterpiece
+1
4
THE ADVENTURE BEGINS: BOOK 1
COMPONENT DETAILS
1Name and Start Location for
your Hero
2Special Ability
3Battle Attribute
4Craft Attribute
5Speed Attribute
6Health Points
7Equipment card
display area
1
2
3 4
7 7 7
5
6
Scenario Cards
Scenario cards have three levels: A, B, and
C. You must complete the quest on each
Scenario card before you can venture on to
the next card. First, you must complete all
the level A cards and then the level B card
or cards. Finally, to win the game, you must
successfully complete 1 level C card.
1 Level
2 Title of the card
3 Quest

“Do you want to die?"
He replied grimly, "Why should I tell
you anything about my mission, Élf.
You're going to kill me anyway."
When Heroes defeat Élfar o the a
ace the o thi car e threat i
averte oce there are  or ore Élfar
on this card or there are no longer
ay Élfar o the a
ach hex o the a ith at eat 1 Élfar
is converted into
Perished Land
.
1
2
3
4
Threat Cards
Threat cards are similar to Adventure cards,
except they don’t provide any reward.
Instead, each of these cards reveals a threat
that makes the game more difcult. You
can only avert this threat by completing
the depicted quest. Once you have averted
the threat, discard the Threat card without
further effect.
1 Title of the card
2 Flavor Text
3 Quest
4 Threat (effect)
Equipment Cards
Equipment cards support your ght for
Girdlegard. Some offer a permanent
advantage, while others must be discarded
for particularly strong advantages. Use
them wisely.
1 Title of the card
2 Abilty
Adventure Cards
Adventure cards provide a quest that may
be completed by any Hero. The indicated
reward will be granted once one of your
Heroes has completed the quest. Then the
Adventure card will be discarded.
1 Title of the card
2 Flavor Text
3 Quest
4 Reward
Visit the Pointy Ears
"Tree houses!" Ingrimmsch declared doubtfully.
"I wouldn’t feel comfortable up there..."
1 Hero ut trave to the ve
io of aur and then
icar 1 of their uiet car
there icari a uiet car
oe ot reuire a actio
etur  troo of your choice ac to
their uy fro the a aor car
1
2
3
4
 a creae Heath tie to your
Hero oar to raie your Heath iit
y 1 eiatey reaia of your
Heath oit a a 1 tie eect

Masterpiece
+1
1
2
A
A Critical Task
i uet i coete the
ext tie a veture car
i coete
1
2
3
Cards (Details for the cards can be found in the Glossary on pages 15-16.)
Hero boards (Details for individual Heroes can be found in the Glossary on page 15.)
Your Hero is depicted on your Hero board. On the right side of
the board there is a scroll showing your Hero’s name and start
location, their special ability, and the values for their Battle, Craft,
and Speed Attributes. These Attribute values show the number of
dice your Hero will use for battles, when moving, and when sending
dispatches to the Dwarven Council, as well as for making various
Attribute checks.
You can place an unlimited number of Equipment cards along the
bottom of the Hero board. On the left are heart icons that show your
Hero’s current Health. If this value drops to 0, your Hero dies.
Important: As soon as even a single Hero dies, the game is lost,
and evil has triumphed.
5
SETUP
Hero Boards
Players may choose a Hero board and the corresponding Hero
gure, or they can be distributed randomly. When playing Andôkai,
that player also takes Andôkai’s Spell cards (see page 15). Next,
each player places a Health marker on the top heart icon on their
Hero board to track their Hero’s Health.
Then, each player places their Hero gure in the listed start location
(Examples: the Gate for a clan, such as Tungdil at the Fourthlings’
Gate; or, other Locations such as Furgas in Mifurdania).
Cards
Separate the cards into their 4 types:
Scenario Cards (brown frame)
Adventure Cards (white frame)
Threat Cards (black frame)
Equipment Cards (red frame)
First create the Scenario deck by sorting the Scenario cards
(brown frame) according to their level (A, B, C). Next, shufe the
three level C cards and place them facedown to create the deck. Then
place the single level B card (or cards in later Books) facedown
on top of them. Finally, shufe the level A cards and place them
facedown on top to complete the deck (see illustration next page).
You may adjust the level of difculty by removing level A cards
from the Scenario deck as shown below and returning them to the
box without looking at them. You won’t need them for this game.
Easy Remove 4 Cards
Normal Remove 3 Cards
Challenging Remove 2 Cards
Brave Remove 1 Card
Heroic Keep all Cards
When rst learning the game or when playing with inexperienced
players, we recommend playing the Easy level of difculty.
Important: The following pages will explain the general course of the game for Book 1. New rules for Books 2–5 can be found
on pages 12–14. However, before you face the challenges of Books 2 through 5, we recommend you begin by playing a few games
using the rules for Book 1 rst.
4Craft Attribute
5Speed Attribute
6Health Points
7Equipment card
display area
Game Boards
Place the large and small game boards in the play area within easy
reach of all players. The large game board shows a map of Girdlegard
divided into its 7 kingdoms (beginning in the north and continuing
clockwise): Gauragar, Urgon, Idoslân, Sangreîn, Rân Ribastur,
Weyurn, and Tabaîn.
In addition, several locations important to the plot are indicated, as
well as the Tunnel Entrances for the Tunnel system, and the Gates
through which the Army of Evil will invade Girdlegard.
Place the markers for the Doom track located in the north at the top
of the map.
Place the Hero marker in its start space at the left end of the track.
Place the Doom marker in its start space at the right end of the
track.
Important: These two markers will advance towards one another
during the course of the game. If the 2 markers meet, the Heroes
have immediately lost the game allowing evil to triumph.
In addition, 3 supply areas for the Army of Evil troops are depicted at
the top of the board: Orcs on the left, Élfar in the middle, and Trolls on
the right. Place the troops for each type as a supply on these pictures.
During the game, as the Army of Evil troops populate the map, the more
the visage of each troop type will show and the more horric the Army
of Evil will become.
The small board shows the Dwarven Council: anked on the left side
by Bislipur and by Balendilín on the right. Place the Council marker
on the axe in the middle of this area. The position of the Council marker
in the Dwarven Council will inuence your actions in the game. If you
manage to move the marker in the direction of Balendilín, you will
enjoy certain advantages. On the other hand, if the marker moves in the
direction of Bislipur, your efforts to defeat the Army of Evil will be made
more difcult.
Place the Attribute Value Modication tiles, the Tunnel tile, the
Number and Recruitment dice, and the Scenario markers in easy
reach of all players. Place the Perished Land tiles facedown and mix
them together. Then place them in a pile next to the board ready for use.
6
3+3+4+4+5+5+6+6+
D
W
A
R
V
E
N
C
O
U
N
C
I
L
At the beginning of your turn,
advance the Doom marker 1 space
towards the Hero marker.
Aer rolling the Recruitment
dice, re-roll any dice showing
a blank side. e new result
counts.
Aer rolling Number dice, re-roll
one die with the highest number
showing. e new result counts.
Aer revealing a new reat
card, decide which Hero must
lose 1 Health point.
Aer revealing a new reat
card, decide which Hero gains
1 Health point.
Aer completing an Adventure
card, you may discard 1 faceup
reat card without consequence.
Aer rolling the Number dice,
you may re-roll 1 die of your
choice. e new result counts.
As an action, you may make
1 Cra check 4+. If successful,
you may draw 1 Equipment card
and then decide which Hero will
keep it.
B
I
S
L
I
P
U
R
B
A
L
E
N
D
I
L
Í
N
V V
I
V
IV
V
VV I
IV IV I IV VVI I II II
II IV V I II IV V
IV IVV VI
I
IV
4
+
5
+
2 2 2 2
22
Toboribor
WEYURN
GAURAGAR
TABAÎN
RÂN RIBASTUR
Porista
Dsôn Balsur
Mifurdania
T
U
N
N
E
L
T
U
N
N
E
L
T
U
N
N
E
L
Toboribor
Lot-Ionans Vaults
Blacksaddle
Porista
Dsôn Balsur
Green Haven
Elven Kingdom
of Âlandur
Dragonsfire
Roodacre
Mifurdania
Queen Xamtys II
Dragonsfire
Roodacre
Elven Kingdom
of Âlandur
Green Haven
Queen
Xamtys II
SANGREÎN
IDOSLÂN
Lot-Ionans
Vaults
Blacksaddle
1.
Advance the Hero Marker
2.
Reveal New Cards
3.
Perform 2 Actions
WEYURN
6
Toboribor
Lot-Ionans Vaults
Blacksaddle
Porista
Dsôn Balsur
Green Haven
Elven Kingdom
of Âlandur
Dragonsfire
Roodacre
Mifurdania
Queen Xamtys II
Map Legend for
the 11 Locations
Lot-Ionans
1 of the 11 Locations
Start space for
the Doom marker
Equipment
deck
Adventure
deck
Threat
deck
Troll Troop Supply
Turn Summary
T
U
N
N
E
L
1 of the 4 Tunnel
Entrances
Start space for
the Hero marker
Doom Track
1 of the 4 Gates
Orc Troop Supply
Élfar Troop Supply
Start space for the Council marker
V
IV
V
VV
I
IV I
2
2
IV I
II IV V I II IV V
V
II IV V I II IV V
V
Banners for the
7 Kingdoms
URGON
Erobert Dsôn Balsur
Stellt 2
Reist nach Dsôn Balsur ,
um die Armeen auf dieser Karte
zu bekämpfen.
Die Aufgabe ist erfüllt, wenn sich
keine Armee mehr auf dieser
Karte befindet.
Dwarven
Council
Erobert Dsôn Balsur
Stellt 2
auf diese Karte.
Reist nach Dsôn Balsur ,
um die Armeen auf dieser Karte
zu bekämpfen.
Die Aufgabe ist erfüllt, wenn sich
keine Armee mehr auf dieser
Karte befindet.
A
Conquer Dsôn Balsur
Place 2
Travel to Dsôn Balsur
,
to defeat these troops.
i uet i coete he
there are o ore troo
on this card.
6
+
6
+
Abandoned Tunnel
Tunnels allow us to travel unseen.
 Hero ut trave throuh the
ue yte a ae a raft
chec  o the ae tur
Add or relocate the
Tunnel
tile
to a hex ithout text or
Perished Land
.
Recuperate at Roodacre
She pointed to a tavern with a dimly glowing
lantern inside. "Shall we go in?"
1 Hero ut trave to Mifuraia
and then to Roodacre .
ecie hich Hero ieiatey
reai  Heath oit or hich
 Heroe i reai 1 Heath
point each.

Looking down, Tungdil saw the mighty
portals of the Stone Gate and all around
them Giselbert and the Fifthlings were
fighting to the death.
1 Hero ut trave to acae
and then to Greenhaven .
etur  troo ac to their uie
fro either the a or car
Adventure
3
+
6
+
D
W
D
W
D
A
W
A
W
C
I
L
At the beginning of your turn,
advance the Doom marker 1 space
towards the Hero marker.
Aer rolling the Recruitment
dice, re-roll any dice showing
a blank side. e new result
counts.
Aer rolling Number dice, re-roll
one die with the highest number
showing. e new result counts.
Aer revealing a new reat
card, decide which Hero must
lose 1 Health point.
Aer revealing a new reat
card, decide which Hero gains
1 Health point.
Aer completing an Adventure
card, you may discard 1 faceup
reat card without consequence.
Aer rolling the Number dice,
you may re-roll 1 die of your
choice. e new result counts.
As an action, you may make
1 Cra check 4+. If successful,
you may draw 1 Equipment card
and then decide which Hero will
keep it.
5
+
5
+
6
+
Aer rolling the Number dice,
3
+
4
+
4
+
W
A
W
A
W
R
A
R
A
V
R
V
R
E
N
C
O
U
N
C
I
N
O
U
N
N
Adventure
Adventure
Place the Scenario deck facedown on the left space of the small
board. Then draw the top card and place it faceup on the deck.
C
B
B
Schmiedet die
Feuerklinge
Die Aufgabe ist erfüllt, wenn sich
2 Spielfiguren am Drachenbrodem
befinden und einem dieser Spieler
innerhalb eines Spielzugs
2 Handwerksproben 5+ gelingen.
Entscheidet anschließend gemeinsam,
wer diese Karte erhält. Dessen
Attribut Kampf erhöht sich um 2.
B
C
Besiegt Nôd’onn!
Bedingung: Es befinden sich 15+
Plättchen Totes Land auf der Landkarte.
Vorbereitung: Legt 4 Szenariosteine auf
diese Karte. Ihr seid alle am Schwarzjoch .
Aufgabe: Befindet sich keine Armee
am Schwarzjoch , kann jeder Spieler
Nôd’onn bekämpfen. Entfernt für jeden
Treffer (6+) 1 Szenariostein. Gelingt kein
Treffer, verliert der Spieler 1 Lebenspunkt.
Ihr gewinnt, wenn ihr Nôd’onn besiegt.
A
Conquer Toboribor
Place 4
Orcs
on this card.
Travel to Toboribor
,
to defeat these troops.
i uet i coete he there
are o ore troo o thi car
Erobert Toboribor
Legt 4 Orks auf diese Karte.
Reist nach Toboribor ,
um die Armeen auf dieser Karte
zu besiegen.
Befindet sich keine Armee mehr auf
dieser Karte, ist die Aufgabe erfüllt.
A
Create the Adventure deck: Shufe the Adventure cards (white
frame) and place them as a facedown draw deck to the right of the small
game board. Then turn over 3 Adventure cards and place them on the
corresponding storage spaces on the small game board.
Create the Threat deck: Shufe the Threat cards (black frame) and
place them as a facedown draw deck next to the game board. Then take
the top 3 Threat cards and shufe them into the Adventure deck
without looking at them.
Create a common discard pile for all of the Adventure and Threat
cards discarded during the game. If the Adventure deck runs out,
shufe all discarded Adventure and Threat cards and use them to create
a new Adventure deck.
Finally, create the Equipment deck: Shufe the Equipment cards (red
frame) and place them as a facedown draw deck next to the game board.
If the Equipment deck runs out, shufe all discarded Equipment cards
and use them to create a new Equipment deck.
Setup Example
7
3+3+4+4+5+5+6+6+
D
W
A
R
V
E
N
C
O
U
N
C
I
L
At the beginning of your turn,
advance the Doom marker 1 space
towards the Hero marker.
Aer rolling the Recruitment
dice, re-roll any dice showing
a blank side. e new result
counts.
Aer rolling Number dice, re-roll
one die with the highest number
showing. e new result counts.
Aer revealing a new reat
card, decide which Hero must
lose 1 Health point.
Aer revealing a new reat
card, decide which Hero gains
1 Health point.
Aer completing an Adventure
card, you may discard 1 faceup
reat card without consequence.
Aer rolling the Number dice,
you may re-roll 1 die of your
choice. e new result counts.
As an action, you may make
1 Cra check 4+. If successful,
you may draw 1 Equipment card
and then decide which Hero will
keep it.
B
I
S
L
I
P
U
R
B
A
L
E
N
D
I
L
Í
N
GOAL OF THE GAME
You all win as a team if you successfully complete 1 level C Scenario card.
You all lose as a team, if either:
The Hero and the Doom markers meet one another on the Doom track,
OR
Any Hero dies.
1. Advance the Hero Marker
COURSE OF PLAY
First, agree on a start Hero. The start Hero takes their turn rst,
and then the other Heroes will each take their turns in clockwise
order. Continue play using this same Hero order for the entire game.
Throughout the game players should discuss everything they want
to do so they can decide together what might be best for their Heroes
and for achieving the goal of the game. However, the nal decision
for what to do is always made by the Hero whose turn it is.
When it’s your turn, perform the following steps in the order given:
1. Advance the Hero Marker
2. Reveal New Cards
3. Perform 2 Actions
Advance the Hero marker 1 space on the Doom track in the
direction of the Doom marker. The icon in the space the Hero marker
now occupies indicates which of the following 3 actions you must
now take immediately:
1Dwarven Council: Move the Council marker 1 step in the
direction of Bislipur (to the left). If the Council marker is already
on the leftmost space, it remains there. The text in the space
occupied by the Council marker is now in effect (until the Council
marker moves to a new space putting a new text space into effect).
2Threat cards: Draw 2 cards from the Threat deck and shufe
them into the Adventure deck without looking at them.
3Place Army of Evil troops on the map: Roll all 3 Recruitment
dice. Take troops of the respective colors (Élfar, Trolls, Orcs)
from their supply according to the number of skulls on the
matching color Recruitment dice. Place these troops on the Gate
indicated by the Roman numeral above the Hero marker. (If there
are no more troops of a color available in the supply, then no
troops of that color are placed)
21 3
1 32
2 Threat
cards
Adventure
Deck
4
+
Important: Player and Hero are used interchangeably in the game. Whenever the game refers to players or Heroes, it always refers to
all players or Heroes unless otherwise noted. This includes the player/Hero whose turn it is.
8
Perished Lands and Troop Movements
1If there are 5 or more troops in a hex on the map after moving
armies or resolving a card, this hex immediately turns into Perished
Land. Randomly draw 1 Perished Land tile and place it faceup on
the affected hex so that the direction of the large arrow in the center
of the tile matches with the direction of the arrow of the same color
in this space. (If all of the Perished Land tiles are already on the map,
no further hexes can be converted into Perished Land. In addition,
there can now be 5 or more troops in a hex.)
2The tile also depicts 2 troops (colored squares) on each side of
the arrow. If available, move the 2 troops matching that color from
each hex side to the corresponding adjacent hexes on the map. If
there are not enough troops in the hex for a color, only move the
matching troops that are available. If the movement would take the
indicated troops to a Perished Land hex or beyond the edge of the
map, those troops will remain in place and will only be moved in the
next step 3.
3Now move all remaining troops to the hex indicated by the
large arrow.
If this results in 5 or more troops on a hex, this hex also becomes a
Perished Land. Repeat the process as described.
4
If troops enter a map hex that is already Perished Land, continue
moving these troops in the direction of the large arrow to the next
hex. If necessary, repeat this until the troops reach a hex without
Perished Land. (If there are 5 or more troops there, this hex also
becomes Perished Land.)
Blacksaddle
Eventually, all Perished Land tiles lead to the Blacksaddle hex. After
moving all of the Army of Evil troops, if 5 or more troops have
accumulated in the Blacksaddle hex, remove all of these troops
and return them to their respective supply. In addition, immediately
advance the Doom marker 1 space in the direction towards the
Hero marker. (The Doom marker doesn’t activate icons on the
Doom track.) The Blacksaddle hex never turns into Perished Land.
2. Reveal New Cards
A. Scenario Cards
If there is no faceup Scenario card, reveal the top card of the
Scenario deck. If the quest for the new Scenario has already been
completed, discard it and immediately reveal the next Scenario card.
If you are required to place troops on the new card and there are not
enough in the supply, take the necessary troops from hexes of your
choice on the map.
Some level C Scenario cards have a condition. If this condition is
not met, discard it and reveal the next card from the deck. There will
always be at least 1 level C Scenario card whose requirement will be
met when drawn. Carry out the preparations described on the card.
Important: After you have revealed a new Scenario card, the effects
for all of the Threat cards in the display must be resolved. Follow the
text under the .
If a Threat card turns a map hex into a Perished Land, any
troops in that hex must immediately move per the usual rules.
Once all of the Threat cards have been resolved, discard them along with
any unresolved Adventure cards to the discard pile (maximum of 3).
B. Adventure and Threat Cards
If there are now fewer than 3 Adventure and/or Threat cards in
the display, you must reveal new cards from the Adventure deck
one-by-one until there are 3 cards in the display. If a Threat card
requires troop placements and there are not enough of the necessary
troops in the supply, you must rst resolve any effects on the card
and then discard it and reveal a new card. If you reveal a Threat
card with an IMMEDIATE effect, resolve the immediate effect and
discard it. Then reveal another card from the Adventure deck.
V V
I
V
IV
V
VV I
IV IV I IV VVI I II II
II IV V I II IV V
IV IVV VI
I
IV
2 2 2 2
22
GAURAGAR
Toboribor
Lot-Ionans Vaults
Blacksaddle
Porista
Dsôn Balsur
Green Haven
Elven Kingdom
of Âlandur
Dragonsfire
Roodacre
Mifurdania
Queen Xamtys II
Elven Kingdom
of Âlandur
1 2 3 4
Dragonsfire
T
of Âlandur
Dragonsfire
Dragonsfire
Elven Kingdom
Elven Kingdom
Elven Kingdom
Elven Kingdom
Elven Kingdom
Elven Kingdom
Elven Kingdom
Elven Kingdom
Elven Kingdom
Elven Kingdom
Elven Kingdom
Elven Kingdom
Elven Kingdom
Elven Kingdom
Elven Kingdom
Elven Kingdom
Elven Kingdom
Elven Kingdom
9
3. Perform 2 Actions
You may take 2 actions each turn. You may choose the same action
twice.
A. Move on the Map
B. Fight the Army of Evil
C. Send Dispatches to the Dwarven Council
D. Make an Attribute Check
A. Move on the Map
Roll Number dice equal to the Speed Attribute value on your Hero
board. Then, using the highest number rolled, move your Hero
gure up to that many hexes on the map.
If your Hero enters a hex with Army of Evil troops, you must
immediately end your move there. In your next, or a later action,
you may continue your movement from this hex. You are not required
to ght troops when you are in the same hex with them. Troops on
cards do not end your movement.
Moving on the map is not a Speed Attribute check.
Movement through Perished Land
For each Perished Land hex your Hero enters(!), you must decide to
either lose 1 Health point or to advance the Doom marker 1 space in
the direction of the Hero marker. For each hex, as usual, discuss your
choice of penalty with your team. (NOTE: The Doom marker doesn’t
activate icons on the Doom track.)
These same penalties apply whenever a Hero is moved to a Perished
Land by a card effect. There is no effect if a Hero begins their turn on
Perished Land or if their current hex is turned into Perished Land.
Tunnel System
On the map of Girdlegard, there are several entrances to an
underground Tunnel system.
During movement your Hero can move to a Tunnel entrance hex
with one movement point and can then continue their move from
any other Tunnel entrance hex with their next movement point, all
in the same turn.
During the game, once you have successfully completed a quest
on certain Adventure cards, you can create an additional Tunnel
entrance through the use of the Tunnel tile.
Important: Tunnel entrance hexes located on Perished Land hexes
no longer provide access to the Tunnel system. (Note: the Tunnel
tile can still be moved.) You should protect Tunnel entrance hexes
as best as you can. All other Location hexes can still be visited
even if they have been turned into Perished Land.
Example: Your movement ends after 3 hexes because there are
troops on the 3rd hex. During your movement you entered 2
Perished Land hexes. You must now decide for each of these
hexes whether you will lose 1 Health point or whether you will
advance the Doom marker 1 space closer to the Hero marker.
10
B. Fight the Army of Evil
If your Hero is in a hex with one or more troops, they may ght them
in battle. Roll Number dice equal to the value of the Battle Attribute
on your Hero board. Depending on your dice results, you will defeat a
specied number of troops:
For each 6 rolled, defeat 1 troop of your choice: Élfar, Troll, or Orc.
For each 5 rolled, defeat 1 troop of your choice: Troll, or Orc.
For each 4 rolled, defeat 1 Orc troop.
Remove all defeated troops from the hex and return them to their
respective supplies on the board. Rolls of 3 or less will not defeat any
troops (unless otherwise specied).
Important: Your Hero must lose 1 point of Health if they were
unable to defeat any troops with your Fight the Army of Evil
action. Decrease your Hero’s Health marker by 1 point on your
Hero board.
Example: Using the dice rolls shown, you can remove 2 troops:
the 6 allows you to remove 1 troop of your choice (probably
the Élf) and the 4 allows you to remove the Orc troop. The
second 4 is ignored as there aren’t any more Orcs in the hex. To
successfully ght a Troll troop, you would have needed at least
a 5. Since you successfully defeated at least 1 troop, you won’t
lose a Health point.
Troops on Cards
Some Scenario, Adventure, and Threat cards will require you to
place Army of Evil troops on them. In order to ght these troops,
your Hero must be in the Location indicated on the card. (To make
this clear on the map, place a scenario marker on this Location
hex.) Fight the battle as described above. (Keep in mind that if you
don’t defeat at least 1 troop, you will lose 1 Health point). If there
are also troops on the Location hex, you ght all of the troops at the
same time: both those on the map hex and those on the card.
Fighting Army of Evil troops is not a Battle Attribute check.
C. Send Dispatches to the Dwarven Council
You may Send Dispatches to the Dwarven Council from any hex on
the map to inuence the election of the new king. Roll Number dice
equal to the value of the Craft Attribute on your Hero board. If at
least 1 of the dice rolled is equal to or greater than the number to the
right of the Council marker (in the direction of Balendilín), move the
Council marker 1 space to the right.
If the value of your highest die is lower than the required number,
your attempt fails, and your action is over without further effect.
Send Dispatches to the Dwarven Council is not a Craft Attribute
check.
Important: You can only move the Council marker by 1 space per
action. The text in the box where the Council marker is currently
located is now in effect until the Council marker is moved to
another space which would put that new text into effect instead.
Example: To successfully Send Dispatches to the Dwarven
Council, you need at least a 5 (indicated by 5+ to the right of the
Council marker). Even though you rolled a 6 in addition to a 5 as
shown, you can still only move the Council marker 1 space. The
text in the new space with the Council marker is now in effect.
3+3+4+4+5+5+6+6+
D
W
A
R
V
E
N
C
O
U
N
C
I
L
At the beginning of your turn,
advance the Doom marker 1 space
towards the Hero marker.
Aer rolling the Recruitment
dice, re-roll any dice showing
a blank side. e new result
counts.
Aer rolling Number dice, re-roll
one die with the highest number
showing. e new result counts.
Aer revealing a new reat
card, decide which Hero must
lose 1 Health point.
Aer revealing a new reat
card, decide which Hero gains
1 Health point.
Aer completing an Adventure
card, you may discard 1 faceup
reat card without consequence.
Aer rolling the Number dice,
you may re-roll 1 die of your
choice. e new result counts.
As an action, you may make
a Cra check 4+. If successful,
you may draw 1 Equipment card
and then decide which Hero will
keep it.
B
I
S
L
I
P
U
R
B
A
L
E
N
D
I
L
Í
N
5
+
Aer revealing a new reat
Aer completing an Adventure
10
10
10
10
11
Example: To complete this Adventure card, you must make a Craft Attribute check
by rolling 4 or more three times during your turn (maximum of 2 actions). With
your current Craft Attribute value of 4, you roll 4 Number dice. For your 1st action,
you roll 2 successful checks (a 4 & 6). Then for your 2nd action, you manage to
make the third check (a 5). You may not use the remaining successful checks (a 5
& 6) from your 2nd roll to complete an Attribute check on another card. With your
success, you now gain the reward described on the card and discard it.
If you had not rolled another 4+ with your 2nd action you would have failed. Then,
any Hero on a subsequent turn can try again, but they will still need three 4+ rolls
to complete the Attribute check (and hopefully with only 1 action).
D. Make an Attribute Check
If an Adventure, Threat, or Scenario card on display requires the
completion of 1 or more Attribute checks (Craft , Speed , or
Battle ), roll Number dice equal to the value of the corresponding
Attribute for the check as shown on your Hero board. Each die
with the required value or higher counts as 1 successful check. This
means you can complete several successful checks with a single
Make an Attribute Check action. You can only use successful checks
for 1 card per action. If you complete more successful checks than
required, the excess checks have no effect. (For example, the box
on the far right of the Dwarven Council only allows you to take
1 Equipment card no matter how many successful checks you rolled
because it only requires 1 successful Craft check.) If you succeed in
all the checks required on an Adventure card, you gain the reward
shown below the , and then you discard it. If you have not
successfully completed all of the required checks during your turn,
the card remains in place, and these checks must all be completed
again on another turn by any Hero.
Important: New cards are only revealed by the next player!
If you make a Speed Attribute check, you do not move your Hero.
If you make a Battle Attribute check, you do not ght the Army
of Evil and you don’t lose a Health point if you fail. If you make a
Craft Attribute check, you are not performing Send Dispatches to
the Dwarven Council.
1st Action Roll
2nd Action Roll
A Dwarven Melody
e melodies were simple and easy to
remember as ornate songs were foreign to
Dwarves. To Tungdil’s ear, they seemed
somewhat melancholy.
Mae  raft chec 4+
in a single turn.
Move a Hero of your choice to
a hex of your choice
These two expansions allow you to experience new adventures in Girdlegard by providing more variety to your Book 1 games either as
individual additions or all together. You can also use the Equipment cards from both expansions for games in all 5 Books. The expansion
cards are all marked on the front with a letter on the bottom right: A for the Élfar expansion and B for the Combined Might expansion.
A. Élfar Expansion
Girdlegard faces a terrifying new threat: a portal to the kingdom
of Phondrasôn has opened and horrible things are emerging
from it.
During setup, shufe the expansion cards into the corresponding
decks. Place the new level C Scenario card Seal the Élfar Portal
facedown in the Scenario deck in place of all previous level C cards.
Place the Élfar Portal tile 3 hexes south of Gate I. Return the
Tunnel tile back in the box; you won’t need it for this game. The
Portal tile provides the same abilities as the Tunnel tile. It can be
used as a Tunnel entrance and you can move the Portal tile with
Adventure cards that can move the Tunnel tile. If the Portal tile is
on a hex that has been turned into Perished Land, it can no longer
be used as a Tunnel entrance. However, the Portal itself still remains
active and cards related to the Portal still have their effect.
B. Combined Might Expansion
The Army of Evil has taken advantage of the quarrels in Girdlegard
and have invaded with renewed strength. You will need to support
one another to withstand them.
During setup, shufe the expansion cards into the corresponding
decks. Create the Scenario deck: rst, shufe the 9 level C cards and
place them facedown. Then place 1 randomly drawn level B card
facedown on top. Finally, shufe the level A cards and place them
facedown on top of the deck. Depending on the level of difculty you
want to play, remove level A cards from the deck and return them to
the box without looking at them; you won’t need them in this game.
Easy Remove 10 cards
Normal Remove 9 cards
Challenging Remove 8 cards
Brave Remove 7 cards
Heroic Remove 6 cards
THE
ÉLFAR
AND
COMBINED MIGHT
EXPANSIONS
12
New adventures await you in Girdlegard: the stories from Books 2–4 bring you back to ght powerful dragons, search for magical
diamonds, and crush the Army of Evil.
CHANGES IN GAME SETUP
Leave all of the cards from the base game in the box except for the
Equipment cards. Place the Equipment cards and all other materials in
your playing area as usual. Place the new Council tile in
the second space to the right in the Dwarven Council. It
replaces the text for this space.
Decide which Book you want to play and take the Saga cards with
the corresponding Book number on their back. For now, put aside the
Blacksmith card from Book 2, the Dispatches and Hidden Shortcut
cards from Book 3, and the High King card from Book 4. They will
only come into play when indicated by a Saga card. Then sort the Saga
cards by letter (A, B, C). First, shufe the 3 level C cards, draw 1 of
them and place it facedown to start the Saga deck. Return the rest to
the box without looking at them. Then shufe the 2 level B cards and
place them both facedown on top of the deck. Finally, shufe the level
A cards and place them facedown on top to complete the deck.
Depending on the desired level of difculty, remove level A cards (as
described on page 5) and return them to the box without looking at
them. You won’t need them for this game.
Now, place the Saga deck facedown on the left space of the small game
board. Then turn over 3 cards and place them on the 3 spaces to the right
of the Saga deck. (The Saga cards replace the Scenario and Adventure
cards from Book 1.) Shufe all of the Threat cards for Books 2–4 and
place them facedown as a Threat deck to the right of the small game
board. Unlike Book 1, don’t shufe any of these cards into the Saga
deck.
RULE CHANGES
All rules from Book 1 apply with the following exceptions:
Saga Cards
As soon as you have completed the quest for a Saga card, gain the
reward shown, if any, and then discard the card. During the next
Hero’s Reveal New Cards step, draw 1 card from the Saga deck for
each card that was discarded. If the new card you draw has the next
letter, don’t reveal it, but place it facedown in the display instead.
Once all faceup level A Saga cards have been completed during the
Reveal New Cards step, then the level B cards can be revealed.
Once both level B cards have been completed, then the level C card
can be revealed. Once you complete it, you’ve won the game!
IMPORTANT: Revealed Threat cards do not count as Saga
cards. Display them faceup next to the small game board!
Threat Cards
When the Hero marker on the Doom track moves to the Threat cards
icon, Reveal 2 Threat cards from the Threat deck.
As a team, decide which of the 2 cards you will face as your new
threat and place it faceup next to the small game board. Return the
other card facedown to the bottom of the Threat deck. If you decide
on a card with an IMMEDIATE effect, resolve it immediately and
then return the card to the box as it will not be used again in the
game. Unlike with Book 1, do not draw another Threat card.
Threat cards without an IMMEDIATE effect still have an effect that
applies immediately and for as long as the card is faceup. If there is
a quest on the card and you manage to resolve it, you may return the
card to the box as it will not be used again in the game
SPECIAL FEATURES FOR EACH BOOK
Book 2
Girdlegard is threatened with new dangers. Keenre has fallen into
the hands of the Élfar and numerous conicts have made Girdlegard
vulnerable. You must ght side-by-side against the invaders!
You will need the following additional game components for this
Scenario:
Hammer tile
Blacksmith 12 Saga Cards
for Book 2
Élf bearing
Keenre tile
A

he your Hero i o the
Haer
tile
you ca chooe the fooi
actio Mae 1 raft chec
4+ to
ra uiet car a the
ecie hich Hero i tae
each card.
NEW ADVENTURES: BOOKS 24
13
Book 3
To prevent the Mighty Diamond from falling into the wrong hands, ten
copies were made and then all 11 were hidden in Girdlegard. Now the
Army of Evil has set out to nd the Mighty Diamond. You must nd it rst!
You need the following additional game components for this Scenario:
Special Setup
Mix all 11 Diamond tiles and place them facedown in the map
hexes with the diamond icon .
Special Rules
If a hex with a diamond is occupied by an enemy troop or if it is turned
into Perished Land, the diamond is immediately revealed and placed
on Bislipur in the Dwarven Council. Then, roll 2 Number dice and
sum their values. If the result is equal to or less than the sum of the
values of all diamonds that have been collected on Bislipur, the Army
of Evil has found the Mighty Diamond. This will make the level B
and C cards more difcult for you (as noted on effects on cards).
Remove all of the remaining diamonds from the map when this
happens.
If you are in a hex with a diamond, you may immediately use
1 action to make a Craft check 4+. If successful, reveal the
diamond and place it on Balendilín in the Dwarven Council. Then
roll 2 Number dice and sum their values. If the result is equal to
or less than the sum of the values of all diamonds that have been
collected on Balendilín, the heroes have found the Mighty Diamond.
This will make the level B and C cards easier for you (as noted on
effects on cards). Remove all of the remaining diamonds from
the map when this happens.
Of course, it’s also possible that neither side will nd the Mighty
Diamond. If so, continue following the usual directions for the level
B and C cards.
Book 4
Leaders have spurred the Army of Evil to greater power and powerful
dragons roam the skies of Girdlegard. Fearlessly face these new dangers
and vanquish your enemies!
You need the following additional game components for this Scenario:
Special Rules
Army of Evil Leaders
There are now Saga cards that will bring leaders into play. Leaders
follow normal troop movement rules, which means they wander
in the direction of the big arrow on Perished Land tiles. However,
they count as 2 troops when converting hexes into Perished Land.
This means a hex with 1 leader and 3 troops would now convert into
Perished Land. In all other respects, leaders are not treated as troops.
Cards or other effects related to troops do not apply to leaders. To
remove a leader, a Hero needs 2 die results for that troop type during
a single Fight the Army of Evil roll. For example, you will need 2 dice
with 4+ on your roll to remove an Orc leader. As usual, your Hero
loses 1 Health point if they fail to remove at least a leader or any other
troop as a result of a battle. When counting troops at Blacksaddle,
each leader counts as 2 troops. If troops are removed, any defeated
leaders will remain on Blacksaddle instead of being removed. In this
case, the Doom marker will advance 2 spaces in the direction of the
Hero marker (instead of the usual 1 space).
Dragons
There are now Saga cards that bring dragons into play. A dragon
is not considered a troop in any way and therefore does not affect
the conversion of hexes into Perished Land. Cards or other effects
related to troops do not apply to dragons. At the end of each turn,
each dragon moves 3 spaces in a random direction as shown on the
Dragon tile. Roll 1 Number die to determine the direction the dragon
will move. Dragons may move through hexes with Heroes, troops,
and Perished Land without restriction. They don’t use the Tunnel
system. If a dragon encounters the edge of the map while moving,
their move will end there. Heroes who are on or adjacent to the
dragon’s destination hex lose 1 Equipment card or 1 Health point
(their choice). If a Hero decides to lose 1 Health point, another Hero
may take this damage instead.
A
Hidden Shortcut
or the ret of the ae Heroe ca
chooe the fooi actio he o
the
Mie art
tile
Mie art
tile
Mie art
chooe the fooi actio he o
Select another Hero and decide on a
ie hex to ace oth of your Heroe
Mine Cart tile
11 Diamond tiles
Dispatches
rave to a ate ithout a ceario
arera actio ace 1 ceario
arer there
other Hero ay tae
Dispatches
fro you ithout ei a actio
or iterruti their oveet if they
are o the ae or a aacet hex
Dispatches
oe ot cout a uiet
Dispatches
oe ot cout a uiet
Dispatches
Hidden
Shortcut
12 Saga cards
for Book 3
Dispatches
A
High King
ace 1 ceario arer o each
coete coitio
e Hih i ha
full Health points.
1 or ore troo have
been collected on this
card after their defeat
o the a
o the a
o the a
e Hih i efeat
or ore troo i a
ie tur o the a
e ouci arer
is on the furthest
space to the right next
to Balendilín.
e Hih i
is in 1 of the 4 Gates
a ae a raft
chec
5+.
5+.
Élfar Leader tile5 Catapult
tiles
Lohasbrand
Dragon tile Kordrion
Dragon tile Ramparts
tiles
Ramparts
12 Saga cards
for Book 4
High King
Orc Leader tile Troll Leader tile
Élfar
Leader tile
Élfar Leader tileÉlfar
14
TRIUMPH OF THE DWARVES: BOOK 5
Prepare yourself for a decisive battle. It is imperative that you win
your nal triumph over the Army of Evil!
This expansion is based on the rules for Book 1, but also takes
individual elements from the rules for Books 2–4. We recommend
playing all of the rst 4 books before taking on this challenge.
Changes for Setup
Setup all of the components for Book 1 as usual except for the Scenario
cards. The Scenario cards for Book 1 and the components for Books 2–4
will not be required.
Place the special Equipment cards from the expansion as an faceup deck
next to the normal Equipment deck. The 2 decks should not be mixed
together.
Now create the Scenario deck from the Scenario cards for Book 5: Sort
the Scenario cards by letter (A, B, C) and shufe the respective stacks.
Then randomly draw 1 level C and 1 level B Scenario card and place them
facedown with the level C card on the bottom. Then shufe the 8 level A
Scenario cards and place them facedown on top of the other 2 Scenario
cards. For an easier game, remove 1 or 2 level A cards from the game.
Return all unused Scenario cards back to the box without looking at them.
You won’t need them for this game. Place the Scenario deck facedown on
the left space of the small game board. Then turn the top card over and
place it faceup on top the deck. To win the game, you must play through
the entire Scenario deck and successfully complete the level C card at
the end.
The New Cards
The Scenario cards for Book 5
All level A Scenario cards have a direct effect on the difculty of
level B and C Scenario cards. The following 5 terms may appear on
the cards: Effect, Quest, Reward, Time, and Penalty.
Effect: Similar to the Threat cards in Books 2–4, Effects on these
cards apply as long as the card is faceup.
Quest: As usual, this is what the Heroes must do to complete the
Scenario card.
Reward (only on level A Scenario cards): When you have completed
a quest, you gain the specied special Equipment card. Decide which
Hero will take it.
Time (only on level A Scenario cards): Place a number of Scenario
markers on the card as required. At the start of each Hero’s turn (before
moving the Hero marker), remove 1 Scenario marker. The quest must
be completed before the end of the turn when the last Scenario marker
is removed. If not, you must immediately advance the Doom marker
3 spaces towards the Hero marker. If you complete the quest in time,
return the card back to the box and take the indicated reward. During
the game, place any unfullled level A Scenario cards facedown next
to the game board.
Penalty (only on level B & C Scenario cards): These cards will apply
negative effects for any unfullled level A Scenario cards.
If there isn’t a faceup Scenario card, a new one will only be revealed
on the next Hero’s turn (regardless of whether the Scenario card was
fullled or not).
Special Equipment Cards
The Special Equipment cards are treated like normal Equipment cards.
However, they only come into play through successfully completed
level A Scenario cards and therefore are kept in a separate deck. When
you reveal one of these level A Scenario cards, you can look for the
Special Equipment card and place it on top of its deck faceup so
everyone can read the benets it provides.
Once you have beaten the heroic game, you can increase the level
of difculty even further with the following small rule modication:
If there are 4 or more Army of Evil troops on a map hex, it immediately
turns into Perished Land.
VARIANT FOR EXPERT PLAYERS
Graphic Design: Jens Wiese
Realization: Klaus Ottmaier, Irina Siefert
Designers: Michael Palm & Lukas Zach
Illustration: Jarek Nocoń
CREDITS
Pegasus Spiele GmbH, Am Straßbach 3, 61169 Friedberg, Germany, under license from Markus Heitz www.mahet.de. © 2021 Pegasus Spiele GmbH. All
rights reserved. Based on the novels by Markus Heitz: The Dwarves, The War of the Dwarves, The Revenge of the Dwarves, The Fate of the Dwarves, The
Triumph of the Dwarves © 2003, 2004, 2005, 2008, 2015 by Markus Heitz, represented by: AVA international GmbH Author and Publishing Agency, Germany
www.ava international.de We want to thank our hard-working play testers who, with a lot of patience and good ideas, helped develop this game. We especially
thank Demian, Thilini, Babs, Arne, Philipp, Thomas, Sigrun & Christoph. We also want to thank Markus Heitz for his extensive and cordial cooperation. Thank
you, Mahet, for allowing us to playfully bring Girdlegard to life.
English Translation: Ralph H Anderson
Reprinting and publishing of game rules, game components or illustrations
without permission of Pegasus Spiele is prohibited.
15
GLOSSARY
HERO SPECIAL ABILITIES
THE CARDS
Andôkai the Tempestuous
We recommend playing Andôkai only after you become familiar with some
other Heroes.
When playing Andôkai, take the Spell cards in addition to the Hero board
and the gure during setup. Use the Spell cards to create your Magic deck:
Shufe the Spell cards and place them facedown next to your Hero board.
As an action during your turn, you can draw 1 spell and put it in your hand.
If you ever have more than 3 Spells in hand, you must immediately discard
down to 3 cards and return the discards facedown to the bottom of the Spell
deck. You can play spells at any time even during other heroes’ turns and
they don’t require taking an action. Discard played spells facedown to the
bottom of the Spell deck so that you can draw and cast them again later.
The Spell Book card counts as equipment. If you draw it, immediately place
it faceup in front of you. If you discard it as the result of a card, return it
facedown to the bottom of the Spell deck.
Balyndis Ironnger
Balyndis may re-roll all dice once after a Make a Craft Check action, even
after re-rolling a single die using the Dwarven Council box that allows you
to re-roll 1 die. After the second roll, the Dwarven Council box can be used
again.
Bavragor Hammerst
Bavragor can move through Perished Land without effect.
Boëndal Pinnhand
Boëndal may increase 1 die result of his choice by 1 point when using the
action Fight the Army of Evil. He may use his special ability before or after
using the Dwarven Council box that allows you to re-roll 1die, but only once
per action.
Boïndil “Ingrimmsch” Two Blades
Boïndil may re-roll all dice during a Fight the Army of Evil action once,
even after re-rolling a single die using the Dwarven Council box that allows
you to re-roll 1 die. After the second roll, the Dwarven Council box can be
used again.
The Fabulous Rodario
Rodario may increase 1 die result of his choice by 1 point when using any
Make an Attribute Check action. He may use his special ability before or
after using the Dwarven Council box that allows you to re-roll 1die, but only
once per action.
Gandogar Silverbeard
When using the action Fight the Army of Evil, Gandogar may ght troops in
his hex as well as any troops in adjacent hexes by allocating his successful
rolls into several hexes. All hexes directly adjacent to the hex with his Hero
count as adjacent.
Narmora
Narmora may only remove an additional troop from the hex in which her
Hero is standing. She can’t use her special ability when ghting troops on
a card.
Tungdil Goldhand
Tungdil may increase 1 die result of his choice by 1 point when using the
action Send Dispatches to the Dwarven Council. He may use his special
ability before or after using the Dwarven Council box that allows you to re-
roll 1die, but only once per action.
Xamtys II The Stubborn
Her special ability is used when Xamtys completes Adventure cards in
Books 1 & 5 and Saga cards in Books 2–4.
General Information for Cards
Some cards introduce new action choices. These will be available to you in
addition to the usual actions A-D.
Equipment Cards
Heroes can have any number of Equipment cards, but never 2 of the same
card. You may never transfer an Equipment card to another Hero
during the game. If all Heroes already have a copy of a newly drawn
Equipment card, return it facedown to the bottom of the Equipment deck
and draw a new card.
Scenario Cards
At any point during your turn, you may complete the quest for a faceup
Scenario card and then immediately discard it. New Scenario cards are not
revealed until the next players turn. Exception: If the quest on a Scenario
card is already fullled when it is revealed, it is immediately discarded, and
the next Scenario card is revealed.
Adventure Cards
Adventure cards can be completed during your turn. In order to complete
some Adventure cards, it is sufcient to simply enter their specied location
during the action Move on the Map. You don’t have to end your movement
there, unless the card requires you to perform a specic quest in that location
(such as making an Attribute check or meeting up with another Hero). If an
Adventure card requires that you travel from one gate or location to another
gate or location, the following rule applies: You may not perform any other
actions or complete any other Adventure card during this movement as you
must complete your travel rst.
Threat Cards
If you must place troops on a card, take them from their respective supply.
If there are not enough troops in the supply, rst apply any effect on the
card and then discard it. Then reveal a new card in its place. Once you have
defeated all of the troops on a card, the threat is averted, and the card is
discarded without any further effects.
English Translation: Ralph H Anderson
16
6Number Die Result (6 depicted)
GLOSSARY
Individual Card Explanations
Equipment cards
Deceptive Disguise: In Books 1 and 5, discarding this card allows you to
discard 1 Threat card with no effect as soon as the threat occurs. In Books
2–4 discarding this card allows you to prevent the effect of the respective
Threat card for the duration of 1 Hero’s turn. Discarding this card also
allows you to prevent any IMMEDIATE effects on Threat cards, which are
then discarded with no further effect.
Book 1
Persuade the Kings of Mankind / Hold the Gates: The Craft checks can
be completed in different turns and by different Heroes.
Forge Keenre: The card can be given to any of the Heroes. (It doesn’t
have to go to one of the two Heroes in the Dragonsre location). Also give
that Hero the necessary Attribute Value Modier tile.
Vanquish Nôd’onn: If the condition of this card is met, immediately move
all of the Hero gures to the Blacksaddle hex (except for any Heroes affected
by the Sinthoras’ Assassination card or the Élfar Ambush card).
Midnight Assault by the Élfar: Decide which Hero will lose 1 Health point
for each Health point a Hero must lose.
Protective Shield: If another Hero must lose 2 Health points, your Hero can
take 1 or 2 points of the damage instead.
A Never-ending Nightmare / Defeat the Overwhelming Power of the
Orcs / The High King’s Last Battle: If the mentioned Location has already
been. converted into Perished Land, move the troops according to the usual
rules.
The Forest Fights Back / Tion’s Minions Attack the Secondlings /
Surrounded!: The hexes with 1+ troops are converted into Perished Land.
Then the troops are moved. This effect does not repeat. Then, any hexes that
now have 5+ troops are converted into Perished Land.
Combined Might Expansion
To the Death!: see Midnight Assault by the Èlfar (Book 1)
A Trap for Nôd’onn: You are not allowed to transport more than 1 Scenario
marker at any time. However, once you have delivered a Scenario marker to
Blacksaddle, you can pick up another one. You don’t have to transport the
Scenario marker that your Hero brought into play.
Book 2
Save King Glaïmbar / Blacksmith: Place the Hammer tile on the Fifthlings’
Gate even if it is already Perished Land. You can also travel to the Hammer
tile and make a Craft check if it is on Perished Land. You must still follow
the rules for entering Perished Land.
The New Realm of the Fifthlings: The 3 Craft checks must be successfully
completed in 3 separate turns.
Defeat the Élf Bearing Keenre / Banish the Thirdlings: Never place the
Élf or the Scenario markers on the Tunnel tile – ignore it.
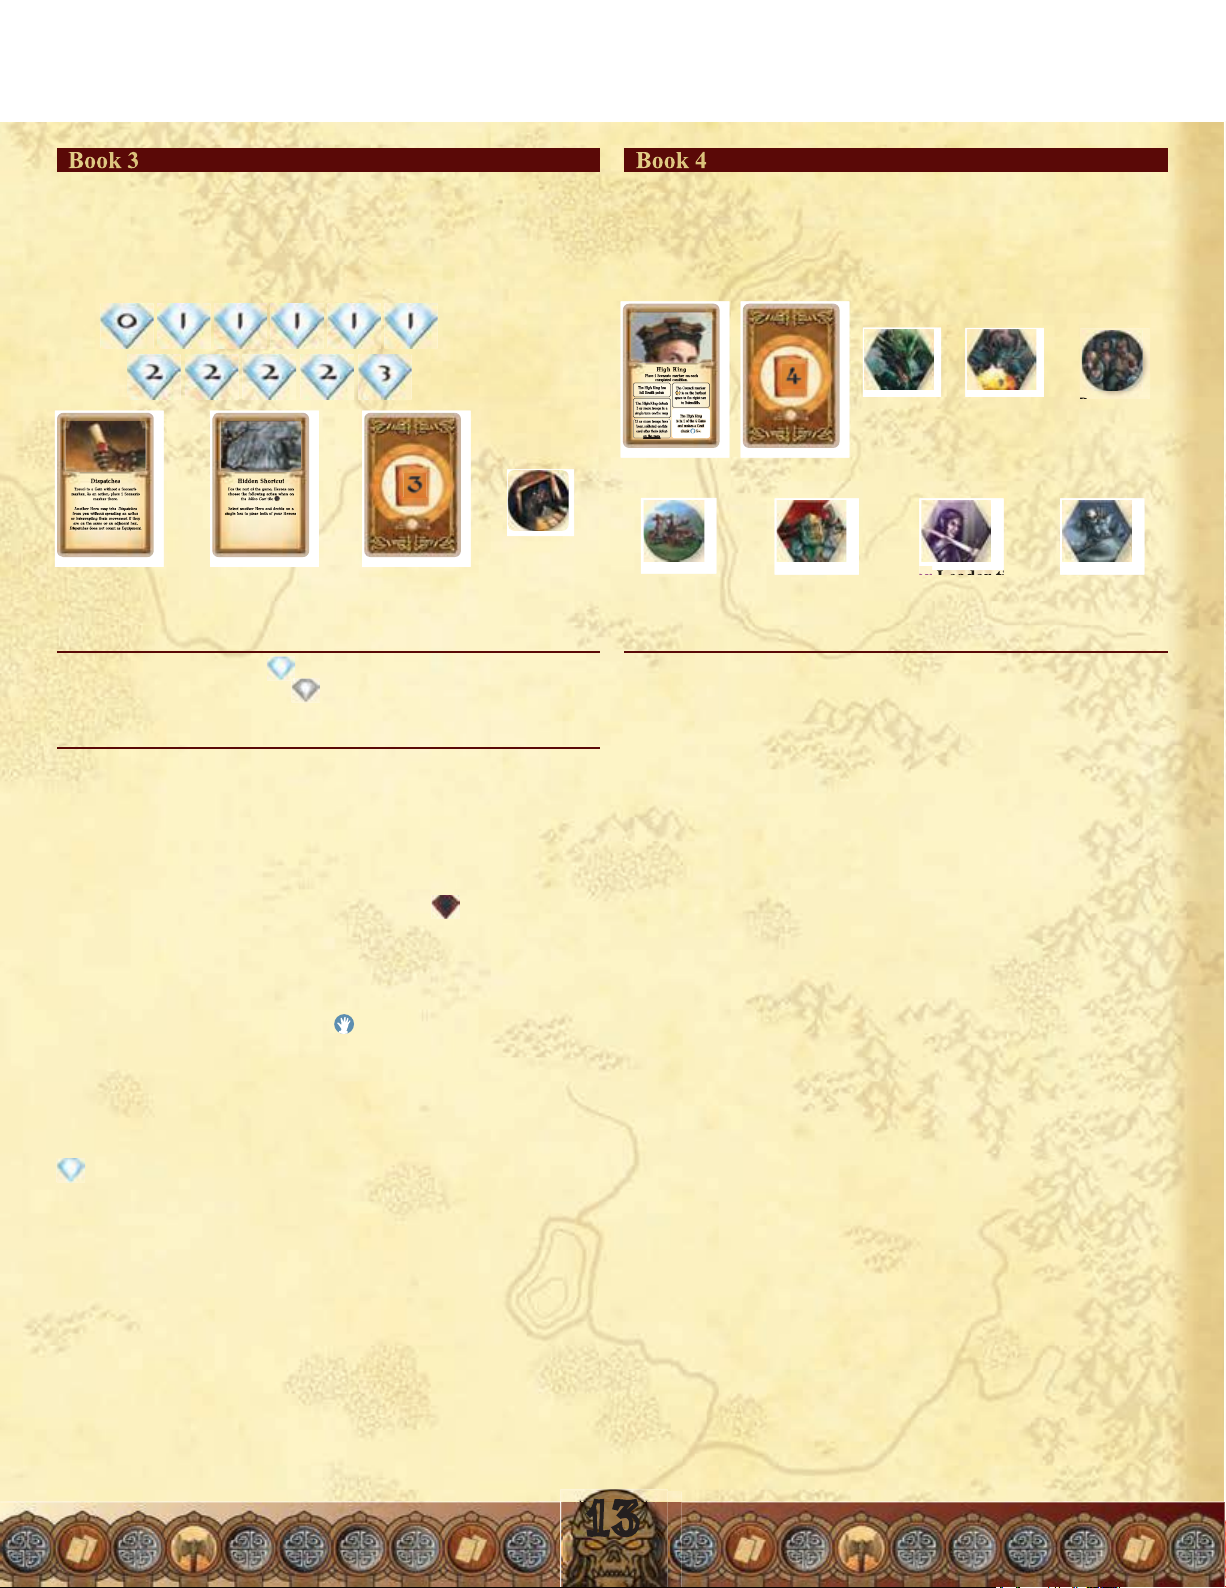
Book 3
Forgotten Lore / Hidden Shortcut: You can travel to the Mine Cart tile
even if the corresponding hex has been converted into Perished Land. You
must still follow the rules for entering Perished Land.
Rescue the Son: Lakes are depicted in light blue on
the map.
Book 4
High King: If you have met a condition, the Scenario marker remains even
if the condition is no longer met. When you have collected 12 troops on the
card, mark the condition with a Scenario marker and return the troops back
to their supply.
Threat Cards (Books 2-4)
Keenre is Lost!: All Equipment cards now provide no effects as long
as this card is on display. Remove all Attribute Value Modier tiles for
Equipment as well as any Increased Health tiles you have for Chainmail
Masterpiece and/or Tionium Armor. If your Health marker was currently
on an Increased Health tile, place it on your top Heart icon on your Hero
board instead. Once the threat has been averted, your equipment is restored
to power and you can return your tiles back to your Hero boards. You do not
gain any Health back from the return of your Increased Health tile.
Battle Check
Craft Check
Speed Check
Tunnel Entrance
Tunnel tile
Increased Health tile: If a card increases your total Health points, place an
Increased Health tile on the top left of your Hero board above the heart icons.
Attribute Value Modier tiles: If a card increases the value of one of your
attributes, place the corresponding Attribute Value Modier tile on your Hero
board. If the card is discarded during the the course of the game, re-adjust
your corresponding attributes accordingly.
Kingdom: To complete a kingdom quest on a card, you must travel to any
hex of your choice in the specied kingdom.
Important Map Locations: Porista (depicted), Dsôn Balsur, Toboribor,
Dragonsre, Blacksaddle, Green Haven, Roodacre, Elven Kindgdom of
Âlandur, Mifurdania, Lot-Ionans Vault (see Map Legend), Queen Xamtys II.
Gates I, II, IV, V: These icons represent the Gate spaces on the map.
Hero marker
Doom marker
Council marker
Reward
Threat
ICONOGRAPHY
V V
I
V
IV
V
VV I
IV IV I IV VVI I II II
II IV V I II IV V
IV IVV VI
I
IV
4+6+5+
2 2 2 2
22
Toboribor
WEYURN
URGON
GAURAGAR
TABAÎN
RÂN RIBASTUR
Porista
Dsôn Balsur
Mifurdania
T
U
N
N
E
L
T
U
N
N
E
L
T
U
N
N
E
L
T
U
N
N
E
L
Toboribor
Lot-Ionans Stollen
Schwarzjoch
Porista
Dsôn Balsur
Grünhain
Elbenreich
Âlandur
Drachenbrodem
Grüschacker
Mifurdania
Königin Xamtys II
1.
Heldenmarker weiterziehen
2.
Neue Karten aufdecken
3.
Zwei Aktionen ausführen
Drachenbrodem
Grüschacker Elbenreich
Âlandur
Grünhain
Königin
Xamtys II
SANGREÎN
IDOSLÂN
Lot-Ionans
Stollen
Schwarzjoch
Peg_Zwerge_Saga_mainboard_RZ.indd 1 13.05.16 12:24
3


Need help? Post your question in this forum.

Forumrules


Report abuse

Libble takes abuse of its services very seriously. We're committed to dealing with such abuse according to the laws in your country of residence. When you submit a report, we'll investigate it and take the appropriate action. We'll get back to you only if we require additional details or have more information to share.

Product:

For example, Anti-Semitic content, racist content, or material that could result in a violent physical act.

For example, a credit card number, a personal identification number, or an unlisted home address. Note that email addresses and full names are not considered private information.

Forumrules

To achieve meaningful questions, we apply the following rules:

Register

Register getting emails for Pegasus The Dwarves Big Box at:


You will receive an email to register for one or both of the options.


Get your user manual by e-mail

Enter your email address to receive the manual of Pegasus The Dwarves Big Box in the language / languages: English as an attachment in your email.

The manual is 6.98 mb in size.


You will receive the manual in your email within minutes. If you have not received an email, then probably have entered the wrong email address or your mailbox is too full. In addition, it may be that your ISP may have a maximum size for emails to receive.

The manual is sent by email. Check your email

If you have not received an email with the manual within fifteen minutes, it may be that you have a entered a wrong email address or that your ISP has set a maximum size to receive email that is smaller than the size of the manual.

The email address you have provided is not correct.

Please check the email address and correct it.

Your question is posted on this page

Would you like to receive an email when new answers and questions are posted? Please enter your email address.


Info