64
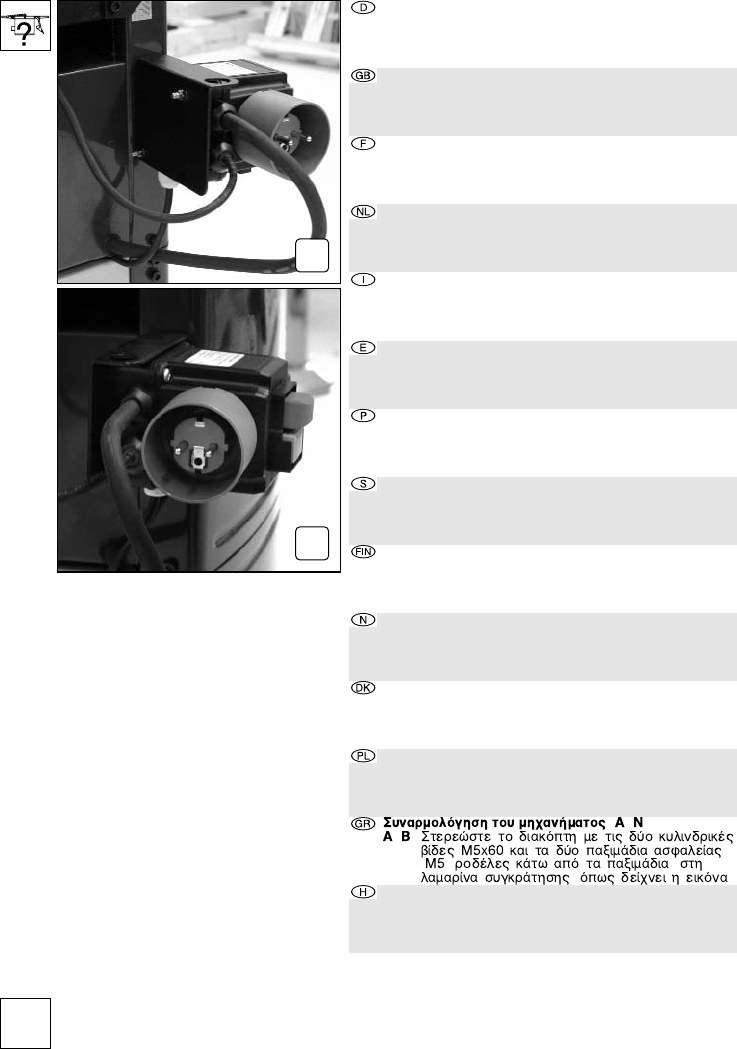
Assembling the machine (A–N)
A+B: Fix switch with the two hexagon socket-head
screws M5x60 and 2 locknuts (M5, washers under
nuts) to retaining sheet as shown.
Assemblage de la machine (A–N)
A+B: Fixer l'interrupteur à la tôle de retenue de la
manière indiquée avec 2 vis à tête cylindrique
M5x60 et 2 écrous de sécurité (M5, rondelles
sous les écrous).
Montage van de machine (A–N)
A+B: Maak de schakelaar met de twee bouten M5x60
en de twee borgmoeren (M5, sluitringetjes onder
de moeren) zoals aangegeven aan de
bevestigingsplaat vast.
Assemblaggio della macchina (A–N)
A+B: Fissare l’interruttore con le 2 viti cilindriche
M5x60 e i 2 bulloni di sicurezza (M5, anelli sotto
i bulloni) alla lamiera d’appoggio.
Montaje de la máquina (A–N)
A+B: Fijar el interruptor con los dos tornillos cilíndricos
M5x60 y las 2 tuercas de seguridad (M5, arande-
las bajo las tuercas) en la chapa de soporte.
Montagem da máquina (A–N)
A+B: Fixar, como indicado, o interruptor, com os 2
parafusos cilíndricos M5x60 e as 2 porcas de
segurança (M5, as anilhas sob as porcas), à
chapa de fixação.
Hopmontering av maskinen (A–N)
A+B: Fäst brytaren med de 2 cylinderskruvarna M5x60
och de 2 låsmuttrarna (M5, brickor under mut-
trarna) på fästplåten, såsom bilden visar.
Koneen asentaminen (A–N)
A+B: Kiinnitä koneen katkaisin kahdella kuusiokoloruu-
villa M5x60 ja kahdella vastamutterilla (M5, alus-
laatat ruuvien alle) kuvan osoittamalla tavalla ala-
tasoon.
Montering av maskinen (A–N)
A+B: Fest bryteren med de 2 sylinderskruene M5x60 og
de 2 låsemutrene (M5, brikker under mutrene) på
festeplaten, slik bildet viser.
Montage af maskinen (A–N)
A+B: Monter kontakten på befæstigelsespladen med 2
cylinderskruer (M5x60) og de 2 låsemøtrikker (M5)
med tilhørende skiver, som vist på tegningerne.
Montaż urządzenia (A-N)
A+B: Przymocować wyłącznik do płyty mocującej przy
pomocy 2 śrub z łbem walcowym M5x60 i 2 nakrę-
tek zabezpieczających (M5, pod nakrętki podłożyć
podkładki) w sposób pokazany na ilustracji.
A gép összeszerelése (A-N)
A+B: A kapcsolót a 2 hengeres csavarral (M5x60) és
2 biztosítóanyával (M5, tárcsákkal az anyák alatt)
az ábrázolt módon rögzítse a tartólemezre.
Zusammenbau der Maschine (A–N)
A+B: Schalter mit den 2 Zylinderschrauben M5x60 und
den 2 Sicherungsmuttern (M5, Scheiben unter den
Muttern) wie gezeigt am Halteblech befestigen.
B
A