Calibration
22 ENGLISH
Control and Calibration
Note: The ACM is a quality rotation laser, the tolerances of which are by 100%
preset in the factory. For reasons of product liability, however, we wish to
inform you that the calibration should be checked regularly after the
instrument has been transported or stored for an extended period.
Control and Calibration
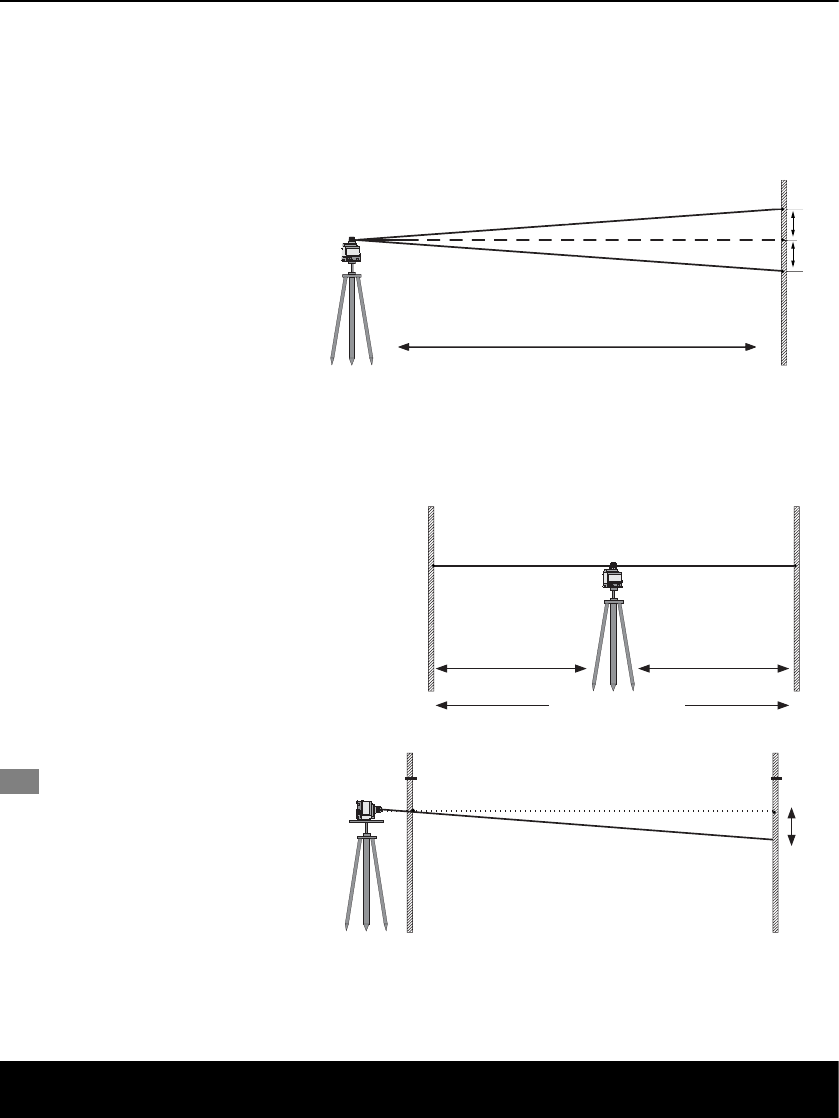
X-/y-axis
1. Install instrument with the
axis to be controlled pointing
towards a wall.
2. Mark point 1 on this wall
3. Turn instrument by precisely
180° (without changing tri-
pod height).
4. Mark point 2 on the wall.
5. For electronic calibration see next page.
Z-axis
Determination of reference markings
1. Place instrument horizontally in the midd-
le between two targets.
2. Mark reference marking A on target A
(for instance levelling staff).
3. Turn instrument by precisely 180°
(without changing tripod height).
4. Mark reference marking B on target B
Calibration
1. Set up instrument vertically
near target A.
2. Measure distance of beam
(through marking A2) to
marking A.
3. Transfer measured distance to
target B (marking B2). For
electronic calibration see next
page.
B
A
P2
P1
M
½ L
½ L
min. 20 - 30 m
min. 20 - 30 m
B
A
B
2
A2

