32
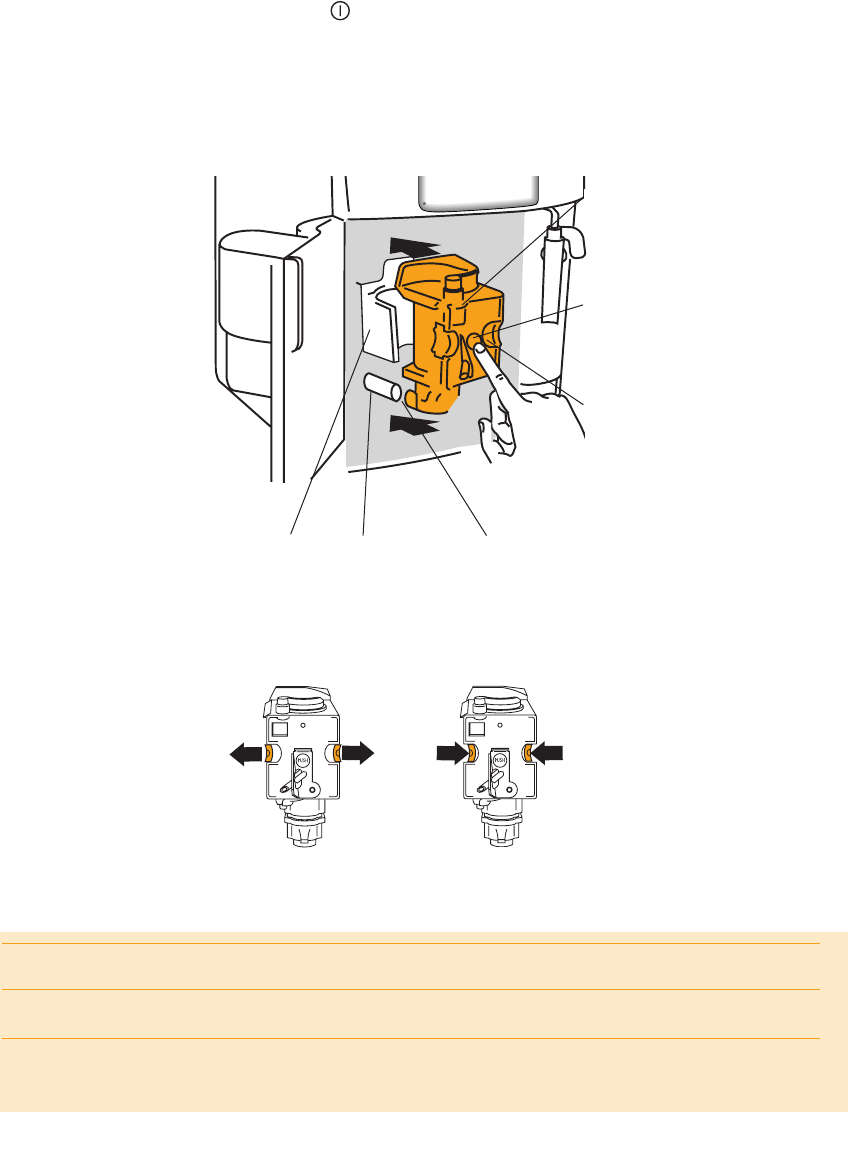
CORRECT
INCORRECT
The two red buttons have
snapped out CORRECTLY
The two red buttons have not
snapped out
•replace the infuser by sliding it onto the supports and pin at the bottom, then push the PUSH symbol fully
in until it clicks into place.
Check that the two red buttons have snapped out, otherwise the door cannot be closed.
•replace the drip tray, complete with the grounds container;
• close the service door.
NOTE 1: If the infuser is not inserted correctly until it clicks into place and the two red buttons have not snap-
ped out, the service door cannot be closed.
NOTE 2: if it is hard to insert the infuser, before inserting it, squeeze to size by pressing it vigorously from
above and below at the same time, as shown in Figure 31.
NOTE 3: If it is still hard to insert the infuser, leave it out of the appliance, close the service door, unplug from
the mains, then plug in again. Wait for all the lights to go off after the self-diagnosis, then open the door and
replace the infuser.
Support
Pin
Infuser
Push the PUSH symbol fully in
until it clicks into place.
After having heard the click,
check that the red buttons have
snapped out.
Bottom pipe on the infuser.
The pin must be inserted into the bottom
pipe on the infuser.
15.2 Cleaning the infuser
The infuser must be cleaned regularly to avoid the build-up of coffee encrustations which could cause mal-
function. Proceed as follows:
• turn the appliance off by pressing the button (fig. 6) (do not unplug) and wait for the display to go
off;
• open the service door (Fig. 14);
•remove the drip tray and the grounds container (Fig. 15) and clean them;
•press the two red release buttons on the infuser sideways and towards the centre (Fig. 28) and pull it out;
• IMPORTANT: THE INFUSER CAN ONLY BE REMOVED IF THE APPLIANCE IS OFF. ATTEMPTING TO
REMOVE THE INFUSER WITH THE APPLIANCE ON MAY CAUSE SERIOUS DAMAGE.
• wash the infuser
under running water,
without using deter-
gents. Never wash
the infuser in the
dishwasher;
• carefully clean the
inside of the
appliance. To remo-
ve the coffee stuck to
the parts inside the
appliance, scrape it
with a plastic or
wooden fork (Fig.
29) and then pick up
all the residues using
a vacuum cleaner
(Fig. 30);