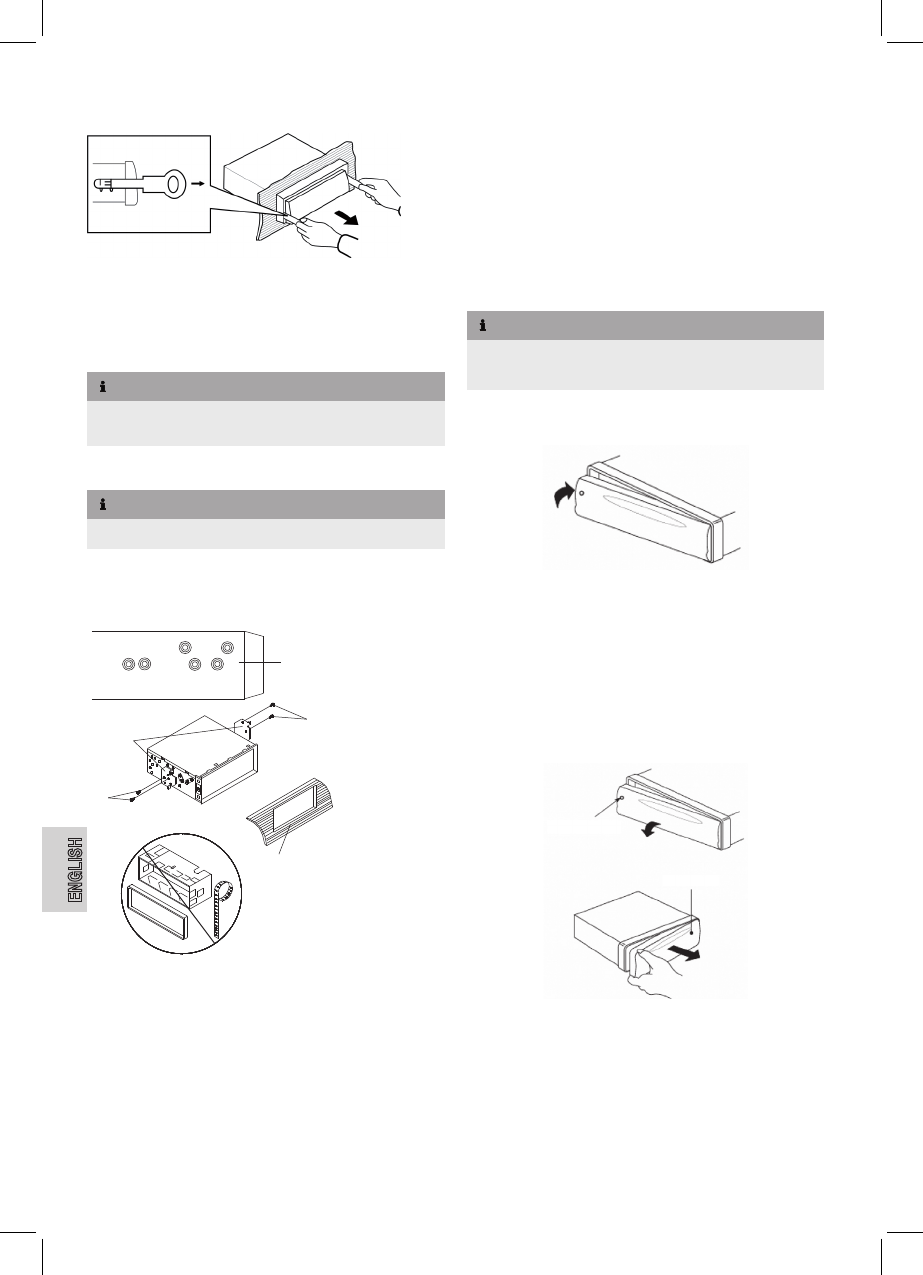
169042
66
Zoom out
Zoom in
Previous page
1/90
Next page
ENGLISH
66
Remove Unit
Follow these instructions to remove the unit:
Remove the frame.
Insert left and right installation keys in the slots left and right
(the claws are now bent back).
Slide the unit out of the sleeve.
NOTE
Unevenness of the casing can cause the claws to lock.
Unlock the claws with the installation keys, if necessary.
Toyota or Nissan Installation
NOTE
Sleeve, frame and mounting strip are not needed.
Use the threads on the side of the casing (A) to mount the unit on
the vehicle bracket (supplied with your car). The holes are marked
with T (for Toyota) and N (for Nissan).
A
B
C
D
B
Loosen the mounting screws for the hooks left and right at the
front of the unit and remove the hooks.
Mount the brackets (B) with screws on the unit (D).
Connect External Audio Device
Connect line out of the external audio device to
AUX IN (11)
jack on the front panel.
Select playback mode for external device by repeatedly press-
ing MODE (21) until AUX is displayed.
Start-up
To protect against theft remove the front panel. Do not keep the front
panel in the car.
NOTE
Keep the front panel in its casing.
Do not touch the contacts on the unit or on the front panel.
Attach Front Panel
Place the front panel with its right side in the frame.
Now press the left side until it locks in place.
Ensure the front panel is attached properly. If the front panel is
not attached properly this can cause malfunctions.
Detach Front Panel
Press unlock button (A) for the front panel and remove the
front panel (B).
A
B
66


Need help? Post your question in this forum.

Forumrules


Report abuse

Libble takes abuse of its services very seriously. We're committed to dealing with such abuse according to the laws in your country of residence. When you submit a report, we'll investigate it and take the appropriate action. We'll get back to you only if we require additional details or have more information to share.

Product:

For example, Anti-Semitic content, racist content, or material that could result in a violent physical act.

For example, a credit card number, a personal identification number, or an unlisted home address. Note that email addresses and full names are not considered private information.

Forumrules

To achieve meaningful questions, we apply the following rules:

Register

Register getting emails for Clatronic ar 815 at:


You will receive an email to register for one or both of the options.


Get your user manual by e-mail

Enter your email address to receive the manual of Clatronic ar 815 in the language / languages: English, German, Italian, Portuguese, Spanish as an attachment in your email.

The manual is 5,61 mb in size.


You will receive the manual in your email within minutes. If you have not received an email, then probably have entered the wrong email address or your mailbox is too full. In addition, it may be that your ISP may have a maximum size for emails to receive.

The manual is sent by email. Check your email

If you have not received an email with the manual within fifteen minutes, it may be that you have a entered a wrong email address or that your ISP has set a maximum size to receive email that is smaller than the size of the manual.

The email address you have provided is not correct.

Please check the email address and correct it.

Your question is posted on this page

Would you like to receive an email when new answers and questions are posted? Please enter your email address.


Info