59
ENGLISH
7. Search and Edit Channel
Your TV set can receive DVB-T signals as well as conventional analogue signals (e.g. via cable). The stations which can be
received depend on the selection of the input signal: your DVB-T antenna for DVB-T reception or analogue cable tuner.
Both methods can be saved in the channel list – but generally you will only use one kind of reception.
• DVB-T channels are displayed as DTV in the OSD menu.
• Analogue channels are displayed as ATV in the OSD menu.
7.1 Channel Search
1. Press the TV MENU button to display the OSD main menu.
2. Press in CHANNEL menu to select Auto Tuning.
3. Press OK. Press / to select one of three tuning methods (DTV+ATV,
DTV, ATV). Now press .
4. Then press to select the country as your location.
5. Press OK to start Channel Search. This will take a few minutes. The
progress is shown on screen.
6. After auto scan channel 1 is displayed.
7. The window closes automatically after a few seconds or press EXIT
to close it.
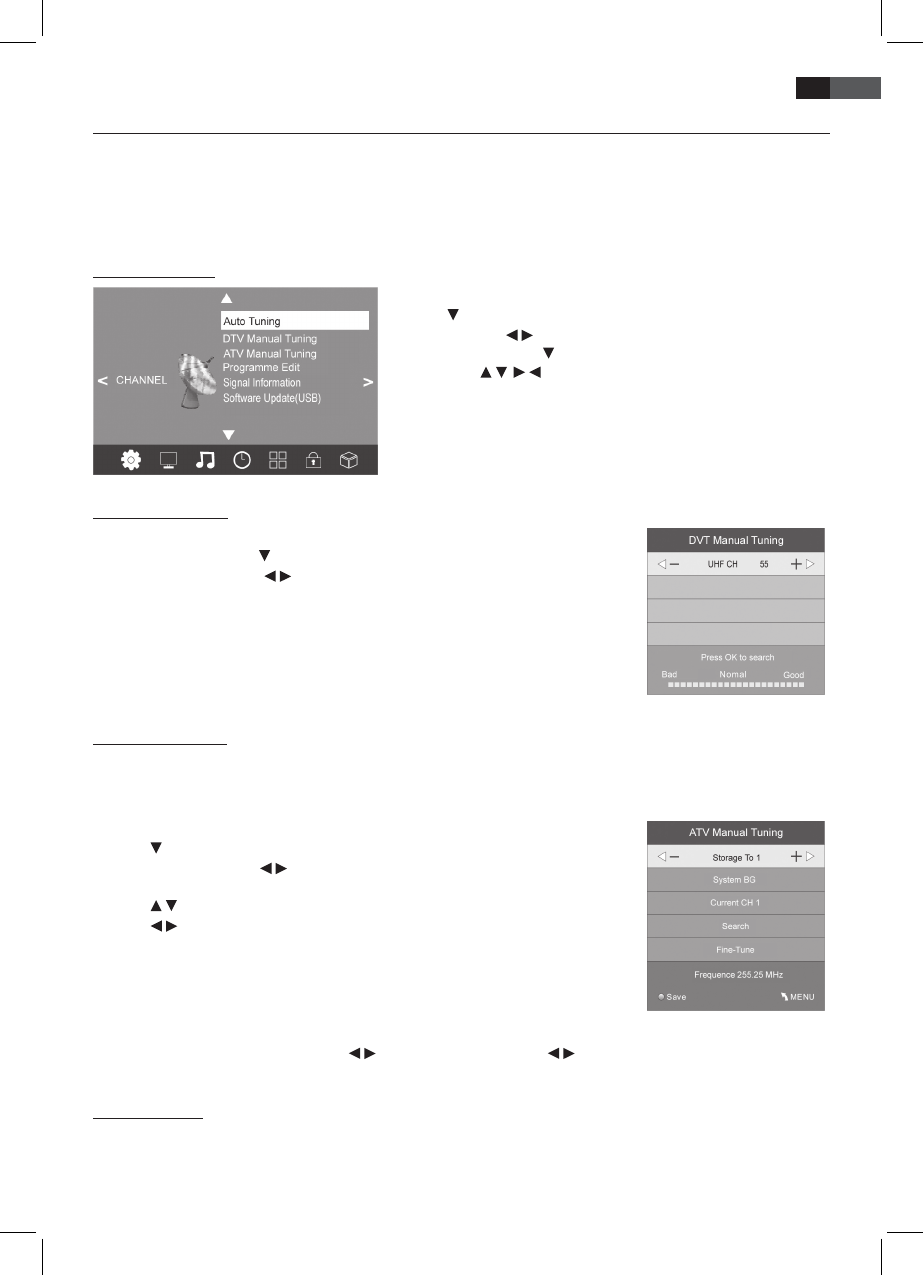
7.2 DTV Manual Scan
1. Press the TV MENU button to display the OSD main menu.
2. Press the arrow button
to select item DTV Manual Tuning and press OK.
3. Press the arrow buttons / to select a channel. The signal strength of the selected
channel is displayed. If no signal is received on the selected channel NO SIGNAL is
displayed. In this case select a dierent channel.
4. Press OK to start the manual scan.
5. After nishing the manual scan the number of found channels is displayed.
Press EXIT to close the window.
7.3 ATV Manual Scan
To receive analogue channels an analogue antenna signal (e.g. cable tuner) must be connected. Analogue channels are
displayed as ATV (TV) in the OSD menu. If previously DVB-T channels were saved the new analogue channel is added to
this list. The digital channels are not overwritten.
1. Press the TV MENU button to display the OSD main menu.
2. Press
in CHANNEL menu to select ATV Manual Tuning and press OK.
3. Under Storage To press / to select the position in the channel list for the new
analogue channel.
4. Press / to highlight Search.
5. Press / , to start the manual scan. The changing frequency is displayed during the
scan. After a channel is found the sound is activated again.
6. Press the red button to save the channel.
7. To scan for additional channels rst select a position in the channel list for the new
analogue channel with Storage To and then restart the scan.
In this menu you can also perform the following settings: System: is generally not changed. Current CH: shows which
channel is active in the background. Press
/ to change. Fine-Tune: Press / to change the frequency in small steps.
Frequency: Shows the current frequency.
7.4 Edit Channels
After auto scan all channels are saved in found sequence. You can add channels in the favourite list (FAV) or change the
sequence by moving/swap or skipping channels.