Reinigung der Innenteile
Bevor Sie das GerŠt in Betrieb nehmen, beseitigen
Sie den typischen ÇNeugeruchÈ am besten durch
Auswaschen der Innenteile mit lauwarmem Wasser
und einem neutralen Reinigungsmittel SorgfŠltig
nachtrocknen.
Bitte keine Reinigungs- bzw. Scheuermittel
verwenden, die das GerŠt beschŠdigen
kšnnten.
Dieses Gefrierabteil ist mit dem
ÇViersterne-È Symbol versehen, was bedeutet,
da§ darin sowohl frische Lebensmittel
eingefroren werden kšnnen als auch
TiefkŸhlkost langfristig gelagert werden kann.
Inbetriebnahme
Netzstecker in die Steckdose einstecken. Das
Aufleuchten der Kontrollampe (A) zeigt an, da§ das
GerŠt unter Spannung steht.
Den Schalter (E) Ÿber die Stellung ÇOÈ drehen. Die
Kontrollampe (C) leuchtet auf.
Den Stillstand erhŠlt man durch Drehen des
Schalters (E) auf Stellung ÇOÈ.
Temperaturregelung
Die Temperatur wird automatisch geregelt und kann
erhšht werden (wŠrmer) durch Drehen des Thermo-
statknopfes auf niedrigere Einstellungen oder
verringert (kŠlter) durch das Drehen auf hšhere
Zahlen.
Die richtige Einstellung erhŠlt man, unter
BerŸcksichtigung folgender, die Innentemperatur
beeinflussender Faktoren:
¥ Raumtemperatur,
¥ HŠufigkeit des TŸršffnens,
¥ Menge der eingelagerten Lebensmittel,
¥ Aufstellung des GerŠtes.
Die mittlere Einstellung ist meistens die
geeignetste.
Wichtig
Hšchste KŠlteeinstellung bei hoher
Raumtemperatur und erheblicher
Lebensmittelmenge kann fortdauernden
KŸhlschrank-Betrieb verursachen, dabei kann
sich eine Reif- oder Eisschicht an der hinteren
Innenwand bilden. In diesem Falle den
Thermostatknopf auf wŠrmere Temperaturen
stellen, damit das automatische Abtauen, mit
folglich geringerem Stromverbrauch,
gewŠhrleistet werden kann.
GEBRAUCH
Bedienungsblende
A. Betreibskontollampe
B. Schnellgefrierkontrollampe
C. Alarm-Lampe
D. Schnellgefrierschalter (Normal/Super)
E.Temperaturregler(Thermostat)
Schnellgefriervorgang
Schalterknopf (D) auf ÇSÈ drehen. Die Kontrollampe
(B) leuchtet auf.
Alarmlampe (C)
Die Alarmlampe leuchtet auf, wenn die Temperatur
im GerŠteinneren steigt, und dadurch die richtige
Lagertemperatur nicht mehr gewŠhrleistet wird. Sie
leuchtet jedoch auch dann auf, wenn das GerŠt
gerade eingeschaltet worden ist und bleibt solange
eingeschaltet, bis die richtige Lagertemperatur
erreicht ist.
5
48
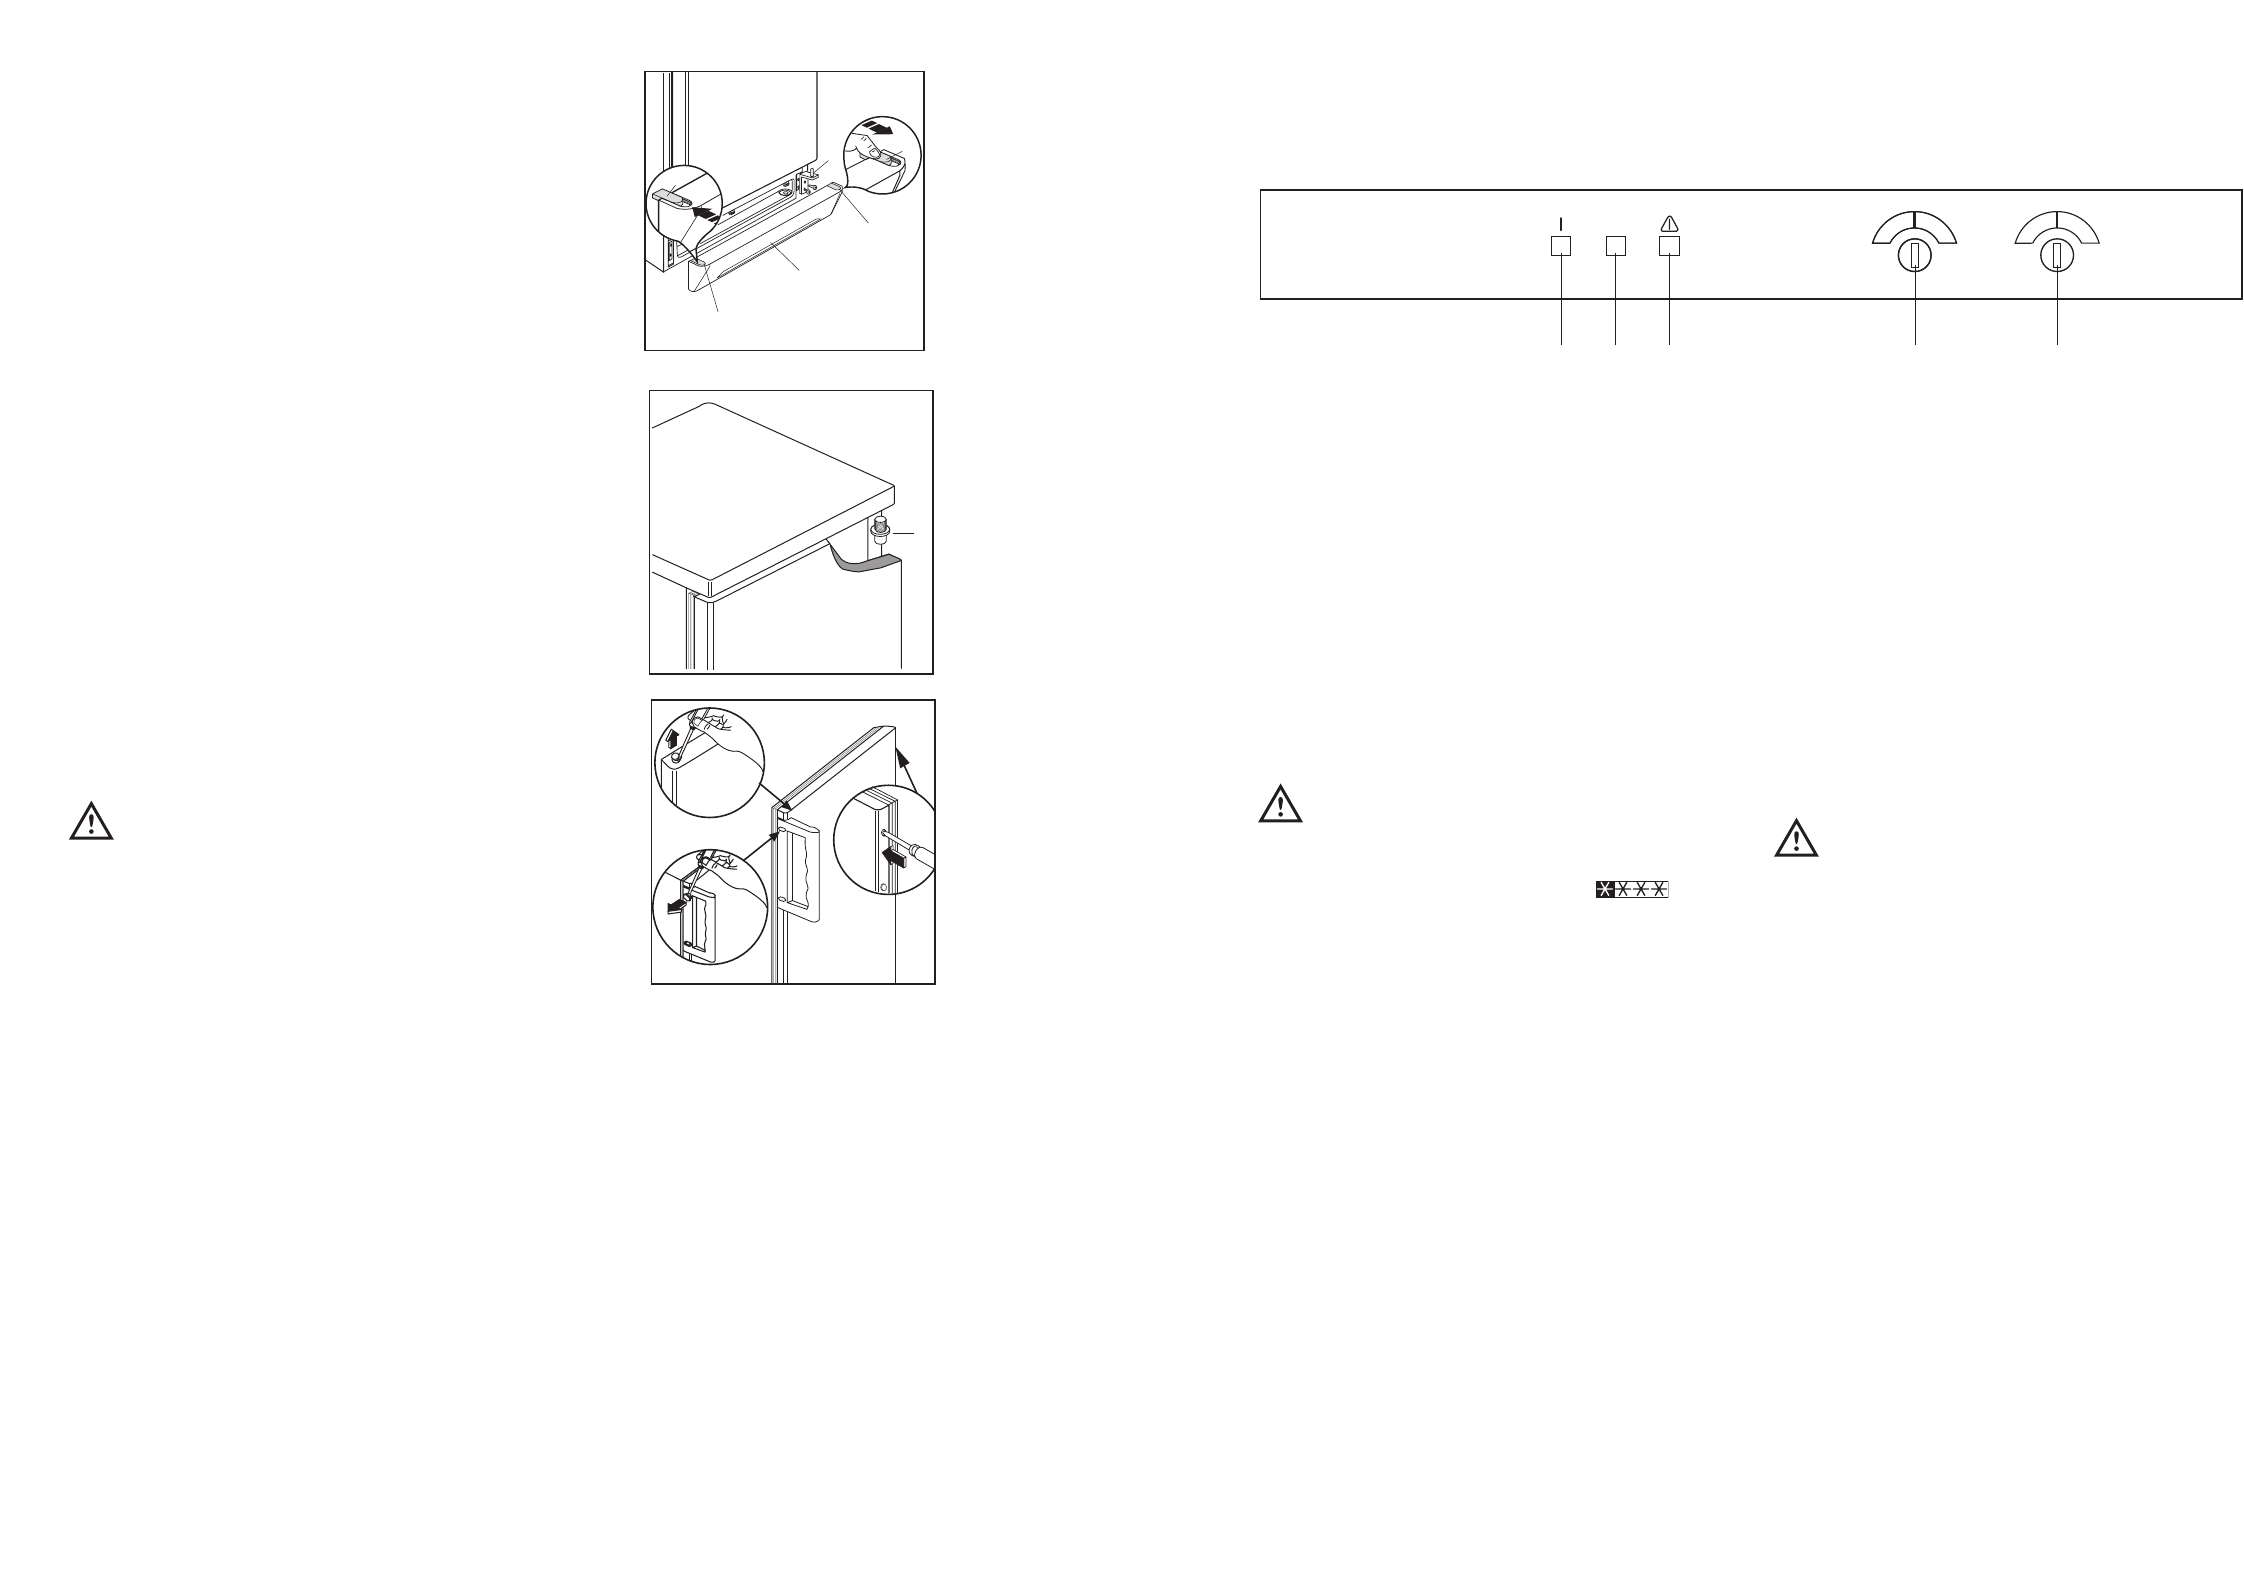
Changing the opening direction of
the door
Before carrying out any operations, remove the plug
from the power socket.
To change the opening direction of the door,
proceed as follows:
1. Remove the ventilation grill (D).
2. Unscrew the bottom hinge (E).
3. Remove the door by releasing it from the top
hinge pin (G).
4. Remove the pin then mount these on the
opposite side.
5. Remove the two plugs, to reveal the holes for the
hinge pivots, and remount them on the other
side.
6. Replace the freezer door.
7. Screw down the bottom hinge (E) on the opposite
side by using the screws previously removed.
8. Remove the plug (F) from the ventilation grill (D)
and replace it on the opposite side.
9. Re-assemble the ventilation grill (D).
10.Unscrew the handle. Refit it on the opposite side
after having pierced the plugs with a punch.
Cover the holes left open with the plugs
contained in the documentation pack.
Warning:
After having reversed the opening direction of the
doors check that all the screws are properly
tightened and that the magnetic seal adheres to the
cabinet. If the ambient temperature is cold (i.e. in
Winter), the gasket may not fit perfectly to the
cabinet. In that case, wait for the natural fitting of the
gasket or accelerate this process by heating up the
part involved with a normal hairdrier.