PORTDetermines the MIDI transmission port for the corresponding track. Playback data of tracks set to off is output
without Port signal via MIDI.
When using the internal tone generator block, the Port setting here is available for the tracks assigned to the Plug-in
Parts 1-3 (when the single Plug-in Board has been installed) and Multi Plug-in Parts 17-32 (when the PLG100-XG
has been installed) are assigned. Tracks using the internal tone generator parts of this synthesizer are automatically
fixed to Port 1.
Settings:off, 1 ~ 3
nPort data can be output only through the USB terminal. No port data is transmitted through the MIDI OUT terminal, even if the
corresponding track is set to a specific port number.
[SF2] OUT SW (Output Switch)
INT SW (Internal Switch)Determines whether playback data is transmitted to the internal tone generator block or not.
Settings:on, off
EXT SW (External Switch)Determines whether playback data is output to the external MIDI tone generator via MIDI or not.
Settings:on, off
[SF3] TR LOOP (Track Loop)From this display you can determine whether the data in the selected track loops or not in playback. Using Loop can
be an effective way to repeat short patterns and phrases throughout the Song. For details, see page 238.
Settings:off, on
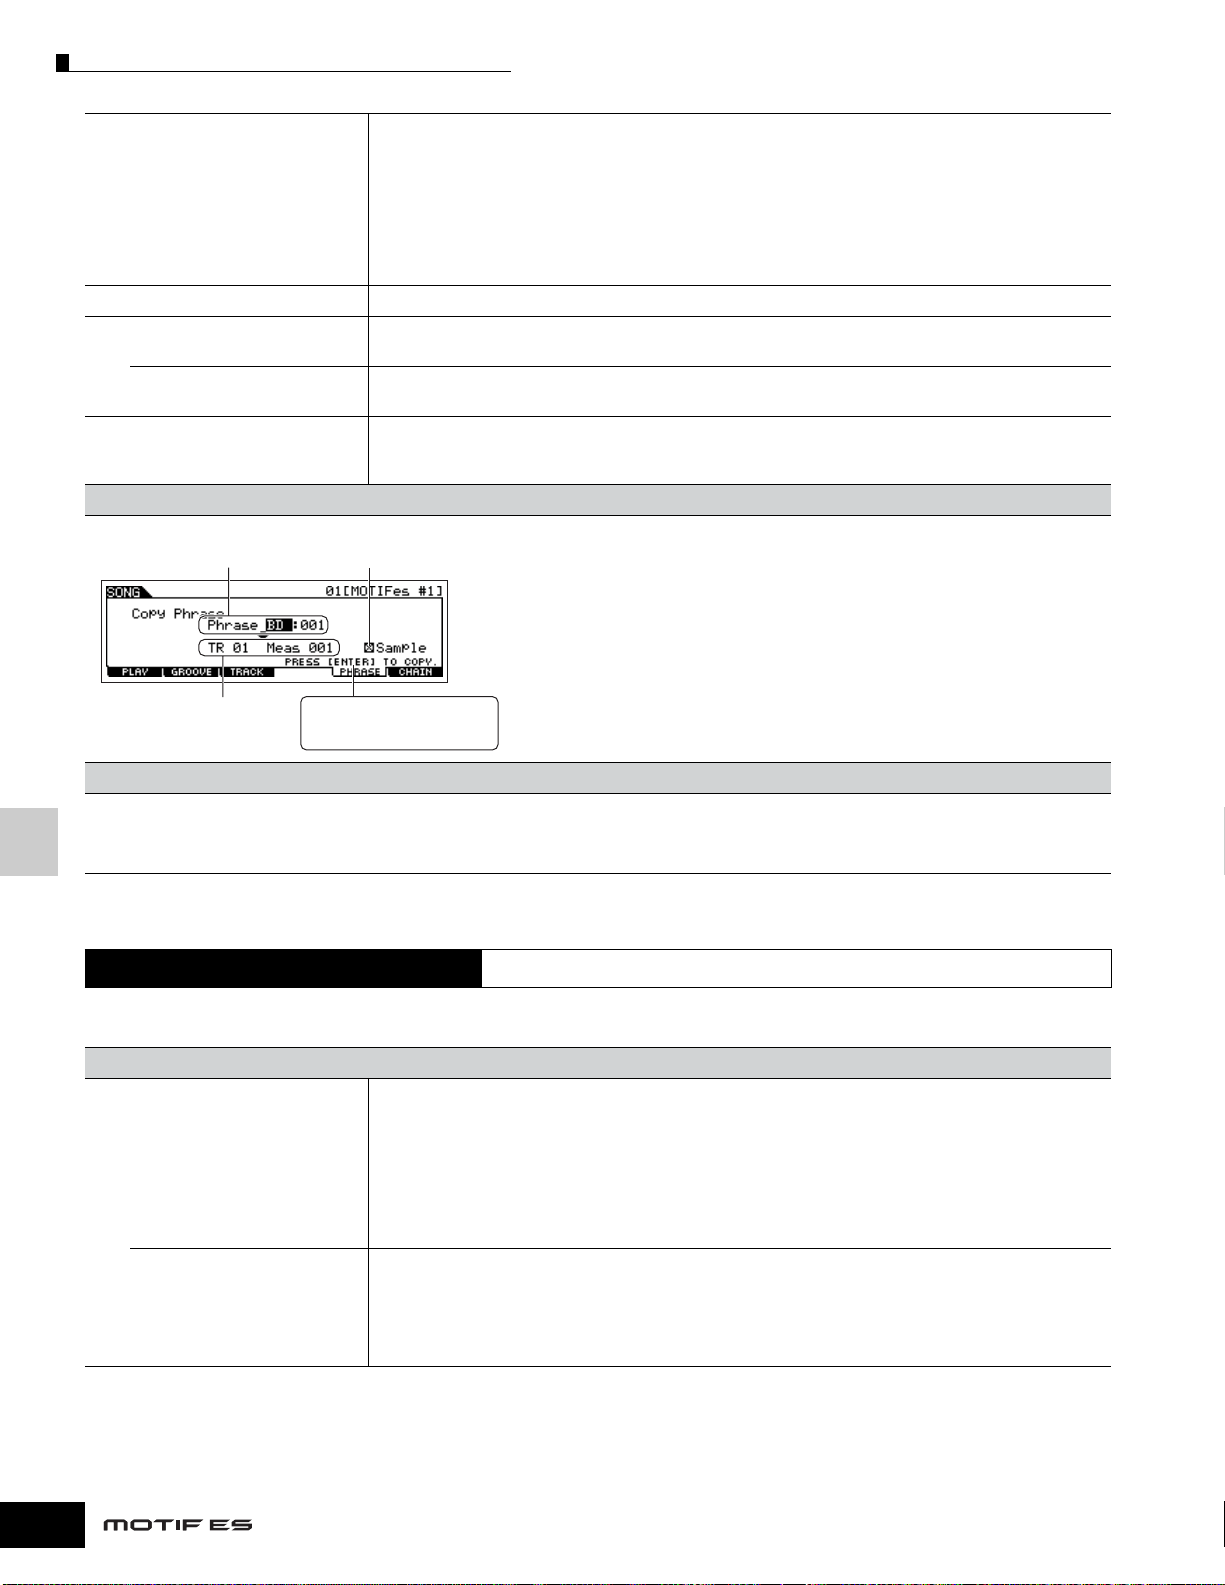
[F5] PHRASE
You can copy Pattern track data (Phrase) to a Song track. You can also copy preset
phrases that are not assigned to the Pattern track by using the Patch function (page
241). For details, refer to page 113 in the Quick Guide section.
[F6] CHAIN
This function allows Songs to be “chained” together for automatic sequential playback. For details, refer to the Quick Guide on page 59.
skip..................Skips past (ignores) the selected chain number and continues playback from the next chain number.
stop.................Stops Song chain playback at that chain number. You can restart the Song chain playback from the next chain number by pressing the [F] (Play) button.
end...................Indicates the end mark of the Song chain data.
Song Record mode[SONG] → Song selection → [I] (Record)
[F1] SETUP
Type (Recording Type)Determines the recording method. For details on each method, refer to page 168 in the Basic Structure section.
Settings:When the RecTrack is set to any of 1-16: replace, overdub, punch, step
When the RecTrack is set to tempo: replace, punch, step
When the RecTrack is set to scene: replace, punch
When the RecTrack is set to multi: replace, overdub, punch
nWhen “punch” is selected, “Punch-in measure: beat” and “Punch-out measure: beat” appear in the display and should be set.
If you’ve set the Locate 1 and 2 points (Loc1, Loc2; see page 58), the punch-in/out points can be set with a single button
press. Move the cursor to the punch-in/out value, and notice that a “COPYLOC” menu item appears. Press the [SF1]
COPYLOC button, and the punch-in/out settings are automatically assigned to the existing Locate points.
nWhen “step” is selected, you should specify the event type to be entered.
QuantizeThis parameter is available when the Recording Type is set to something other than “step.” Record quantize aligns
the timing of notes automatically, as you record.
You can set this parameter also by using the Note Type selection window called up via the [INFORMATION] button.
Libble takes abuse of its services very seriously. We're committed to dealing with such abuse according to the laws in your country of residence. When you submit a report, we'll investigate it and take the appropriate action. We'll get back to you only if we require additional details or have more information to share.
Product:
Forumrules
To achieve meaningful questions, we apply the following rules:
First, read the manual;
Check if your question has been asked previously;
Try to ask your question as clearly as possible;
Did you already try to solve the problem? Please mention this;
Is your problem solved by a visitor then let him/her know in this forum;
To give a response to a question or answer, do not use this form but click on the button 'reply to this question';
Your question will be posted here and emailed to our subscribers. Therefore, avoid filling in personal details.
Register
Register getting emails for Yamaha MOTIF ES7 at:
new questions and answers
new manuals
You will receive an email to register for one or both of the options.
Get your user manual by e-mail
Enter your email address to receive the manual of Yamaha MOTIF ES7 in the language / languages: English as an attachment in your email.
The manual is 8,4 mb in size.
You will receive the manual in your email within minutes. If you have not received an email, then probably have entered the wrong email address or your mailbox is too full. In addition, it may be that your ISP may have a maximum size for emails to receive.
If you have not received an email with the manual within fifteen minutes, it may be that you have a entered a wrong email address or that your ISP has set a maximum size to receive email that is smaller than the size of the manual.
The email address you have provided is not correct.
Please check the email address and correct it.
Your question is posted on this page
Would you like to receive an email when new answers and questions are posted? Please enter your email address.