WHEELS AND TYRES
* Option/accessory.
503
Crank up the jack* so that it makes contact
with the car's jacking point. Check that the
head of the jack is correctly positioned in the
jacking point so that the bump in the centre
of the head fits into the jacking point hole
and the base is positioned vertically below
the jacking point. Also make sure you turn
the jack so that the crank is as far away from
the side of the car as possible, at which point
the jack's arms are perpendicular to the
direction of the car.
WARNING
Never crawl under the car when it is raised on
the jack.
Passengers must leave the car when it is
raised on the jack. If a wheel must be
changed in a trafficked environment, passen-
gers must stand in a safe place.
9. Lift the car so that the wheel is free. Remove
the wheel bolts and lift off the wheel.
Related information
•
When changing wheels (p. 501)
•
Raise the car (p. 518)
•
Fitting the wheels (p. 503)
•
Tool kit (p. 506)
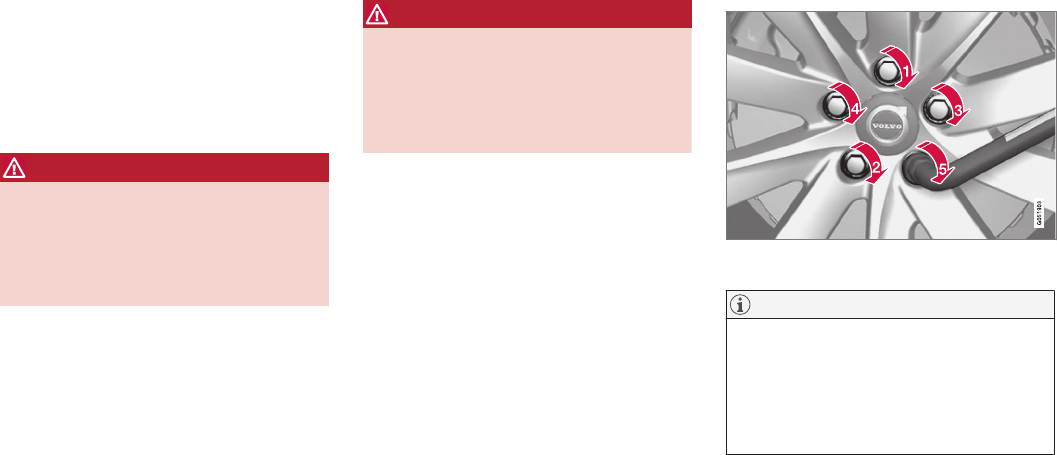
Fitting the wheels
Instructions for fitting a wheel when changing
wheels.
WARNING
Never crawl under the car when it is raised on
the jack.
Passengers must leave the car when it is
raised on the jack. If a wheel must be
changed in a trafficked environment, passen-
gers must stand in a safe place.
1. Clean the contact surfaces between wheel
and hub.
2. Put on the wheel. Tighten the wheel bolts
thoroughly.
Do not use lubricant on the threads of the
wheel bolts.
3. Lower the car so that the wheels cannot
rotate.
4. Tighten the wheel bolts crosswise. It is impor-
tant that the wheel bolts are tightened prop-
erly. Tighten to 140 Nm. Check the tighten-
ing torque with a torque wrench.
5. Refit the plastic caps on the wheel bolts.
NOTE
•
After a tyre has been inflated, always refit
the dust cap in order to avoid damage to
the valve from gravel, dirt, etc.
•
Only use plastic dust caps. Metal dust
caps can rust and become difficult to
unscrew.
Related information
•
Removing a wheel (p. 501)
•
When changing wheels (p. 501)
•
Spare wheel* (p. 504)