6 x 2
VE
Declaratio
In
W
−
Directiv
−
EMC Directive 2004/108/EE
− me
Directiv
−
EN 55014-2, EN
−
to the harmonise
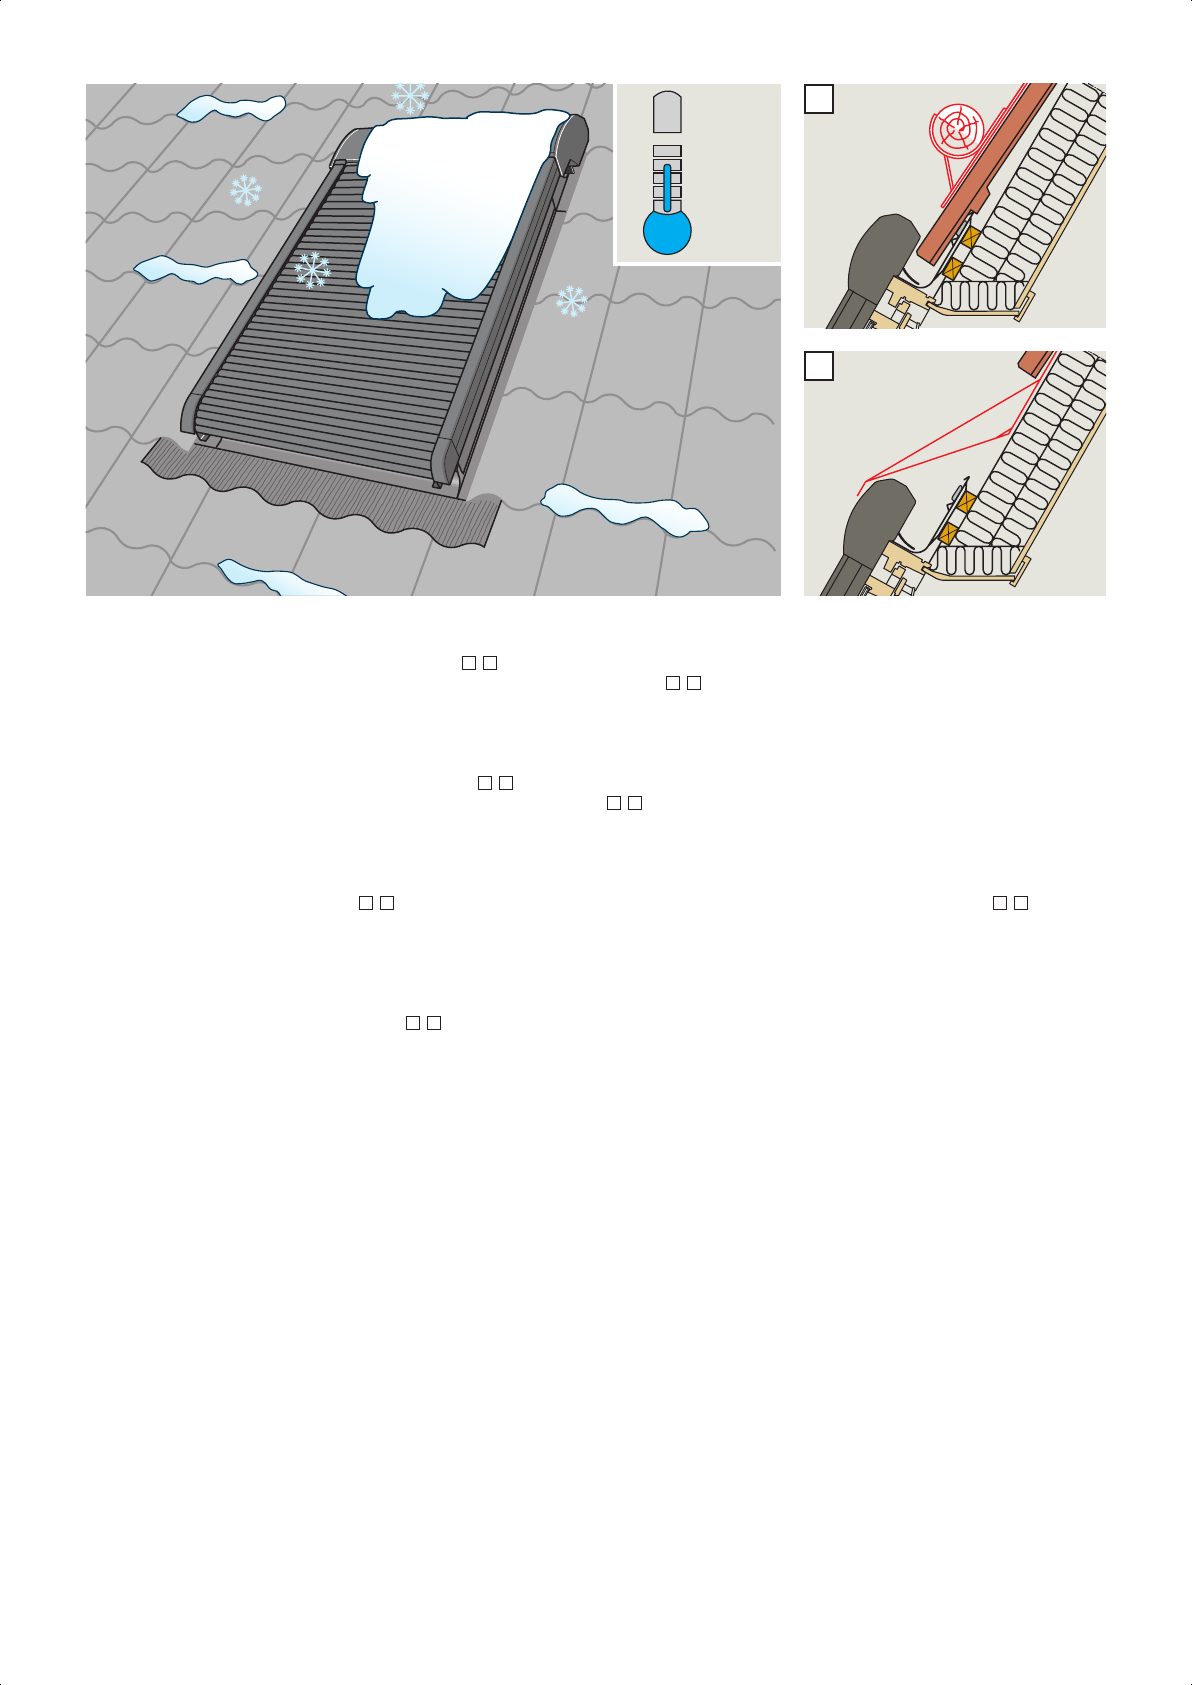
window according to instructions
When one of the abov
and is connected
machine,
instructions and
T
Dir
Konformitätserklärung
Laut
Wir erklär
−
2006/
− d
inklusive deren Änderungen
− n
Mandats entsprechen,
− 24
EN 60335-1 und
− ß
der harmonisi
Anleitun
wor
Wt
und an eine VELUX Steu
eine Maschine
Anleitungen und
Das Gesamtsystem wird dann
Rates 2006/
deren Änderungen gerecht.
Déclaratio
Sel
Nous déclarons que
−
2006/
− ve
EMC 2004/108/CEE et ses
−
Pr
− ,
EN 55022, EN
− -
nisée EN 13659
notice de
Quand un -
cor
une machine qui ne doit pas êtr
instructions et
Le sy
Conseil 2006/-
dements ultérieurs.
Overensstemmelseserklæring
I
Vi erklærer hermed,
−
med senere ændringer,
−
2004/108/EF med senere ændringer,
− opfylder E
−
EN 55014-2, EN
− -
niserede standard EN 13659-
vindue i
Når en af ovenstå
en VELUX styreenhed, betragtes det samlede
tages i
Det samlede
2006/
Verklaring
V
Wij verklaren hiermee
− o
en geamendeerd in
− in
EMC Richtlijn
− v
Bouwproducten 89/106/
− 1,
EN 55014-2, EN
− v
ove
deze is geïnstalleerd op een
W
dakve
gehele sy
wor
Het gehele
2006/
Dichiarazione di Conformità
In conformi
Con la
−
Macchinari 2006/
−
Direttiv
−
Costruzione 89/106/
−
EN 55022, EN
−
standar
VELUX in conformità
Qualora una delle
per tetti
complesso deve essere considerato come un -
one solo
In tal sso risponde ai requis
del Consiglio
emendamenti.
Declarac
En cumpl
Por la presente declaramos que las
−
Maquinaria 2006/
−
2006/95/
−
Construcción 89/106/
−
EN 55022, EN
−
acuerdo con la
ventana VELUX para tejados, de
Cuando una persi
venta
considera una máquina,
hay
El sistema
del Consejo 20
modificada.
VEL
(Sør
Ådal
Erk
451904-0109-SML.indd 51 12-01-2009 14:58:25