Using other equipment
46
RQT6523
Reference
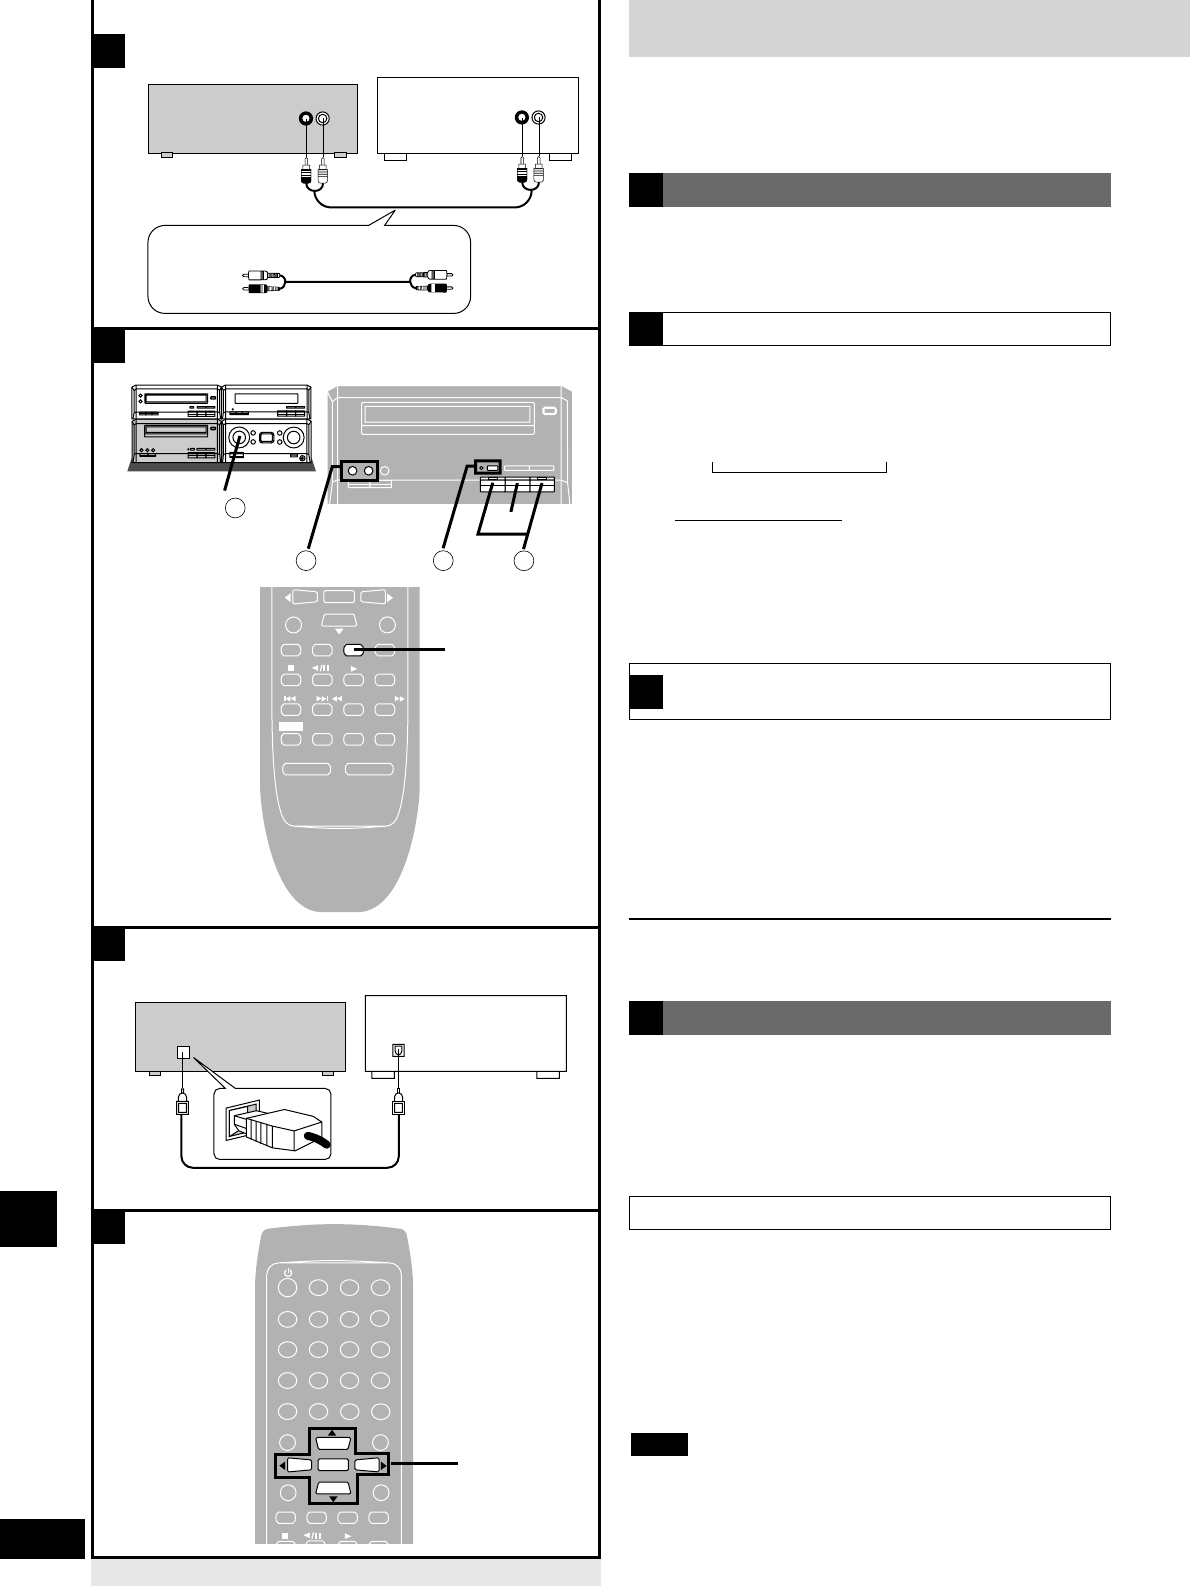
1 Turn [INPUT SELECTOR] to select
EXT mode.
Each time you turn [INPUT SELECTOR]:
TUNER – DVD – TAPE – EXT
On the remote control
Press [EXT].
2 Operate the unit.
See the unit’s manual for details on operation and
connection.
Analogue connection
A
qq
Turn [INPUT SELECTOR] to select EXT mode.
ww
Select Dolby NR and reverse mode.
ee
Press [* REC PAUSE].
rr
Press [w] or [q] to start recording.
tt
Start the source to be recorded.
See the unit’s manual for details on operation and connection.
To stop recording
Press [g] on the deck.
A
Playing an external source
B
¡Turn off the power to all units before making connections.
¡Refer to the manual of the other unit for details.
(Cables and equipment not included.)
Connect other equipment to the EXT IN terminals to output sound
through this unit’s speakers or to record onto the cassette deck.
You will need a phono equalizer if you connect a record player.
Recording an external source to this unit’s tape
deck
B
Digital connection
C
Use an optical fiber cable to connect other digital recording
equipment to DIGITAL OPTICAL OUT on the back of the DVD
player. This connection enables you to make digital recordings.
Connecting an optical fiber cable
The DIGITAL OPTICAL OUT terminal has a dust cover. The cover
opens when you plug in the cable.
Recording discs to other digital equipment
Change the Digital output settings before recording (
\\
page 47).
PCM Down Conversion: Yes
Dolby Digital: PCM
DTS Digital surround: PCM
MPEG: PCM
Digital Audio output: On (RE-MASTER Off)
Start recording on the external unit and start playing the disc
to be recorded.
¡Some discs cannot be recorded digitally.
¡When playing DVD-Audio and “D.MIX” is flashing on the display,
only the sound for the front speakers is recorded.
Note
Tuner
MD deck, record player, etc.
Stereo phono cable (not included)
White (L)
Red (R)
DVD player
Digital recording equipment
(e.g., MD deck)
Optical fiber cable (not included)