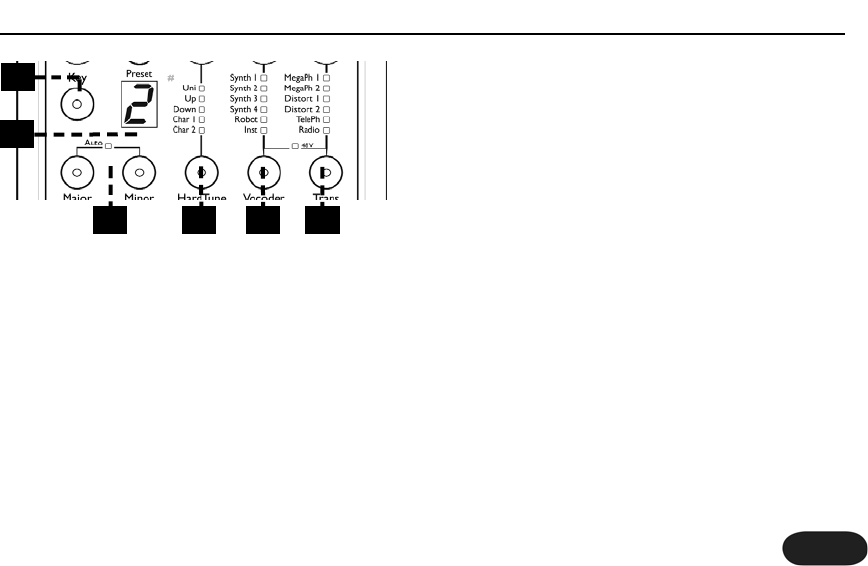
Advanced HardTune & Vocoder Style Select
Each HardTune and Vocoder style (Uni, Up, Synth, Robot,
respectively) have additional selections. For example, to
browse additional Synth 1 sounds, cycle the Vocoder
button to the Synth 1 style, then hold the Vocoder button
(Vocoder LED will flash). Tap the Vocoder button to
sample the options that are numbered in the preset
display. Once you’ve found one you like, press and hold the
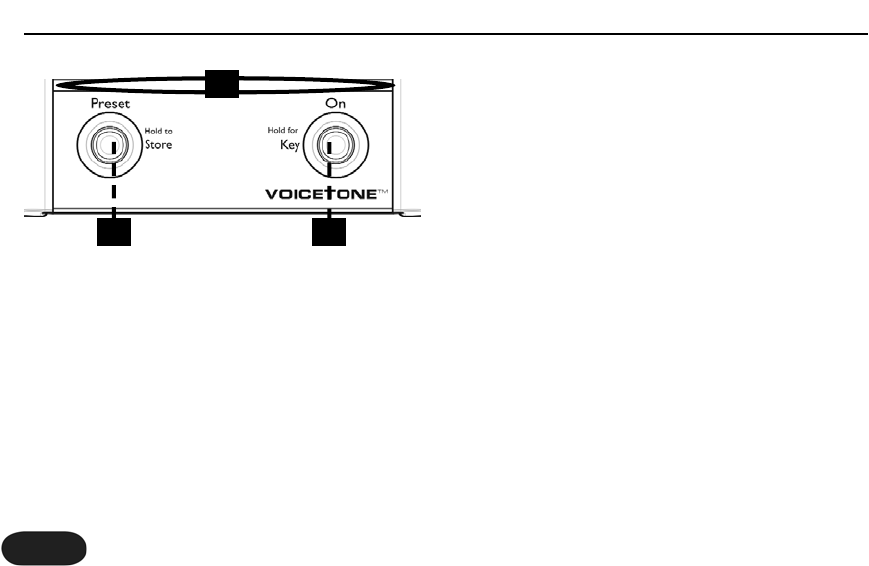
Vocoder button to exit. Hold the Preset footswitch to
store if desired. Note that cycling through the Vocoder
styles again with the Vocoder button will return your edit
to the default style (#1) in each style bank.
This functionality is the same for HardTune, except that
you would hold the HardTune button to enter and exit
the style select mode. In firmware version 1.1 onward, the
alternate selections in HardTune impose natural pitch
correction values on the respective style. For example, the
alternate HardTune Down style retains the octave down
pitch shift while softening the effect of the pitch correction.
24 242424242424
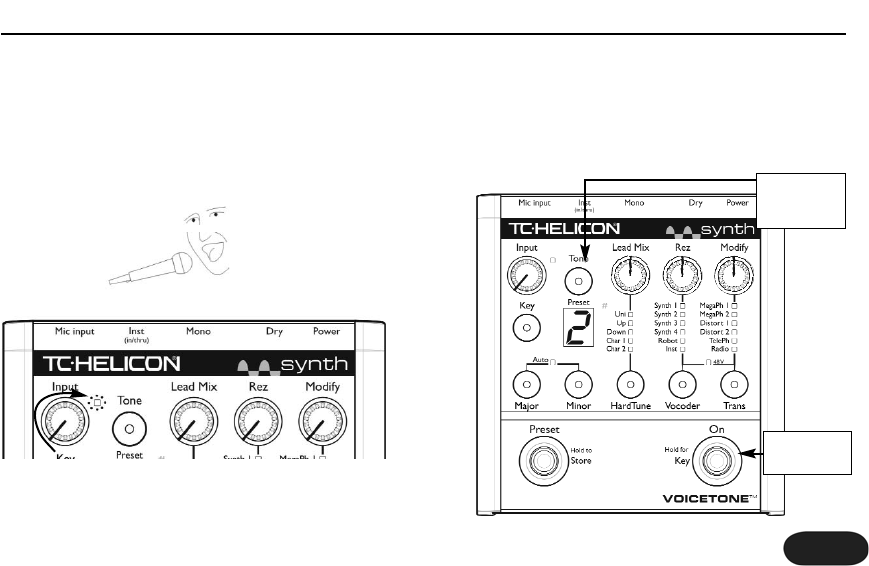
Choosing Alternate Tone Settings
The factory default for the Tone button accommodates
a wide range of singers but there are options to further
customize this feature.
To access the alternate tone settings, hold the Tone
button until you see the Preset number display flash.You
can tap the Tone button to cycle through the numbered
choices shown below:
d: Default setting. Best for most situations.
1: Best if you have a very bright sounding PA.
2: This option adds “warmth” to your voice.
3: Increased compression. Caution: this increases
the likelihood of feedback.
4: Default setting plus a -50dB threshold gate on
Transducer to help reduce feedback.
5: Default setting plus a -40dB threshold gate on
Transducer to help reduce feedback.
6: Default setting plus a -30dB threshold gate on
Transducer to help reduce feedback.
For Advanced Users