590818
16
Zoom out
Zoom in
Previous page
1/24
Next page
-31-
1.) Ausbau der „alten“ Tür
Als erstes entfernen Sie die Siche-
rungsspange am oberen Zapfenschar-
nier.
Öffnen Sie die Tür möglichst weit und
deaktivieren Sie die Bauart A1. Dazu
ziehen Sie die Madenschraube, die
sich unten auf der Scharnierseite
befindet, mit einem Inbusschlüssel an.
Anschließende entnehmen Sie die Kachelofentür aus dem Kachelofen
dazu heben Sie die Tür auf der Scharnierseite an und ziehen sie nach
unten vor.
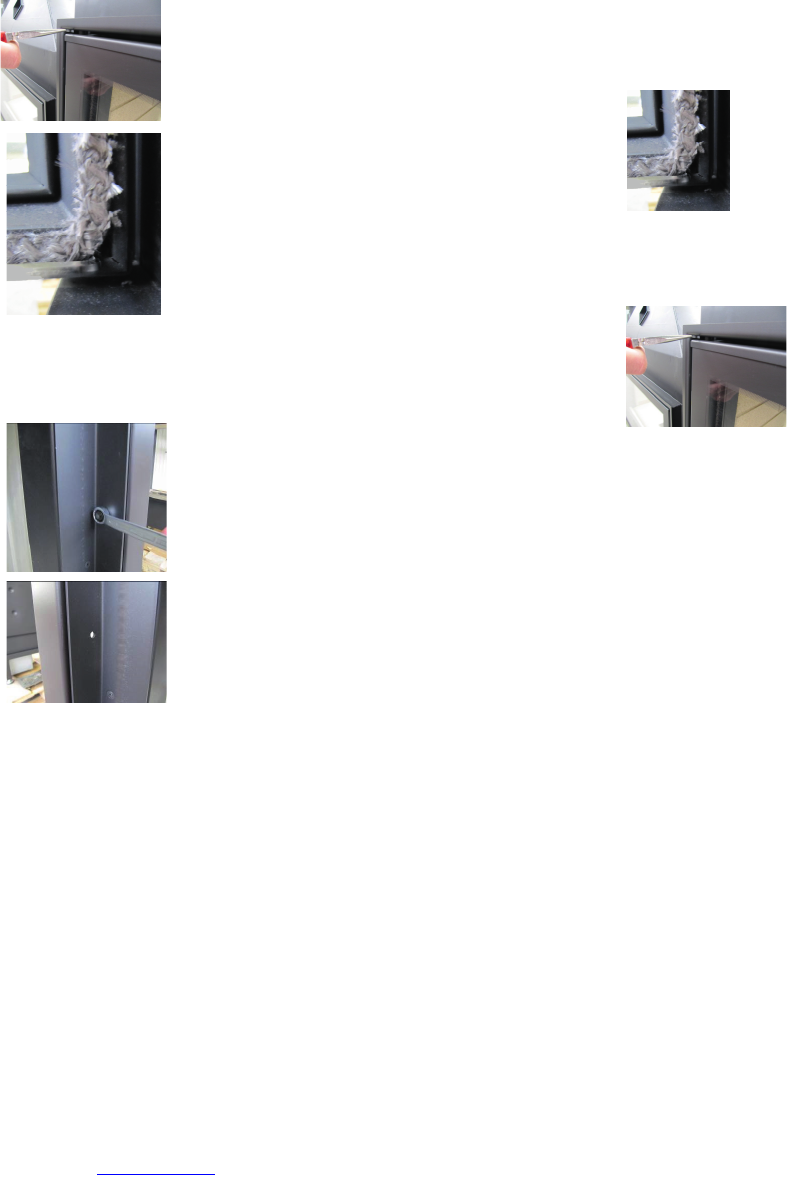
2.) Verschlussbolzen wechseln
Demontieren Sie mit Hilfe eines
Maulschlüssels den Verschlussbol-
zen.
Montieren Sie den Verschlussbolzen
auf der gegenüber liegenden Seite,
dort ist eine Bohrung vorgesehen.
-32-
3.) Einsetzen der „neuen“ Tür
Setzen Sie die „neue“ Tür wieder ein dazu schieben Sie die Tür
mit dem oberen Zapfenscharnier in die vorgesehenen Bohrungen.
Die Tür dann 90° öffnen und das untere Zapfenscharnier (sechs-
eckig) in die vorgesehene Bohrung einstecken.
Aktivieren Sie wieder die Bauart A1. Dazu
lösen Sie die Madenschraube, die sich unten
auf der Scharnierseite befindet, mit einem 3mm
Inbusschlüssel.
Kontrollieren Sie nun die ordnungsgemäße
Funktion der Tür!
Sollte die Tür nicht selbsttätig schließen, muss diese nachgestellt
werden. Der Betrieb mit nicht selbsttätig schließender Tür ist nicht
erlaubt.
Als letztes setzen Sie die Sicherungs-
spange am oberen Zapfenscharnier
wieder ein.
Heruntergeladen von manualslib.de Handbücher-Suchmachiene
16


Need help? Post your question in this forum.

Forumrules


Report abuse

Libble takes abuse of its services very seriously. We're committed to dealing with such abuse according to the laws in your country of residence. When you submit a report, we'll investigate it and take the appropriate action. We'll get back to you only if we require additional details or have more information to share.

Product:

For example, Anti-Semitic content, racist content, or material that could result in a violent physical act.

For example, a credit card number, a personal identification number, or an unlisted home address. Note that email addresses and full names are not considered private information.

Forumrules

To achieve meaningful questions, we apply the following rules:

Register

Register getting emails for Spartherm Renova at:


You will receive an email to register for one or both of the options.


Get your user manual by e-mail

Enter your email address to receive the manual of Spartherm Renova in the language / languages: German as an attachment in your email.

The manual is 2,55 mb in size.


You will receive the manual in your email within minutes. If you have not received an email, then probably have entered the wrong email address or your mailbox is too full. In addition, it may be that your ISP may have a maximum size for emails to receive.

Others manual(s) of Spartherm Renova

Spartherm Renova Usermanual and installation guide - German - 20 pages

Spartherm Renova Installation Guide - Dutch - 28 pages


The manual is sent by email. Check your email

If you have not received an email with the manual within fifteen minutes, it may be that you have a entered a wrong email address or that your ISP has set a maximum size to receive email that is smaller than the size of the manual.

The email address you have provided is not correct.

Please check the email address and correct it.

Your question is posted on this page

Would you like to receive an email when new answers and questions are posted? Please enter your email address.


Info