647852
7
Zoom out
Zoom in
Previous page
1/23
Next page
7
4. Zoek naar de Rechter Handleuning (72). Deze heeft een
grote gat in de linkerkant. Voer de Draadharnas (42) van-
uit het grote gat in de vierkante houder op de Rechter
Handleuning. (Opgelet: Gebruik een neuspunt buigtang
om de Draadharnas uit het gat te trekken). Druk een
Handleuning Kapje (76) in de onderkant van de Rechter
Handleuning zoals aangegeven. Verwijder de plastic ver-
bindingen van de houder.
Steek de houder op de Rechter Handleuning (72) in de
bovenkant van de Rechter Staander (29) zodanig dat de
Kap van de Handleuning (76) tegen de Staander rust
zoals is aangegeven. Maak de Rechter Handleuning en
het Handleuning Kapje vast met drie 1” Bouten (37) en
twee Tussenringen (38) zoals aangegeven. Draai de
bouten nog niet te vast.
Bevestig de linker Handleuning (niet afgebeeld) op de-
zelfde wijze.
76
72
29
42
38
38
37
37
37
Groot
Gat
Houder
4
3. Til met de hulp van een tweede persoon de beide Staan-
ders (25, 29) naar een verticale positie.
Open onderdelenzak B. Plaats de Dwarsstang (40)
aan/op de houder op de Staanders (25, 29). Maak de
Dwarsstang met twee Dwarsstang Schroeven (39) vast.
Draai de Dwarsstang Schroeven nog niet te vast.
29
39
25
39
40
3
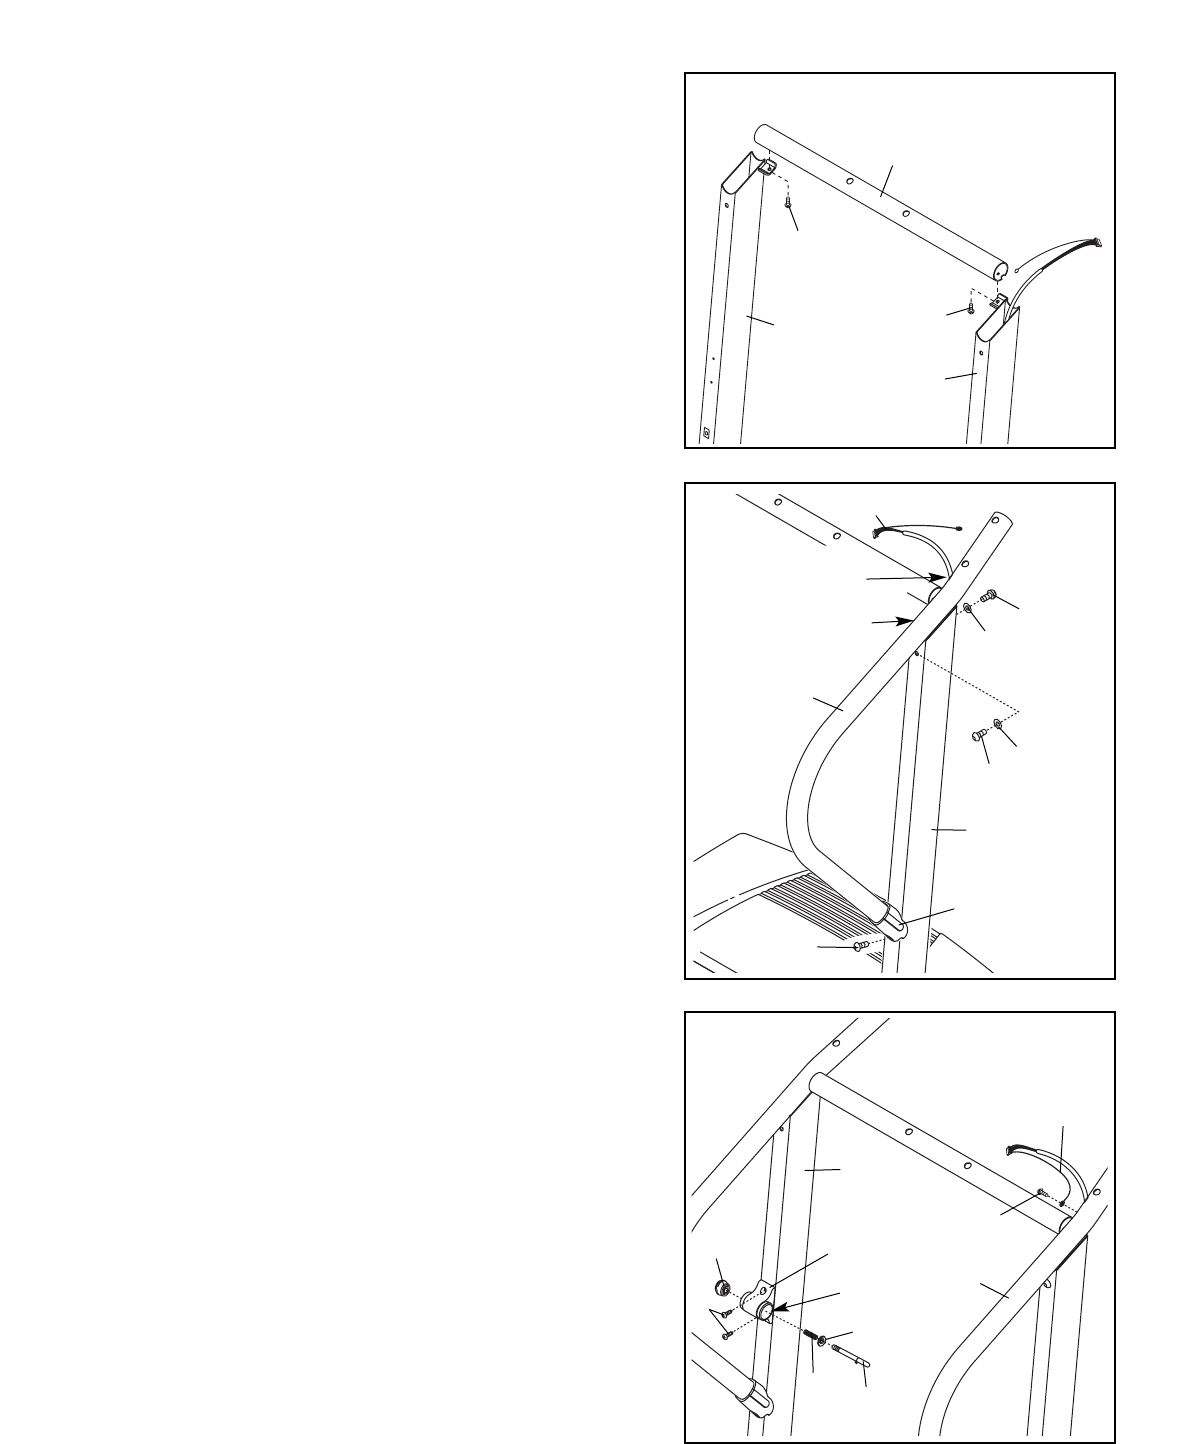
5. Open onderdelenzak C. Bevestig het eind van de
gronddraad met een Zilveren Geaarde Schroef (75) in
het kleine gat in de zijkant van de Rechter Handleuning
(72).
Maak het Slot (36) aan de Linker Staander (25) vast met
twee 3/4" Schroeven (61).
Verwijder de Sluitknop (30) van de Sluitpin (35). Zorg er-
voor dat de Sluitpinkraag (33) en de Veer (32) op de
Sluitpin zitten zoals aangegeven (36) en draai de
Sluitknop op de Sluitpin.
Gronddraad
72
75
61
5
25
32
36
30
Groot
Gat
35
33
7


Need help? Post your question in this forum.

Forumrules


Report abuse

Libble takes abuse of its services very seriously. We're committed to dealing with such abuse according to the laws in your country of residence. When you submit a report, we'll investigate it and take the appropriate action. We'll get back to you only if we require additional details or have more information to share.

Product:

For example, Anti-Semitic content, racist content, or material that could result in a violent physical act.

For example, a credit card number, a personal identification number, or an unlisted home address. Note that email addresses and full names are not considered private information.

Forumrules

To achieve meaningful questions, we apply the following rules:

Register

Register getting emails for Pro-form 360P - PETL30131 at:


You will receive an email to register for one or both of the options.


Get your user manual by e-mail

Enter your email address to receive the manual of Pro-form 360P - PETL30131 in the language / languages: Dutch as an attachment in your email.

The manual is 3,34 mb in size.


You will receive the manual in your email within minutes. If you have not received an email, then probably have entered the wrong email address or your mailbox is too full. In addition, it may be that your ISP may have a maximum size for emails to receive.

Others manual(s) of Pro-form 360P - PETL30131

Pro-form 360P - PETL30131 User Manual - English - 23 pages

Pro-form 360P - PETL30131 User Manual - German - 23 pages

Pro-form 360P - PETL30131 User Manual - French - 23 pages


The manual is sent by email. Check your email

If you have not received an email with the manual within fifteen minutes, it may be that you have a entered a wrong email address or that your ISP has set a maximum size to receive email that is smaller than the size of the manual.

The email address you have provided is not correct.

Please check the email address and correct it.

Your question is posted on this page

Would you like to receive an email when new answers and questions are posted? Please enter your email address.


Info