40094
10
Zoom out
Zoom in
Previous page
1/21
Next page
INSTALLATION
17
16
INSTALLATION
General
This appliance should be connected to the
power supply by a recognized fitter who is
familiar with, and works according to the
correct safety regulations.
Important that you know
If the cooker hood is to be fitted to an
existing duct no other appliances, such as
a geyser or heater, may be connected to
that same duct.
Consider local regulations with respect to
the ventilation of gas appliances!
The cooker hood should be mounted at
least 650 mm above the hob.
The shorter the duct, and the fewer the
bends in it, the better the cooker hood will
work.
Before you start drilling check that there
are no installation cables present.
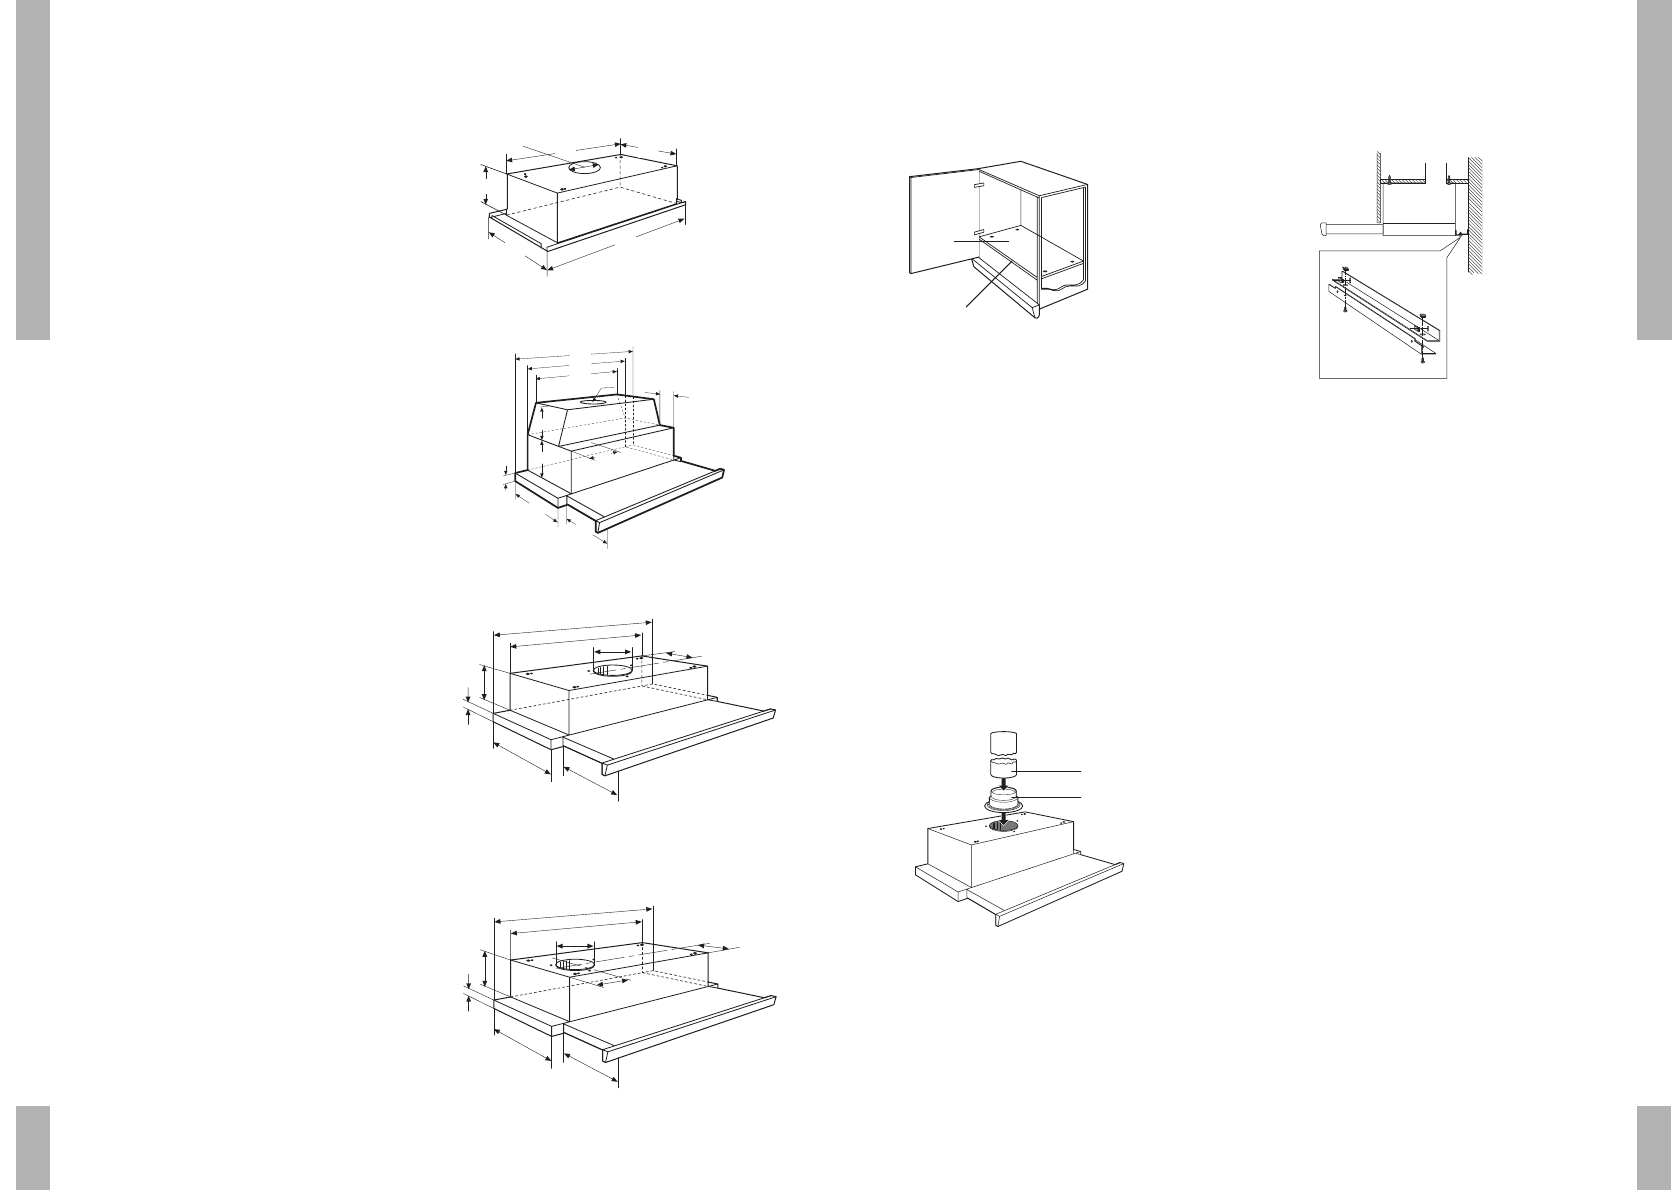
Building-in dimensions Cooker hoods with a visor
Mounting the cooker hood
Drill 4 holes in the bottom of the wall
cupboard, using the stencil provided (H). Also
saw the hole for the duct.
Using the 4 screws supplied, fix the cooker
hood to the bottom of the cupboard. Make sure
that the front of the cooker hood does not stick
out in front of the side of the cupboard (G).
The handle may be replaced by other material,
e.g. the same material used for the kitchen
cupboards or the light strip. The handle is
fitted from the back with screws.
Connect the cooker hood outlet flange (P) to
the duct (A). Put the plug in the wall socket.
Mounting the cover
If the cupboard is deeper than the cooker
hood, you can mount the cover via the slotted
holes on the back of the hood. The depth can
be adjusted from 35 to 85 mm.
H
G
Fig. 8. Mounting
A
P
Fig. 9. Extraction
Fig. 10. Cover
454
256
286
148
525
ø
ISW 700
598
510
140
40
295
200
95
420
ø150
60
120
SLK 810
598
510
ø 125
202
150
40
265
200
SLK 700/ MSL 140
598 (898)
510 (810)
150
Ø 125
95
175
40
265
200
SLK 750/950
10


Need help? Post your question in this forum.

Forumrules


Report abuse

Libble takes abuse of its services very seriously. We're committed to dealing with such abuse according to the laws in your country of residence. When you submit a report, we'll investigate it and take the appropriate action. We'll get back to you only if we require additional details or have more information to share.

Product:

For example, Anti-Semitic content, racist content, or material that could result in a violent physical act.

For example, a credit card number, a personal identification number, or an unlisted home address. Note that email addresses and full names are not considered private information.

Forumrules

To achieve meaningful questions, we apply the following rules:

Register

Register getting emails for Pelgrim SLK 750 at:


You will receive an email to register for one or both of the options.


Get your user manual by e-mail

Enter your email address to receive the manual of Pelgrim SLK 750 in the language / languages: English, German, Dutch, French as an attachment in your email.

The manual is 0,25 mb in size.


You will receive the manual in your email within minutes. If you have not received an email, then probably have entered the wrong email address or your mailbox is too full. In addition, it may be that your ISP may have a maximum size for emails to receive.

The manual is sent by email. Check your email

If you have not received an email with the manual within fifteen minutes, it may be that you have a entered a wrong email address or that your ISP has set a maximum size to receive email that is smaller than the size of the manual.

The email address you have provided is not correct.

Please check the email address and correct it.

Your question is posted on this page

Would you like to receive an email when new answers and questions are posted? Please enter your email address.


Info