-ii-
Advanced Streaming Settings................................................................................................................................................. 37
AVI Encoder Settings................................................................................................................................................ 41
Flash Encoder Settings............................................................................................................................................. 42
MPEG-4 Encoder Settings ....................................................................................................................................... 43
Encoder Settings Web Interface.............................................................................................................................................. 43
Real Encoder Settings (Helix) ................................................................................................................................................ 50
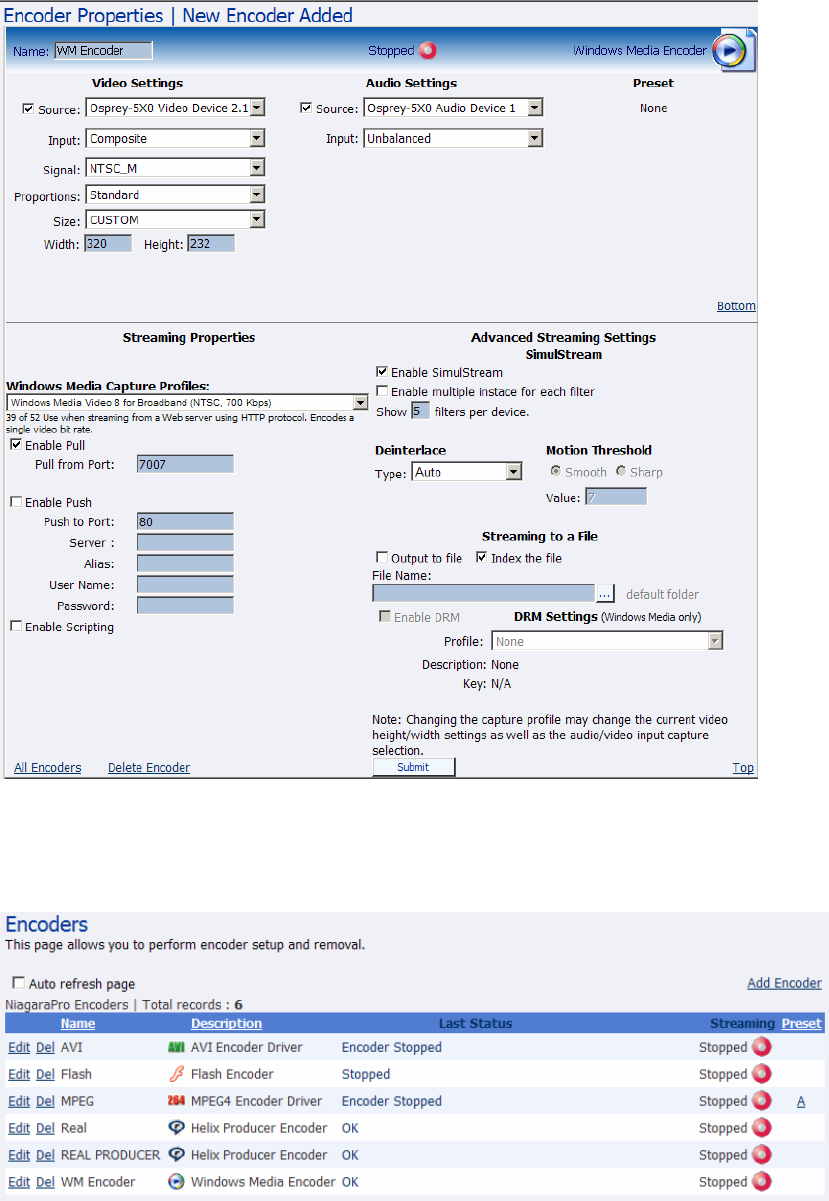
Windows Media Encoder Settings ............................................................................................................................ 54
Deleting an Encoder Profile..................................................................................................................................... 57
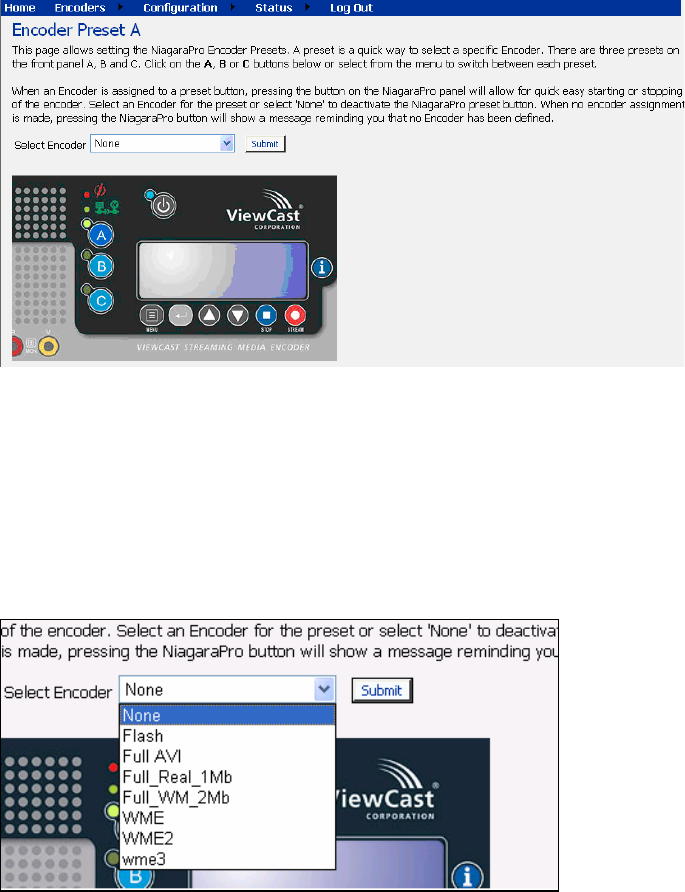
My Niagara Pro........................................................................................................................................................ 59
Computer Name........................................................................................................................................................ 59
Niagara Pro Properties............................................................................................................................................ 60
Changing the Login Password from the Factory Default........................................................................................................ 60
Restoring the Login Password to the Factory Default............................................................................................................. 61
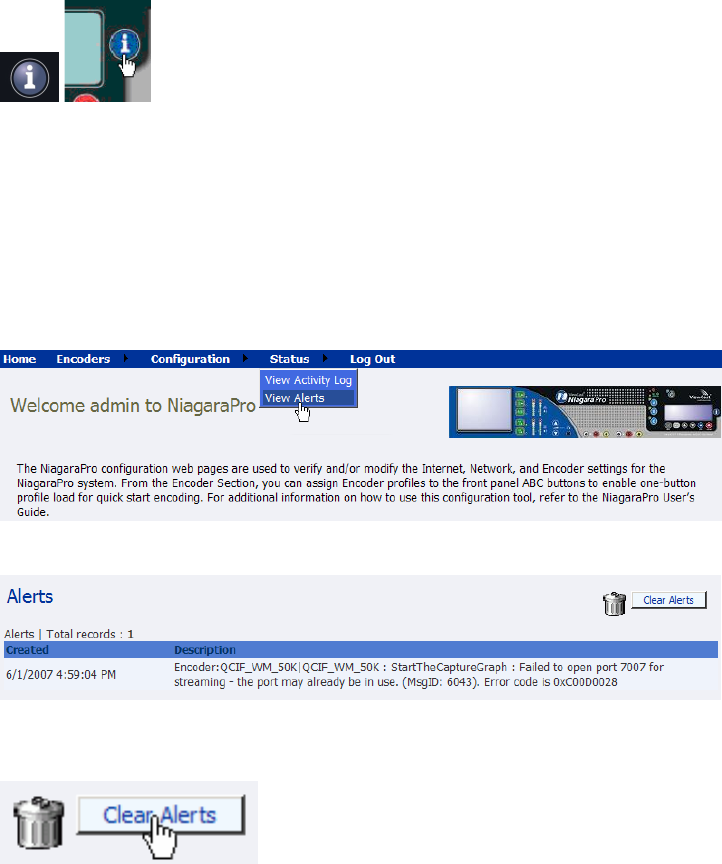
NIAGARA PRO ALERTS ...................................................................................................................................................62
Email Alert ............................................................................................................................................................... 62
Alarm Light............................................................................................................................................................... 62
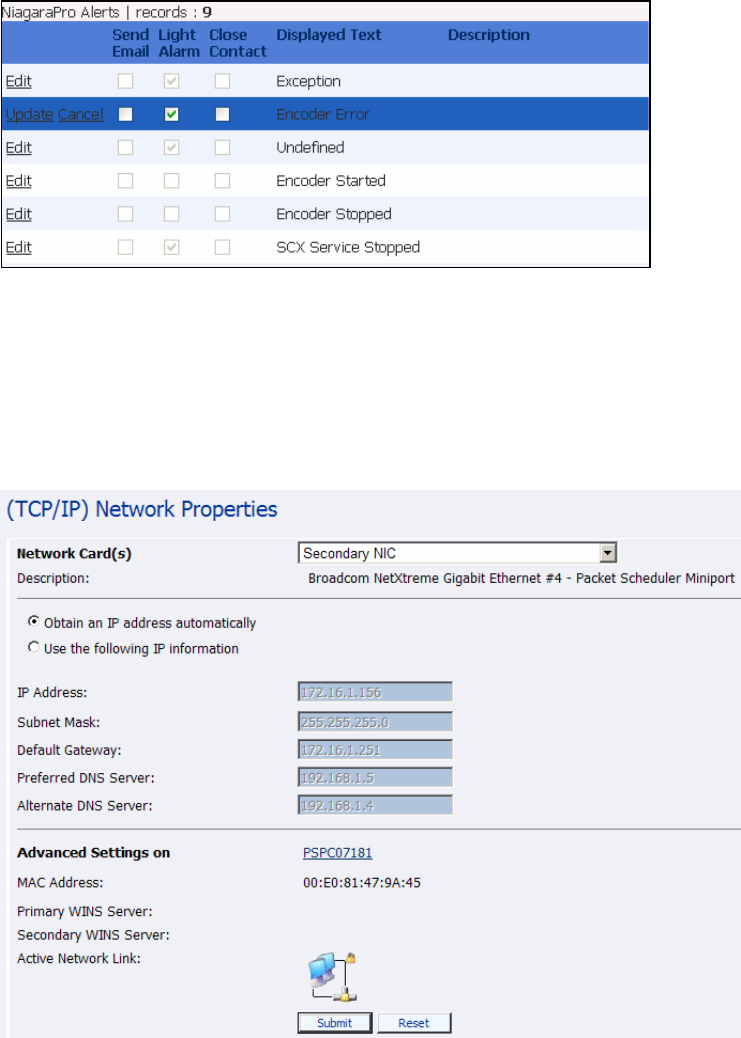
Edit Alert Settings..................................................................................................................................................... 62
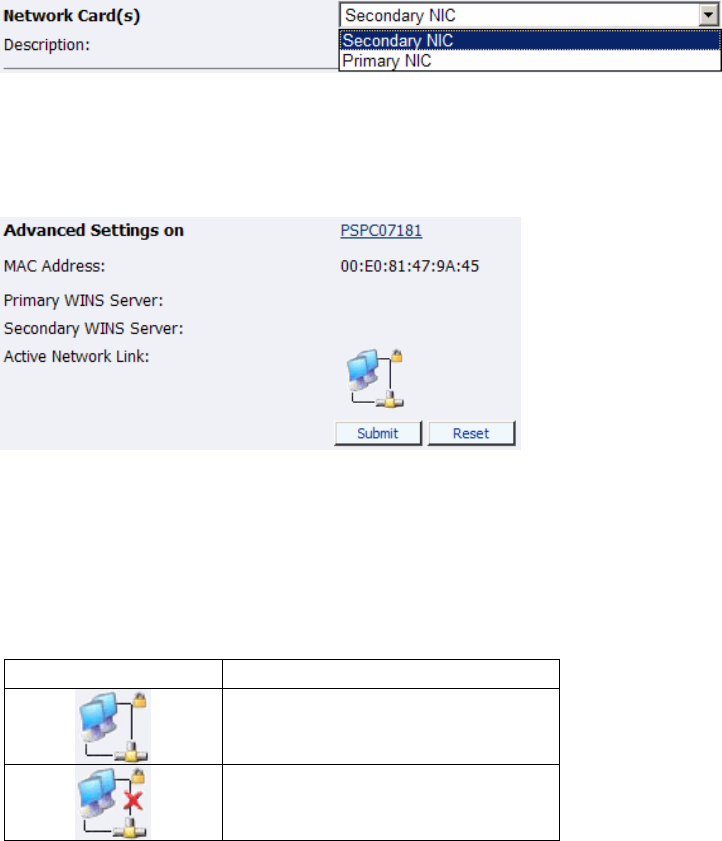
NETWORK PROPERTIES ...................................................................................................................................................63
Network Card(s)....................................................................................................................................................... 64
Advanced Settings (Network).................................................................................................................................... 64
SYSTEM CONFIGURATION SETTINGS...............................................................................................................................65
Restore Niagara Pro Factory Defaults..................................................................................................................... 65
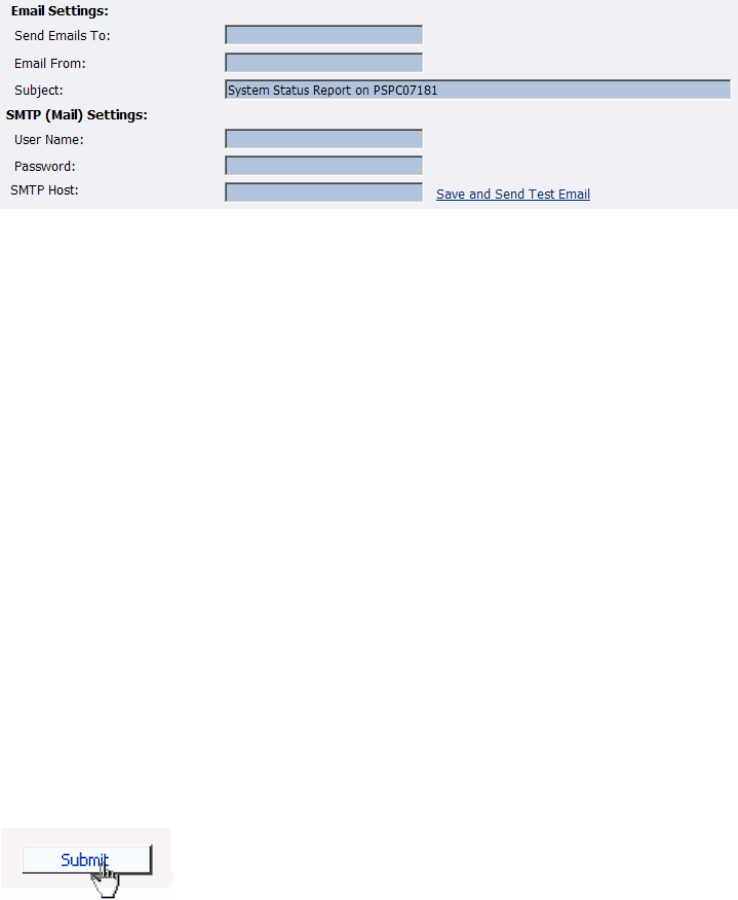
Email Settings........................................................................................................................................................... 67
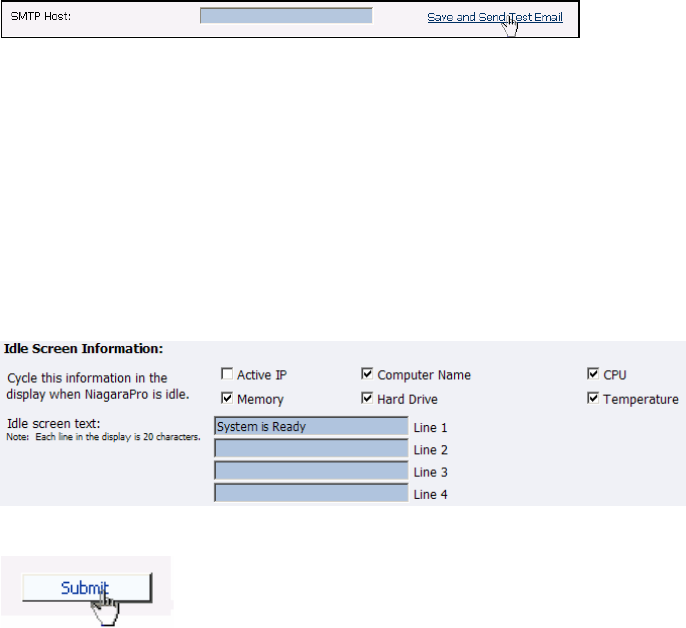
Idle Screen Information............................................................................................................................................ 68
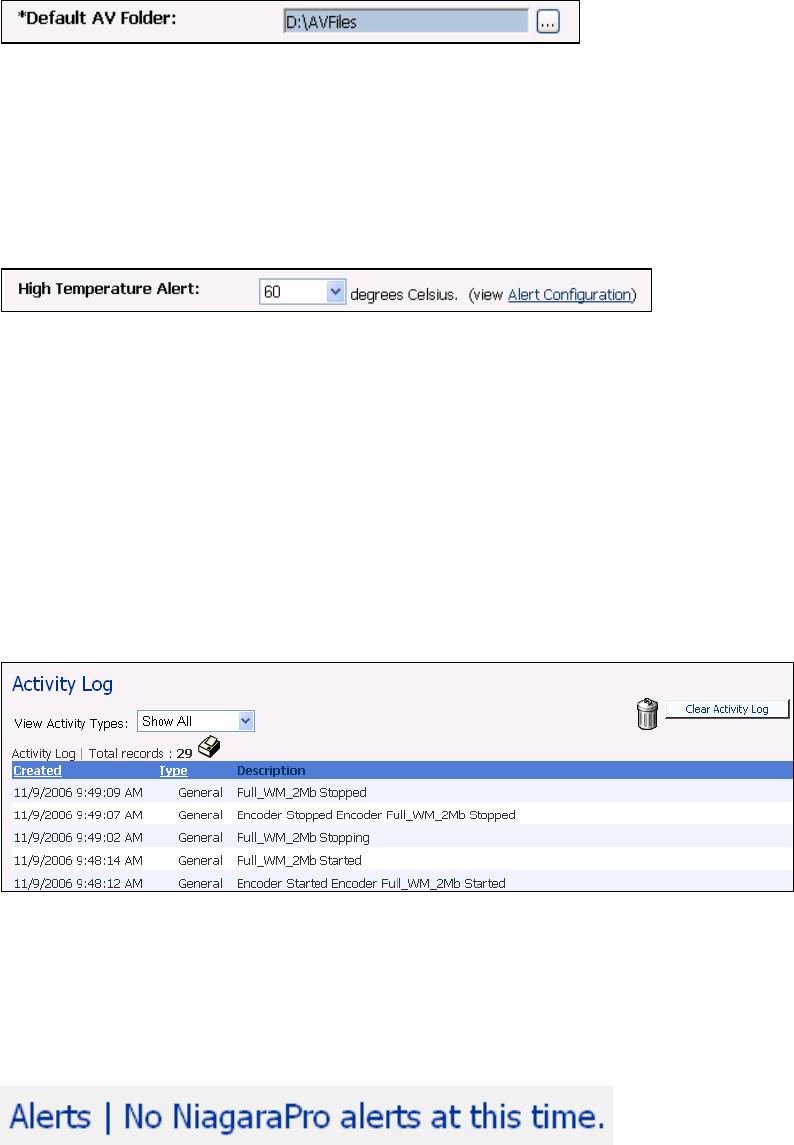
Default Directory Setting ......................................................................................................................................... 68
High Temperature Alert ........................................................................................................................................... 69
Niagara Pro EASE Menu (LCD Display) ...................................................................................................................... 70
ENCODE MENU ...............................................................................................................................................................70
Encode Start ............................................................................................................................................................. 70
Encode Stop.............................................................................................................................................................. 70
Encode Status ........................................................................................................................................................... 71
ACCESS HEALTH MENU ..................................................................................................................................................71
CPU Status ............................................................................................................................................................... 71
Memory Available .................................................................................................................................................... 71
Temperature Status................................................................................................................................................... 71
SETUP NIAGARA PRO MENU ...........................................................................................................................................72
Network Link Status.................................................................................................................................................. 72
Network MAC Address ............................................................................................................................................. 72
View Network Settings.............................................................................................................................................. 72
Enable DHCP........................................................................................................................................................... 73
Set Static IP Addresses ............................................................................................................................................. 73
Set Gateway Address ................................................................................................................................................ 74
Set Date & Time ....................................................................................................................................................... 75
Setting Temperature Alarm ...................................................................................................................................... 76
EXPORT FILES MENU ......................................................................................................................................................77
Export to USB Drive................................................................................................................................................. 77
SHUTDOWN NIAGARA PRO .............................................................................................................................................77
Niagara SCX Web Interface ........................................................................................................................................... 78
LOG IN ............................................................................................................................................................................78
HOME PAGE ....................................................................................................................................................................79
Menu Bar.................................................................................................................................................................. 79
Home ........................................................................................................................................................................ 79
Encoders................................................................................................................................................................... 80
Configuration ........................................................................................................................................................... 80