12
Installation
SPEAKER HOOK-UP
This amplifier is equipped with special high-current, binding-post speaker terminals to handle the highest
peak-power levels that may occur with low-impedance speakers. At moments when the amplifier is
producing maximum power, voltages of nearly 100V may be present on the speaker terminals, so plastic
covers protect the terminals. To connect loudspeaker cables, first switch off the amplifier’s power by
disconnecting the AC-power cord from the wall outlet.
Connect the wires from one of your speakers to the “+” and “-” terminals on the rear panel of the NAD
CI-series amplifier. In each channel, the red terminal is the positive “+” output, and the black terminal is
the negative “-” or “ground” terminal (see Figure 2).
Use heavy-duty (16-gauge/2mm or thicker) wire, especially with 4-ohm loudspeakers. Bare wires can be
connected directly to the binding-post terminals. For a longer lasting and more corrosion resistant
connection, you may install speaker cables with gold-plated connectors (pin connectors or spade lugs), or
you can install such connectors on the wires yourself. Connections to each binding post may be made in
the three ways described below.
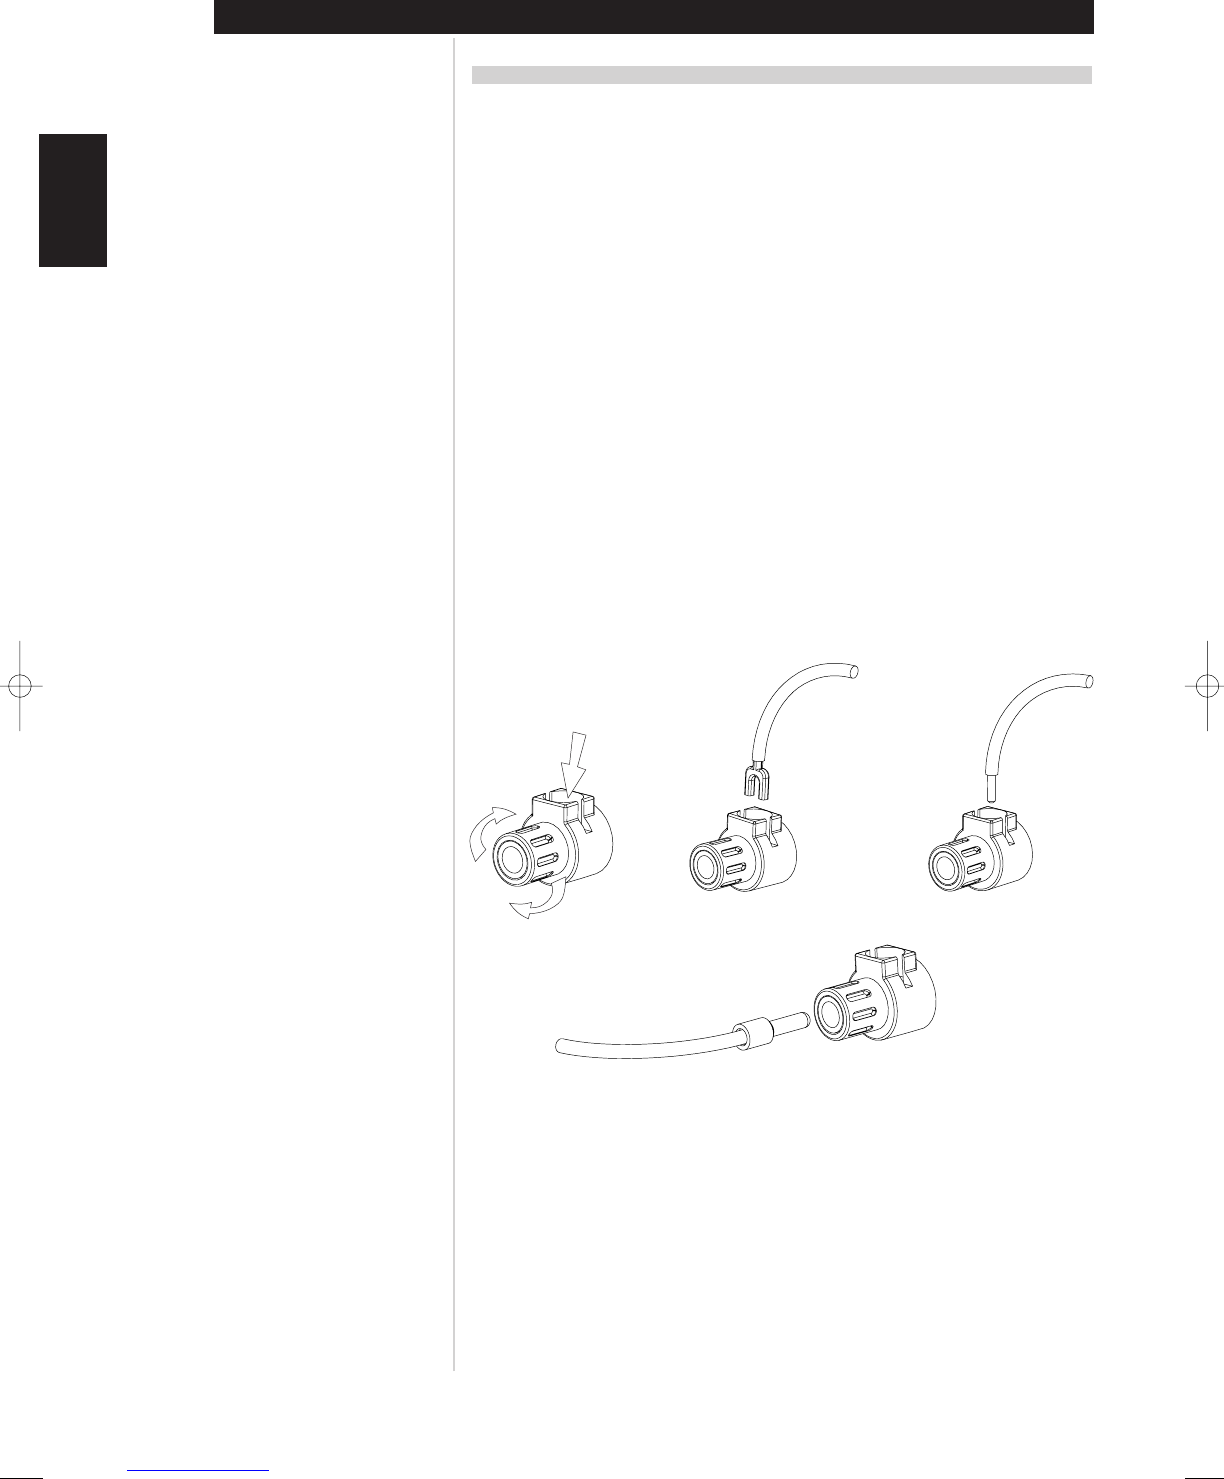
1 Pin connectors: A pin connector is a slim metal shaft that is crimped or soldered onto the end of a wire.
The threaded shaft of each binding post contains an opening that accepts pin connectors up to 3mm
in diameter. Unscrew the plastic bushing on each terminal to expose the hole in the metal shaft. Insert
the pin connector through the hole, and turn the bushing clockwise until it is tight (see Figure 2).
2 Spade lugs: Unscrew the plastic bushing, insert the U-shaped spade lug into the oblong gap and
tighten the bushing down on it (see Figure 2).
3 Bare wires: Separate the two conductors of the cord (if they are supplied as a pair), and strip off a half-
inch (1cm) of insulation from each. In each conductor, twist together the exposed wire strands.
Unscrew the plastic bushings for “+” and “-”, insert the bare wire through the hole in the metal shaft,
and tighten the plastic bushing until it grasps the wire securely (see Figure 2). Check to be sure that no
loose strand of wire is touching the chassis or an adjacent terminal. Re-tighten the bushing after a
week or so to make sure that any play that may have developed is eliminated.
Figure 2
ENGLISH FRANÇAIS
DEUTSCH
NEDERLANDS
ESPAÑOL
ITALIANO
PORTUGUÊS
SVENSKA
Spade Wire
Pin