4342
Geavanceerde scanwerkzaamheden
Gebruik de schuiven of voer in de vakjes
waarden in (± 2 in stappen van 0,1). Klik op de
toepassingsknop om het effect van de wijzi-
ging op het preview-beeld en de histogrammen
te zien; de knop wordt rood na elke aanpas-
sing, om aan te geven dat de aanpassing niet
op het preview-beeld is toegepast. Ga door tot
het gewenste resultaat is bereikt. Wilt u alle
instellingen opheffen, klik dan op de Reset-
toets en klik op de toepassingstoets om het
preview-beeld te actualiseren.
Gebruikt u automatische belichting, dan wor-
den de aanpassingen gemaakt in relatie tot de
belichting die door de automatische belich-
tingsregeling werd gerealiseerd. Wilt u een
standaard belichting als uitgangspunt nemen,
schakel dan de automatische belichtingsrege-
ling in het Preferences-venster uit (blz. 40); zet
Exposure control for negatives op manual of
klik het vakje Auto expose for slides leeg. Dit is
aan te bevelen wanneer u voor specifieke films
instellingen wilt maken.
De tab Exposure control kan niet worden
gebruikt met Digital ROC of SHO.
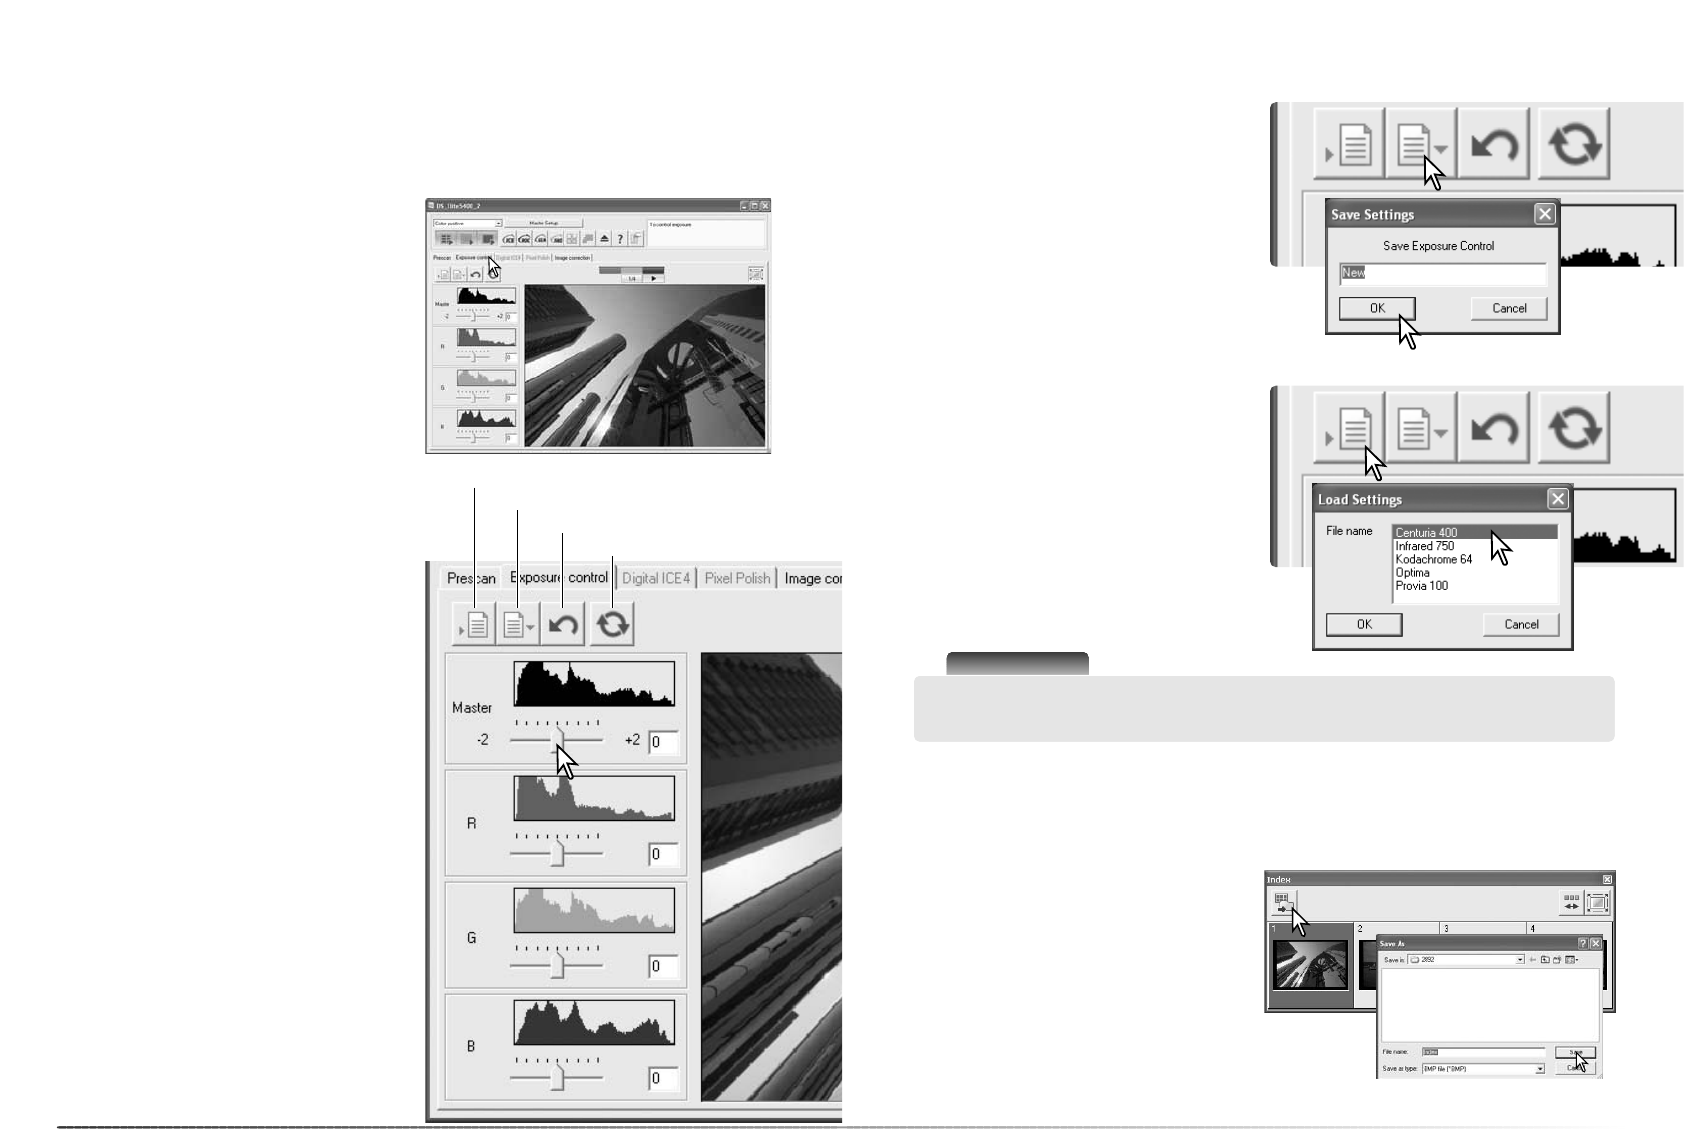
Belichtingsregelings-tab (Exposure control)
Knop instelling opslaan
Knop instelling oproepen
Reset-knop
Apply button
Klik simpelweg op de tab Exposure control om
het geselecteerde beeld te laten verschijnen. Is
de prescan-knop geel, maak dan een prescan.
Worden er veranderingen in de belichting aan-
gebracht, dan kleurt de tab Image correction
rood (Windows) of verschijnt er op de tab een
asterisk (Macintosh).
Met de Master-schuif en het invoervakje kunt u
de belichting regelen. De R-, G- en B-schuiven
en invoervakjes kunt u gebruiken om een kleur-
zweem te corrigeren.
Met de tab Exposure control kunt u het belichtingssysteem van de scanner afstemmen op
bepaalde films, lichtsituaties of op een persoonlijk belichtingsindex die is gebaseerd op de com-
binatie van film, ontwikkeling, objectief en sluiter. U kunt dit ook gebruiken om te corrigeren voor
een slecht belichte film.
Belichtingsinstellingen opslaan
Belichtingsinstellingen oproepen
Klik op de opslagknop om het opslag-venster
te openen.
Voer de naam voor het instellingenbestand in.
Klik op OK.
Klik op de oproepknop om het oproepvenster
te openen.
Klik op bestandsnaam om hem te markeren.
Klik op OK om de instellingen toe te passen op
het beeld dat in de tab Exposure control te
zien is. Controleer de instellingen voor automa-
tische belichting in het Preferences-venster
(blz. 40).
Scanner-info
Wilt u een instellingenbestand wissen, open dan het oproepvenster en klik op op de
bestandsnaam om hem te markeren. Gebruik de Delete-toets van het toetsenbord om het
bestand te wissen.
De miniatuurbeelden kunnen in een beeldbestand worden opgeslagen. De filmhouder hoeft niet
in de scanner te zitten om de beelden te kunnen opslaan, maar alle beelden in de filmhouder,
inclusief lege kaders, moeten zijn gescand.
Indexminiaturen opslaan
Klik op de knop voor de opslag van het index-
beeld. Het Bewaar als (Save as) venster ver-
schijnt. Voer de bestandsnaam in en selecteer
de bestemming en het bestandsformaat voor
het beeldbestand. Klik op de bewaar-knop om
het bestand aan te maken.