1716
Klaarmaken van de scanner
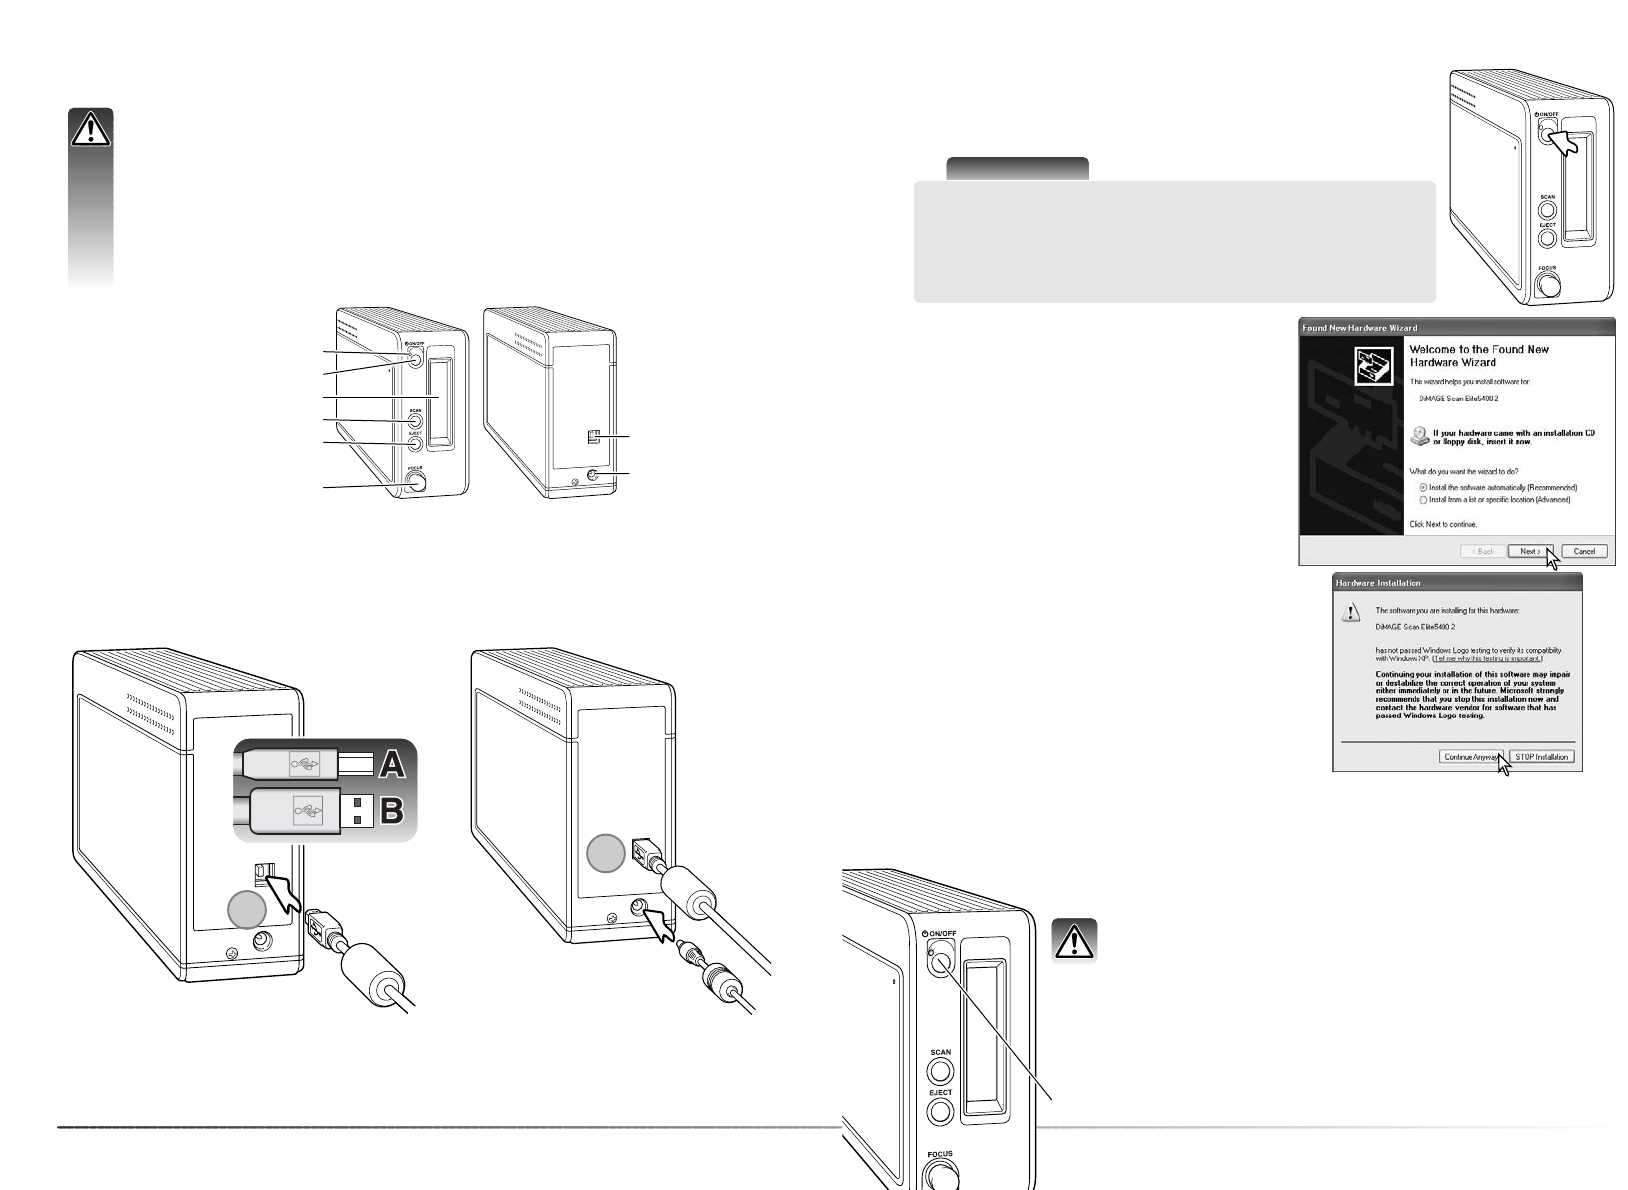
Steek de voedingsstekker van de lichtnetadapter in de voedingsaansluiting (2) van de camera.
Sluit de lichtnetadapter aan op een stopcontact.
Steek de stekker A van de USB-kabel zorgvuldig in de USB-aansluiting (1) van de scanner en de
stekker B in de USB-aansluiting van de computer. De scanner dient rechtstreeks op de computer
aangesloten te worden. Een verbinding tussen scanner en computer via een USB-hub kan er toe
leiden dat er geen goede verbinding tot stand komt, waardoor storingen kunnen optreden.
Voordat u de scanner op de computer aansluit dient u eerst de DiMAGE Scan Utility te
installeren. Kijk voor een juiste procedure op blz. 9 t/m 14.
De scanner dient op een vlakke, trillingvrije ondergrond geplaatst te worden. Hij mag niet
in direct zonlicht staan en heeft een schone, droge, goed geventileerde omgeving nodig.
Sluit nooit de scannerkabel aan als er informatie-uitwisseling plaatsvindt tussen de com-
puter en andere randapparatuur.
Voordat u de scanner aansluit
Aansluiten van de scanner
Zet de scanner aan met de hoofdschakelaar. Schakel de computer in.
Aanzetten van de scanner
Is de scanner voor het eerst aangesloten op een
computer met een Windows XP besturings-
systeem, dan verschijnt de Wizard voor nieuwe
hardware. Gebruik de optie voor automatische
installatie. Klik op Volgende.
Verlaat de DiMAGE Scan Utility. Verzeker u ervan dat het signaallampje van
de scanner niet knippert. Zet de scanner uit en ontkoppel vervolgens de
kabel.
Ontkoppel de scanner nooit als het signaallampje knippert.
Ontkoppelen van de scanner
Klaarmaken van de scanner
Benaming der onderdelen
Scandeurtje
Hoofdschakelaar
USB-aansluiting
Voedings-
aansluiting
Signaallampje
Uitvoertoets
Draaiknop handmatige
scherpstelling
Quick Scan toets
Scanner-info
Wanneer u de DiMAGE Scan Utility start, knippert het sigaal-
lampje zolang de scanner aan het opstarten is. Brandt het
lampje constant, dan kan de scanner worden gebruikt.
Is de scanner voor de eerste maal aangesloten op een computer met een Windows 98, 98SE of
2000 Professional besturingssysteem, dan verschijnt kort de wizard voor nieuwe hardware. U
hoeft niets te doen. Bij Windows 2000 verschijnt mogelijk de melding dat de digitale handteke-
ning niet werd gevonden. Klik op de Yes-knop om de installatie te vervolgen.
De melding omtrent het testen van het Windows
logo verschijnt. Klik op de knop voor doorgaan om
de scanner-installatie te voltooien
Signaallampje
1
2