English - 15 -
You can edit the list via GREEN key and delete with
the RED button.
Conditional Access
• Press the “MENU” button to display the main menu and
use the “
” or “ ” button to highlight the “Conditional
Access” line and press the “OK” button:
Some Digital Terrestrial channels operate on a Pay
Per View basis. These require a subscription and a
hardware decoder.
Obtain the Conditional Access Module (CAM) and the
viewing card by subscribing to a pay channel company,
then insert those to the TV using the following procedure.
• Switch off the TV and unplug from the mains.
• The CAM should be correctly inserted, it is impossible
to insert fully if reversed. The CAM or the TV terminal
may be damaged if the CAM is forcefully inserted.
• Connect the TV to the mains supply, switch on and then
wait for few moments until the card is activated.
• Some CAMs may require the following set up. Please
set the CAM by entering the IDTV menu, Conditional
Access then pressing the “OK” button. (CAM set up
menu is not displayed when it is not required.)
• To see the viewing contract information: enter IDTV;
press the “ MENU” button, then highlight Conditional
Access and press the “OK” button.
• When no module is inserted, “No Conditional Access
module detected” message appears on the screen.
• Refer to the module instruction manual for details of
the settings.
Note: Insert or remove the CI module only when the TV is
switched off or in standby mode.
TV Setup
You can use this item to display the TV functions.
The digital TV Setup menu screen is accessed from
the main menu. Press the “MENU” button to display
the main menu and use “
” or “ ” button to highlight
“TV Setup”, press the “OK” button to display TV Setup
menu screen.
You can fi nd detailed information for all menu items in
“Analogue TV Menu System” section.
Setup
The adjustments in this menu are given as the following:
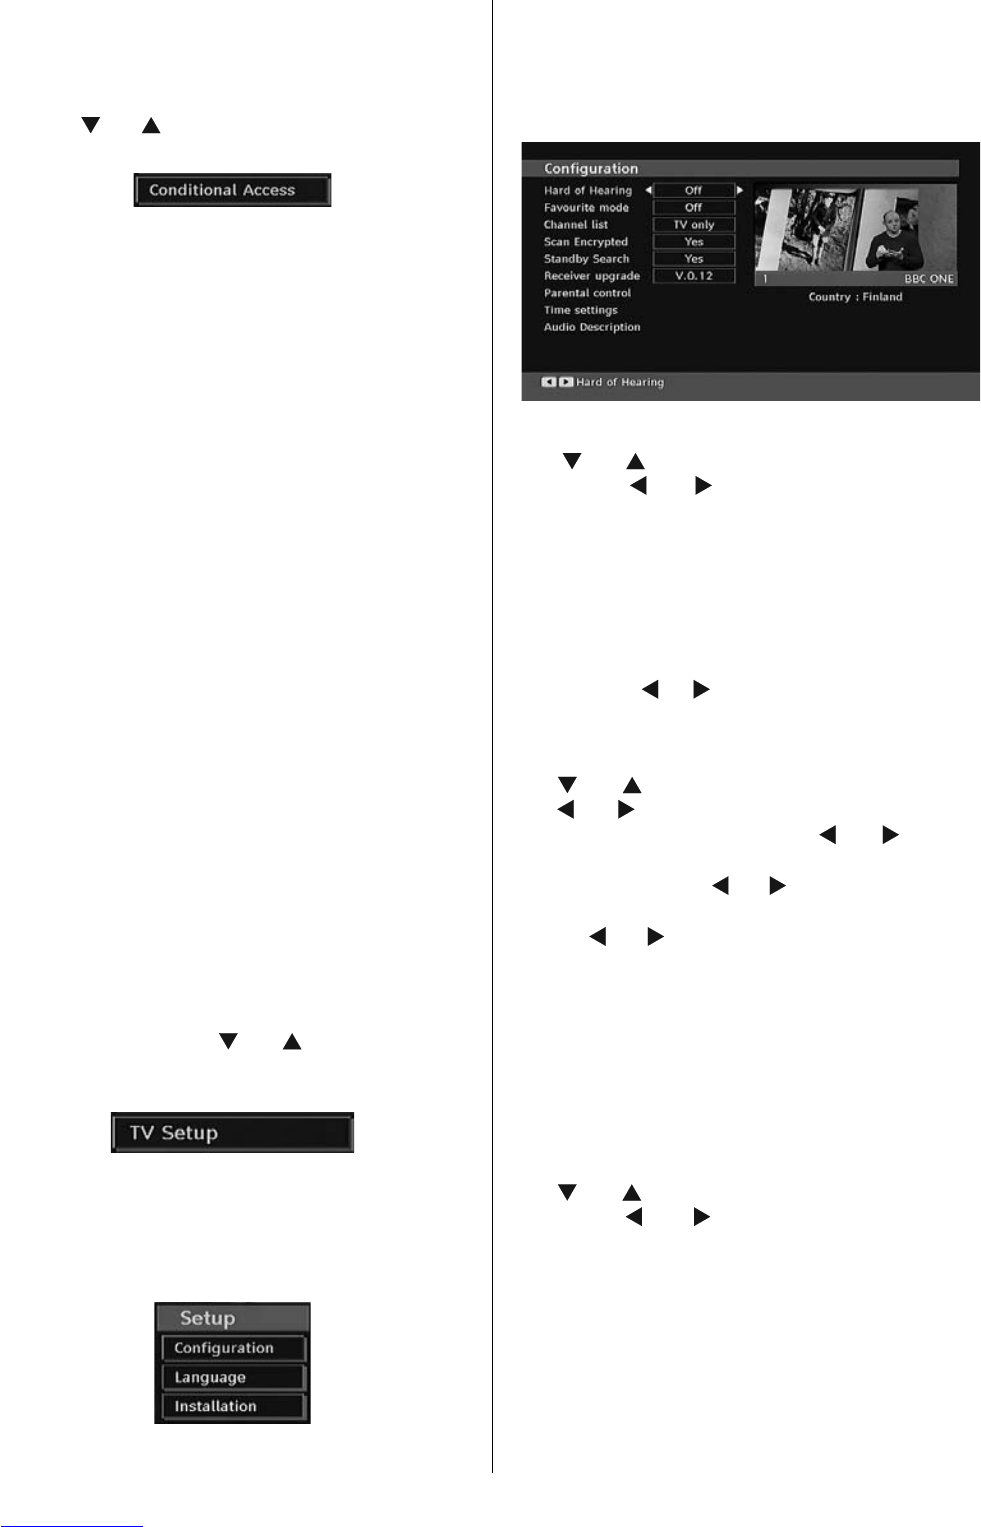
Confi guration
You can confi gure the settings of your TV. Select
Confi guration from Setup menu and press “OK” to
view this menu. Press the “EXIT” button on the remote
control to exit.
Hard of Hearing (* for EU countries only)
Use “ ” or “ ” button to select Hard of Hearing and
then press “
” or “ ” button to set this setting as
On or Off.
If the broadcaster enables any special signal
concerning the audio, you can set this setting as On
to receive such signals.
Favourite Mode
Use this function to enable or disable favourite
mode. Press “
” / “ ” button to set this function as
on or off.
Channel List
Use “ ” or “ ” buttons to go to Channel List option.
Use “
” or “ ” buttons to toggle Channel List Mode.
If you select “TV Only”, with the “
” or “ ” buttons,
you navigate through only TV channels. If you select
“Radio Only”, with the “
” or “ ” buttons, you navigate
through only radio channels. If you select “Text Only”,
with the “
” or “ ” buttons, you navigate through only
text channels.
Scan Encrypted
Scan Encrypted Channel feature will always be ON
after performing first time installation. When this
setting is on, search process will locate the encrypted
channels as well. If it is set as OFF manually, encrypted
channels will not be located while in automatic search
or manual search.
Use “
” or “ ” button to select Scan Encrypted and
then press “
” or “ ” button to set this setting as
On or Off.
Receiver Upgrade
Over Air Download (OAD)