54297
40
Zoom out
Zoom in
Previous page
1/52
Next page
audio visual setup
other equipment connection
40
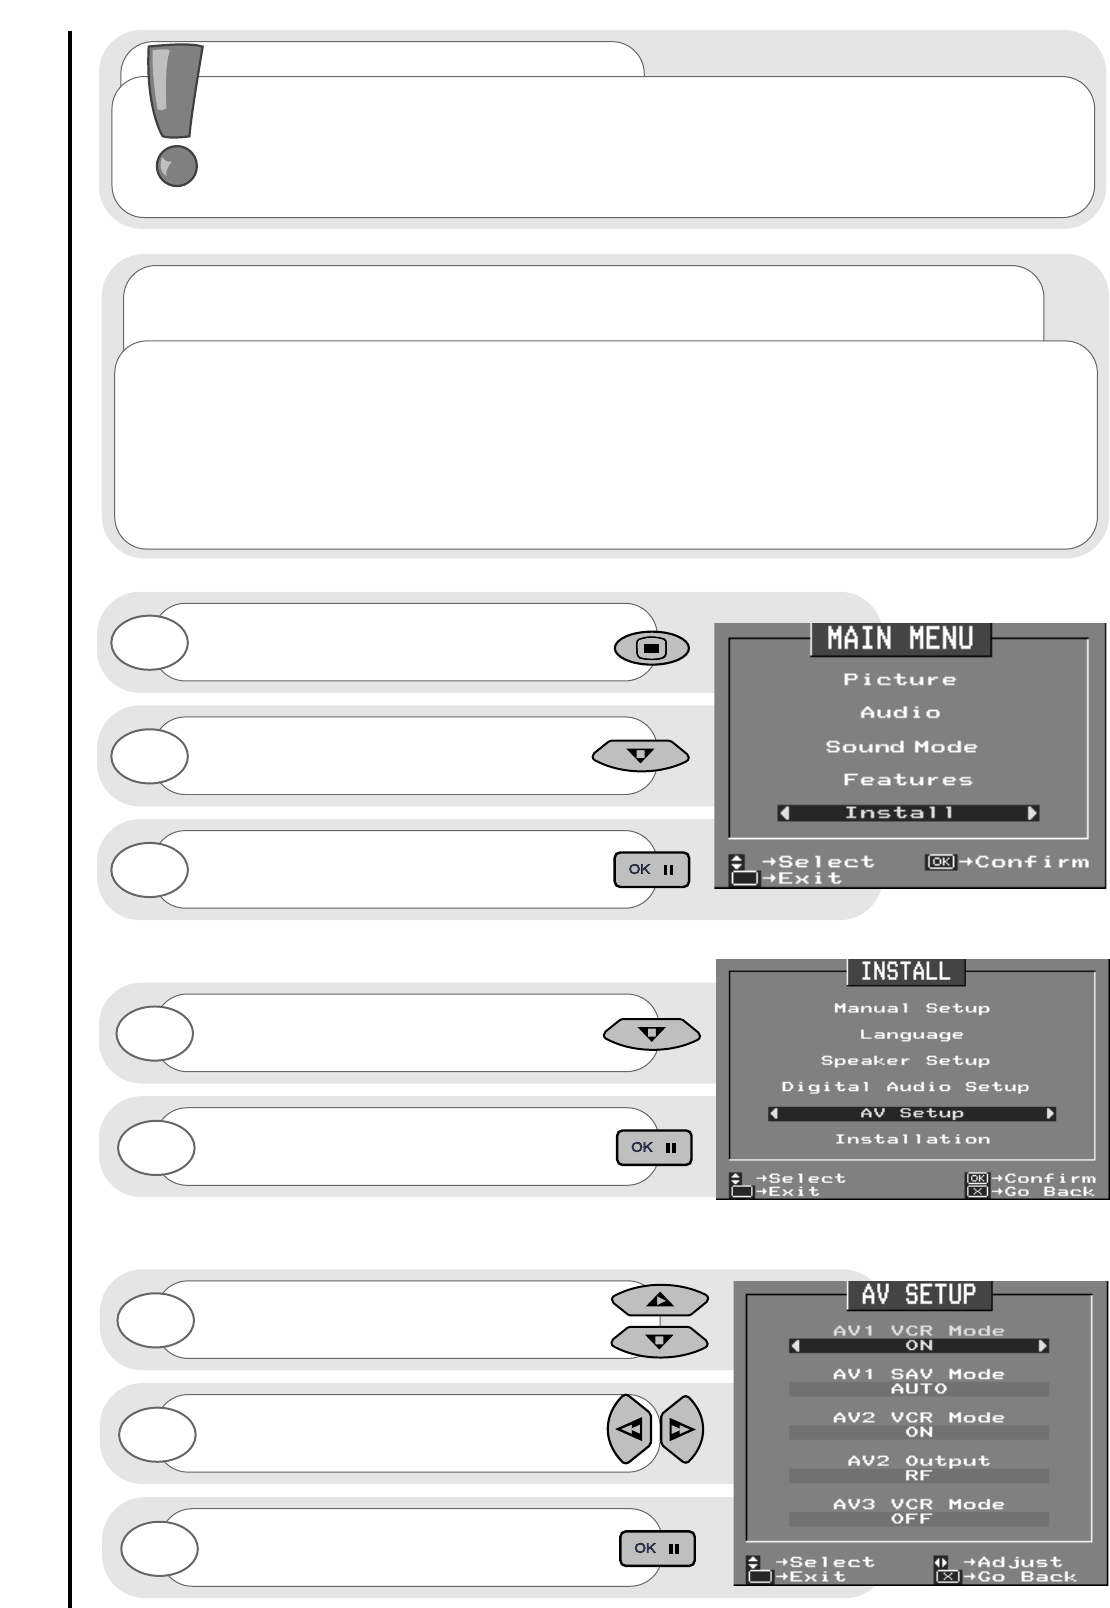
Press and hold the MENU button for 5
seconds. The INSTALL option in the
MAIN MENU appears.
Press the cursor down button to select
INSTALL.
Once highlighted, accept selection.
Press the cursor down button to select
AV SETUP.
Once highlighted, accept selection.
1
2
3
4
5
Use the up/down cursor keys to select AV
to adjust.
Adjust chosen AV by using the left/right
cursor buttons.
6
7
Once highlighted, accept selection.
8
The AV SETUP menu is used as a means of instructing your television to recognise what
external equipment is being connected to your TV’s scart, S-VHS and/or phono sockets. If you have
any equipment connected to your TV (either permanently, like a VCR, or temporary, like a camcorder)
it is important that your TV recognises which kind of equipment is connected. For VCR’s, camcorders
and LaserDiscs the appropriate AV VCR mode should be set to ON in the menu. This helps to provide
a steady picture when playing back a recorded picture. If an S-VHS or Hi8 piece of equipment is to be
used, these should be connected to either AV2 or AV3.
...notes on using VCR’s, camcorders and LaserDiscs
played through AV input
important note
It is very important that the AV menu setup is adjusted correctly when connecting external
equipment to your TV - the incorrect setting may lead to picture breaking and splitting. It must
also be noted that when this external equipment is a VCR or camcorder, and your VCR mode
is set to ‘ON’ Progressive Scan is not an option during playback and your TV automatically
displays the picture at 100Hz.
40


Need help? Post your question in this forum.

Forumrules


Report abuse

Libble takes abuse of its services very seriously. We're committed to dealing with such abuse according to the laws in your country of residence. When you submit a report, we'll investigate it and take the appropriate action. We'll get back to you only if we require additional details or have more information to share.

Product:

For example, Anti-Semitic content, racist content, or material that could result in a violent physical act.

For example, a credit card number, a personal identification number, or an unlisted home address. Note that email addresses and full names are not considered private information.

Forumrules

To achieve meaningful questions, we apply the following rules:

Register

Register getting emails for Hitachi C36WF810N at:


You will receive an email to register for one or both of the options.


Get your user manual by e-mail

Enter your email address to receive the manual of Hitachi C36WF810N in the language / languages: English as an attachment in your email.

The manual is 5,27 mb in size.


You will receive the manual in your email within minutes. If you have not received an email, then probably have entered the wrong email address or your mailbox is too full. In addition, it may be that your ISP may have a maximum size for emails to receive.

The manual is sent by email. Check your email

If you have not received an email with the manual within fifteen minutes, it may be that you have a entered a wrong email address or that your ISP has set a maximum size to receive email that is smaller than the size of the manual.

The email address you have provided is not correct.

Please check the email address and correct it.

Your question is posted on this page

Would you like to receive an email when new answers and questions are posted? Please enter your email address.


Info