Easy Dialog System
Ķ
4
❒
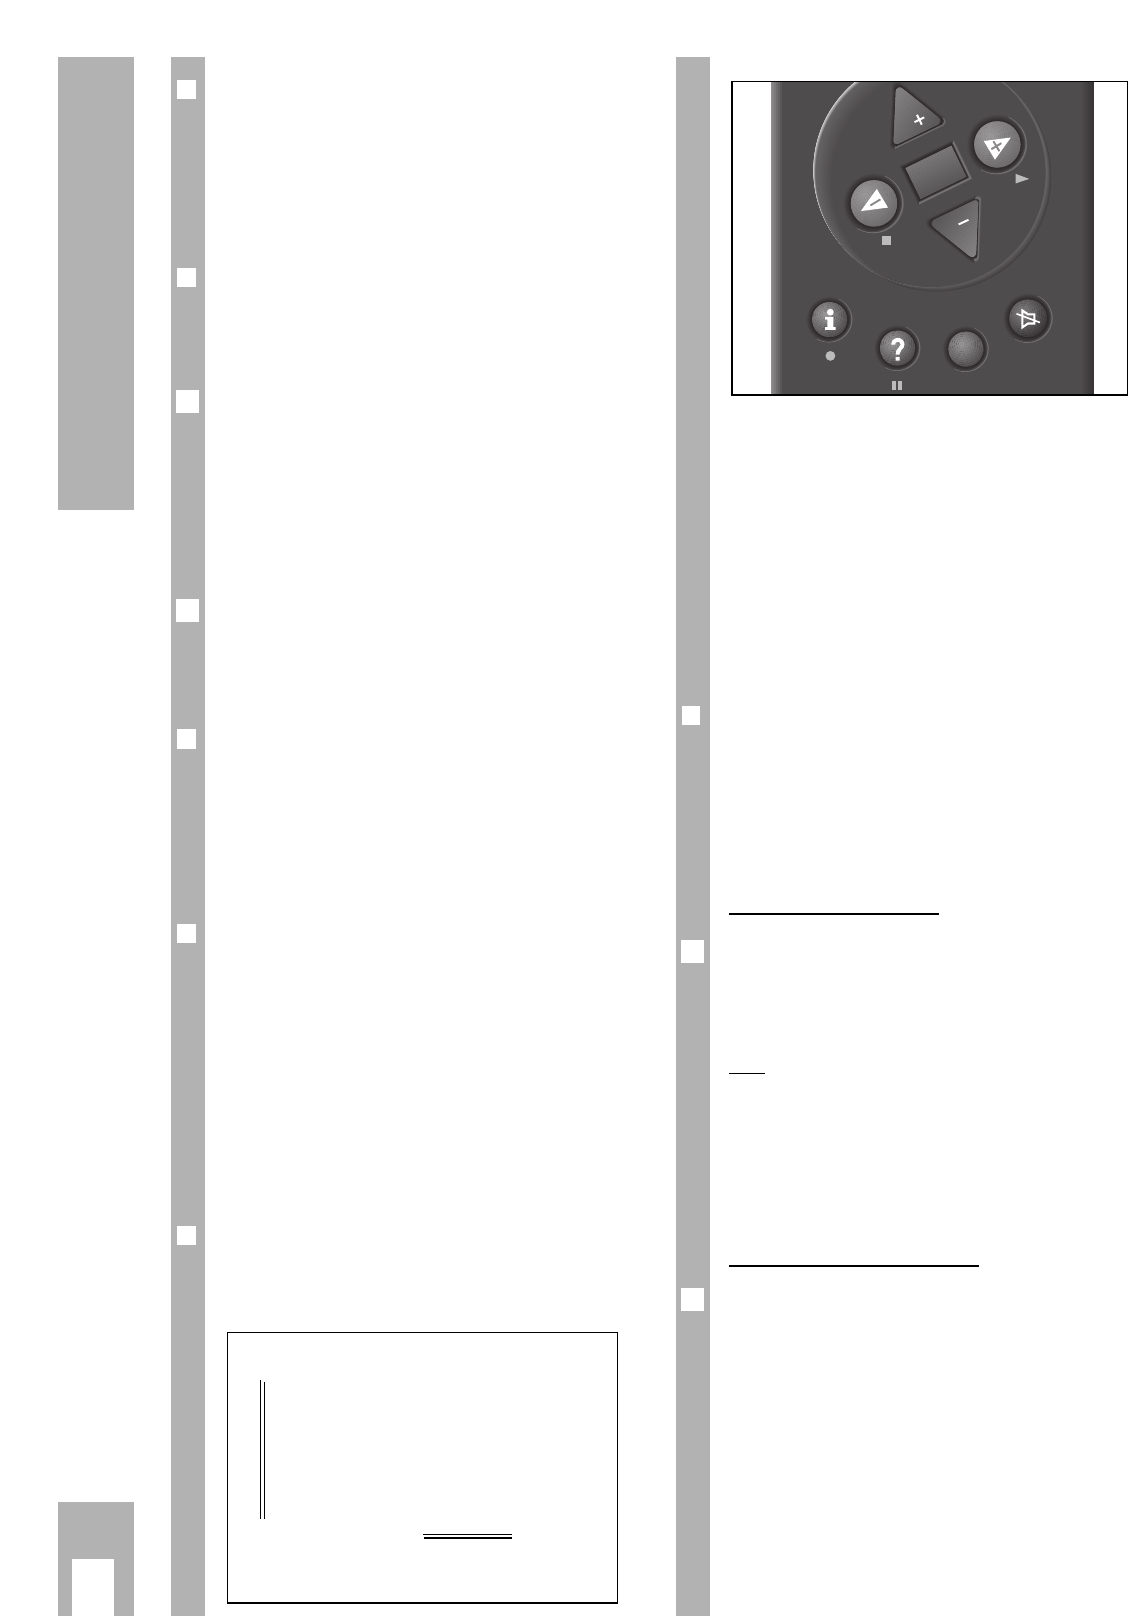
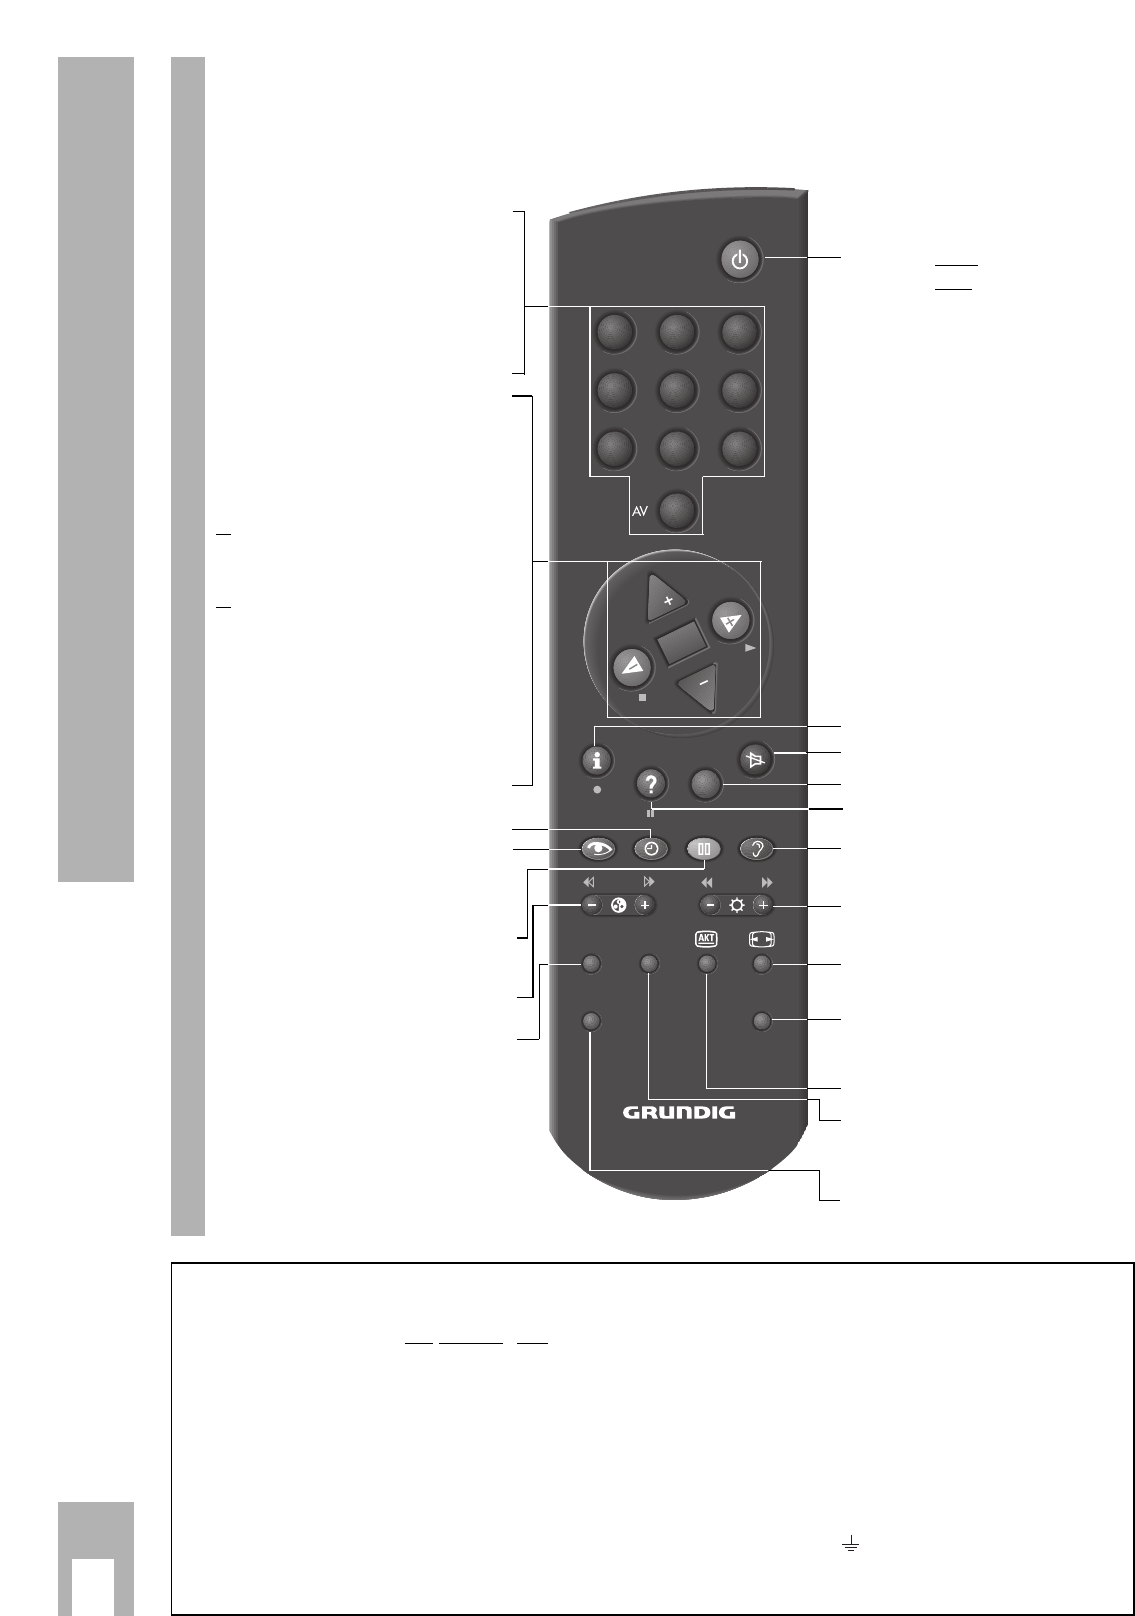
Gerät ein-/ausschalten
Die Taste
¢
IO
am Gerät drücken.
Ń
!
Leuchtet danach nur die LED in der Netztaste, dann
befindet sich das Gerät in Bereitschaft.
Schalten Sie dann mit der Fernbedienung – durch
Drücken der Taste
1
– das Gerät ein.
❒
Programmplätze belegen
Das Gerät ist mit dem automatischen Programm-
suchlauf ATS euro plus ausgestattet, der Ihnen die
Programmplatzbelegung abnimmt.
Nach dem Einschalten des Gerätes bestätigen Sie
die Dialogsprache »Deutsch« mit der Taste
O
.
Wenn die Seite »Dialogsprache wählen« nicht erscheint, drücken Sie die
Taste
.
und anschließend die Taste
O
.
Das Dialogcenter blendet sich ein.
Wählen Sie mit den Tasten
] oder | die Zeile »Automatische Pro-
grammierung« an.
Drücken Sie die Taste
O
.
Wählen Sie mit den Tasten
] oder | die Zeile »Komplette Neupro-
grammierung« an und drücken Sie die Taste
O
.
Bestätigen Sie den Gerätestandort mit der Taste
O
.
Nach Beenden der automatischen Programmplatzbe-
legung erhalten Sie Hinweise zum Easy Dialog
System.
❒
Das Easy Dialog System
Ihr Fernsehgerät ist mit einem »Easy Dialog
System« ausgestattet.
Das heißt, alle Bedienhinweise sind nicht wie sonst
in einer gedruckten Anleitung, sondern in Dialogfel-
dern enthalten, die in das Bild eingeblendet werden
können.
❒
Das Dialogcenter
Das Dialogcenter ist die Steuerzentrale Ihres Fern-
sehgerätes. Durch Drücken der Taste
.
und
anschließendes Bestätigen mit der Taste
O
rufen Sie das Dialogcenter auf. Hier können Sie viel-
fältige Einstellungen vornehmen, Informationen abru-
fen und gezielt Hilfen zur Bedienung Ihres Fernseh-
gerätes (z.B. Erklärung der Fernbedienung, Stich-
wortverzeichnis, Tips und Tricks) erhalten.
Probieren Sie es einfach aus. Sie können nichts
falsch machen
❒
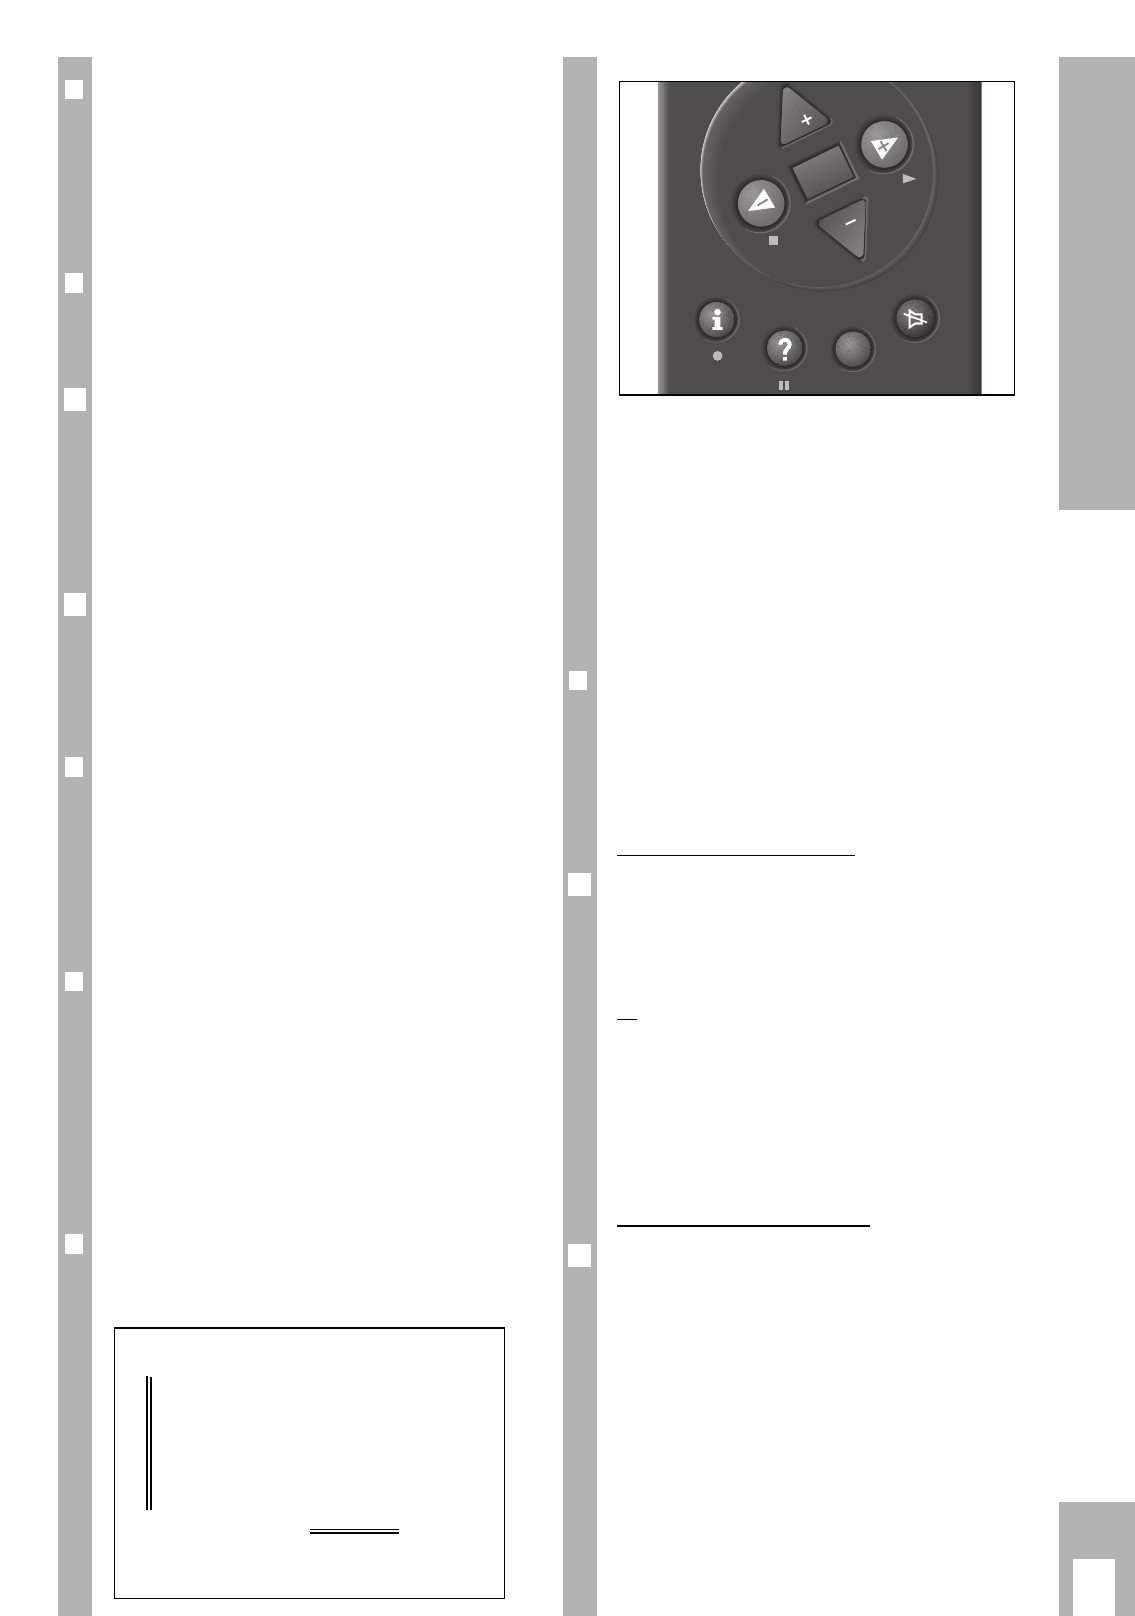
Die Grundbedienung
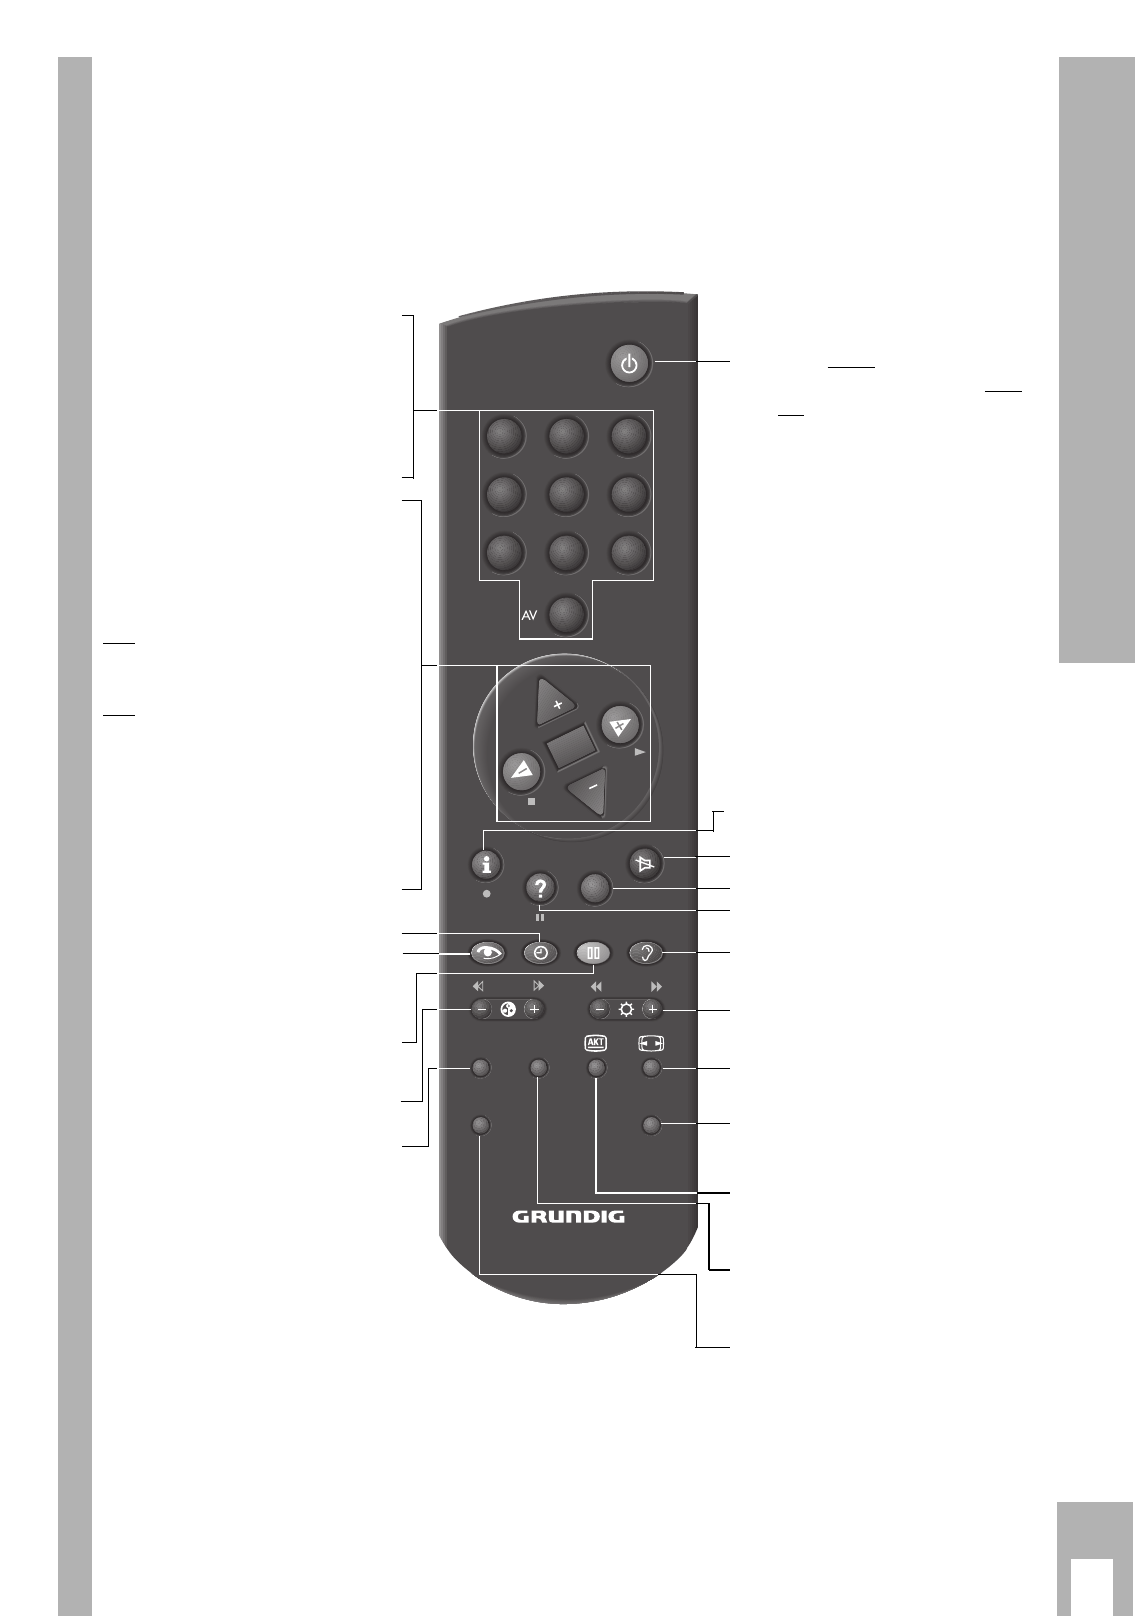
Die Dialogzeichen zeigen bei jedem Bedienschritt
an, mit welchen Tasten bestimmte Funktionen aus-
geführt werden können.
]
|
Zur 1. Seite
xc
O
Aufrufen
¢
?
Hilfe
¢
TXT
TV
2
1
]/ | Bewegen des gelben Balkens nach
oben/unten.
Bei zweiseitigen Menüs wird auf die zweite Seite
»umgeblättert«.
xc
Einstellen von Werten.
O
Aufrufen oder bestätigen der angewähl-
ten Funktion.
¢
TXT
Zurück zum Fernsehbild.
¢
?
Aufrufen der aktuellen Hilfe.
❒
Dolby Surround Pro Logic*
Um den optimalen Höreindruck von Dolby Sur-
round Stereo zu erzielen, benötigen Sie zusätzliche
Lautsprecher-Boxen (siehe Abb. A letzte Seite).
Dazu empfehlen wir Ihnen folgende prinzipielle
Lösungen:
Anschluß Front-Boxen
Als Frontboxen können die bereits vorhandenen
Boxen Ihrer HiFi-Anlage verwendet werden.
Schließen Sie dazu Ihre HiFi-Anlage an die Buchsen
AUDIO OUT an (Abb. B).
oder
Schließen Sie zusätzliche Front-Boxen an die Buch-
sen L und R an. Die Center-Box schließen Sie an die
Buchse Center an (Abb. C).
Ń
!
Die Lautsprecher sollen eine Nennimpedanz von
4-8 Ohm haben.
Anschluß Surround-Boxen
Schließen Sie die Surround-Boxen an die Buchse
Surround an (Abb. D).
Ń
!
Werden mehrere Boxen am Surround-Kanal ange-
schlossen, achten Sie bitte darauf, daß die Nennim-
pedanz von 4 Ohm nicht unterschritten wird.
* Unter Lizenz von Dolby Laboratories Licensing
Corporation.
DOLBY und das Doppel-D-Symbol
ij sind Waren-
zeichen der Dolby Laboratories Licensing Corpora-
tion.
1
1