15
Adjusting the length of the non-slip control sticks
You may change the length of the control sticks to make your transmitter more
comfortable to hold and operate. To lengthen or shorten your transmitter’s sticks,
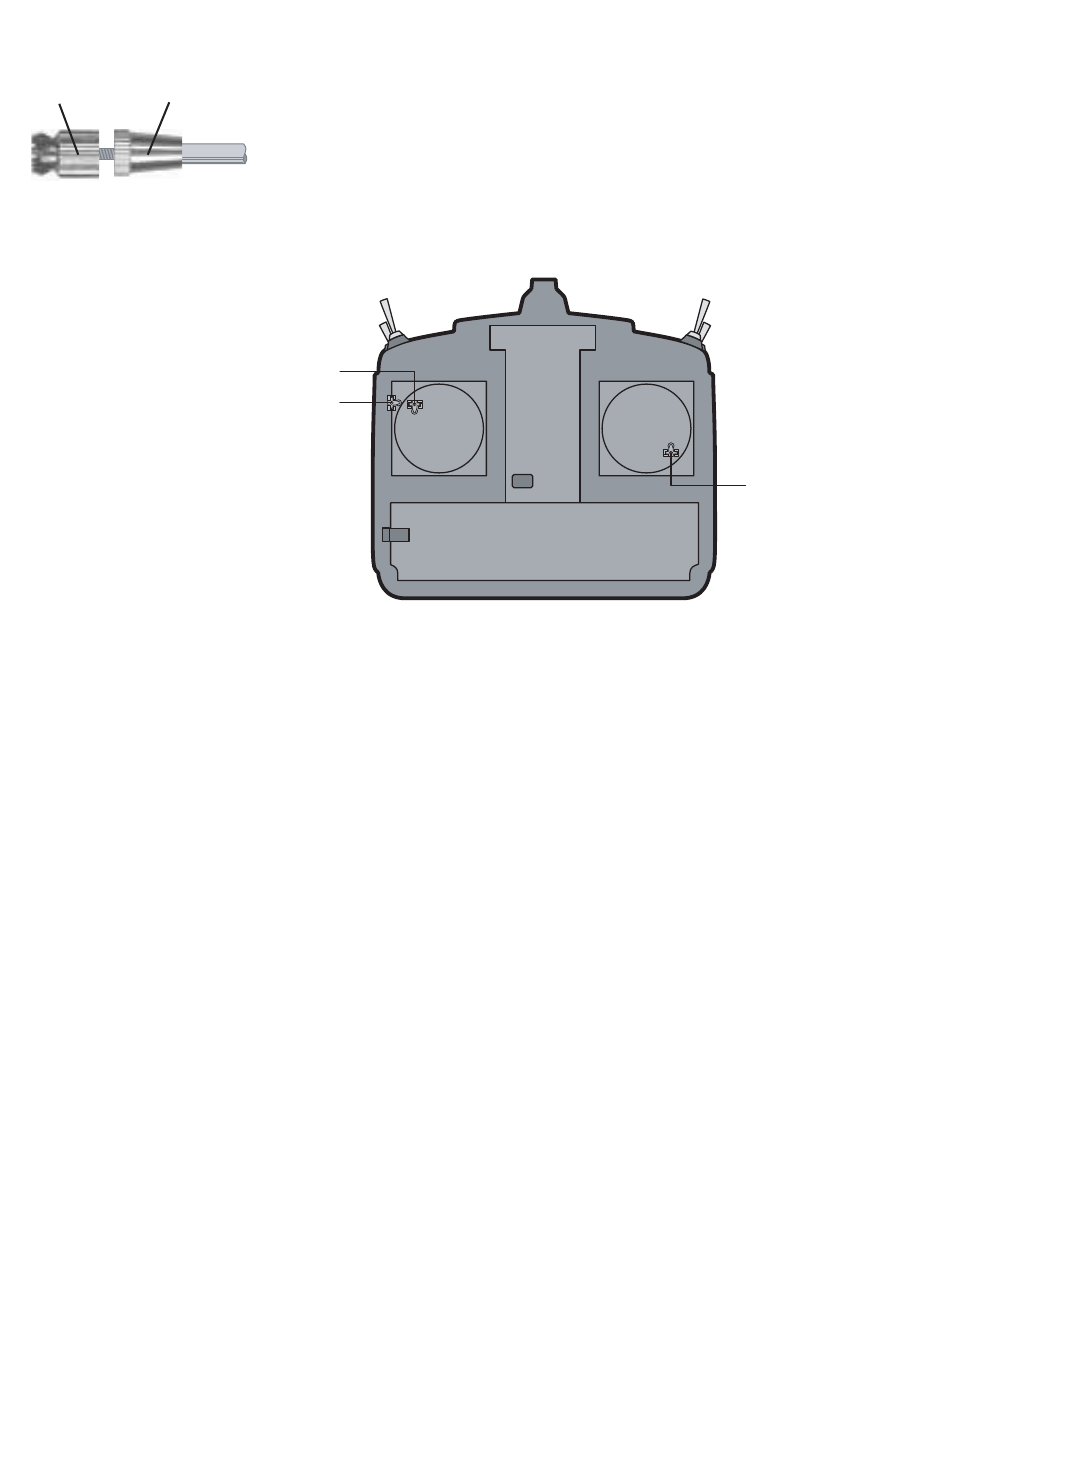
first unlock the stick tip by holding locking piece B and turning stick tip A
counterclockwise. Next, move the locking piece B up or down (to lengthen or
shorten). When the length feels comfortable, lock the position by turning locking
piece B counterclockwise.
Stick lever tension adjustment
You may adjust the tension of your sticks to provide the feel that you prefer for flying. To adjust your springs, you’ll have
to remove the rear case of the transmitter. First, remove the battery cover on the rear of the transmitter. Next, unplug the
battery wire, and remove the battery and RF module from the transmitter. While you are removing the RF module, pay
attention to the location of the pins that plug into the back of the module. Next, using a screwdriver, remove the four screws
that hold the transmitter’s rear cover in position, and put them in a safe place. Gently ease off the transmitter’s rear cover.
Now you’ll see the view shown in the figure above.
Using a small Phillips screwdriver, rotate the adjusting screw for each stick for the desired spring tension. The tension
increases when the adjusting screw is turned clockwise.
When you are satisfied with the spring tensions, reattach the transmitter's rear cover. Check that the upper printed circuit
board is on its locating pins, then very carefully reinstall the rear cover being mindful to guide the RF module connector
pins through the slot in the case. When the cover is properly in place, reinstall and tighten the four screws. Reinstall the
battery, cover and module.
Adjusting Display Contrast
To adjust the display contrast, from the home menu press and hold the End button.
Turn the dial while still holding the menu button:
clockwise to brighten
counterclockwise to darken the display
Let go of the dial and the button.
To reset to default, Hold the END key and press and hold the Dial.
Changing Modes:
Hold down the Mode and End buttons while turning on the Transmitter. The screen reads "STK-MODE". Change this to
the correct mode. Note that this will NOT change the throttle and elevator ratchets, etc. Those are mechanical changes that
must be done by a service center.
Mode 2 transmitter with rear cover removed.