22
Address instellen
Voordat u uw robotmaaier in AUTO modus kunt gebruiken, moet u de
maaier instellen op het juiste basisstation-address. De maaier zal niet
kunnen werken voordat u dit address hebt ingevuld.
- Selecteer de SET optie in het hoofdmenu en bevestig.
- Selecteer de optie ADDRESS en bevestig.
- Voer het juiste ADDRESS in. Dit address kunt u op het label
achterop het basisstation vinden. Zie afbeelding hier onder:
- Start de maaier vervolgens opnieuw op, als de procedure juist
verlopen is zal de basisstation indicator nu op het display te zien
zijn.
Zhejiang Tianchen Intelligence &Technology Co,Ltd
Product name: Robot lawn mower
Model: S510 IP55
Input: 29.4V 2A
Ouput: 29.4V 2A
Made in China
Address ………..
RoHS
Op deze plaats op het label kunt u het address vinden.
Tijdschema instellen
U kunt voor elke dag afzonderlijk bepalen of, en zo ja, welke tijden u de
maaier laat werken.
- Selecteer TIME in het hoofdmenu en bevestig.
- Selecteer SCHEDULE TIME om het tijdschema in te stellen.
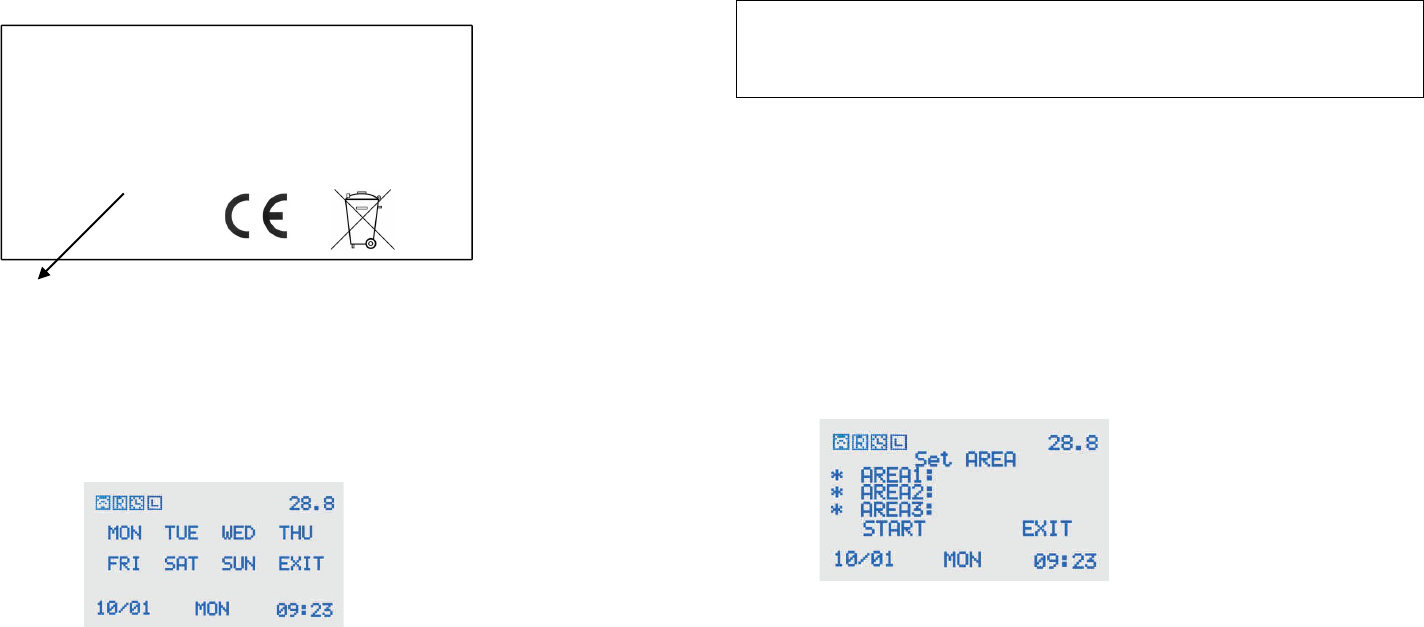
U zult het onderstaande menu te zien krijgen:
- Selecteer de dag (MON, TUE,WED, THU, FRI, SAT, SUN)
waarvan u de werktijden gaat instellen en bevestig.
- Selecteer START TIME en bevestig.
- Voer de gewenste begintijd in en bevestig.
- U kunt ook voor elke zone de gewenste werktijd aangeven.
- Selecteer AREA 1 en bevestig.
- U kunt nu de gewenste hoeveelheid minuten invoeren, en
bevestigen.
- Scrol naar SAVE en bevestig om de invoer op te slaan, of scrol
naar DEL om de invoer te verwijderen.
BELANGRIJKE INFORMATIE
Als u het tijdschema wilt gebruiken moet de functie LINE
(randmaaien) aan staan.
Taal instellingen
- Selecteer SET in het hoofdmenu en bevestig.
- Selecteer LANGUAGE en bevestig.
- Kies de gewenste taal (English / French / German / Danish /
Swedish/ Spanish / Italian) en bevestig.
Gescheiden maaizones instellen
De functie stelt u in staat de efficiëntie van de maaier te verhogen. U kunt
zo een groter gebied opdelen tot 3 gescheiden zones. Deze functie dient u
in combinatie met het tijdschema te gebruiken.
- Selecteer SET in het hoofdmenu en bevestig.
- Selecteer AREA en bevestig.
U zult het onderstaande menu te zien krijgen:
- U kunt de verschillende zones nu aan- of uitzetten door naar de
gewenste zone te scrollen en te bevestigen. Zone 1 staat
standaard aan.