PRIOR TO THE CHIMNEY CONNECTION, TO ENSURE THE CORRECT PERFORMANCE OF THE STOVE, YOU MUST RESPECT THE FOLLOWING TYPES
OF INSTALLATION:
7.5 KW INSERTS
The chimney flue must be installed with 0.5m of pipe of Ø80mm certified to EN 1856-2.
04.4 PELLET KITCHEN
(Electronics p. 19 – 31)
IMPORTANT: THE LENGTH OF THE FLUE DUCT MUST BE OF MAX. 6 METERS WITH A DIAMETER OF 80 mm; EVERY 90° CURVE OR (T) CONNECTION
IS CONSIDERED AS 1 METER OF PIPE.
PRIOR TO THE CHIMNEY CONNECTION, TO ENSURE THE CORRECT PERFORMANCE OF THE STOVE, YOU MUST RESPECT THE FOLLOWING TYPES
OF INSTALLATION:
The pellet stove must be fitted with a 0.5 m-long pipe (Φ 80 mm) certified to EN 1856-2 standard.
The pellet stove, depending on the model you have purchased, can be installed flush or with free-standing installation. In the case of free-standing installation
respect the following distances from combustible wall, Page 10 – 11.
If you want to build the stove into other pieces of the kitchen, you can safely place the furniture close to the hob. The safety distance is given by the heads of the
screws installed in the lid. You can close the space between the lid and the hob with a high-temperature-proof silicone, Page 10 – 11.
This type of stove combines the convenience of pellets with the
proven tradition of an economic kitchen with which it is possible
to prepare meals and heat the environment at the same time.
Thanks to technology, in this case also not only is it possible to
cook but the appliance was created to provide plenty of space to
do so. In addition the pellets are easy to handle, both in terms of
power and for the precise temperature management, with no
mess or clutter. This economical ventilated pellet stove is
equipped with a frontal pellet loading system that is very easy to
use and which makes it extremely practical in everyday use. Its
wide top plate, available in steel or glass ceramic, is perfect for
cooking meals using the heat given off. The fume outlet is top or
rear. In winter, the forced ventilation facilitates rapid and uniform
heating of the entire environment while in summer it is possible
to cook without forced ventilation. Conceived to be functional, the
design was not secondary, in fact the large glass panel was intended to make the fire visible. Available in both the recessed and free-standing version.
Before installing the stove rotate the rear upstand (if any), by loosening the screws.
To install the stove with rear exhaust, it is necessary to break the semi-cut on the rear and then install the pipes.
04.5 PELLET KITCHEN WITH OVEN
(Electronics p. 19 – 31)
IMPORTANT: THE LENGTH OF THE FLUE DUCT MUST BE OF MAX. 6 METERS WITH A DIAMETER OF 80 mm; EVERY 90° CURVE OR (T)
CONNECTION IS CONSIDERED AS 1 METER OF PIPE.
PRIOR TO THE CHIMNEY CONNECTION, TO ENSURE THE CORRECT PERFORMANCE OF THE STOVE, YOU MUST RESPECT THE FOLLOWING
TYPES OF INSTALLATION:
The pellet stove with oven must be installed with 0,5 meters of pipe Φ 80mm certified according to the EN 1856-2 norm.
The pellet stove with oven can be flush mounted or it can have a free installation. Page 10 – 11.
If you want to build the stove into other pieces of the kitchen, you can safely place the furniture close to the hob. The safety distance is given by the heads of the
screws installed in the lid. You can close the space between the lid and the hob with a high-temperature-proof silicone. Page 10 – 11.
Before installing the kitchen it is necessary to rotate the rear backsplash (if present), by unscrewing the screws.
If you want to install the stove with rear outlet please break the pre-cut in the back and then install the pipes.
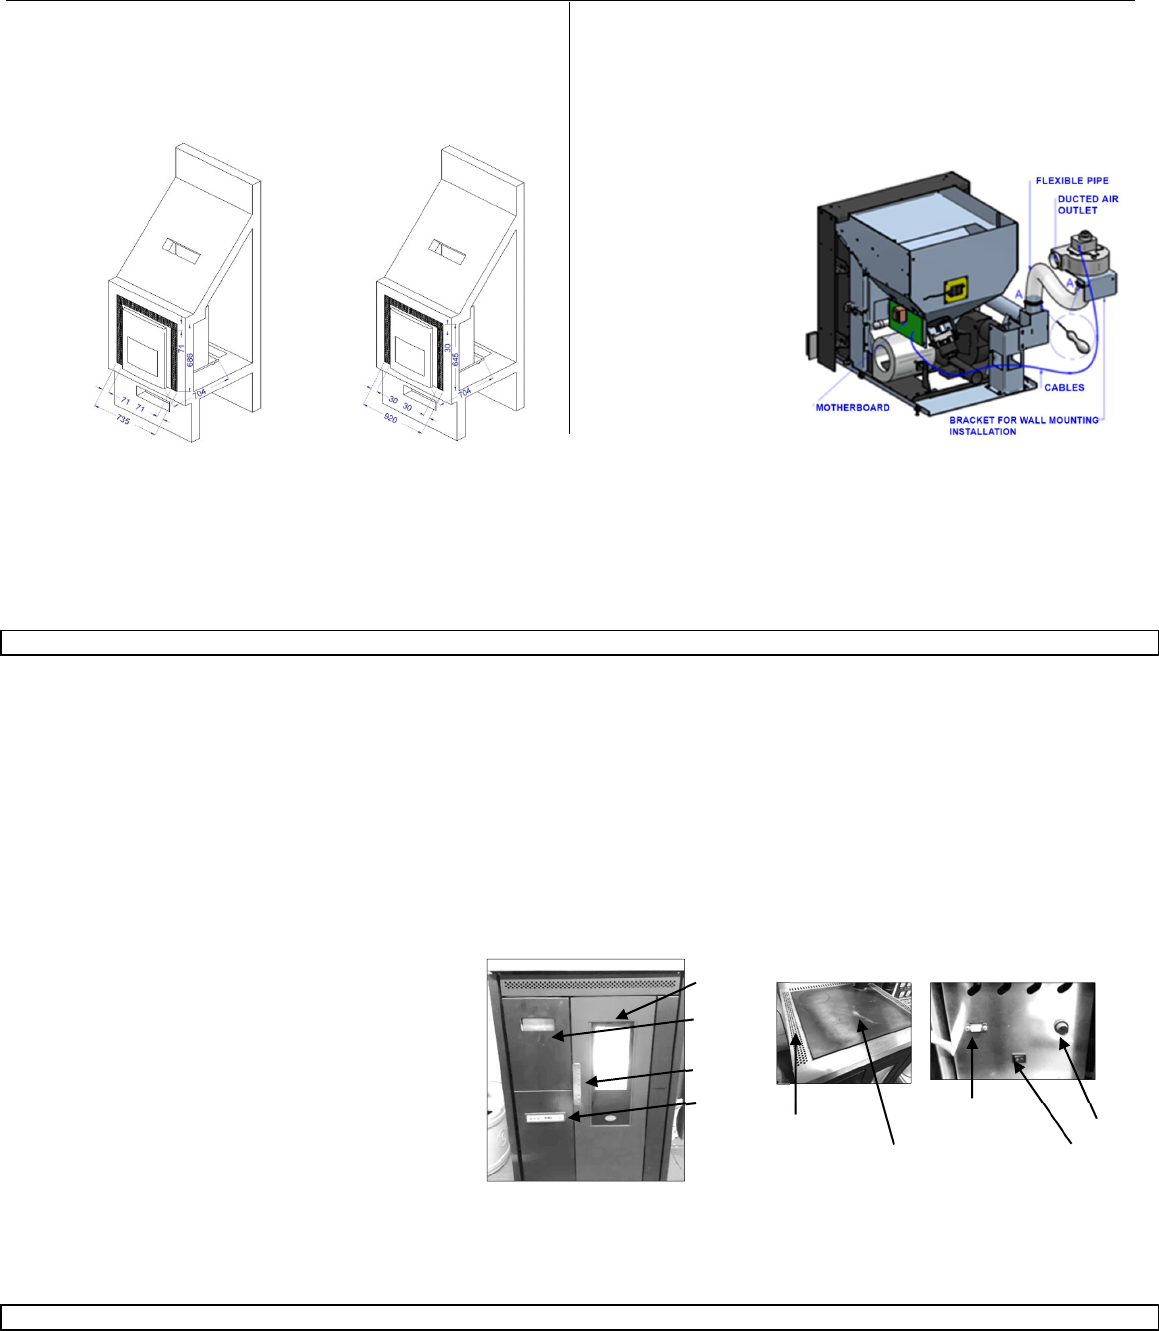
Ducting system
The devices which can be equipped with ducting systems are the 11KW
inserts, not removed for loading.
After installing the insert, fix the bracket with the second blower to the wall in a
comfortable position and if possible, not above the flexible pipe supplied with
the product. Carefully tighten the clamps and connect the blower to another
flexible pipe to channel the air into another room. The second fan setting is on
page 17.
11 KW INSERTS
Suitably isolated the beam above the insert if present. Any extraordinary
maintenance operations shall be carried out by authorised staff, with the
insert switched off, after slightly lifting its front side and pulling it out.
Pellet feeding: remove the upper drawer and fill it with pellet. This operation
can also be performed while the insert is running.
Libble takes abuse of its services very seriously. We're committed to dealing with such abuse according to the laws in your country of residence. When you submit a report, we'll investigate it and take the appropriate action. We'll get back to you only if we require additional details or have more information to share.
Product:
Forumrules
To achieve meaningful questions, we apply the following rules:
First, read the manual;
Check if your question has been asked previously;
Try to ask your question as clearly as possible;
Did you already try to solve the problem? Please mention this;
Is your problem solved by a visitor then let him/her know in this forum;
To give a response to a question or answer, do not use this form but click on the button 'reply to this question';
Your question will be posted here and emailed to our subscribers. Therefore, avoid filling in personal details.
Register
Register getting emails for Eva Calor Erika at:
new questions and answers
new manuals
You will receive an email to register for one or both of the options.
Get your user manual by e-mail
Enter your email address to receive the manual of Eva Calor Erika in the language / languages: English as an attachment in your email.
The manual is 5,83 mb in size.
You will receive the manual in your email within minutes. If you have not received an email, then probably have entered the wrong email address or your mailbox is too full. In addition, it may be that your ISP may have a maximum size for emails to receive.
If you have not received an email with the manual within fifteen minutes, it may be that you have a entered a wrong email address or that your ISP has set a maximum size to receive email that is smaller than the size of the manual.
The email address you have provided is not correct.
Please check the email address and correct it.
Your question is posted on this page
Would you like to receive an email when new answers and questions are posted? Please enter your email address.