619954
43
Zoom out
Zoom in
Previous page
1/51
Next page
Network Management Software
User Manual v1.0
Table of Contents
1.
Installation & Un-installation .............................................................................................. 4
1.1. Install NMS Suite ....................................................................................................................... 4
1.1.1. Step 1: Introduction ......................................................................................................... 4
1.1.2. Step 2: Choose Install Folder .......................................................................................... 5
1.1.3. Step 3: Choose Shortcut Folder ..................................................................................... 6
1.1.4. Step 4: Pre-Installation Summary .................................................................................. 6
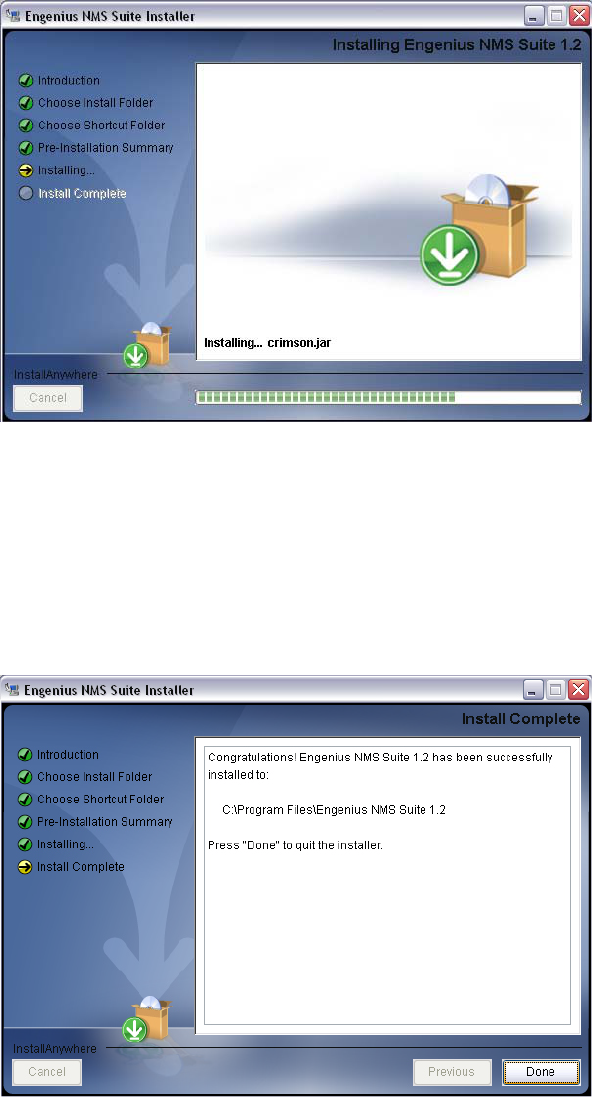
1.1.5. Step 5: Installing .............................................................................................................. 7
1.1.6. Step 6: Install Complete .................................................................................................. 7
1.2. Uninstall NMS Suite .................................................................................................................. 8
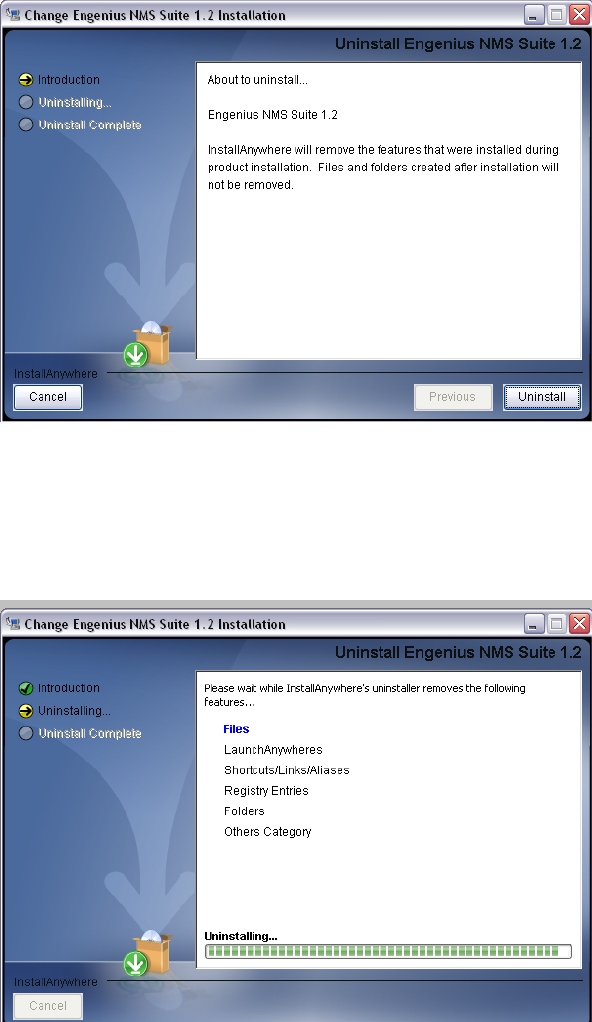
1.2.1. Step 1: Introduction ......................................................................................................... 9
1.2.2. Step 2: Uninstalling .......................................................................................................... 9
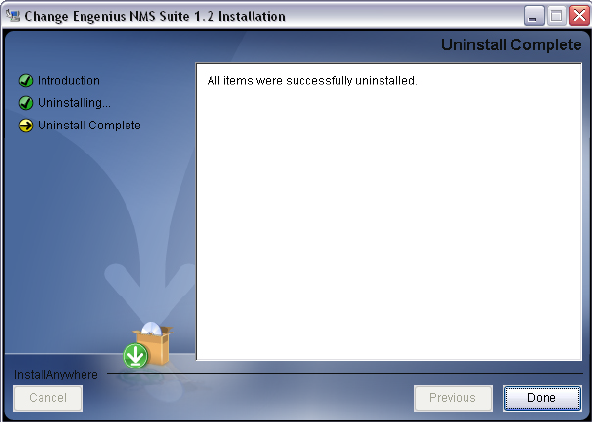
1.2.3. Step 3: Uninstall Complete ........................................................................................... 10
2.
Software Layout ........................................................................................................................ 11
3.
Feature List ................................................................................................................................... 14
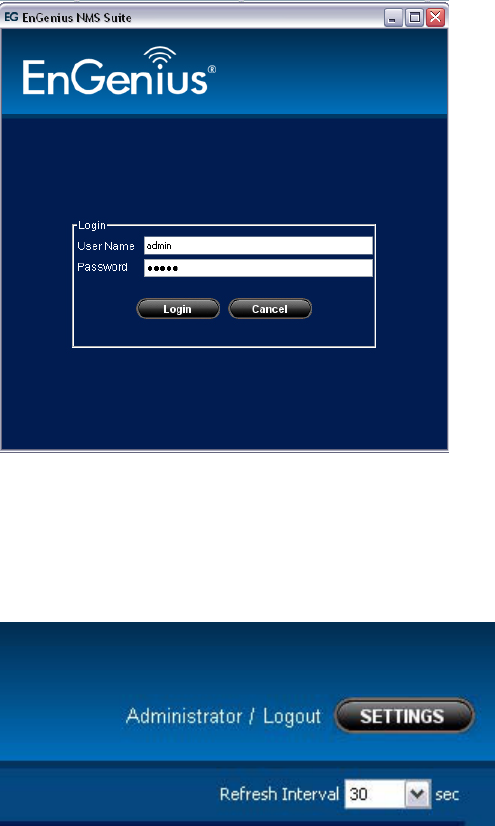
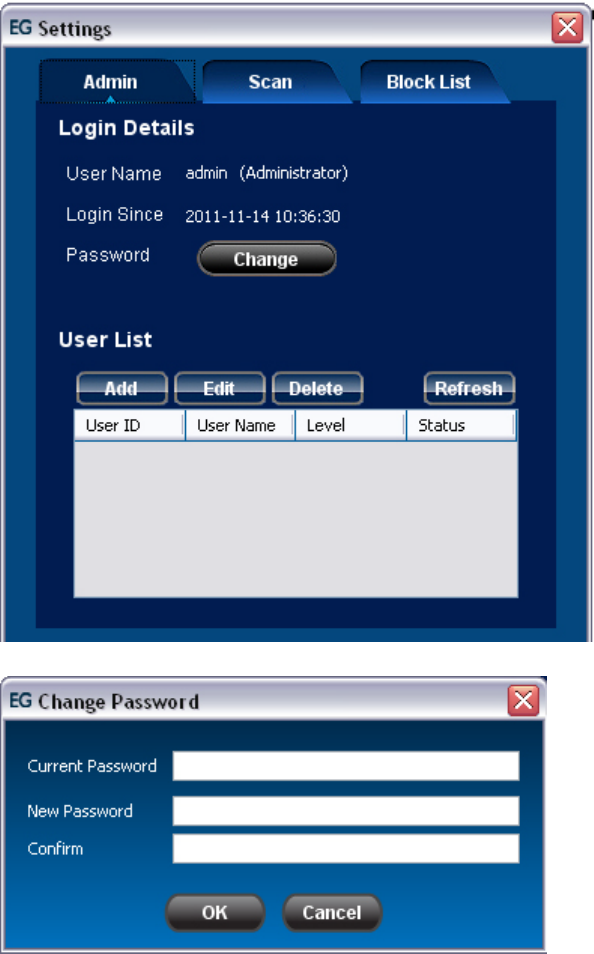
3.1. User Access .............................................................................................................................. 14
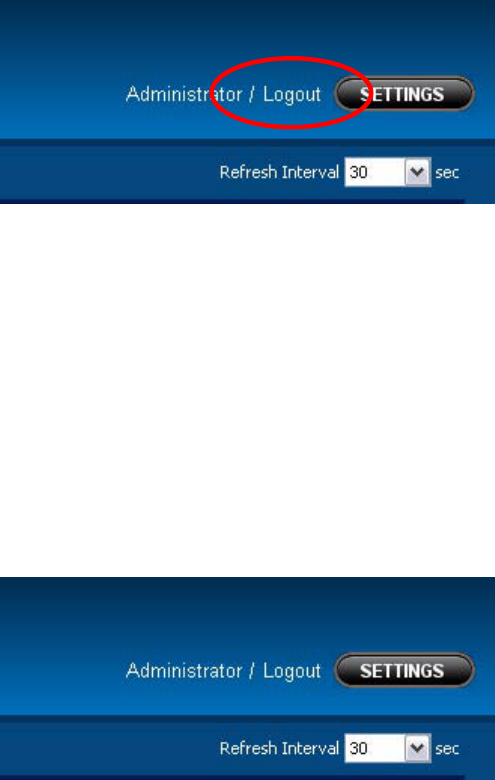
3.2. Log Out ..................................................................................................................................... 15
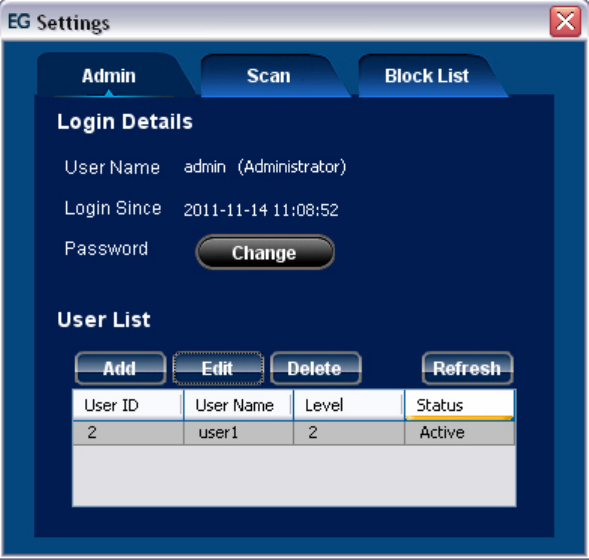
3.3. User Access .............................................................................................................................. 16
3.3.1. Create User ..................................................................................................................... 17
3.3.2. Edit User .......................................................................................................................... 18
3.3.3. Delete User ..................................................................................................................... 19
3.4. Network Discovery .................................................................................................................. 19
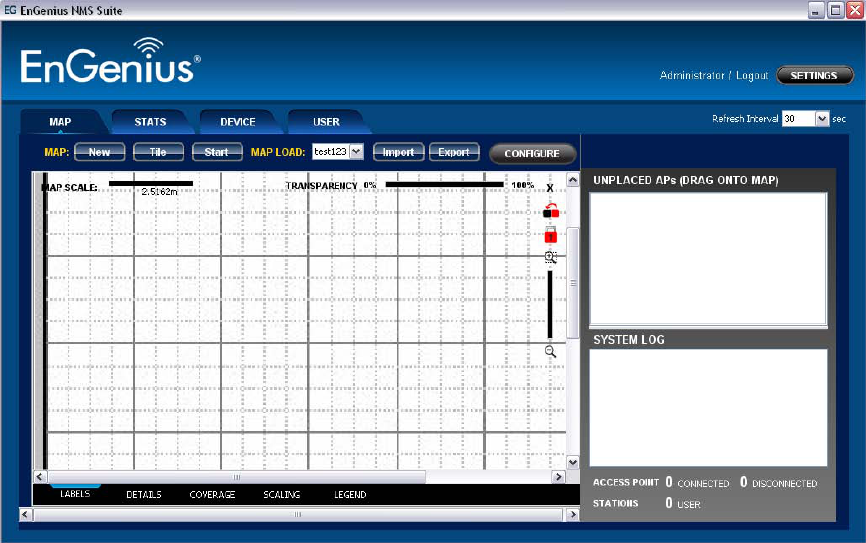
3.5. Map ........................................................................................................................................... 21
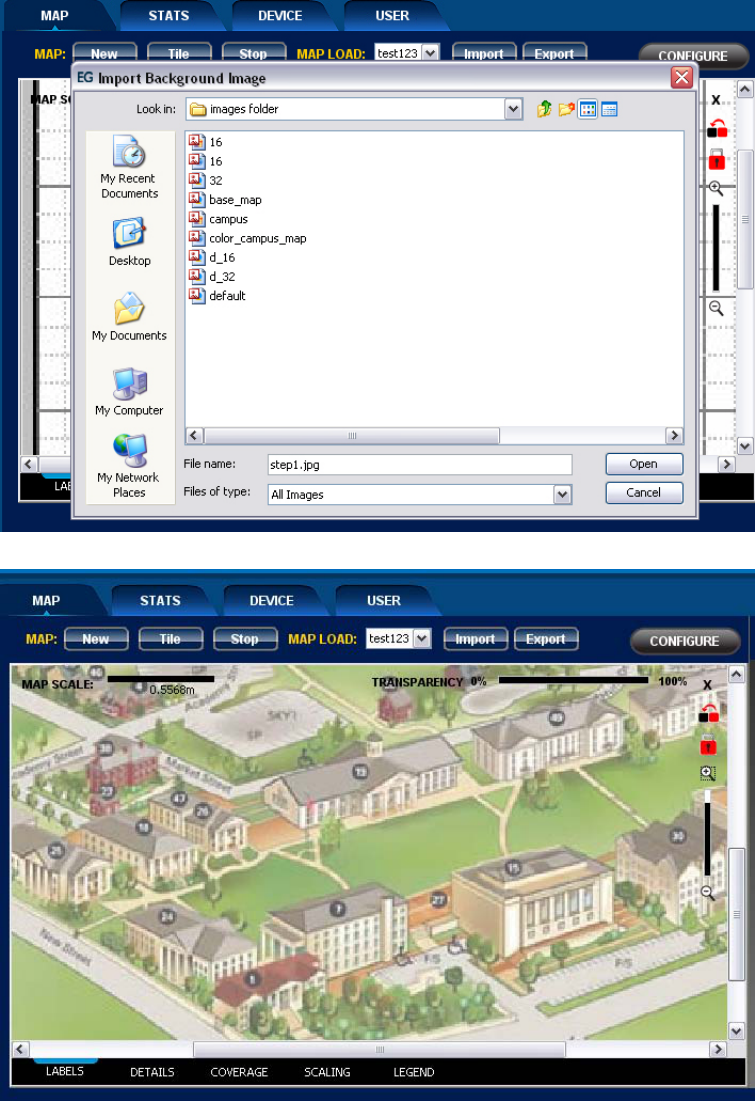
3.5.1. Background Image ........................................................................................................ 21
3.5.2. Transparency .................................................................................................................. 23
3.5.3. Map Zoom ...................................................................................................................... 23
3.5.4. Map Scale ....................................................................................................................... 24
3.5.5. Create New Map ............................................................................................................ 26
3.5.6. Node Labels .................................................................................................................... 28
3.5.7. Node Details ................................................................................................................... 31
3.5.8. Node Coverage .............................................................................................................. 31
3.6. Nodes Properties ..................................................................................................................... 34
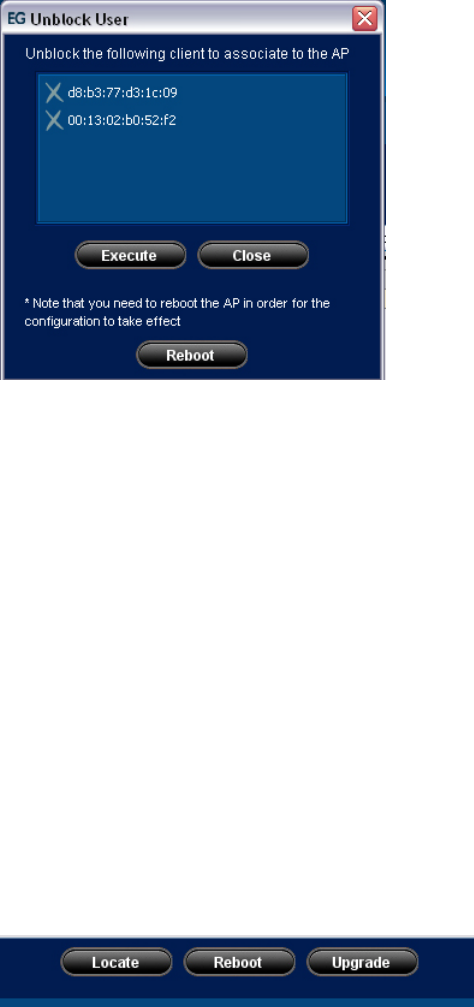
3.7. Block Node ............................................................................................................................... 37
3.8. Import/Export Profile .............................................................................................................. 38
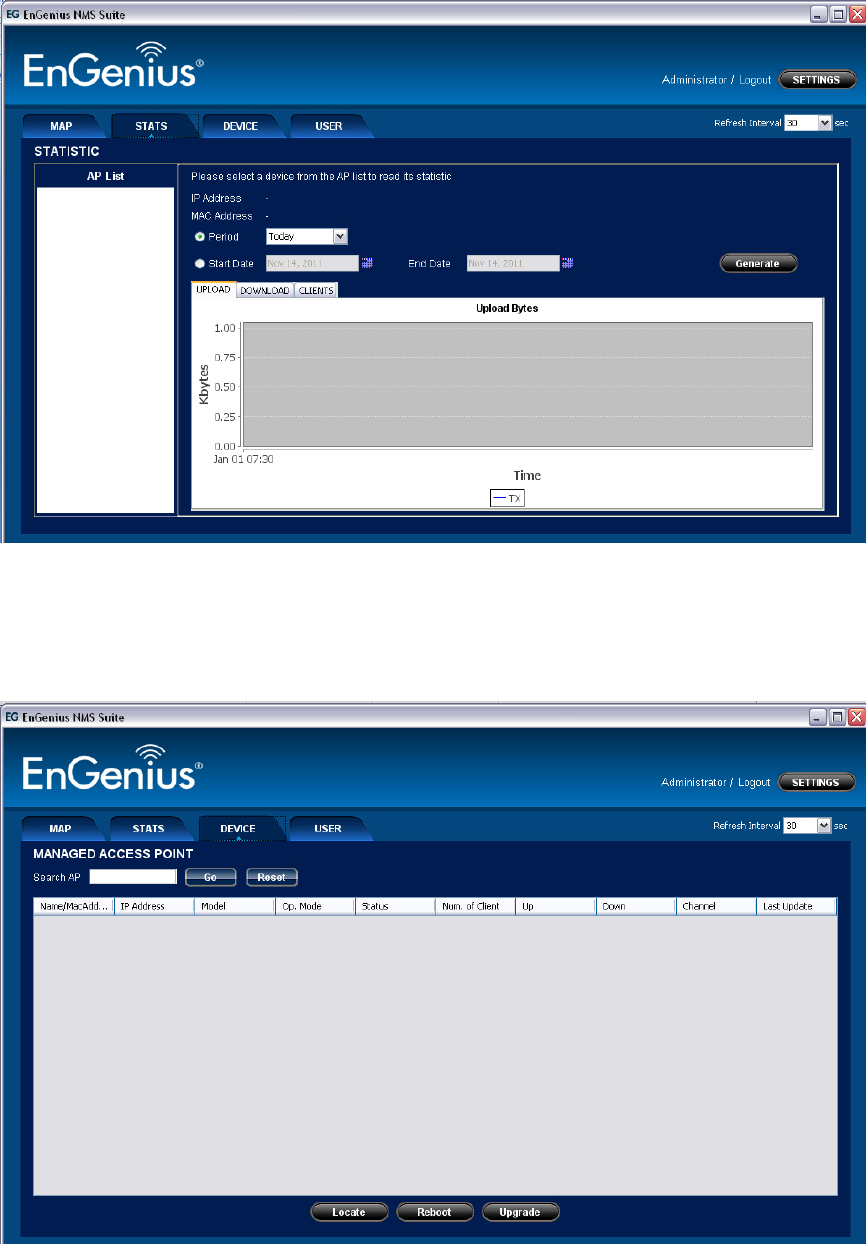
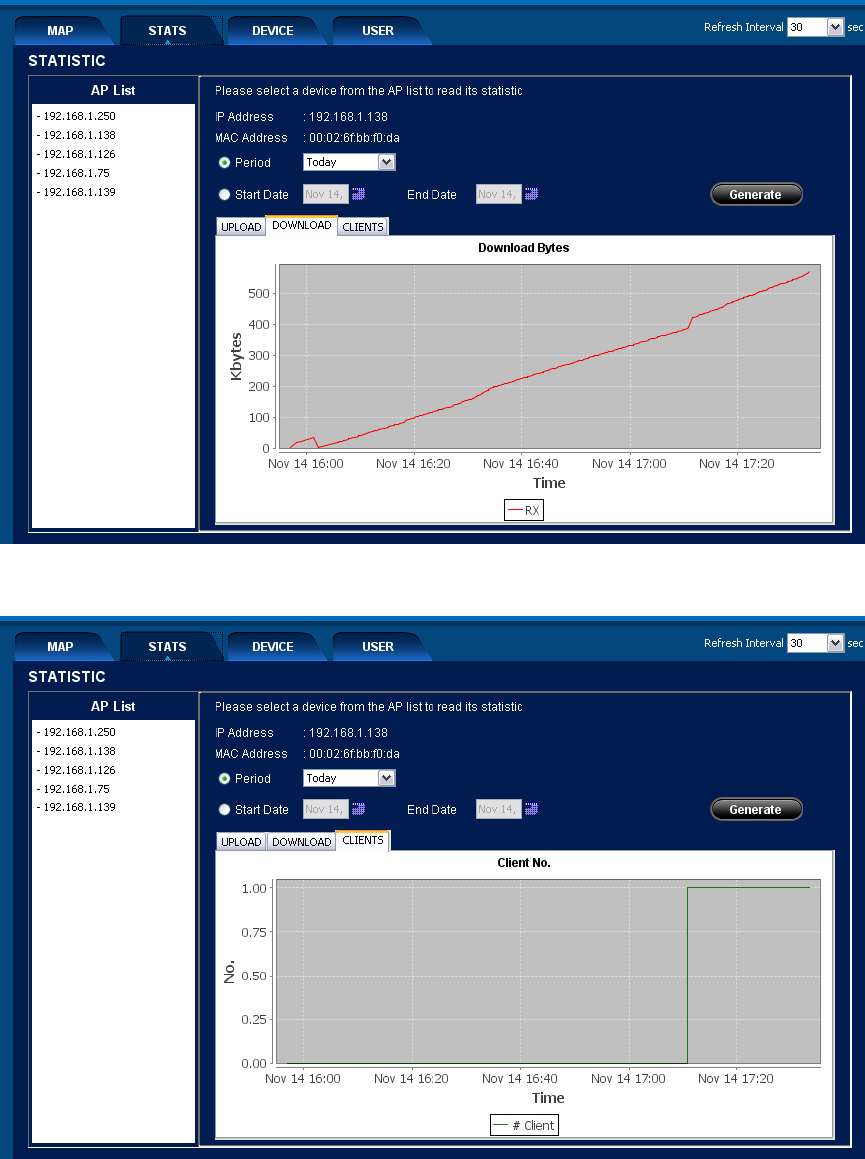
3.9. Stats Tab ................................................................................................................................... 39
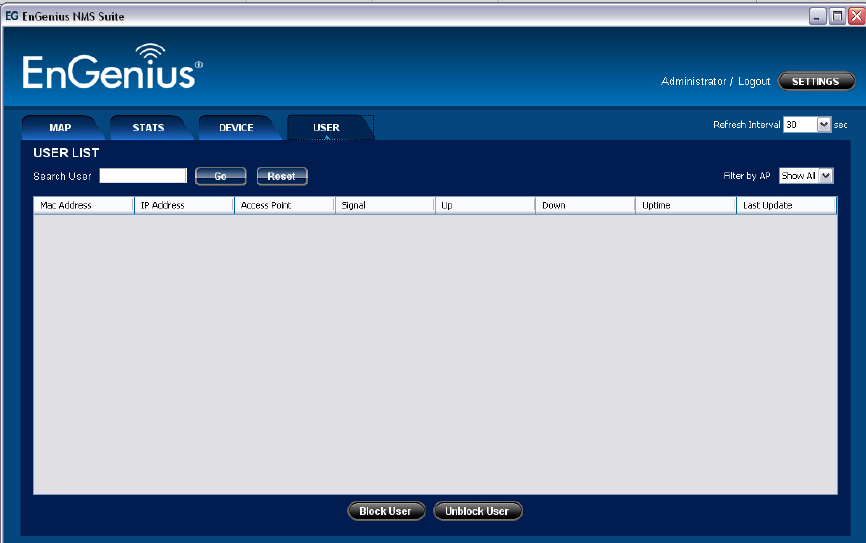
3.10. Device Tab ................................................................................................................................ 41
3.11. User Tab ................................................................................................................................... 41
3.12. Block User ................................................................................................................................ 42
3.13. Unblock User ........................................................................................................................... 42
3.14. Node Reboot ........................................................................................................................... 43
3.15. Node Upgrade ......................................................................................................................... 44
3.16. Quick Config ............................................................................................................................ 46
3.17. Configure Node ....................................................................................................................... 48
3.17.1. General Page .................................................................................................................. 49
3.17.2. Wireless Page ................................................................................................................. 50
3.17.3. Wireless > Security Page
.............................................................................................. 51
1. Installation & Un-installation
1.1. Install NMS Suite
Obtain the installation file engenius_nms_installer.exe (or
engenius_nms_installer.bin for Linux user) from the companion CD or FTP,
and execute it at the system you would like to install. Wait for the installer
to loaded completely and follow the 6 steps of the installation wizard.
1.1.1. Step 1: Introduction
The introduction step describe briefly about the installation. Click the
Next button to proceed to the next step.
1.1.2. Step 2: Choose Install Folder
Select the destination for the installation. By default the wizard select the
Program Files directory for windows user. User can change the directory
by entering the path at the provided field or use the Choose button to
select the desired location. Click the Restore Default Folder button if you
wish to change the install folder back to the default folder.
Click the Next button to proceed to the next step.
1.1.3. Step 3: Choose Shortcut Folder
Choose where to create the shortcut file for the NMS suite launcher. If you
do not need the shortcut file, select the Don’t create icons option at the
bottom.
Click the Next button to proceed to the next step.
1.1.4. Step 4: Pre-Installation Summary
Check the summary of the installation information and if everything is fine,
click the Install button to start the installation process.
1.1.5. Step 5: Installing
The installation is in progress and it might takes about 30 seconds. It
would proceed to the final screen automatically upon completed.
1.1.6. Step 6: Install Complete
Installation is completed. The Engenius NMS Suite is now successfully
installed in your system. Click the Done button to close the installation
wizard. You may now launch your NMS suite from the shortcut you
created just now.
1.2. Uninstall NMS Suite
In order to uninstall the NMS suite from your system, click the uninstaller
file from the short cut. Alternatively, the uninstaller can be found at the
_Engenius NMS Suite 1.x_installation folder located at the NMS install path.
Run the uninstaller entitled Change Engenius NMS 1.x Installation.exe (or
Change Engenius NMS 1.x Installation.bin for the Linux user)
Wait for the uninstaller to loaded completely, and follow the next 3 simple
steps to complete this process.
1.2.1. Step 1: Introduction
A brief description about the process. Click the Uninstall button to start
the uninstallation.
1.2.2. Step 2: Uninstalling
The uninstallation in progress.. This could take about 30 seconds.
1.2.3. Step 3: Uninstall Complete
The uninstall process is completed. The NMS Suite is now removed
successfully from your system. Please note that the files created after
installation such as profiles and data files, will not be removed by the
uninstall process.
2. Software Layout
As overall, the NMS Suite software is divided to four different panels. User can switch
to each panel by selecting the tab button at the top of the suite. The four panels are
Map, Stats, Device and User.
The Map panel is to display the live status of the managed network graphically. The
discovered unit will be plotted on the map area at the left panel. All new located
devices will be added to the Unplaced APs columns before dragged to the map by
the user.
The Stats tab is to monitor the statistic of the node unit that managed by the
software. User can view the record of the upload or download data bytes of the node
by utilizing the available options.
The Device list, meanwhile, listed the discovered node units with their current data.
User can reboot or upgrade firmware of the selected unit at this panel.
The User list tabulates the information of the clients that currently connected to the
node units which are monitored by the NMS.
3. Feature List
3.1. User Access
After installation, user can start the NMS suite via the launcher or shortcut
created during installation process. User is required to enter the correct
username/password in order to use access to the NMS. A window would popup
to prompt user for the login details, and by default, the username and password
are “adminand “admin”.
User is strongly advised to change the default password upon first-time log in to
prevent unauthorized user to access to the system. To change the default admin
password, click the SETTINGS button at the top right corner to initiate the editor.
Select the Admin tab, and click the Change button of the Password field.
Another popup dialog would appear to prompt user for the new password. Enter
the current password and the new password you would like to change and hit
the OK button upon completed.
3.2. Log Out
To log out from the system, click the Logout link at the top corner of the NMS
suite.
3.3. User Access
The admin can create user to co-manage the NMS suite. The only difference
between the admin and normal level user is the ability to manage user. The
admin has the privilege to create, change and delete a user. The user list is
located at the admin setting panel and this table can only be viewed by the
admin. To view the table, click the SETTINGS button at the top right corner to
launch the popup window, and you can find the table at the Admin tab.
3.3.1. Create User
In order to create a new user, click the Add button at the top of the User List,
a dialog box would popup to prompt user for the relevant information.
Enter the new username and provide a password.
At the Status field, option “Active” and “Inactive” are available. Select
“Active” would activate the user account and the user can log in
immediately. By choosing “Inactive” on the other hand, the user account will
be created but the user is not able to log in, until the admin switch the
status to “Active”.
Click OK button upon completing the process and the new user will be
generated.
3.3.2. Edit User
To edit a user account, select the desired user from the user list, and click
the Edit button. A popup dialog would appear to prompt user for the
following action.
Admin can change the status of the selected user by selecting the
appropriate option from the drop down list. If admin wish to update the
password for the user, enable the password fields by checking the Change
Password checkbox. Then, enter the new password at the Password and
Confirm fields and click the Edit button. The change would take place
instantly.
3.3.3. Delete User
In order to delete a user, select the desired user from the User List, and then
hit the Delete button. Confirm your action before proceed because the
change are not reversible.
3.4. Network Discovery
The main purpose of the NMS Suite is to monitor and manage the network.
Therefore it is vital for the system to be able to provide updated data recursively.
By the Engenius NMS Suite, the system discovers the node unit by broadcasting
the SNMP packet. Active device around the network would respond to the NMS
to report their availability so that the NMS can locate them. Hence in other
words, to be able to be monitored by the NMS, these node units must have
SNMP running all the time.
In order to initiate a discovery loop, click the Start button at the top of the map.
The scanning process would begin to search for the active node unit. The
responding unit will be added to the UNPLACED APs area initially. User can then
drag and drop these unplaced units to the map with the appropriate
background map loaded. The discovery process would run recursively by the
interval set at the top right corner of the map. User can select the desired refresh
interval by selecting from the drop down list.
If you wish to stop the discovery process, click the Stop button at the top of the
map and the discovery loop will be stopped.
As stated earlier, the discovery packet is send by broadcasting the SNMP packet,
so user may need to change the SNMP v2c community if the nodes community
is different from the default value “public”.
Click the SETTINGS button at the top of the NMS. The setting window would
appear. Switch to Scan tab and enter the new SNMP community then hit the
Change button. Restart the discovery scan at the map and the changes will be
applied.
Besides, the broadcast IP Address and port can also be configured at this
window. The default values for the broadcast IP and port are 255.255.255.255
and 161 respectively.
3.5. Map
The map is the plotting area for the NMS to illustrate the actual deployment of
the node unit at the site.
3.5.1. Background Image
User can upload an image file to use as the background map for the NMS.
For example, if the NMS is monitoring a network in a campus, user can
upload the map of the campus to the NMS and dragged the node unit to
the position on the map as the actual deployment. The map would help the
user to get a better illustration about the position and arrangement of the
node.
To upload a new background image, click the import
button on the map.
A window would popup to prompt user to select an image file from the
hard disk. Select an appropriate map and click the Open button, then the
new map will be loaded.
3.5.2. Transparency
User can alter the transparency of the background map in order to achieve
perfect illustration of the nodes and map. The transparency tool is located at
the top of the map. Click the 0% to decrease the visibility and 100% to
inverse.
3.5.3. Map Zoom
User can zoom in and out the map to display to get the most suitable size.
User is advised to zoom in the map to the max when plotting the node on
the map to get the most accurate coordinate.
The zoom tool is located at the right side of the map. To zoom in, click the
Zoom in
button, and to zoom out click the Zoom out button.
(Zoom In 100%)
(Zoom Out 40 %)
3.5.4. Map Scale
The map scale is the ratio of the distance on the map to the corresponding
distance on the actual ground. The scale ruler is located at the top left
corner of the map.
By referring to the following image, the map scale is read as 0.4633m per
100 pixels on the map. In other words, every 100 pixels on the map indicate
0.4633 meters on the actual site. Note that the width of the black bar at the
scale is equals to 100 pixels.
In order to define the scale of the map, look for the Scale option at the
bottom of the map pane, as illustrated.
Once you click the Scaling link, a help message would popup to instruct the
user to pin on two points on the map to use as a reference distance.
Use your mouse to click on two points, A and B at the map as illustrated at
the following figure. Click the Next button to proceed to the next step.
Then the help message would prompt the user to enter the actual distance
for the reference distance you define at the last step. Enter the desired value
and click the OK button to complete and the new scale value will be
displayed at the scale ruler at the top of the map.
3.5.5. Create New Map
At some occasion, user might have to use more than one map to display the
node deployment, for example, when the node units are located at different
floor on the same building. User can then create another map, with different
background image, and place the node unit accordingly.
To create a new map, click the New button at the toolbar. A dialog box
would appear to prompt user for the new map name and image file.
A
B
Hit the OK button upon complete and a new map will be added in. When
more than one map is loaded, the maps are by default displayed in cascade
form. User can switch to any map by using the Map Load drop-down box at
the toolbar.
Alternatively, user can switch the map view to tile mode by click the Tile
button next to the New button at the tool bar. The NMS will then look like
the following:
In order to switch back to the default cascade mode, hit the Cascade button
now located next to the New button.
3.5.6. Node Labels
By default, the node displayed on the map is labeled with their IP Address.
However the IP Address could be some meaningless number for some
people. Hence the NMS suite allow user to switch the type of label for the
node unit. There are three types of labels: IP Address, Mac Address or Alias.
To change the label type, click the LABELS link at the bottom of the map. A
dialog box would popup to prompt user for the selection. Select the desired
type and click the OK button. See the following images for the illustration:
Label Type: IP Address
Label Type: Mac Address
Label Type: Alias
The default alias for every node is the system name that read from the
device unit. User can edit the alias by right click on the node, select Change
Alias from the popup menu.
The following dialog would appear to prompt user for the new alias. Enter
the new alias for the selected node and click the OK button and the new
alias will be saved.
3.5.7. Node Details
User can switch the NMS to display the system information of the nodes
plotted on the map by select the DETAILS link at the bottom bar. With this
option user does not need to read the node one by one to get these
information.
3.5.8. Node Coverage
When switch to Coverage view, user can view the estimated coverage area
for each node. Please note that the coverage map is plotted base on
transmit power of the node, with the assumption value of cable loss and
antenna gain.
Upload Data (Kbytes)
Download Data (Kbytes)
Client Count.
Hit the Execute button to remove the selected client from the block list of the
node unit. Upon successfully remove, some node unit requires a reboot for the
changes to take effect. For this purpose, administrator can click the Reboot
button at the bottom to complete the task.
3.14. Node Reboot
There are several occasion where user would need to reboot the node unit for
certain purpose. The reboot command can be issued to the unit via NMS by two
methods.
The first method is through the Device tab. Switch the NMS view to Device tab
and select the desired unit to reboot. User can select more than one unit from
the list. Next, click the Reboot button at the bottom of the list to invoke the
Reboot window.
The second method is via the node Properties window. Launch the Properties
window of a specific node and click the Restart button.
43


Need help? Post your question in this forum.

Forumrules


Report abuse

Libble takes abuse of its services very seriously. We're committed to dealing with such abuse according to the laws in your country of residence. When you submit a report, we'll investigate it and take the appropriate action. We'll get back to you only if we require additional details or have more information to share.

Product:

For example, Anti-Semitic content, racist content, or material that could result in a violent physical act.

For example, a credit card number, a personal identification number, or an unlisted home address. Note that email addresses and full names are not considered private information.

Forumrules

To achieve meaningful questions, we apply the following rules:

Register

Register getting emails for Engenius Network Management Software at:


You will receive an email to register for one or both of the options.


Get your user manual by e-mail

Enter your email address to receive the manual of Engenius Network Management Software in the language / languages: English as an attachment in your email.

The manual is 5,67 mb in size.


You will receive the manual in your email within minutes. If you have not received an email, then probably have entered the wrong email address or your mailbox is too full. In addition, it may be that your ISP may have a maximum size for emails to receive.

The manual is sent by email. Check your email

If you have not received an email with the manual within fifteen minutes, it may be that you have a entered a wrong email address or that your ISP has set a maximum size to receive email that is smaller than the size of the manual.

The email address you have provided is not correct.

Please check the email address and correct it.

Your question is posted on this page

Would you like to receive an email when new answers and questions are posted? Please enter your email address.


Info