24
Never install in locations exposed to aggressive
air.
Comply with all specified minimum distances
(see Important notes on installation).
The indoor and outdoor devices must only ever
be installed in a vertical position.
2. Installation accessories
Before you start to install the devices, please check
that all the installation accessories have been
supplied.
Item Designation Quantity
1 Mounting plate 1
2 Screw 4x30 6
3 Wall hole cap (half) 2
4 Wall hole tube 1
5 Plastic clamp 2
6 Remote control with holder 1
7 Battery, Micro LR03, 1.5V 2
8 Holder for drainage water hose 1
3. Installing the indoor device
It is imperative that you comply with the installation
instructions.
3.1 Before you start installation
Select the location for the indoor device (follow
the previous notes on selecting the location for
installation).
Check that the available mains voltage is the
same as the voltage specified on the rating plate.
Fit appropriate insulation, supplied by the
customer, to the coolant tubes.
3.2 Fitting the mounting plate
The mounting plate for the indoor device must be
fitted horizontally to the wall. In doing so, it is
imperative that you comply with all specified
distances. Mark and drill the holes for fastening
the mounting plate, and then firmly fasten with
dowels and screws. In order to prevent vibrations
on the indoor device, make sure that there are
no gaps between the wall and the mounting
plate.
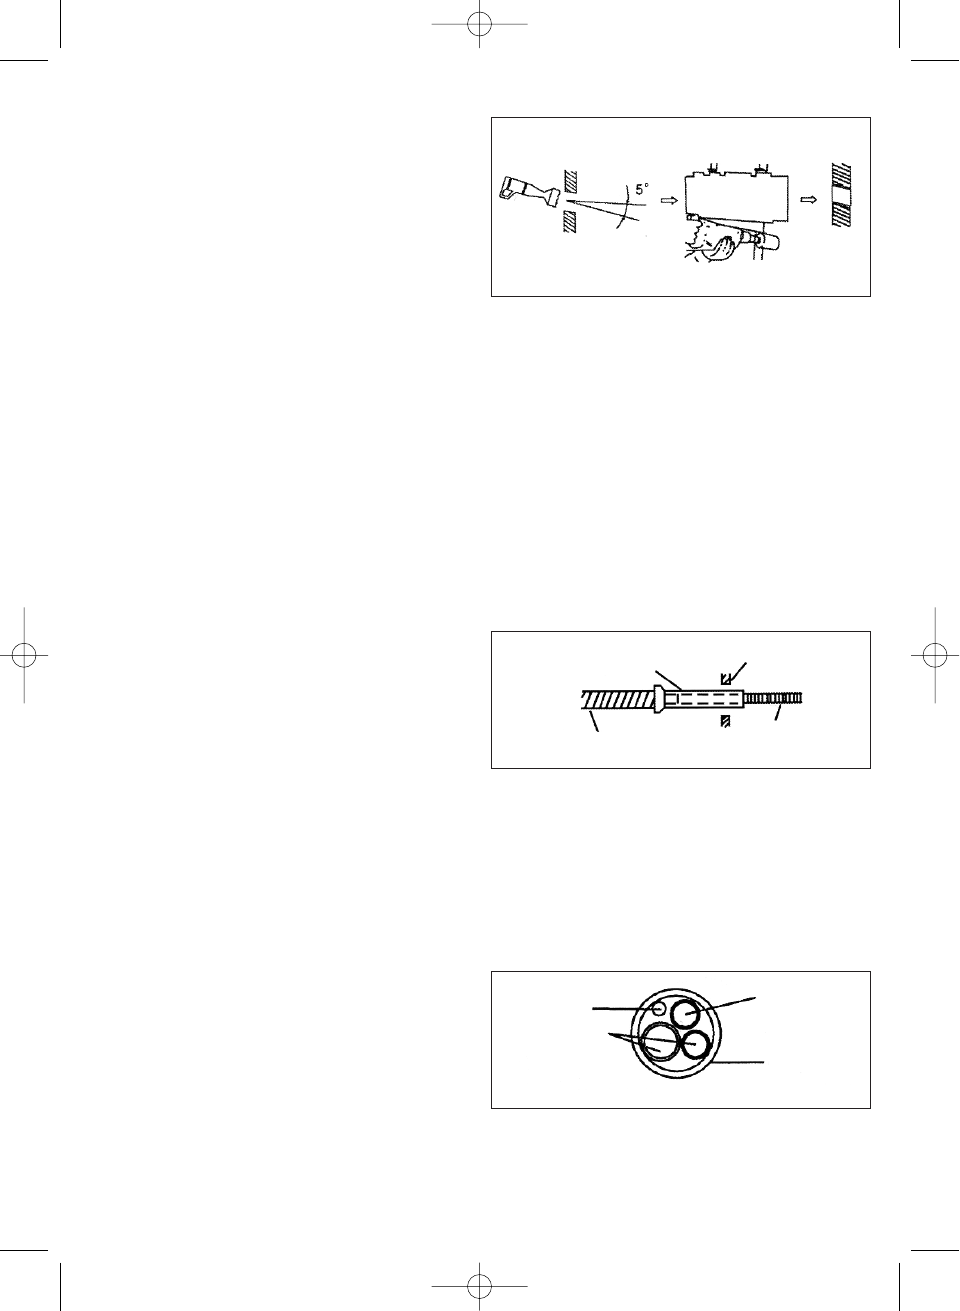
3.3 Drilling the hole through the wall
Drill the hole through the wall for the lines/hoses
using a 65mm drill bit, drilling from the inside to
the outside at an angle downwards of approx. 5°.
Then insert the wall hole tube in the hole in the
wall.
3.4 Fitting the condensation water drainage hose
The drainage water hose must be run to the
outside with a drop. It is imperative that there are
no bends or kinks. The end of the drainage hose
must not be situated in a container of any kind in
which water can collect. Any water held back in
the drainage water hose could lead to water
damage.
Slide the additional drainage hose onto the
mounts on the drainage hose already fixed to the
indoor device. Fasten this connection point with
adhesive tape, checking that it is fully sealed as
you do so. Wrap the section of the drainage hose
in the hole in the wall, plus approx. 10 cm in front
of the wall on both the inside and outside, in
insulation material.
3.5 Wrapping the lines/hoses in protective tape
Please note that the power cable is not to be fed
through to the outside. All tubes, electric cables
and the drainage water hose have to be wrapped
with the supplied protective tape. Depending on
whether the lines are right-hand or left-hand
versions, the corresponding bushing
preparations must be removed from the indoor
device.
3.6 Final installation of the indoor device
Feed the package of lines/hoses through the
hole in the wall.
inside Outside
Inside
Insert the wall
hole tube
Outside
Inside
Insulation
Drainage hose
electric
cable
Drainage hose
Protective tape
Coolant
hose
additional drainage
hose
Wall