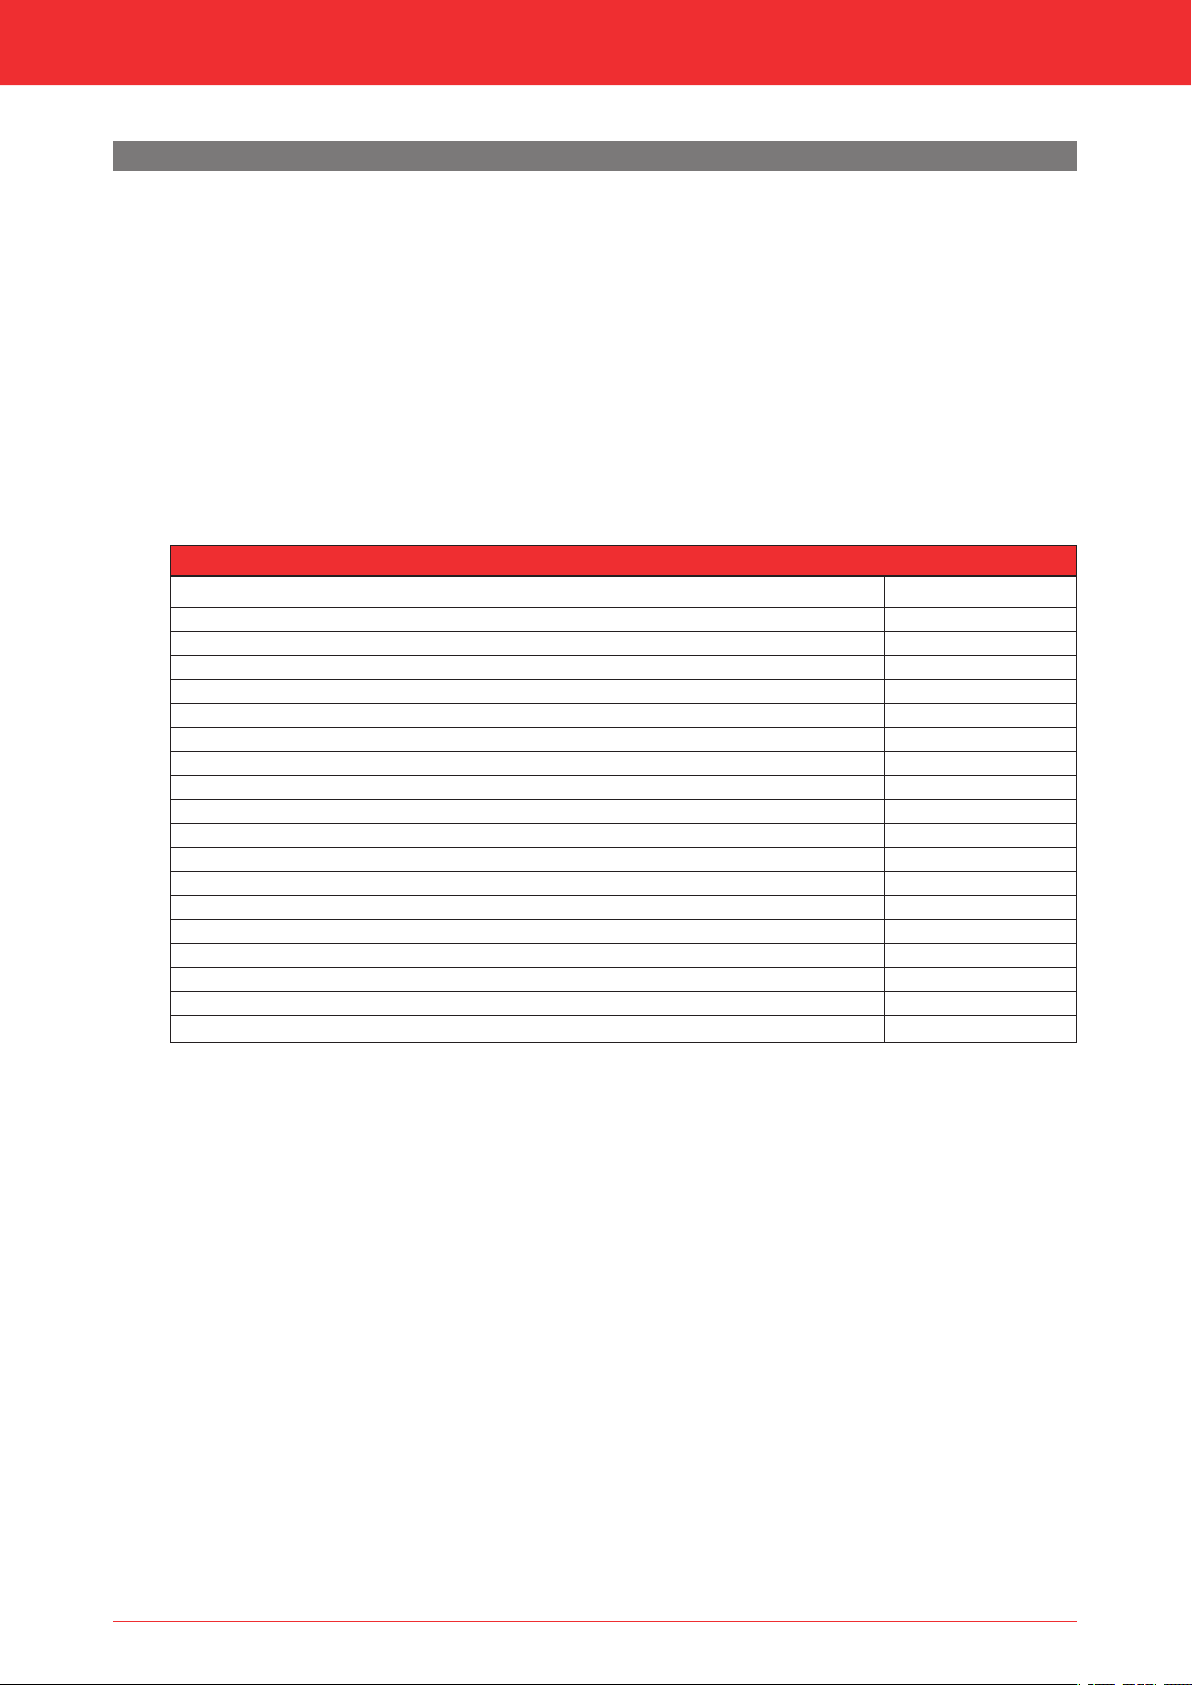
6. Preparation6.1 UnpackingNote the following items when removing the packaging:1Remove all packaging materials.1Remove all supplied components in, on and/or at the appliance.1Check the appliance and accessories for damages (during transport).1If necessary, contact your supplier.1Never install an appliance that is damaged!1Remove any screws that are used to fix the appliance to a platform or pallet.3The glass pane(s) is/are made of a ceramic material. Very small irregularities in the glass panes cannot be avoided, but are within the required quality standards.3Keep plastic bags away from children.Table 6-1 indicates which components should be available after removing the packaging.1Contact the supplier if you find that not all components have been supplied.1Packaging must be disposed of in accordance with the regulations.Installation manual86.2 Type of gasThe data plate indicates for which type of gas, gas pressure and for which country this appliance is intended.The data plate can be found on the appliance or can be attached to a chain to which it should remain attached.3Check whether the appliance is suitable for the type of gas and the gas pressure used at the location.6.2.1 Gas type conversionIn order to convert this appliance to a different type of gas, please contact DRU's service department and ask for the possibilities. The conversion should be performed by a recognised gas installer.6.3 Gas connectionPlace a gas tap in the gas pipe in accordance with the applicable regulations. The gas connection on the gas control islocated next to the receiver (fig. 6-2 (Gin)).3-Make sure there is no dirt in the gas pipes and connections.-No soldering may take place at the flexible gas hose(s), as this could cause leaks.The following requirements apply to the gas connection:-Use a gas pipe with the correct dimensions, so that no pressure loss can occur.-The gas tap must be approved (in the EU this will be the CE mark).-You should always be able to reach the gas tap.Table 6-1: Parts included with the deliveryPartInstallation manualUser manualWood set (including: chips, vermiculite and ash)Glow materialRestrictor slideAir inlet guideRemote controlMains cable Control hatchWall bracketAssembly set platformMantle ironBack-up self-tapping screw for benefit of glass pane assemblyKey bolt M8 (including: Hexagonal nut M8 and Washer M8)Compression fitting 15 mm x G3/8”Socket spanner 8 mmAllen key 2.5 mmSuction cup (only Maestro 80/2 RCH)Number1x1x1x1x1x1x1x1x1x1xSeparately availableSeparately availablenx4x1x1x1x1x
Libble takes abuse of its services very seriously. We're committed to dealing with such abuse according to the laws in your country of residence. When you submit a report, we'll investigate it and take the appropriate action. We'll get back to you only if we require additional details or have more information to share.
Product:
Forumrules
To achieve meaningful questions, we apply the following rules:
First, read the manual;
Check if your question has been asked previously;
Try to ask your question as clearly as possible;
Did you already try to solve the problem? Please mention this;
Is your problem solved by a visitor then let him/her know in this forum;
To give a response to a question or answer, do not use this form but click on the button 'reply to this question';
Your question will be posted here and emailed to our subscribers. Therefore, avoid filling in personal details.
Register
Register getting emails for DRU Maestro 80-3 RCH at:
new questions and answers
new manuals
You will receive an email to register for one or both of the options.
Get your user manual by e-mail
Enter your email address to receive the manual of DRU Maestro 80-3 RCH in the language / languages: English as an attachment in your email.
The manual is 7.09 mb in size.
You will receive the manual in your email within minutes. If you have not received an email, then probably have entered the wrong email address or your mailbox is too full. In addition, it may be that your ISP may have a maximum size for emails to receive.
If you have not received an email with the manual within fifteen minutes, it may be that you have a entered a wrong email address or that your ISP has set a maximum size to receive email that is smaller than the size of the manual.
The email address you have provided is not correct.
Please check the email address and correct it.
Your question is posted on this page
Would you like to receive an email when new answers and questions are posted? Please enter your email address.