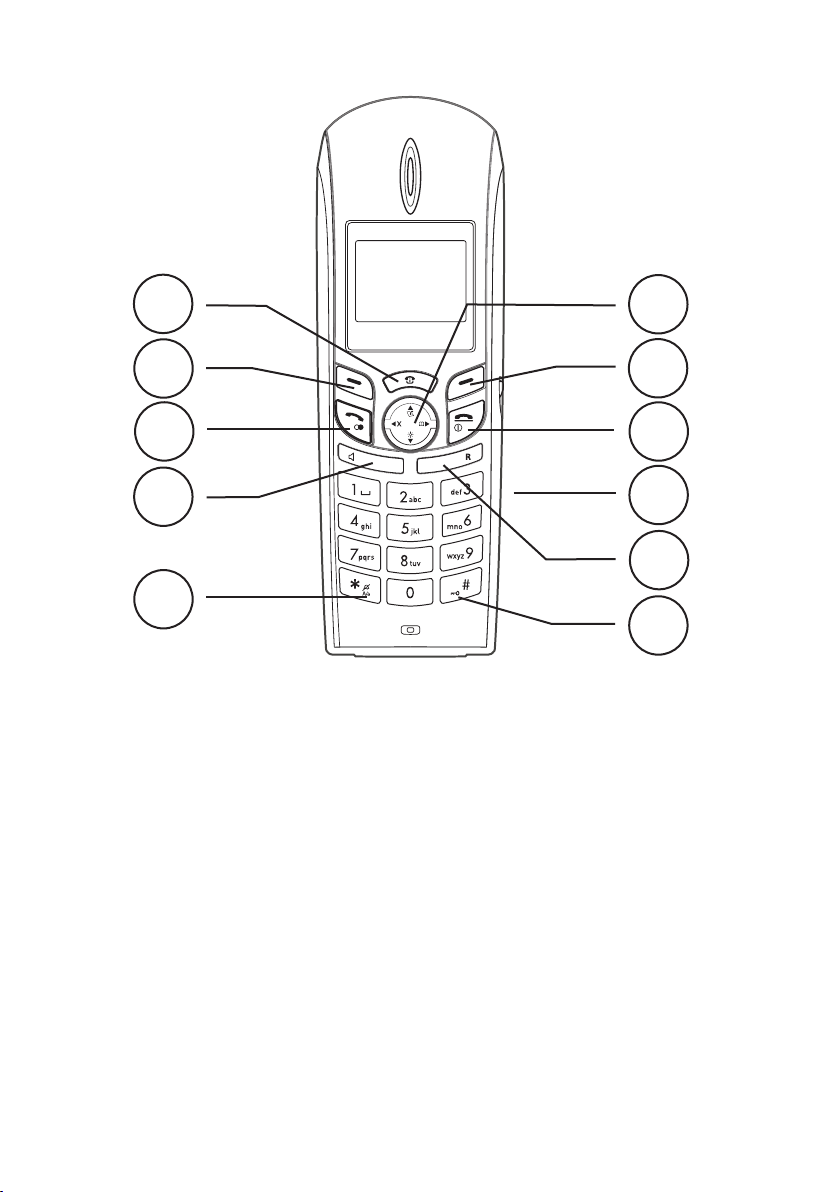
* ......................................................Passaggio tra lettere maiuscole/minuscole ABC/abc
0 (tenere premuto) ..........................Pausa nel numero telefonico
Memorizzazione di un nome/numero nel microtelefono
1.Premere b. Premere Opzioni.
2.Scorrere l’elenco no a selezionare Aggiungi voce. Premere OK.
3.Inserire il numero telefonico comprensivo di presso (Canc=cancella). Premere OK.
4.Premere il tasto numerato equivalente una o più volte per scrivere il nome desiderato.
Premere Salva (Salva).
5.Premere L per tornare in modalità standby.
Gestione della rubrica
1.PremerePremereb.
2.ScorrerelevociutilizzandoitastiScorrere le voci utilizzando i tasti /☼.Èpossibilecercarerapidamentenellarubrica ÈpossibilecercarerapidamentenellarubricaÈ possibile cercare rapidamente nella rubrica
premendo il tasto numerato corrispondente alla prima lettera.
3.PremerePremere O per effettuare la chiamata o Opt per le seguenti opzioni:
-AggiungivoceAggiungi voce Vedi descrizione riportata in precedenza.
-ModicavoceModica voce Modica le informazioni.
-CancellavoceCancella voce/Cancella elenco.
4.PremerePremere OK.
Rubrica condivisa
La rubrica dell’unità base è condivisa da tutti i microtelefoni e può contenere 10 voci che
vengono memorizzate una sola volta indipendentemente dal numero di microtelefoni. In certi
modelli sono stati preinseriti numeri di telefoni utili.
Tuttavia tali numeri possono non corrispondere all’identicazione del chiamante per quanto
riguarda il nome.
1.Premere Menu.
2.Selezionare Servizi. Premere OK.
3.Selezionare Rubrica condiv. Premere OK.
4.Scorrere le voci utilizzando i tasti /☼.
5.Premere O per comporre il numero oppure Opt per sostituire la voce.
6.Scorrere l’elenco no a selezionare Modica voce. Premere OK.
7.Inserire il numero telefonico comprensivo di presso. Premere OK.
8.Inserire il nome. Premere Salva.
5
Italiano
Messaggi SMS
Questa sezione si applica unicamente a chi ha sottoscritto il servizio di messaging
SMS.
Questo servizio non è ancora disponibile in tutti i paesi. Massimo 160 caratteri
per messaggio.
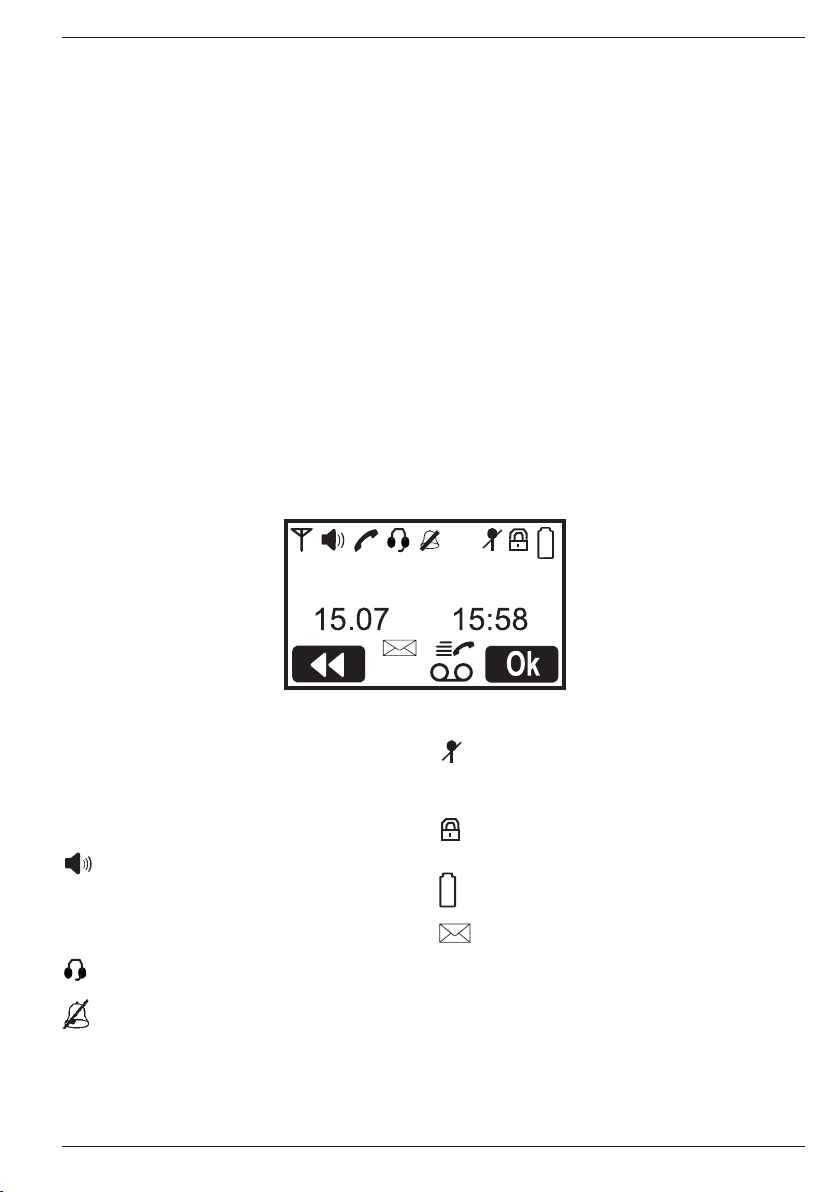
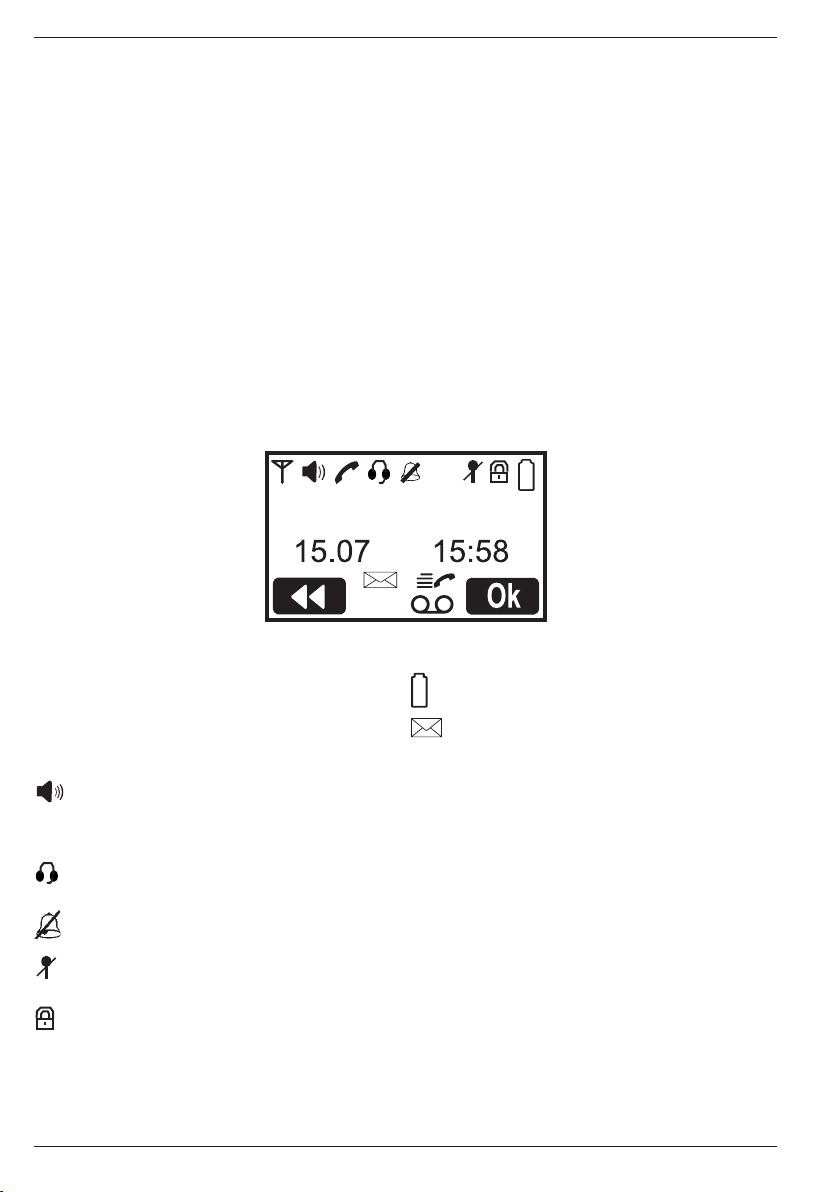
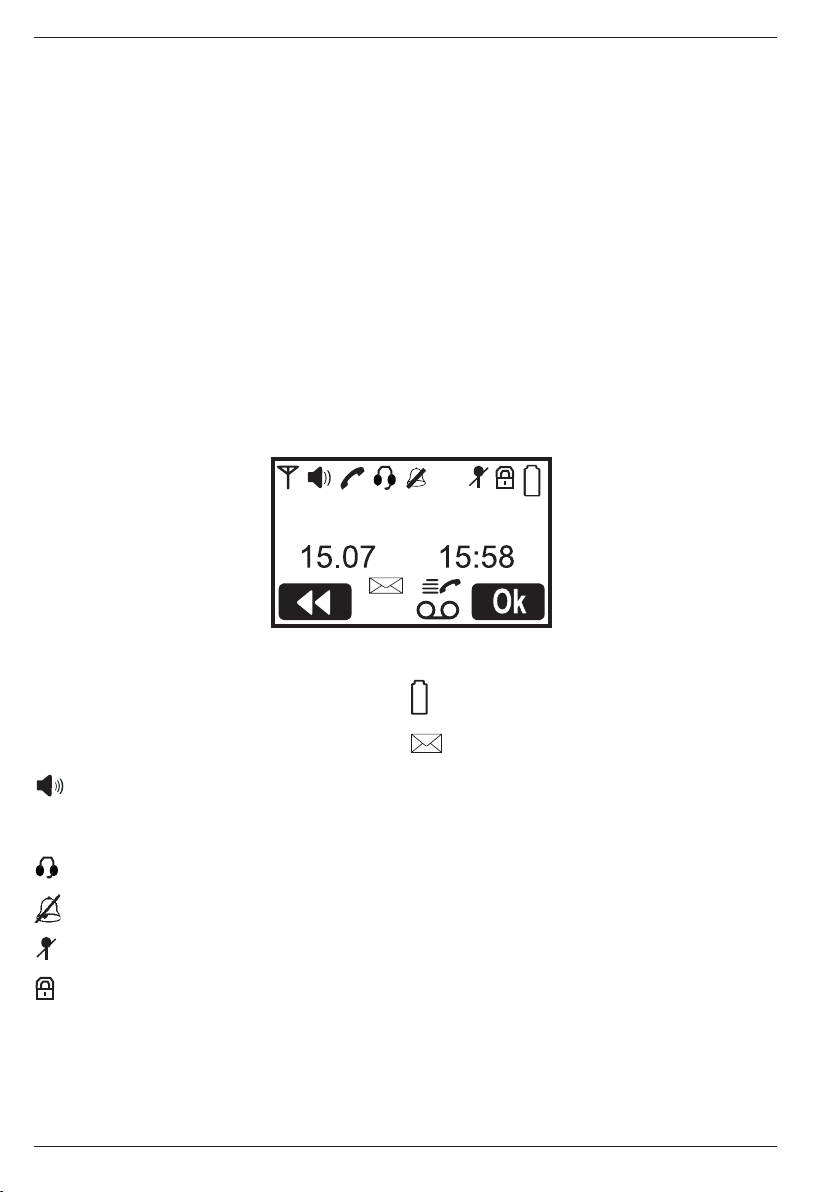
L’arrivo di un nuovo messaggio SMS è indicato da Nuovo SMS e dal simbolo . La
memoria è in grado di contenere no a 30 messaggi.
Attenzione!
Inserire il numero corretto dell’operatore di rete (per le istruzioni, vedere di
seguito).
Nella maggior parte dei casi, per consentire la ricezione dei messaggi, è necessario sottoscrivere sia il servizio
SMS che il servizio ID chiamante, fornito dal vostro provider di servizi.
Le informazioni sulle funzioni disponibili variano in base al provider di servizi. Non è possibile garantire che
tutti i provider di servizi possono inviare/ricevere messaggi SMS con tutti i tipi di dispositivi.
Con certi provider, è possibile inviare un SMS anche a persone senza telefoni SMS compatibili. In questi casi il
messaggio verrà letto da una voce automatica.
I messaggi SMS il cui invio non è riuscito vengono memorizzati nella casella Outbox.
Inserimento di numeri telefonici per la rete/il centro SMS
Vericare che sia stato impostato il numero corretto per il vostro provider di servizi.
1.Premere Menu.Scorrere l’elenco no a selezionare SMS. Premere OK.
2.Scorrere l’elenco no a selezionare Impostazioni SMS. Premere OK.
3.Scorrere l’elenco no a selezionare Centro SMS. Premere OK.
4.Selezionare la voce desiderata. Premere OK.
5.Inserire il numero. Premere OK.
Scrivere un nuovo messaggio SMS
1.Premere Menu.Scorrere l’elenco no a selezionare SMS. Premere OK.
2.Scorrere l’elenco no a selezionare Scrivi SMS (Scrivi nuovo SMS). Premere OK.
3.Premere il tasto numerato equivalente una o più volte per scrivere il testo desiderato.
Libble takes abuse of its services very seriously. We're committed to dealing with such abuse according to the laws in your country of residence. When you submit a report, we'll investigate it and take the appropriate action. We'll get back to you only if we require additional details or have more information to share.
Product:
Forumrules
To achieve meaningful questions, we apply the following rules:
First, read the manual;
Check if your question has been asked previously;
Try to ask your question as clearly as possible;
Did you already try to solve the problem? Please mention this;
Is your problem solved by a visitor then let him/her know in this forum;
To give a response to a question or answer, do not use this form but click on the button 'reply to this question';
Your question will be posted here and emailed to our subscribers. Therefore, avoid filling in personal details.
Register
Register getting emails for Doro 640 at:
new questions and answers
new manuals
You will receive an email to register for one or both of the options.
Get your user manual by e-mail
Enter your email address to receive the manual of Doro 640 in the language / languages: Dutch, Italian, Polish, Portuguese, Spanish as an attachment in your email.
The manual is 4,38 mb in size.
You will receive the manual in your email within minutes. If you have not received an email, then probably have entered the wrong email address or your mailbox is too full. In addition, it may be that your ISP may have a maximum size for emails to receive.
If you have not received an email with the manual within fifteen minutes, it may be that you have a entered a wrong email address or that your ISP has set a maximum size to receive email that is smaller than the size of the manual.
The email address you have provided is not correct.
Please check the email address and correct it.
Your question is posted on this page
Would you like to receive an email when new answers and questions are posted? Please enter your email address.