42
ENGLISH
System Setup
ENGLISH
System Setup
The initial setting that was set prior to shipping from the factory can be changed.
The setting contents are maintained until they are next changed even when the power is switched off.
3
Changing the default settings
Press the CURSOR 0 or 1 button to select the
desired setting icon, then press the ENTER button.
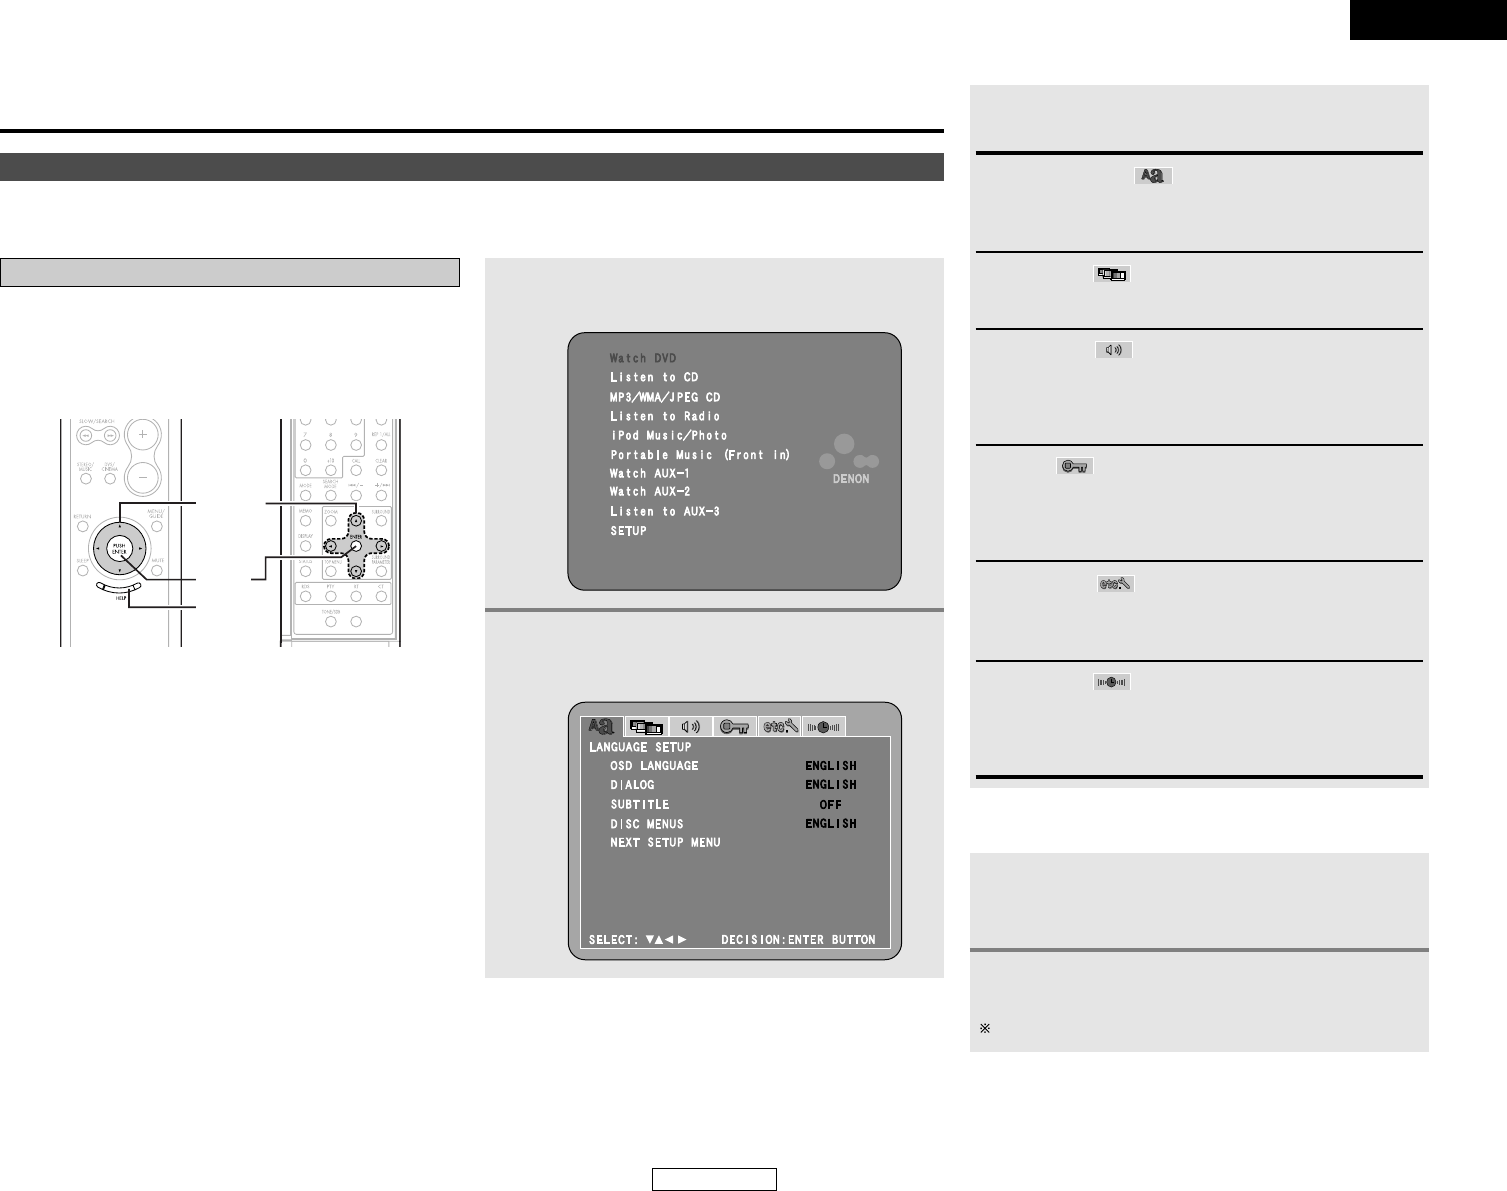
VIDEO SETUP:
Use this to set this unit screen mode.
(“TV TYPE” and “PROGRESSIVE MODE” can be set.)
AUDIO SETUP:
Use this to set this unit audio output mode.
(“SPEAKER SETUP”, “INPUT MODE”, “DIGITAL OUT”,
“LPCM”, “COMPRESSION” and “AUDIO DELAY” can be
set.)
RATINGS:
Use this to disable playback of adult DVDs so that children
cannot watch them. Note that playback of adult DVDs cannot
be disabled if the rating level is not recorded on the DVD, but
that it is possible to disable playback of all DVDs.
LANGUAGE SETUP:
Use this to set the language to be used when playing the disc.
If the set language is not offered on that disc, the discs
default language is set.
OTHER SETUP:
“CAPTIONS”, “WALL PAPER”, “DIM SENSOR”,
“DISPLAY”, “SLIDE SHOW”, “AUTO POWER MODE” and
“SCREEN SAVER” can be set.
TIMER SETUP:
“ONCE TIMER”, “EVERY TIMER” and “CLOCK SETUP” can
be set.
“ONCE TIMER” and “EVERY TIMER” can be set if the time
is set at “CLOCK SETUP”.
CURSOR buttons
0
and
1: Use these to move the cursors (
0
and
1) to the
left and right on the screen.
•
and
ª
: Use these to move the cursors (
•
and
ª
) to the up
and down on the screen.
ENTER button
Press this to switch the display.
Also use this button to complete the setting.
HELP button
Press this to display the system setup menu.
System setup items
• Once all connections with other AV components have been
completed as described in page 10 or 15, make the various
settings described below on the monitor screen using the S-
101’s on-screen display function.
• Use the following buttons to set up the system:
1
Press the HELP button.
• The “HELP” menu screen appears.
2
Press the CURSOR
•
or
ª
button to select
“SETUP”, then press the ENTER button.
• The “LANGUAGE SETUP” menu screen appears.
1
Press the CURSOR 0 or 1 button select
“TIMER SETUP” icon, then press the CURSOR
ª
button to select “EXIT SETUP”.
2
Press the ENTER button.
It is also possible to quit by pressing the HELP button.
2 To exit the setup mode