76
Advanced Setup – Part 1 Advanced Setup – Part 1
ENGLISH
ENGLISH
• If the “Auto Setup” procedure has not been performed, this
item is not displayed.
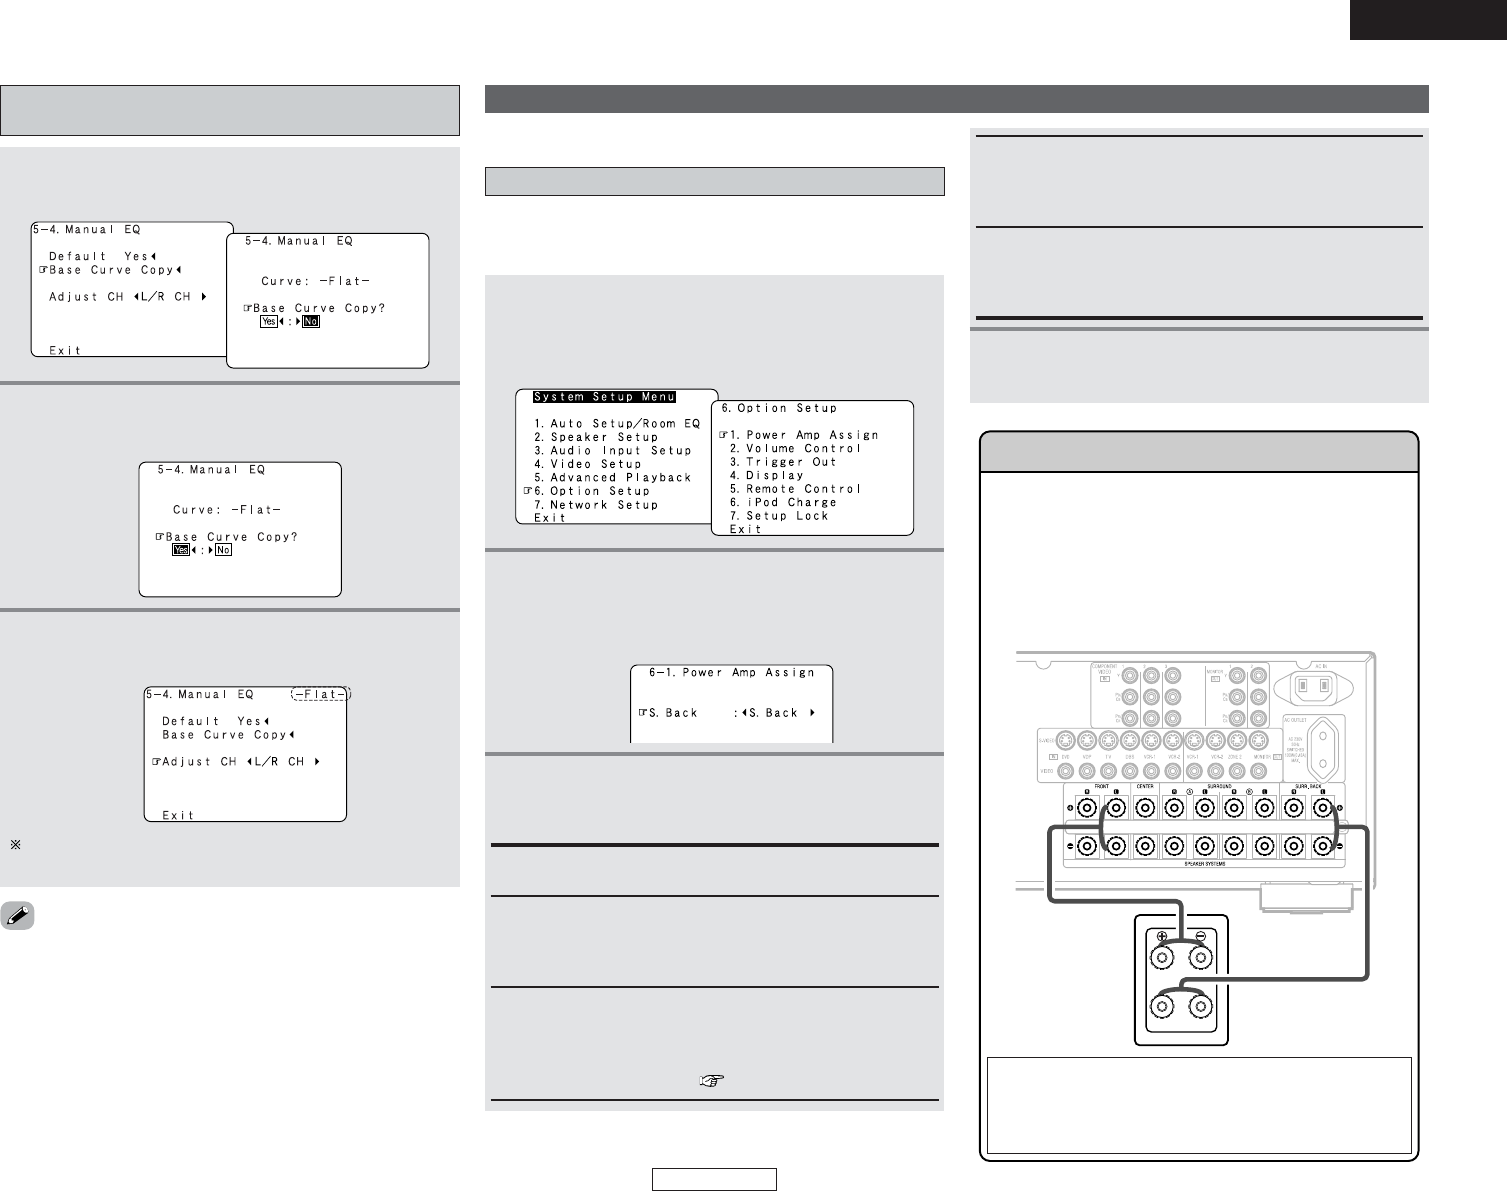
Procedure for copying the “Flat” correction
curve
1
Press the CURSOR
DD
button to select “Base
Curve Copy”, then press the CURSOR
FF
button.
2
Press the CURSOR
FF
button to select “Yes”.
The type of the copied correction curve is displayed in the
upper right of this screen.
3
Press the ENTER button to enter the setting.
• The “Manual EQ” screen reappears.
Setting the Power Amplifier Assignment
If no Surround back speakers are used in the main room, their
amplifier channels can be assigned for multi–zone use or the
front speaker‘s bi-amp connection.
1
Press the CURSOR
DD
or
HH
button to select
“Option Setup” at the “System Setup Menu”,
then press the ENTER button.
• The “Option Setup” screen appears.
Option Setup
2
Press the CURSOR
DD
or
HH
button to select
“Power Amp Assign”, then press the ENTER
button.
• The “Power Amp Assign” screen appears.
3
Press the CURSOR
FF
or
GG
button to select which
channel to assign the surround back power
amplifier to.
S. Back:
The Surround back speakers are used in MAIN ZONE.
Front:
This provides a bi-amp mode for the two main front speakers,
replicating the front left and front right amplifier channel’s
outputs.
Front B:
Both surround back power amplifier channels can be used to
provide a second set of stereo outputs that match the front
left and right speakers, providing a Front B option for stereo
sound in another location ( page 74).
ZONE2:
This mode assigns the surround back amplifier channels to
provide ZONE2 speaker-level outputs from the surround back
speaker terminals.
ZONE3:
This mode assigns the surround back amplifier channels to
provide ZONE3 speaker-level outputs from the surround back
speaker terminals.
4
Press the ENTER button to enter the setting.
• The “Option Setup” menu reappears.
Front Bi-Amp connections
Certain loudspeakers are equipped with two sets of input
terminals, for bi-amplification. The AVR-4306 Amp Assign
mode allows you to power bi-amp-capable speakers with
two amplifier channels. Be sure to consult the owner’s
manual of your bi-amp-capable speakers for further
information before proceeding.
AVR-4306
SPEAKER
NOTE:
• When making bi-amp connections, be sure to remove
the short-circuiting bar included with the speaker.
Make other expert settings.