4
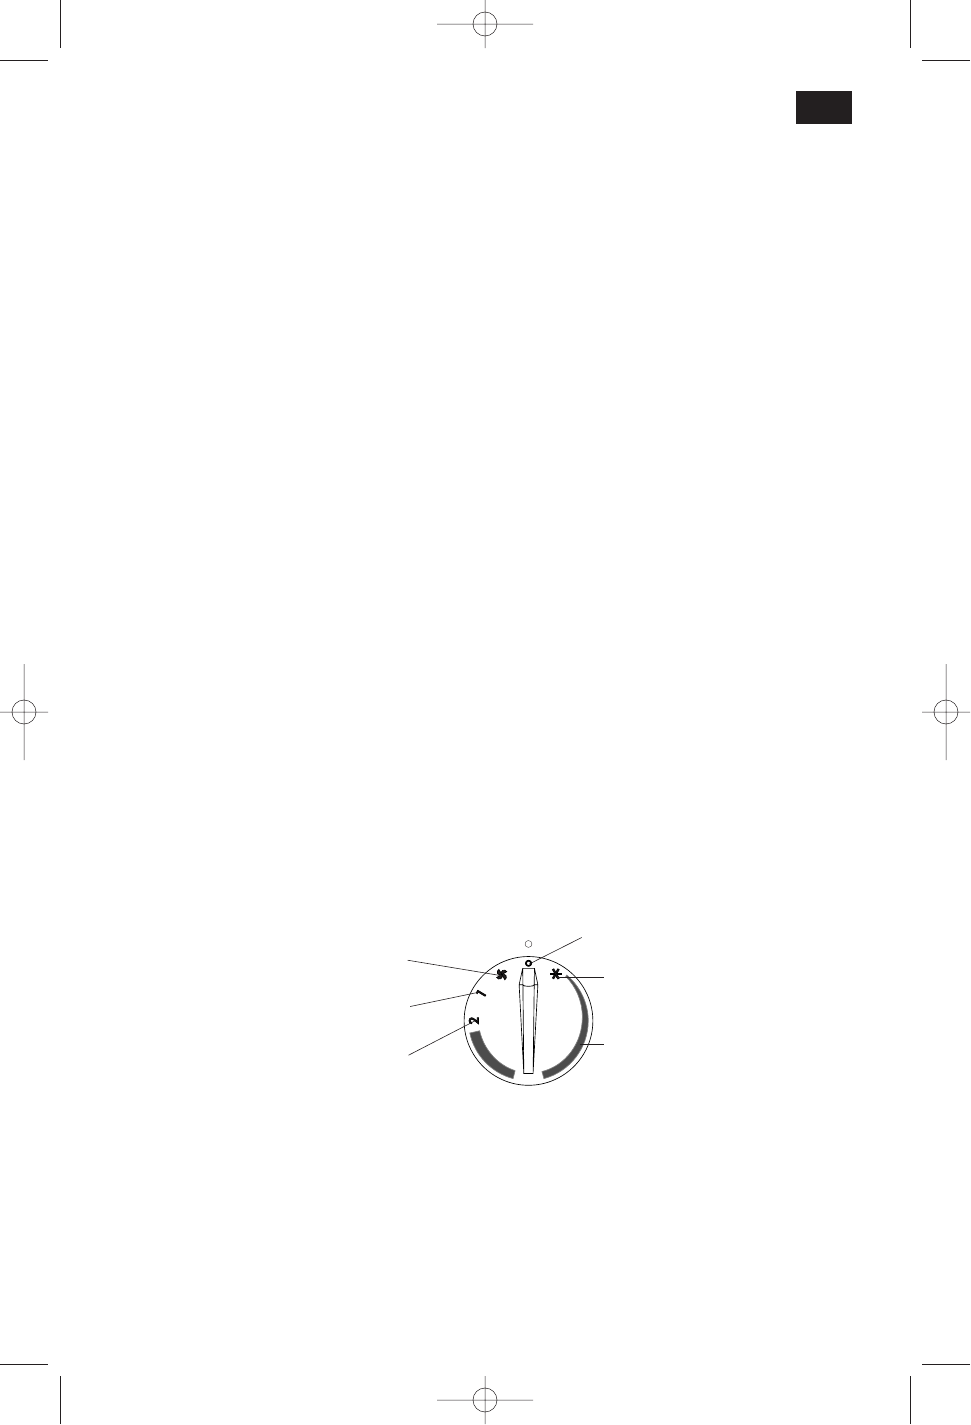
Function selectori + thermostat
Heating 2000W
Heating 1000W
Ventilation only
Unit off
Antifreeze function
Thermostat adjustment
DESCRIPTION
A Instrument panel guard
B Wall attachment bracket
C Panel
D Function and thermostat selector
E Thermostat signal lamp
F Air outlet grille
G Hand-towel dryer assembly
H Hand-towel dryer arm
I Arm release slider
L Appliance anchor
IMPORTANT
• Make sure that the appliance is in full working order; it must not be used if damaged.
• The appliance will only work if fitted to a wall.
INSTALLATION
Before drilling holes in the wall, check that there are no electric cables or piping in the area.
Proceed as follows for installation:
• pull the release slider (fig. 1) and turn the hand-towel dryer arm downwards in order to check
the appliance's maximum side-play for correct installation;
• attach the wall attachment bracket with screws and dowels, observing the minimum measu-
rements shown in fig. 2. If it is installed in a bathroom, the fan must be positioned outside the
protection volume shown in fig. 4 in order to guarantee that the controls are not accessible to
anyone using the bath or shower;
• hang the fan on bracket B (fig. 1) and mark anchoring positions L (fig. 1);
• remove the appliance and drill the holes for the dowels;
• hook the fan on the bracket at a slight angle (fig. 3) and fix it by turning the screw in the upper
part of the bracket in a clockwise direction with a screwdriver before completing the clamping
with the anchoring screws in the lower part.
ELECTRIC CONNECTION
• Before fitting the plug in the mains socket, make absolutely sure that the voltage of your mains
electricity supply is the same as the value in V shown on the heater.
• Make sure the mains socket has a capacity of 10/16 Amperes.
• This appliance complies with EEC Directive 89/336, relating to electro-magnetic compatibi-
lity.
OPERATION AND USE
Heating and setting the thermostat
• 1000W heating: Turn the knob to position 1
• 2000W heating: Turn the knob to position 2
When the room has reached the temperature desired, set the thermostat by slowly turning the ther-
mostat knob counter-clockwise until you hear the click which switches off the heater. The applian-
ce stops and the indicator H (fig. 1) goes off.
The temperature set in this way will be automatically maintained at a constant level by the ther-
mostat.
GB
fig. 5
HBM 12 31-01-2001 13:56 Pagina 4