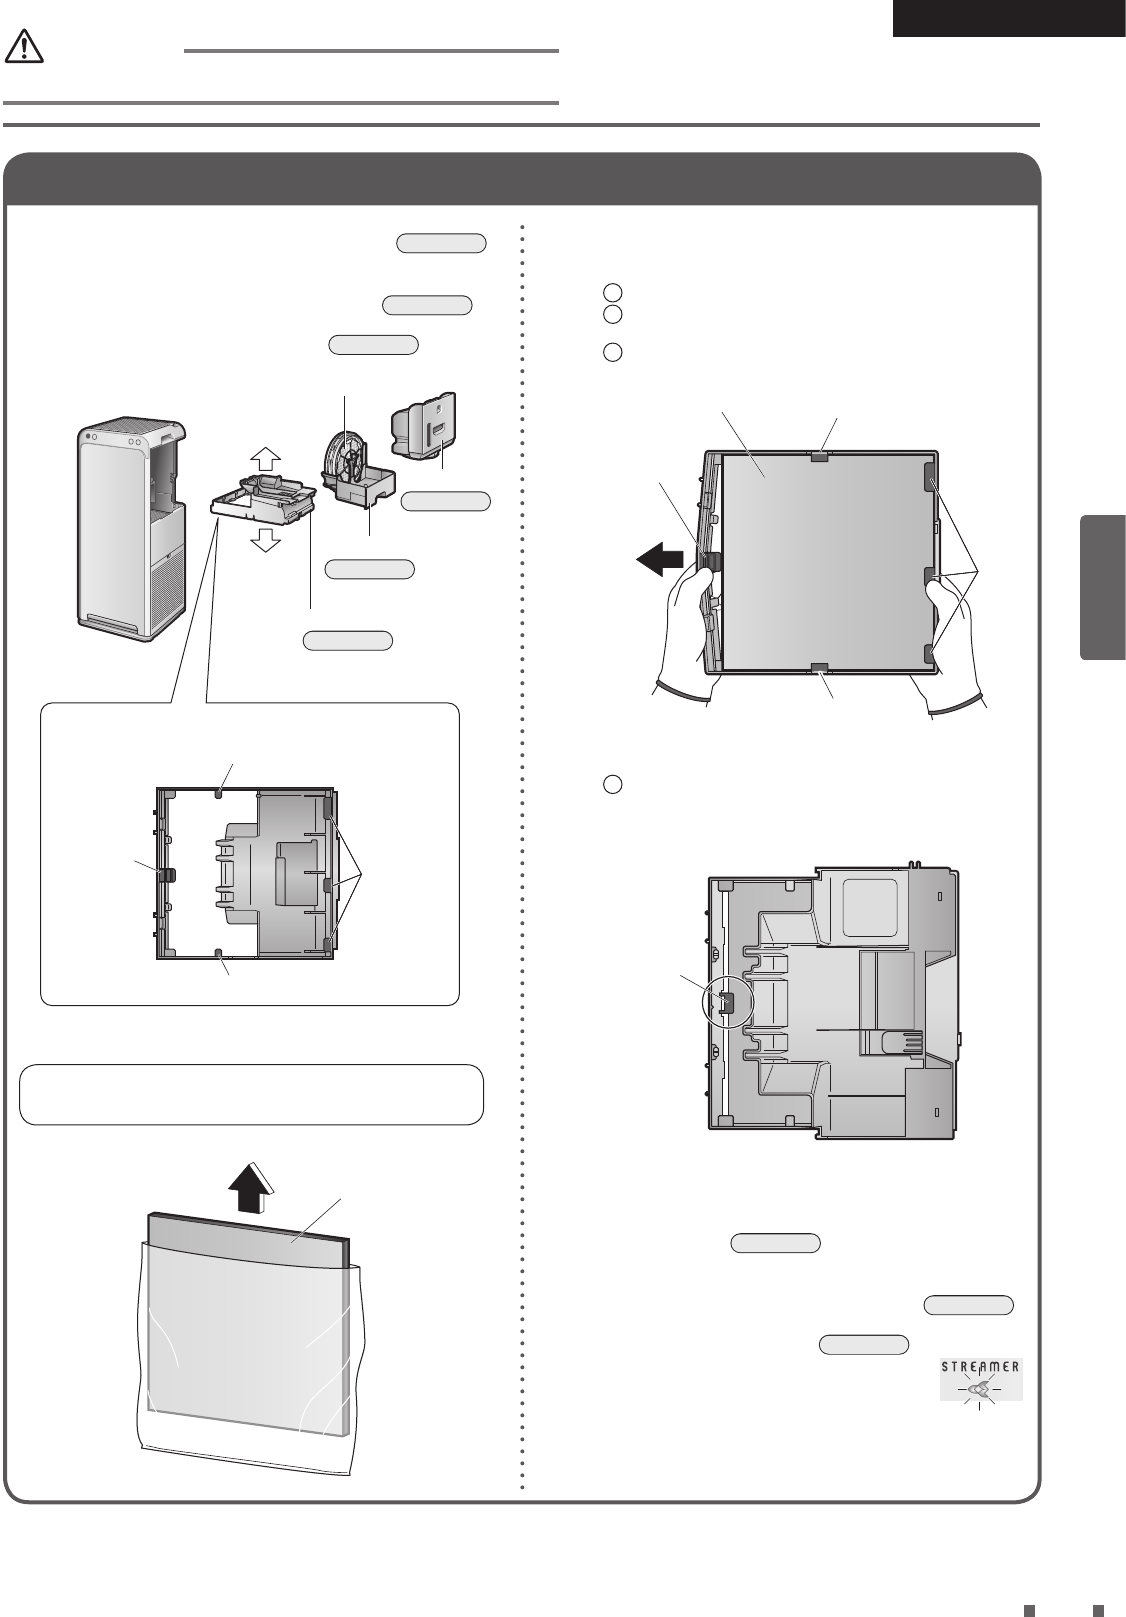
731355
13
Zoom out
Zoom in
Previous page
1/40
Next page
12
Nederlands
Eerst lezen
3
De geurltereenheid bevestigen
1. Haal de watertank uit de hoofdeenheid.
Pagina 13
2. Trek het bevochtigercompartiment uit terwl de
bevochtigingsltereenheid aan staat.
Pagina 25
3. Verwder de geurltereenheid.
Pagina 28
Bevochtigingsltereenheid
Pagina 25
Bevochtigercompartiment
Voorkant
Achterkant
Haak (klein)
Haak (klein)
Vaste delen
Haak (groot)
Achterkant van de geurltereenheid
Pagina 13
Watertank
Pagina 28
Geurltereenheid
4. Haal de geurlter uit de zak.
Draag handschoenen om te voorkomen dat uw
handen vuil worden door stof uit de geurlter.
Geurlter
5. Draai de geurltereenheid om en bevestig de
geurlter.
1
Plaats de geurlter onder de vaste delen (3plaatsen).
2
Spreid het frame open en plaats de geurlter onder de
(kleine) haken in 2plaatsen.
3
Plaats de geurlter op dezelfde manier onder de (grote)
haak om die te bevestigen.
Haak (klein)
Geurlter
Haak (groot)
Haak (klein)
Vaste
delen
(Achterkant van geurltereenheid)
Plaatsen
tdens het
spreiden
van het
frame
4
Kk naar de voorkant van de geurltereenheid en
controleer opnieuw of de geurlter onder de (grote)
haak is aangebracht.
Haak (groot)
(Voorkant van geurltereenheid)
6. Installeer de geurltereenheid in de
hoofdeenheid.
Pagina 28
7. Bevestig het bevochtigercompartiment terwl de
bevochtigingsltereenheid aan staat.
Pagina 25
8. Plaats de watertank erin.
Pagina 13
Als de lamp van de streamer knippert
tijdens het starten, betekent dit dat de
geurfilter niet correct is vastgemaakt.
Respecteer de plaatselke regels voor afvalinzameling
en -scheiding wanneer u de lterzak en de droogstof
verwdert.
OPGELET
Voer deze stappen uit voordat u de voedingsstekker in het stopcontact steekt.
04_NL_3P595628-1.indd 12 2019/12/17 13:16:18
13


Need help? Post your question in this forum.

Forumrules


Report abuse

Libble takes abuse of its services very seriously. We're committed to dealing with such abuse according to the laws in your country of residence. When you submit a report, we'll investigate it and take the appropriate action. We'll get back to you only if we require additional details or have more information to share.

Product:

For example, Anti-Semitic content, racist content, or material that could result in a violent physical act.

For example, a credit card number, a personal identification number, or an unlisted home address. Note that email addresses and full names are not considered private information.

Forumrules

To achieve meaningful questions, we apply the following rules:

Register

Register getting emails for Daikin MCK55WVM at:


You will receive an email to register for one or both of the options.


Get your user manual by e-mail

Enter your email address to receive the manual of Daikin MCK55WVM in the language / languages: Dutch as an attachment in your email.

The manual is 13,17 mb in size.


You will receive the manual in your email within minutes. If you have not received an email, then probably have entered the wrong email address or your mailbox is too full. In addition, it may be that your ISP may have a maximum size for emails to receive.

Others manual(s) of Daikin MCK55WVM

Daikin MCK55WVM User Manual - English - 40 pages

Daikin MCK55WVM User Manual - German - 40 pages


The manual is sent by email. Check your email

If you have not received an email with the manual within fifteen minutes, it may be that you have a entered a wrong email address or that your ISP has set a maximum size to receive email that is smaller than the size of the manual.

The email address you have provided is not correct.

Please check the email address and correct it.

Your question is posted on this page

Would you like to receive an email when new answers and questions are posted? Please enter your email address.


Info