18
7
De HDD/DVD-recorder zoekt de beschikbare
zenders automatisch op en slaat ze op in het
geheugen.
8
Stel na het automatisch zoeken van de zenders,
de klok in.
9
Ga met [œ/√] naar links of naar rechts en
wijzigde instelling met [
…/†] .
10
Druk op [ENTER] om de tijdsinstelling vast te
leggen. Als u de basisinstallatie onderbreekt,
moet u de procedure herhalen.
Installeren
Kies de menutaal voor de disk:
Installeren
Kies de taal waarin de disk moet worden
afgespeeld:
Installation
Welcome.
Press [Enter] to begin auto channel search.
Ensure aerial is connected.
Instructions
Setup-Exit
U moet deze procedures uitvoeren om de tijd,
datum, zenders en de taalvoorkeuren voor de
HDD/DVD-recorder in te stellen.
18
Installeren
Kies de taal waarin de ondertiteling moet
worden afgespeeld:
Default
Engels
Spaans
Frans
Czech
Deens
Duits
Klok instellen
Stel de klok in:
Tijd: 13 : 00
Datum : 02 \ Jan \ 2010 (Zat)
Instructies:
Enter-Confirm Setup-Exit Move …†
…
†
Herinstallatie
Dit apparaat is uitgerust met een multi-tuner voor
het ontvagen van buitenlandse zenders. Om
buitenlandse zenders te kunnen ontvangen, gaat u
als volgt te werk.
1 Druk op [SETUP] en kies 'Fabrieksinstellingen
herstellen' met [
œ
/
√
]. Vervolgens reset u
het apparaat.
(zie pagina 31)
2 Na het inschakelen van de voeding komt u in
de basisinstallatie.
3 Selecteer het gewenste land (zie stap 3) en
herhaal de stappen 4~10.
Installeren
Beschikbare tv-stations worden gezocht.
2 channels
Even wachten a.u.b....
Instructies:
Setup-Exit
Installation
Please select your language to begin auto
install procedure:
English
Spanish
French
Czech
Danish
German
Dutch
Instructions
Enter-Confirm Setup-Exit Move …†
Installeren
Kies het land waar u het apparaat
gebruikt:
Finland
Frankrijk
Duitsland
Griekenland
Italië
Luxemburg
Nederland
Instructies:
Enter-Confirm Setup-Exit Move …†
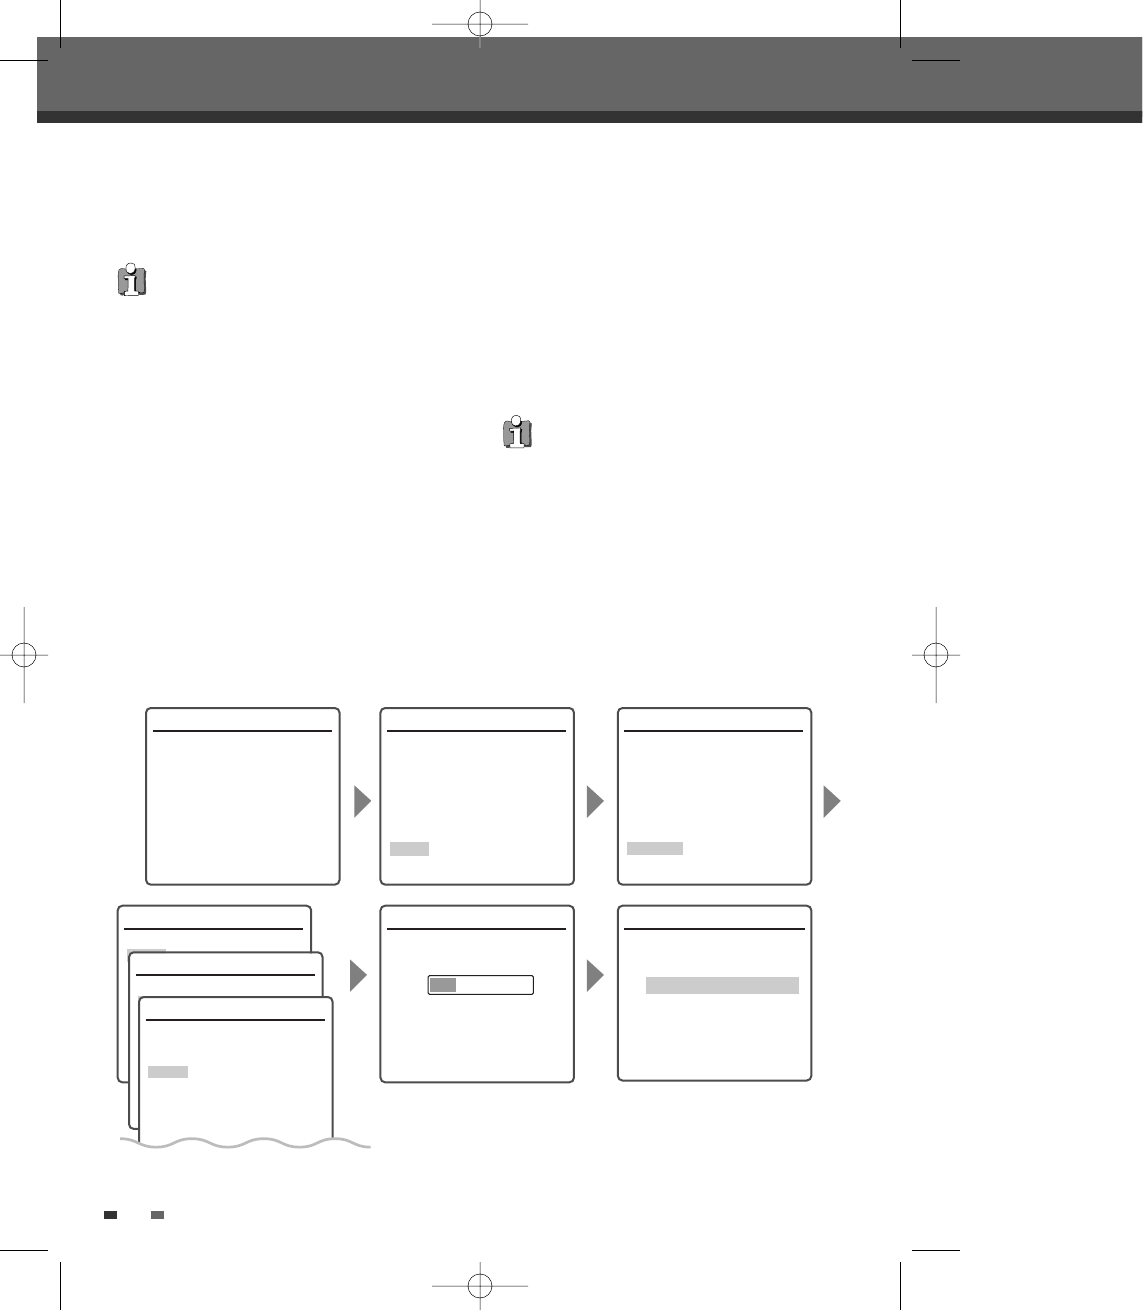
Basisinstallatie
Basisinstallatie
Nadat u de HDD/DVD-recorder met succes heeft
verbonden met de tv en andere apparaten, leest u in
dit hoofdstuk hoe u de basisinstallatie uit kunt
voeren.
1
Op het scherm verschijnt de welkomsttekst.
Controleer of de RF-kabel voor de antenne of
kabel is aangesloten. Druk op [ENTER] om met
het instellen te beginnen.
2
Selecteer de gewenste taal voor het
schermmenu met de toetsen [
…/†]. Druk op
[ENTER] om de keuze te bevestigen.
3
Kies het land waar u verblijft met […/†]. Druk
op [ENTER] om de keuze te bevestigen.
4
Selecteer de gewenste taal voor de diskmenu's
met [
…/†]. Druk op [ENTER] om de keuze te
bevestigen.
5
Selecteer de gewenste dialoogtaal met […/†].
Druk op [ENTER] om de keuze te bevestigen.
6
Selecteer de gewenste taal van de
ondertiteling met [
…/†]. Druk op [ENTER] om
de keuze te bevestigen.
DG-M22-12D1D-HA-I(NL) 2006.1.4 3:35 PM ˘ ` 18 mac001 1200DPI 100LPI