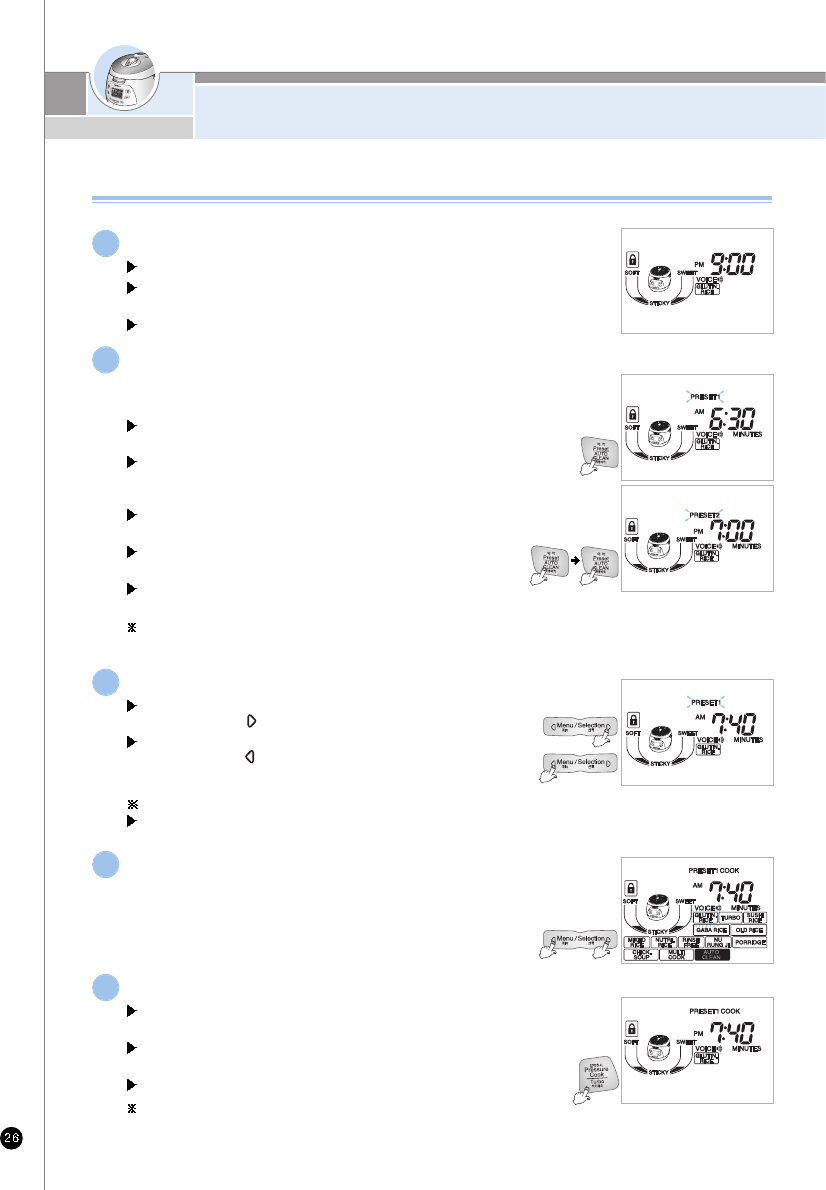
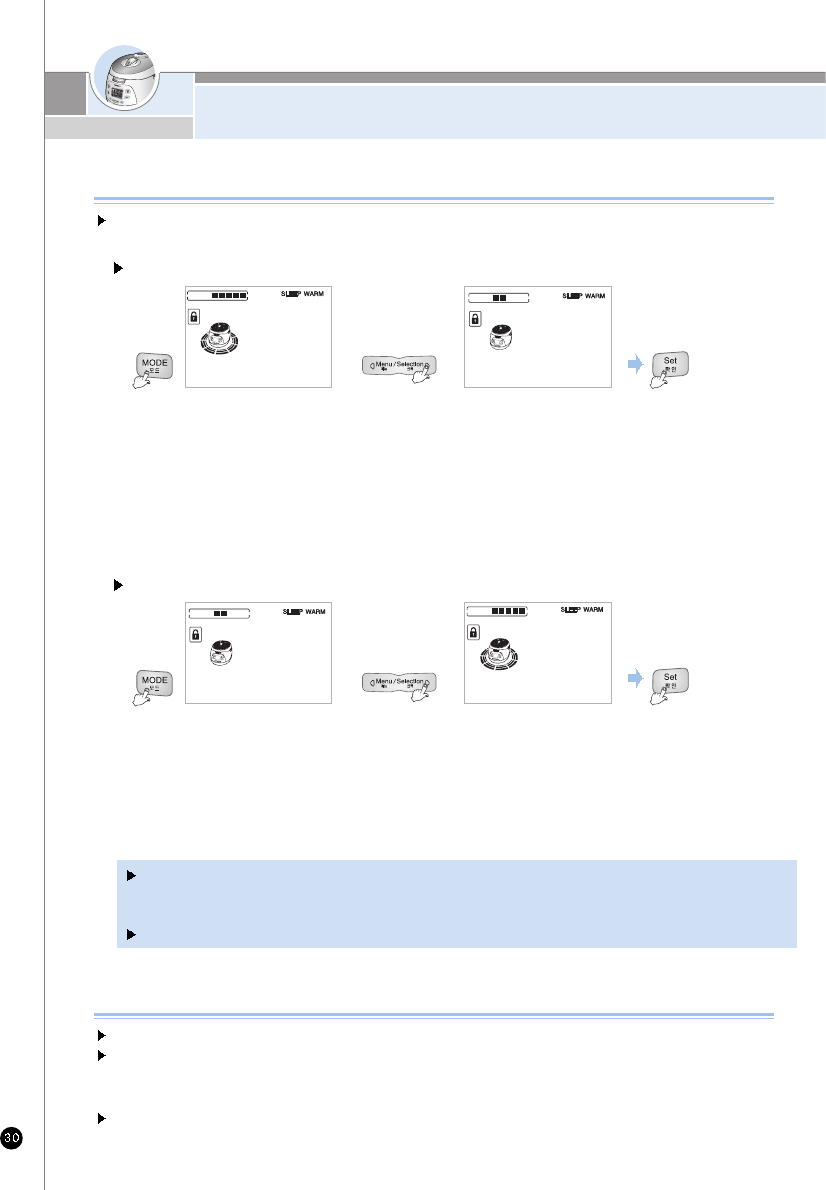
HOW TO PRESET TIMER FOR COOKING
It will be hard to open the lid during warming, or right after it has
finished cooking, So push the pressure weight to the side and
allow the steam to release.
Make sure the handle is in the “Lock” position during warming or
reheating.
It is recommended to evenly stir the cooked rice after cooking.
The rice taste is improved. (For a small quantity of rice, pile up the
rice on the center area of the inner pot to keep warm)
It is recommended to evenly stir the cooked rice after cooking.
The rice taste is improved. (For a small quantity of rice, pile up the
rice on the center area of the inner pot to keep warm)
Do not keep the scoop inside the pot while warming the rice.
When using a wooden scoop it can create serious bacteria and
odors.
It would be better to warm the rice for less than 12 hours because
of odors and color change.
The cooked rice, which cooked by pressure cooker is more prone
to changing color than the rice cooked by general cooker.
During warm mode, the rice can arise and turn white and rise. In
this case, mix the rice.
The mixed and brown rice cannot be in such good condition as
white rice while in warm function due to their characteristics.
Therefore do not keep mixed and brown rice in function for a long
period of time.
Do not mix small amount of rice or leftovers with the rice under
keeping warm. Doing so may cause an odor. (Use a microwave
oven for the cold rice.)
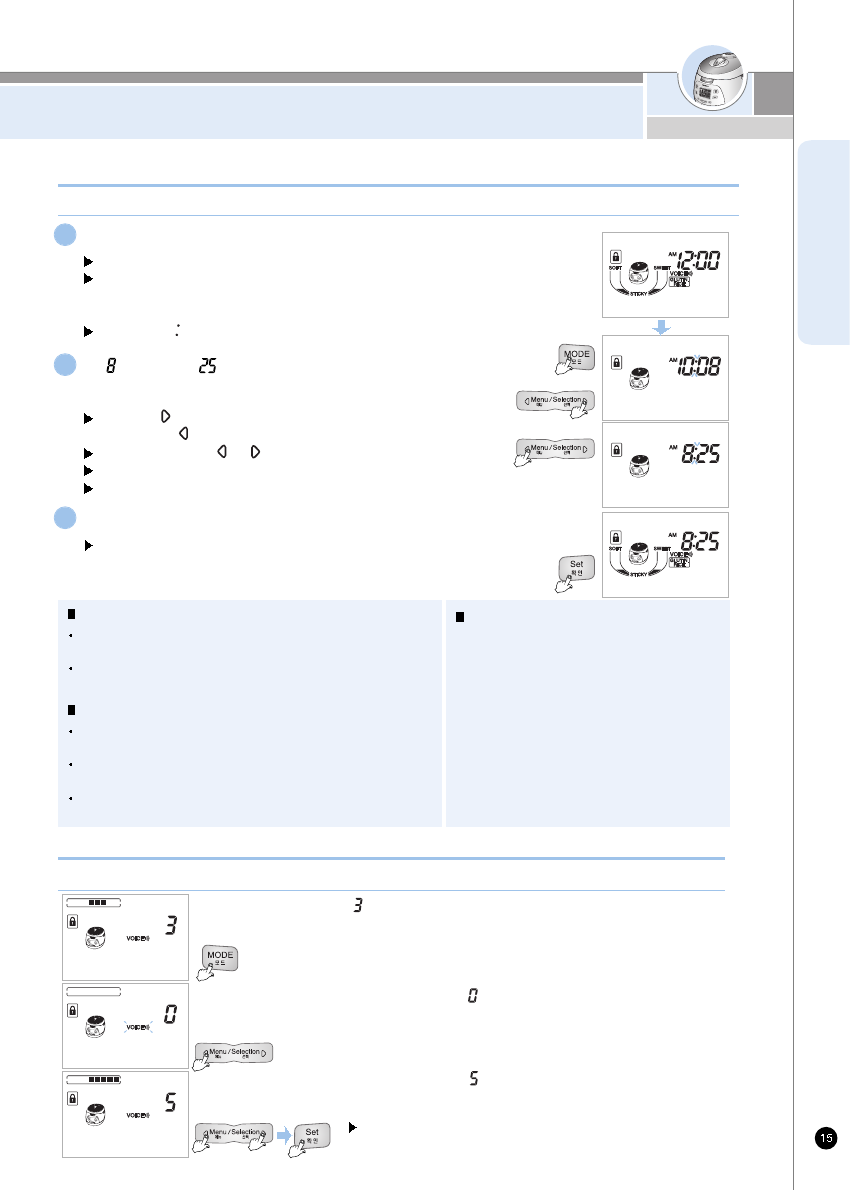
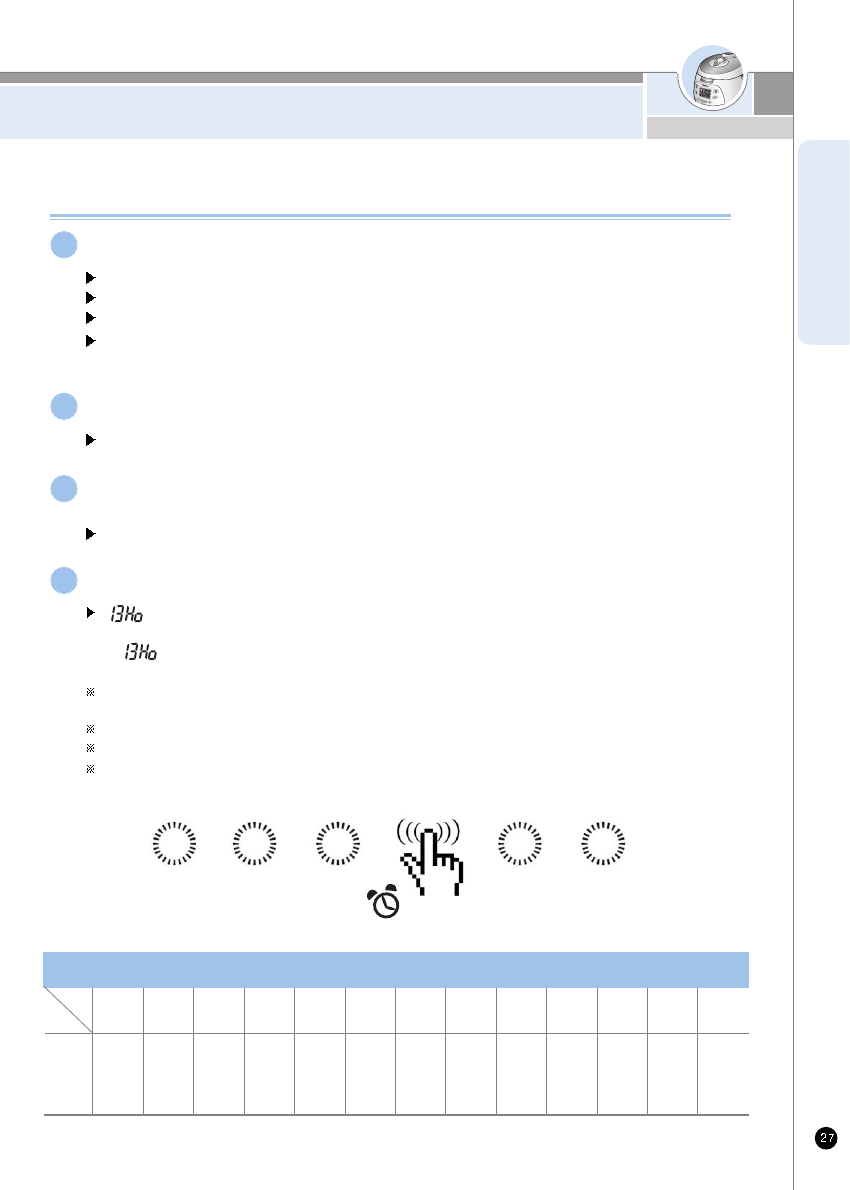
<Keep warming>
The ' ' of function display indicates
3 hours has passed in heat preservation
mode. One press of 'Set' button during
heat preservation displays present heat
preservation temperature, and another
press of 'Set' button present time.
<Finishing reheat>
When the reheat finishes with
the beep sound, keep warming
function will be operated and,
the elasped time will be shown.
Having a meal
If you want to have warm rice, press the “Reheat/keep” warm. Then “Reheat/Keep” warm function
will be started and you can eat fresh rice in 9 minutes.
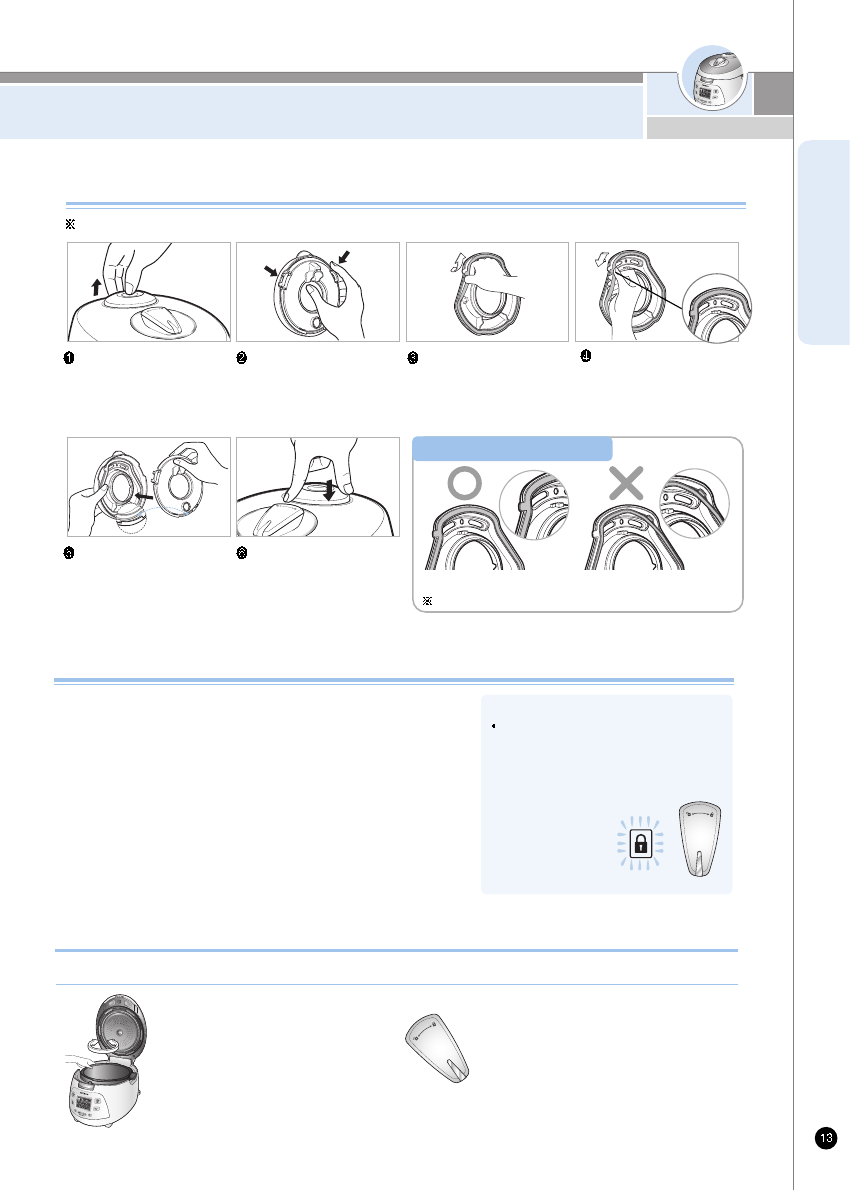
To use reheating in standby status after power is applied, turn lid combining hand grip to
Locked" location, press Reheat/Keep button, and the cooker will convert to Heat Preservation
mode. Here press Reheat/Keep warm button once more.
Cautions for Keeping Warm
If you change the present time during warming, see the page 15.
The frequent use of the “Reheat” function may cause the cooked rice to be discolored or dried. Use it once or twice per day.
If a separate heating appliance or gas burner is used to cook rice, put the cooked rice into the cooker and press the “Keep
Warm/Reheat” button to keep the rice warm. At this time, ' ' is shown on the display. (Like this, transferring hot rice to a cold
cooker may cause the rice to be discolored or develop an odor)
After 24 hours of heat preservation, the lamp of heat preservation time lapse blinks, indicating that long time has passed in heat
preservation condition.
In case the lid combining hand grip is in open status during heat preservation, the cooker does not go for reheating. For reheating,
lock the lid combining hand grip to (Locked) position, and then press Keep warm/reheat button.
If the lid combining hand grip is turned to open status during reheating, function display will show " ". At this time, reheating
will be cancelled, and heat preservation will proceed.
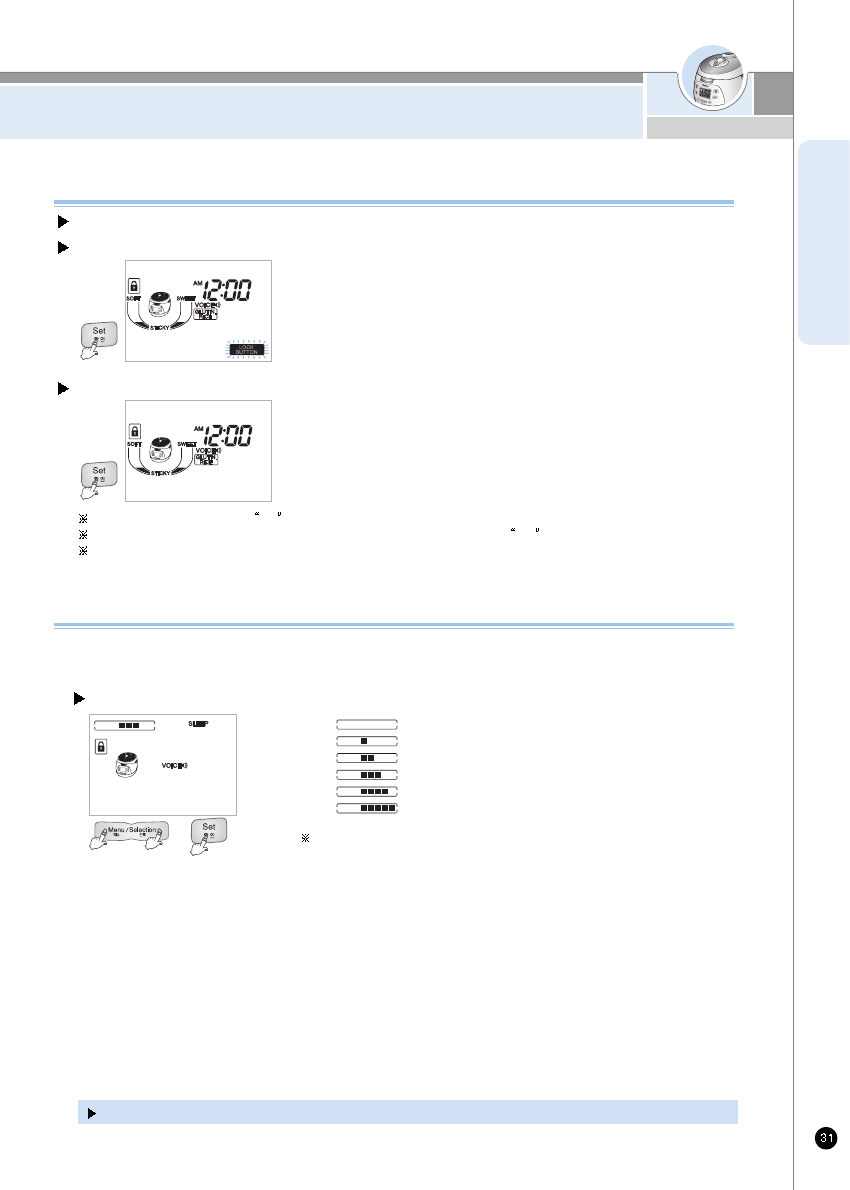
<Present morning temperature>
<Reheating>
The lamp blinks and indicator
will shows the reheat remaining
time will be displayed in minutes
with the mark going around
clockwise.
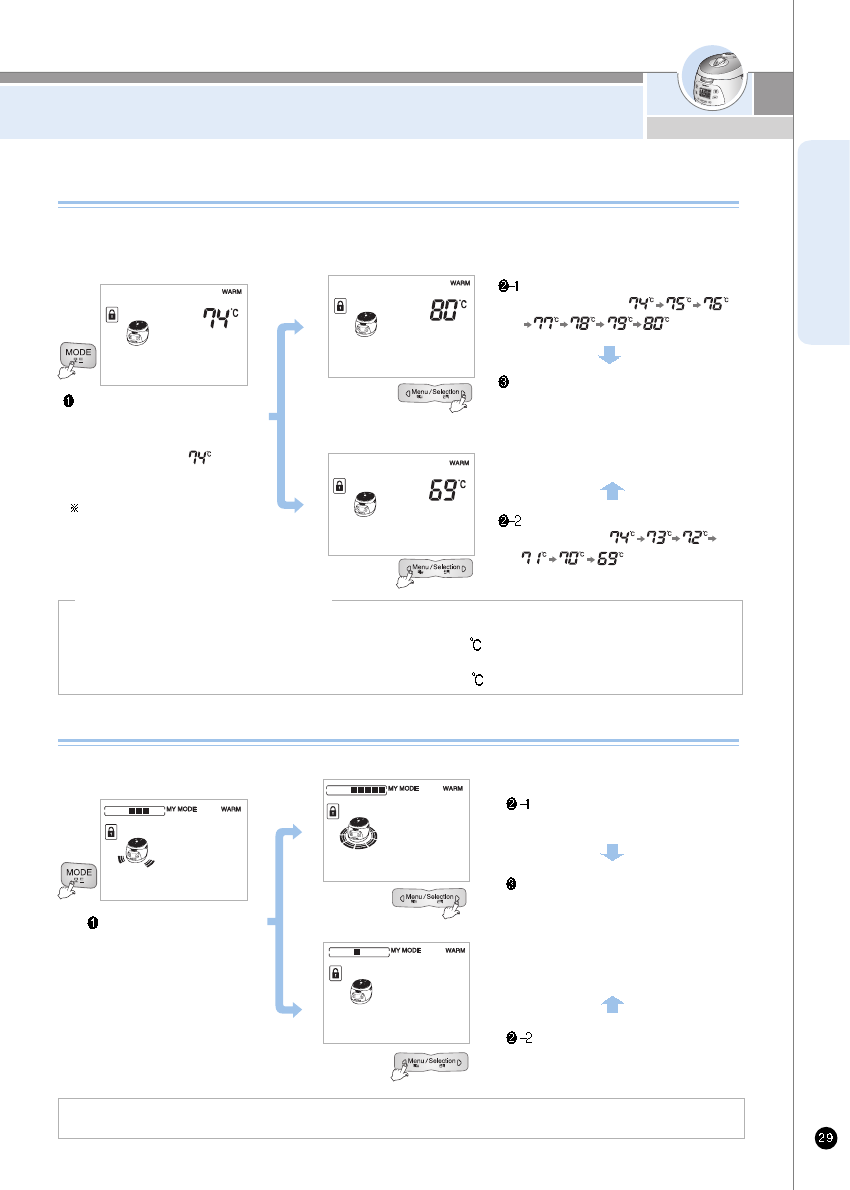
If you push the “set” button present warming temperature is displayed and push “set”
button again. The current time is displayed during warming. Moreover, when you push the
button once more, the time elapsed of warming is displayed
There is a difference between the outer temperature and inner temperature because it
operates with various users and environment.
After cooking rice, temperature is much higher than the warming temperature programmed.