51
ITALIANO
Installazione e rimozione
L’unità può essere installata in qualsiasi vano di installazione ISO. Si
prega di contattare il produttore dell’auto o il concessionario locale
se il suo veicolo non presenta un vano ISO.
NOTA
Prima dell’installazione rimuovere le due viti di trasportoper
►
ssaggio.
Collegare tutti i cavi prima di montare l’unità. Assicurarsi che
►
tutti i collegamenti siano corretti e che il sistema funzioni
adeguatamente.
Istruzioni di montaggio
Inserire l’unità nel vano ISO o scegliere una posizione dove sia ■
possibile raggiungere tutti i comandi e che non metta l’unità
nella linea di guida.
Collegare solo ad una batteria da 12V adeguatamente
■
installata.
Collegare solo tramite i connettori ISO.
■
Installare l’unità in modo che non sia possibile il surriscalda- ■
mento e che l’unità sia ben ventilata.
Se l’angolo di installazione supera i 30º l’unità potrebbe non
■
funzionare bene.
Evitare l’installazione dell’unità se essa è soggetta a tempera-
■
ture elevate, quali la luce solare diretta, aria calda dai condotti
di ventilazione, o se è stata soggetta a polvere, sporcizia o
vibrazioni eccessive.
Contattare il produttore dell’auto o il concessionario locale se
■
sono necessarie modiche al veicolo.
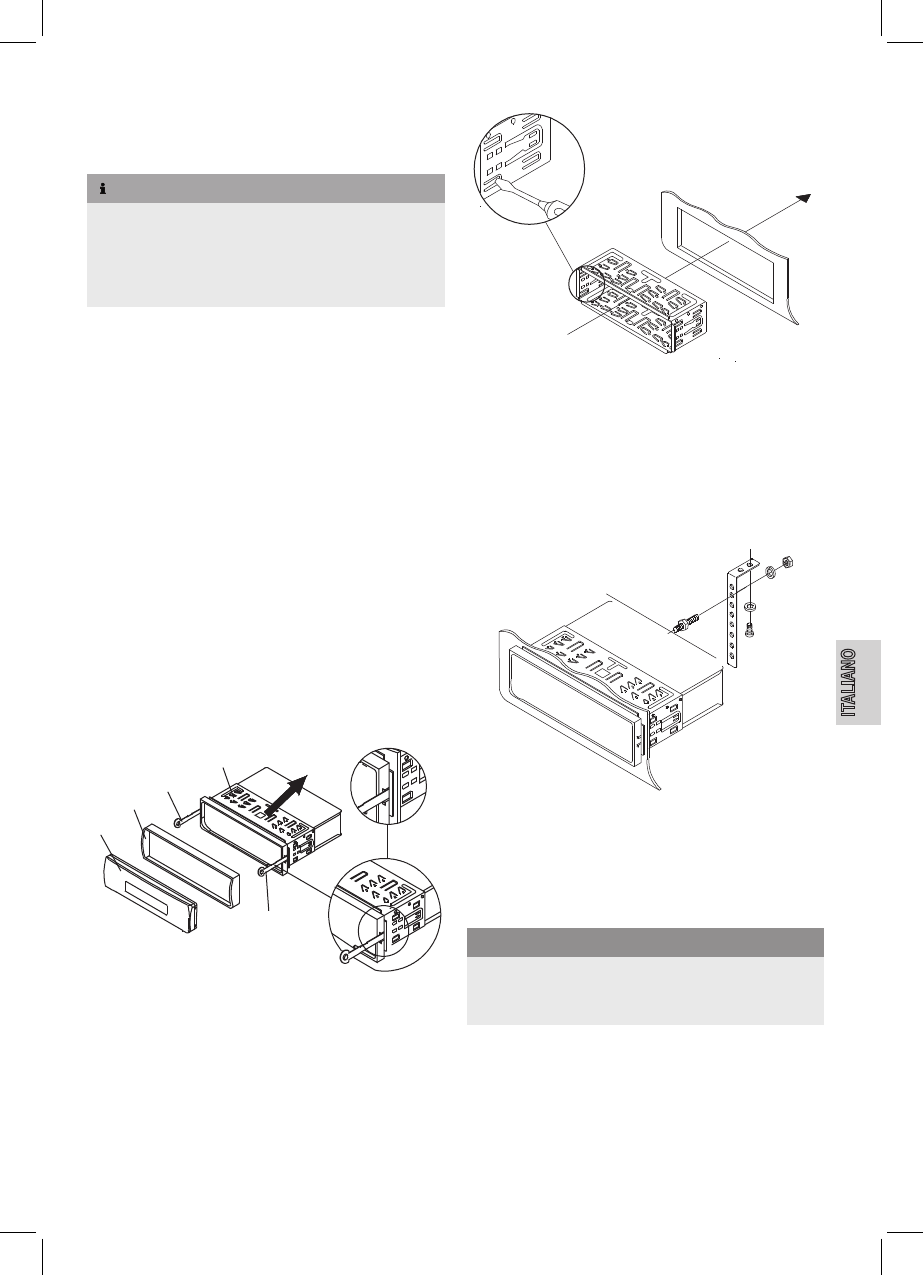
Installazione nel vano ISO
Rimuovere la pista (D) e la montatura (B) dall’unità. Usare le
chiavi di installazione (C), se necessario.
Posizionare la pista nel vano ISO.
Piegare le alette verso l’esterno con un cacciavite per una
perfetta aderenza.
Vericare gli inserti per un aggancio preciso.
Collegare i connettori ISO femmine dell’unità ai due connettori
ISO maschi del veicolo.
Collegare l’antenna al connettore per antenna sul retro
dell’unità.
Assicurare l’unità contro il furto, se necessario. Fissare il
bullone e la pista di montaggio con i materiali di ssaggio in
corrispondenza del sistema di protezione.
Far scivolare con attenzione l’unità nella pista nchè non si
blocca ed aggancia.
Premere
RESET (4) con una penna o con un altro oggetto
appuntito dopo che sono stati effettuati tutti i collegamenti.
Attaccare il pannello anteriore (A) come descritto in “Attaccare
il pannello anteriore”.
ATTENZIONE
Possibile danno ai cavi!
Per evi
► tare danni ai cavi osservare i cavi quando si inserisce
l’unità nella pista.
Attaccare la montatura.