55
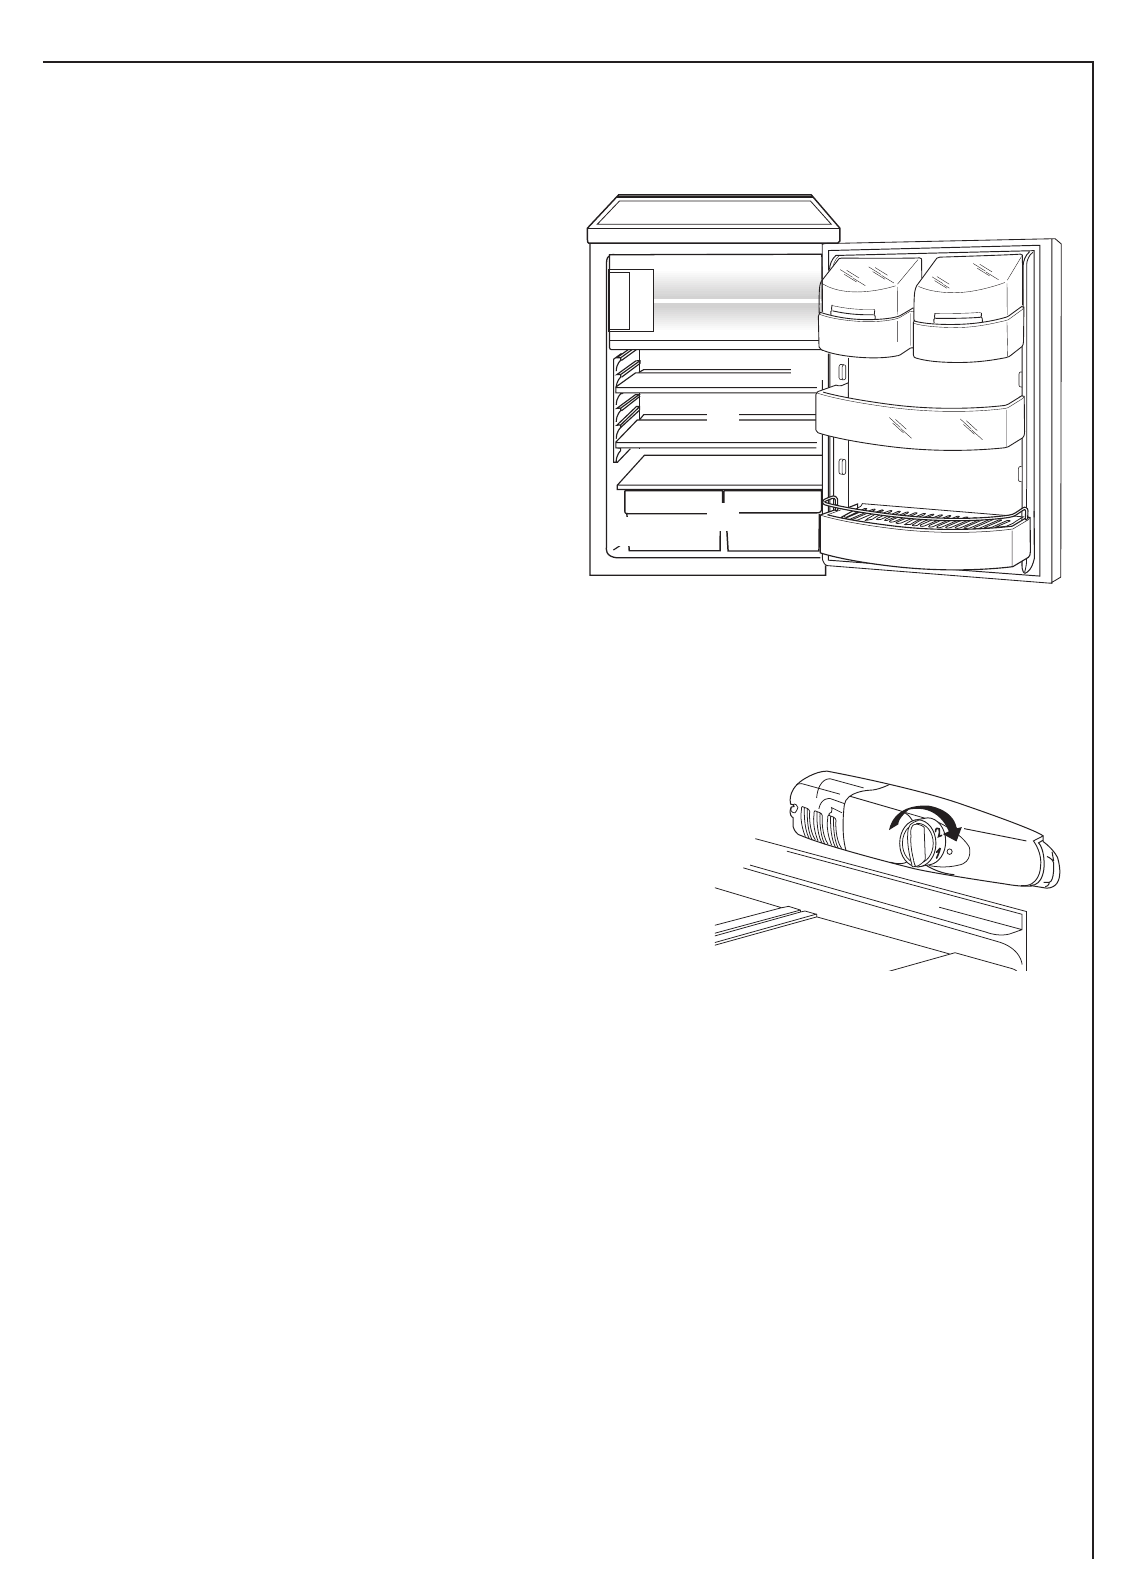
➀
Butter/cheese compartment with flap
➁
Door storage compartment
➂
Bottle shelf
➃
Vegetable baskets
➄
Storage shelves
➅
Temperature regulator and light switch
➆
Freezer compartment
➇
Rating plate
Description of the appliance
View of the appliance
➀
➁
➃
➄
➂
➅
➇
➆
Starting up and temperature regulation
Connect the appliance to the mains electricity supply.
When the refrigerator compartment door is opened, the internal lighting is switched on.
The temperature selector knob is located on the right hand side
of the refrigerator compartment.
Setting “0” means: Off.
Turning clockwise in direction “1”:
Refrigerating unit on, the latter then operates automatically.
Setting “1” means:
Hightest temperature, warmest setting.
Setting “6” (end-stop) means:
Lowest temperature, coldest setting.
The temperatures in the refrigerator compartment and freezer compartment cannot be independently
regulated.
At a low ambient temperature of around 16°C, setting “1” should be selected. At ambient temperatures
of around 25°C, select setting “2”.
If you require a lower temperature, select setting “3” or “4”. On this setting , you can be sure the fresh
food placed in the freezer compartment will be reliably frozen and that a storage temperature of -18°C
will be maintained in the freezer compartment.
If you want to freeze fresh food rapidly, select setting “6”, ensuring that the temperature in the refriger-
ator compartment does not drop below 0°C. You should also promptly reset the thermostat knob to set-
ting “3” or “4” after the freezing of the fresh food is complete.
Important!
High ambient temperatures (e.g. on hot summer days) and a cold setting on the thermostat (position”5”
to “6”) can cause the compressor to run continuously.
Reason: when the ambient temperature is high, the compressor must run continuously to maintain the
low temperature in the appliance. The fridge will not be able to defrost since automatic defrosting of the
fridge is only possible when the compressor is not running (see also "Defrosting" section). The result is
the build up of a thick layer of frost on the fridge rear wall.
If this happens, turn the thermostat knob back to a warmer setting (position “3” to “4”). At this setting
the compressor will be switched on and off as usual and automatic defrosting recommenced.
☞