DR650S-1CH
3
Tips for optimal performance ..................................41
Formatting the microSD card ................................................ 41
Format using the dashcam’s self-format function .............................................41
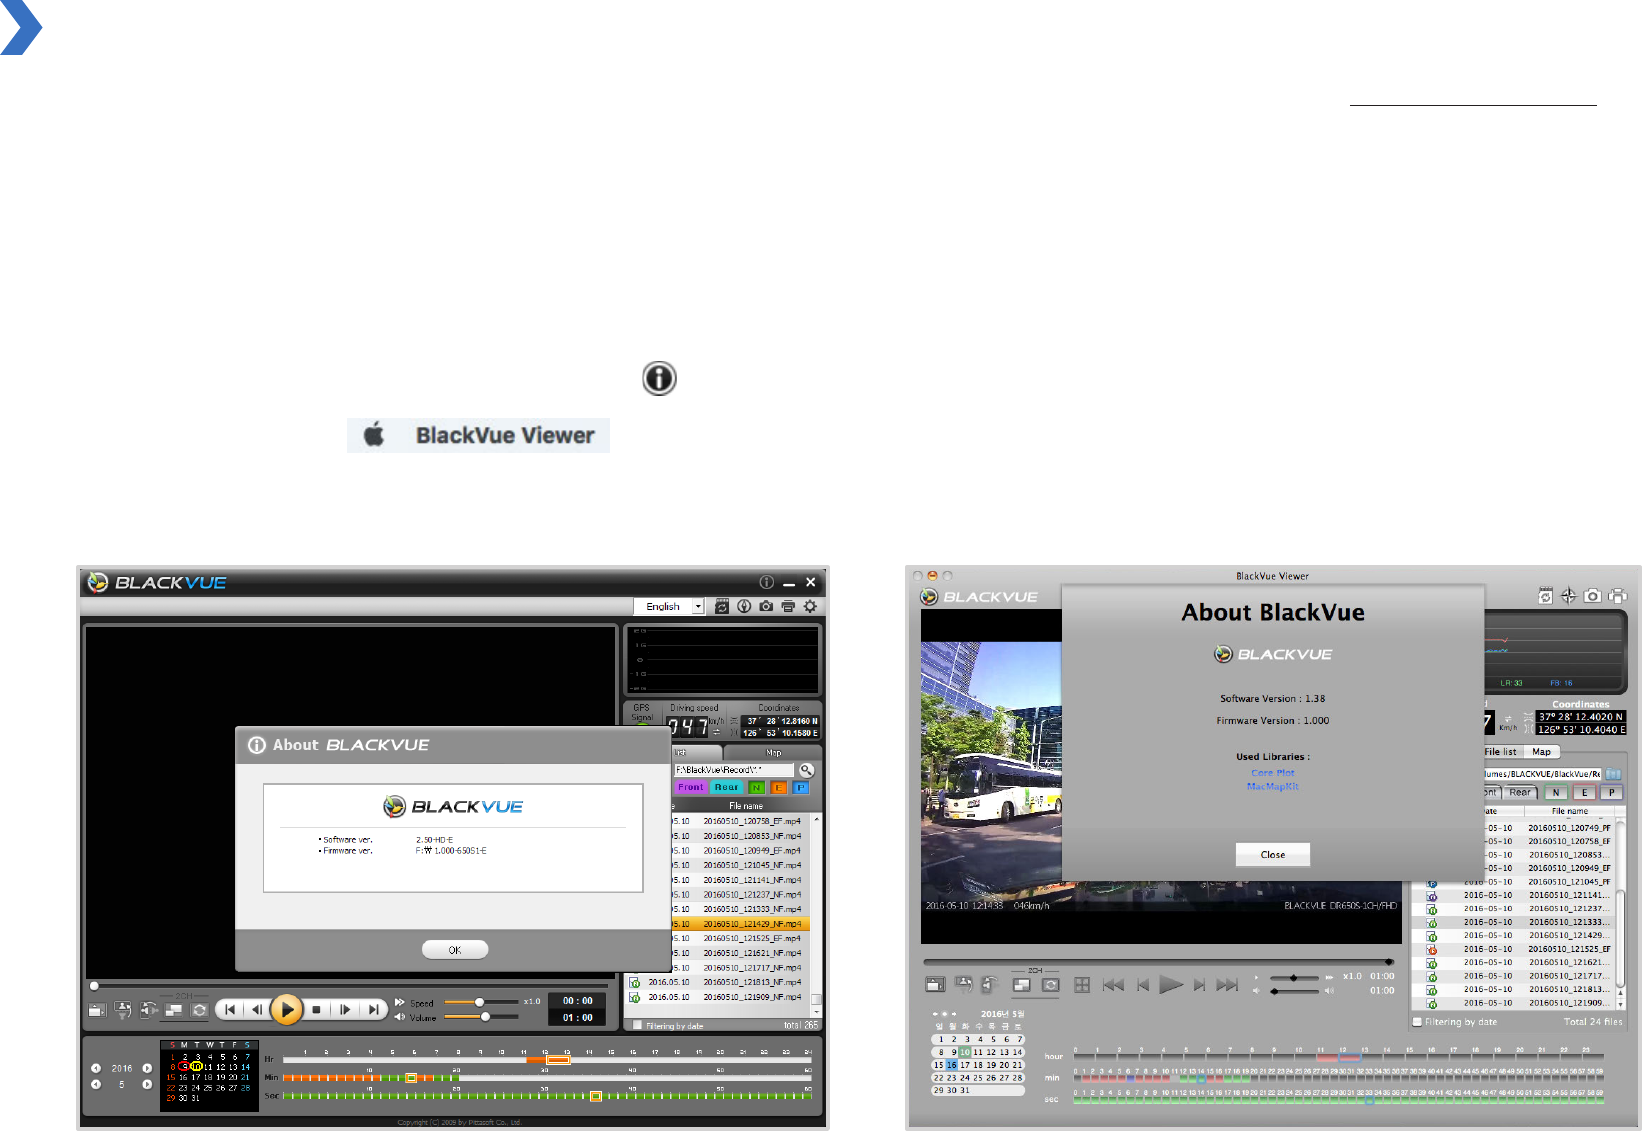
Format using Windows Viewer
..............................................................................42
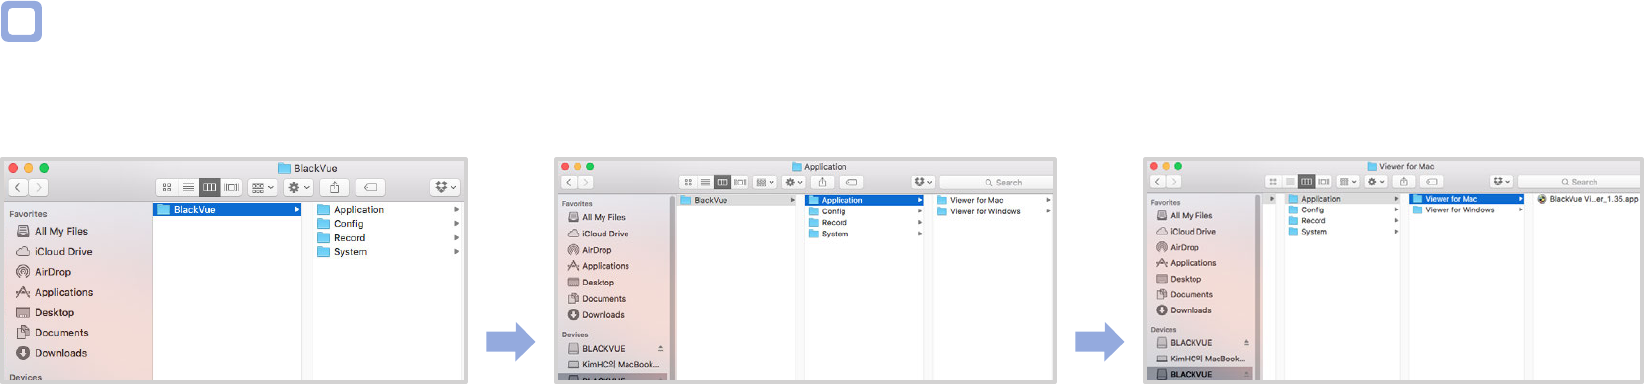
Format using Mac Viewer
.......................................................................................43
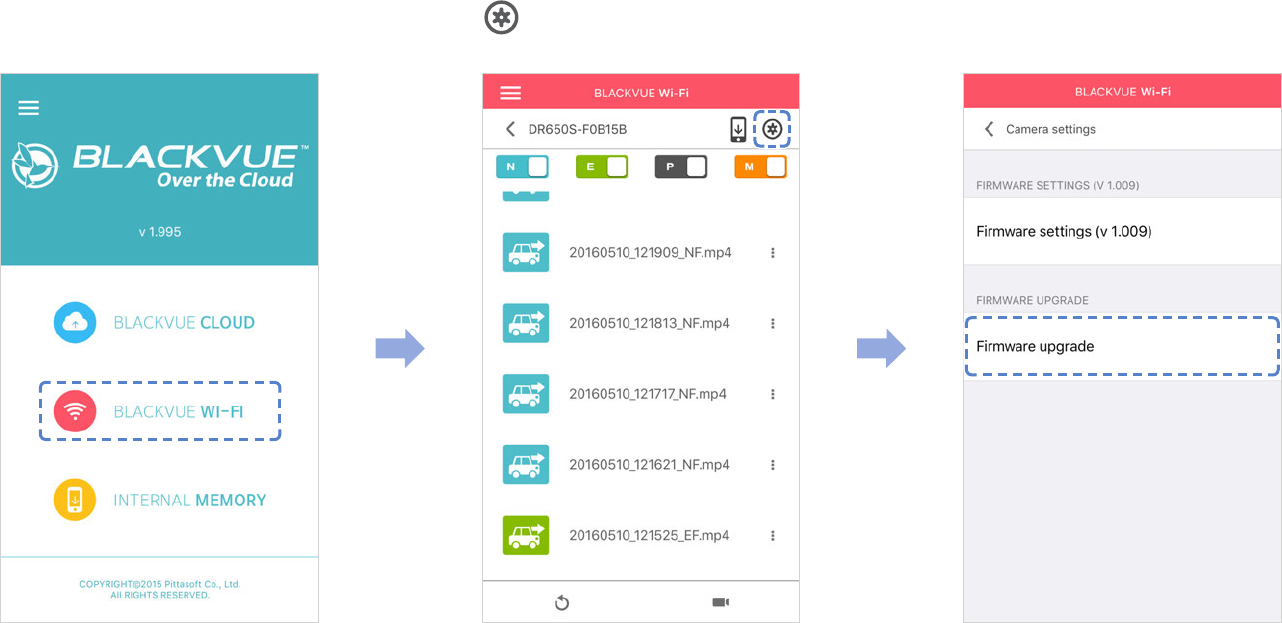
Upgrading the rmware ......................................................... 45
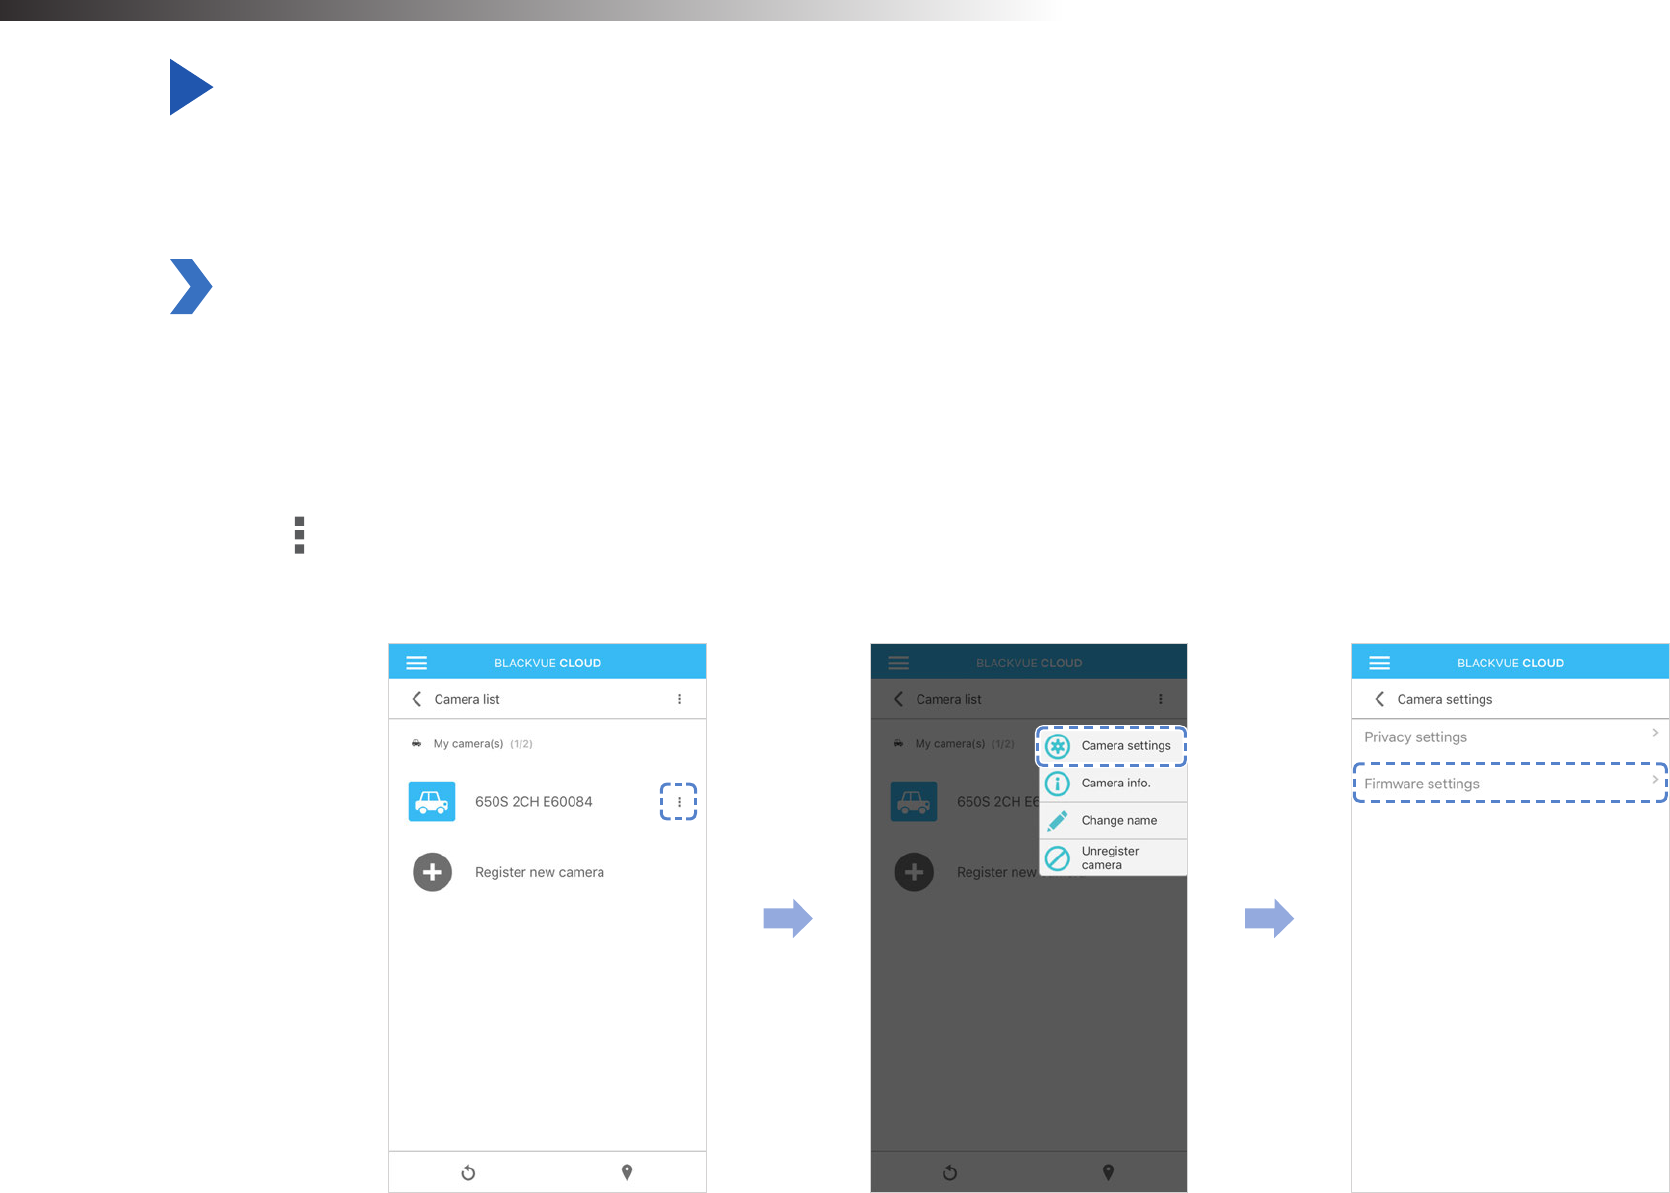
Upgrading the rmware using an iOS or Android device
(Firmware Over The Air)
..........................................................................................45
Upgrading the rmware using a computer (Windows or Mac)
.......................48
Changing settings .....................................................50
Changing settings using your smartphone (Android/iOS) .... 50
Basic settings ............................................................................................................51
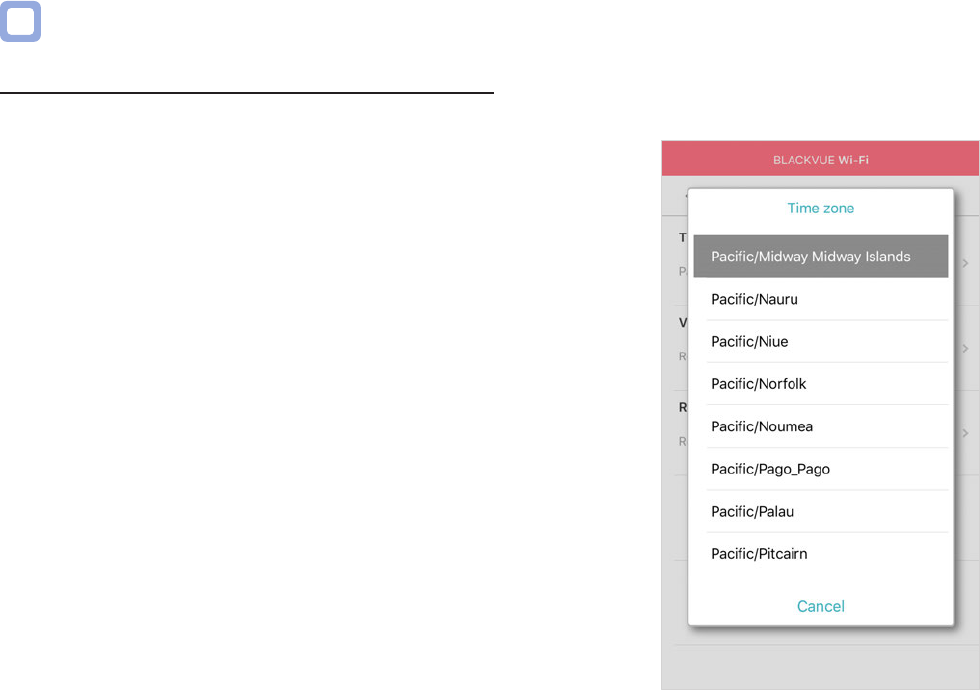
Time zone ........................................................................................................................................52
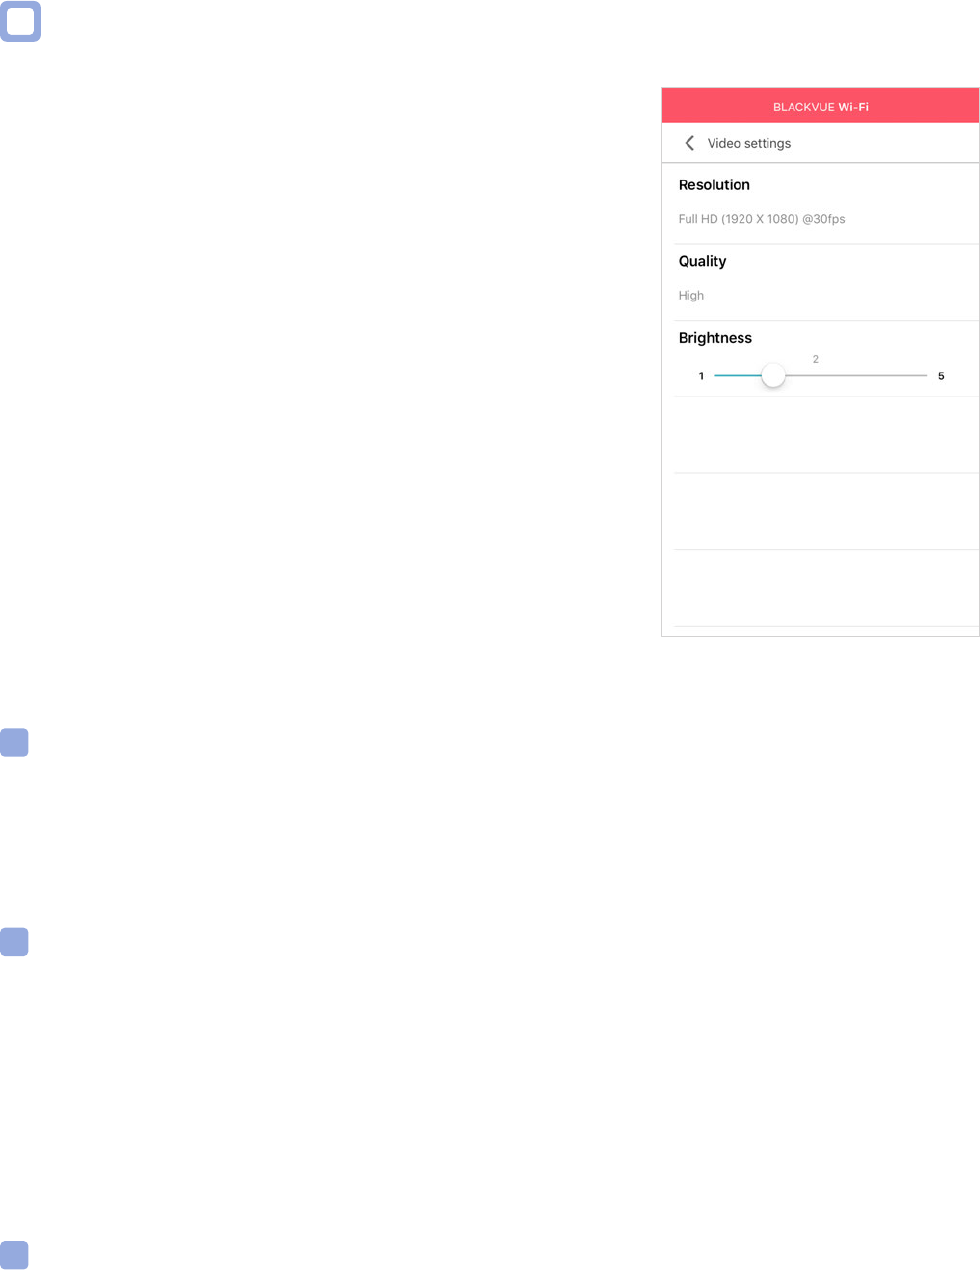
Video settings
................................................................................................................................. 53
Resolution ....................................................................................................................................................................... 53
Image quality
.................................................................................................................................................................. 53
Brightness
........................................................................................................................................................................ 53
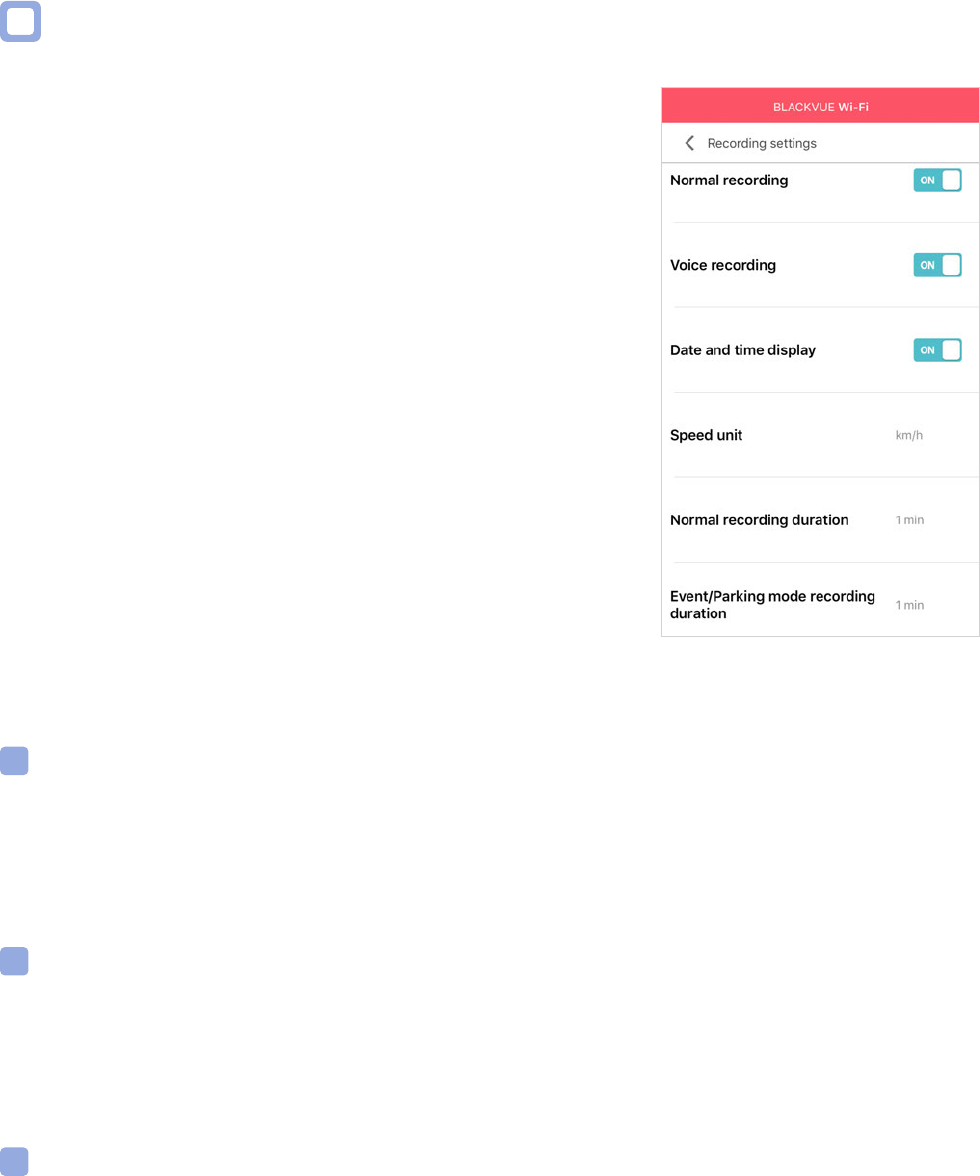
Recording settings ......................................................................................................................... 54
Normal recording .......................................................................................................................................................... 54
Voice recording
.............................................................................................................................................................. 54
Date and time display
.................................................................................................................................................. 54
Speed unit
...................................................................................................................................................................... 55
Normal recording duration
.......................................................................................................................................... 55
Event/Parking mode recording duration
.................................................................................................................. 55
Auto switching to parking mode
............................................................................................................................... 55
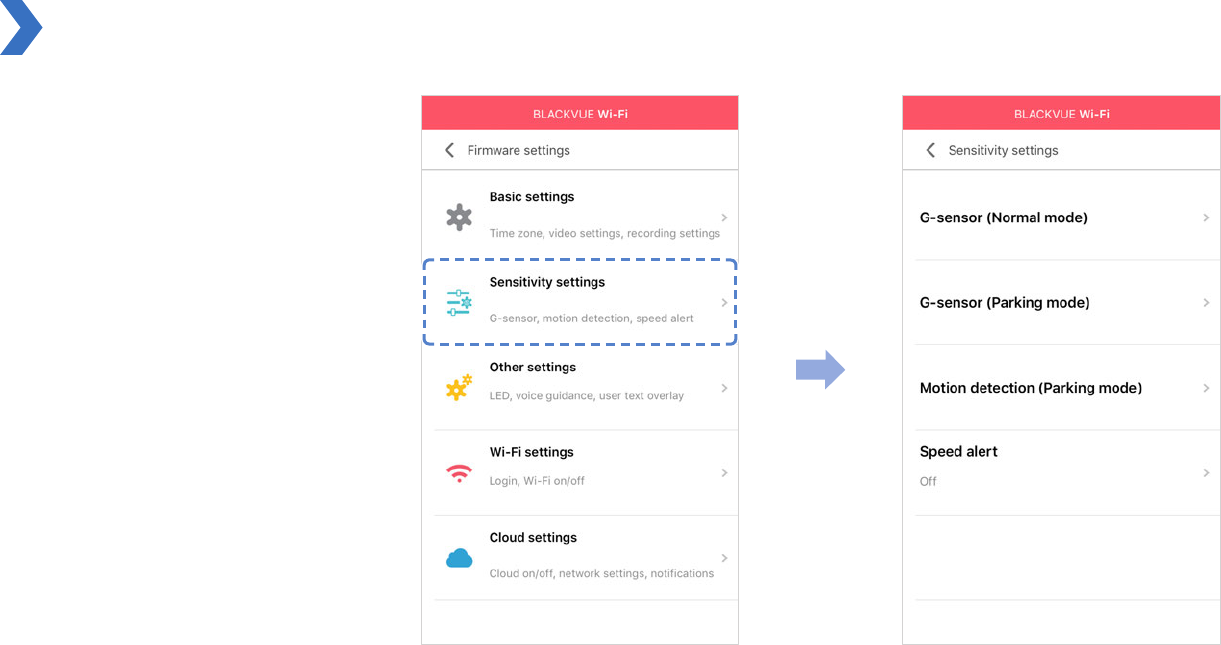
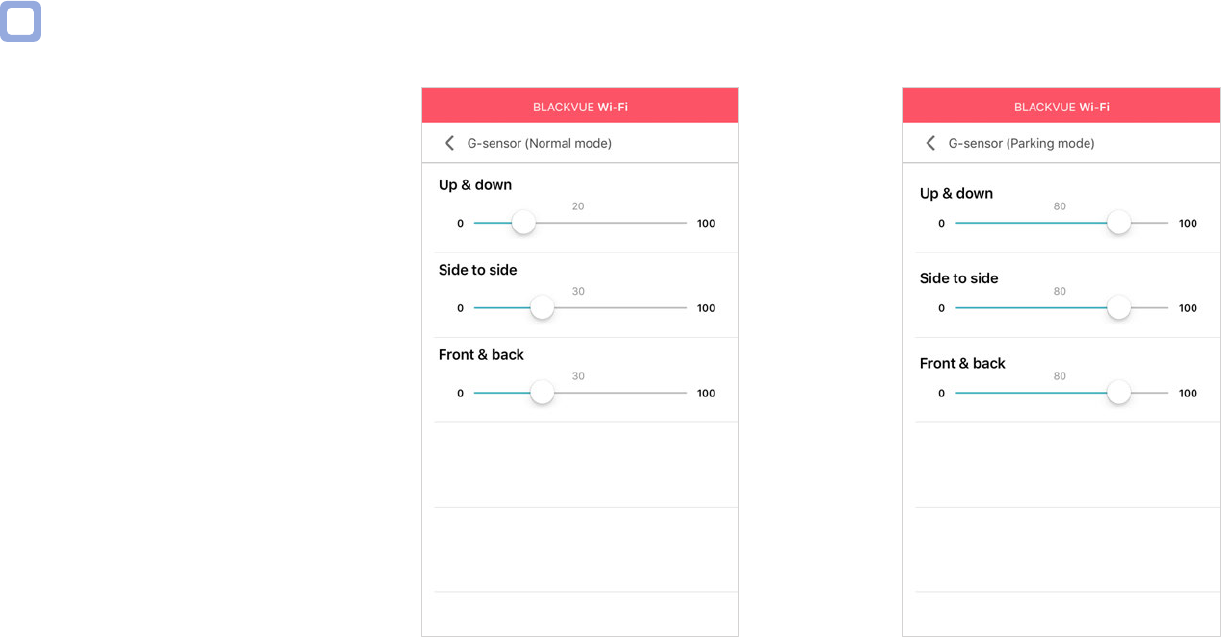
Sensitivity settings ..................................................................................................56
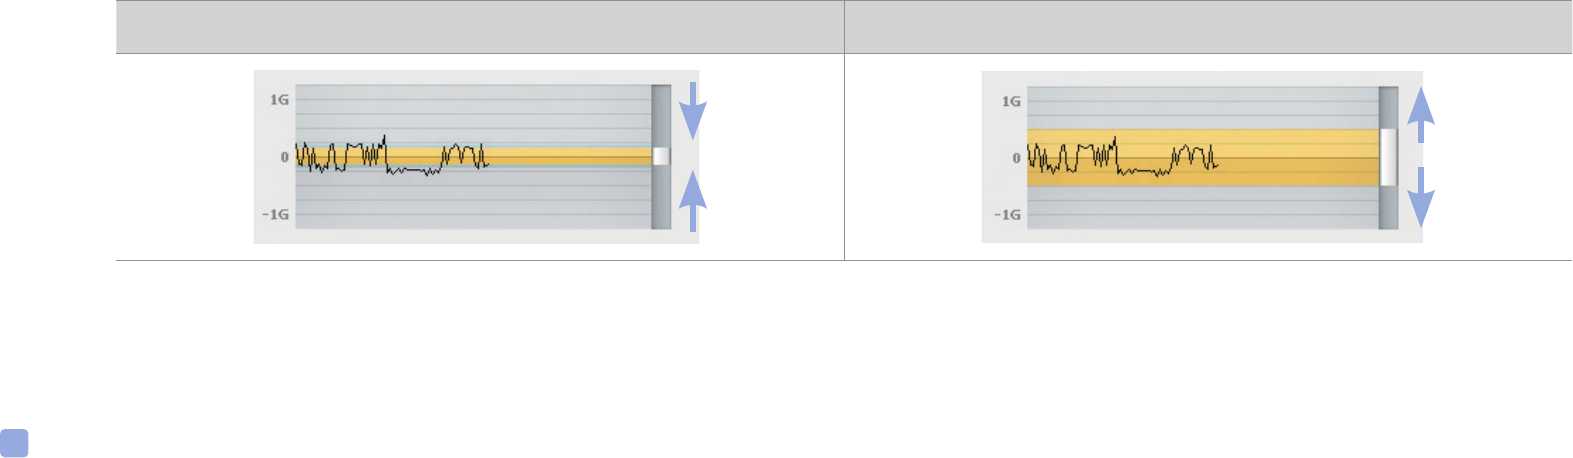
G-sensor (Normal mode and parking mode) ............................................................................ 57
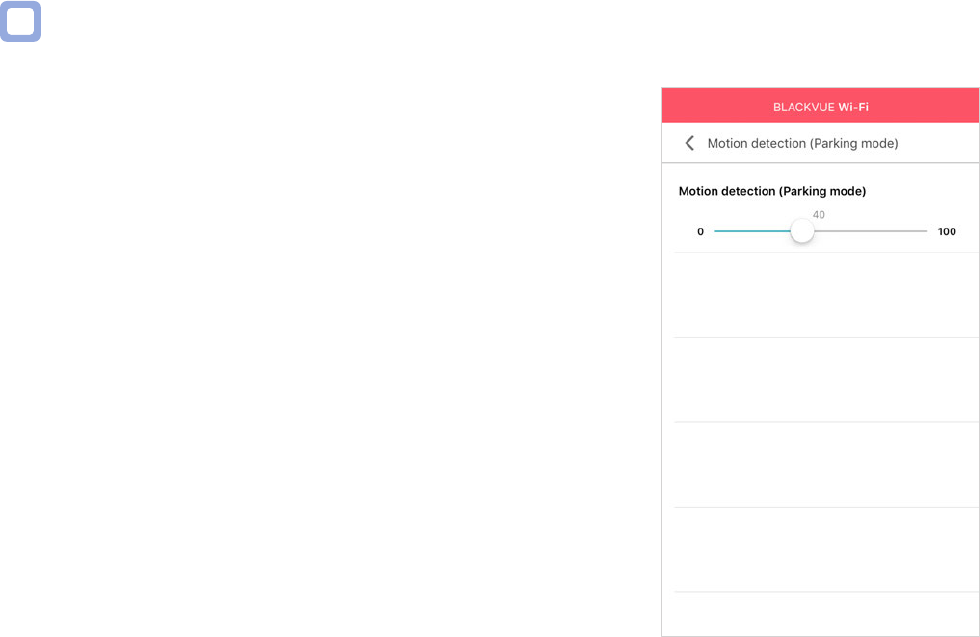
Motion detection (Parking mode)
..............................................................................................58
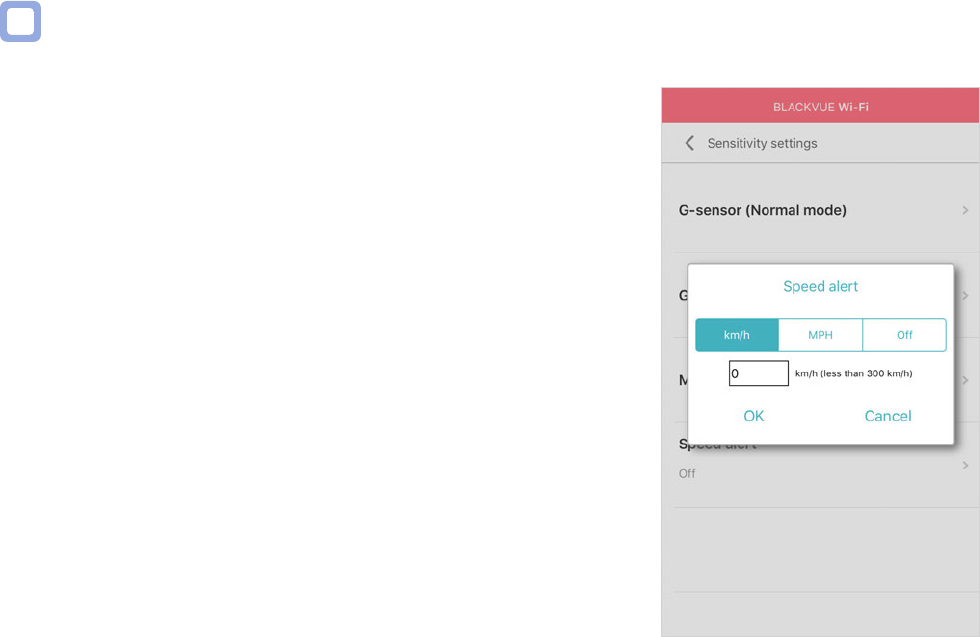
Speed alert
......................................................................................................................................59
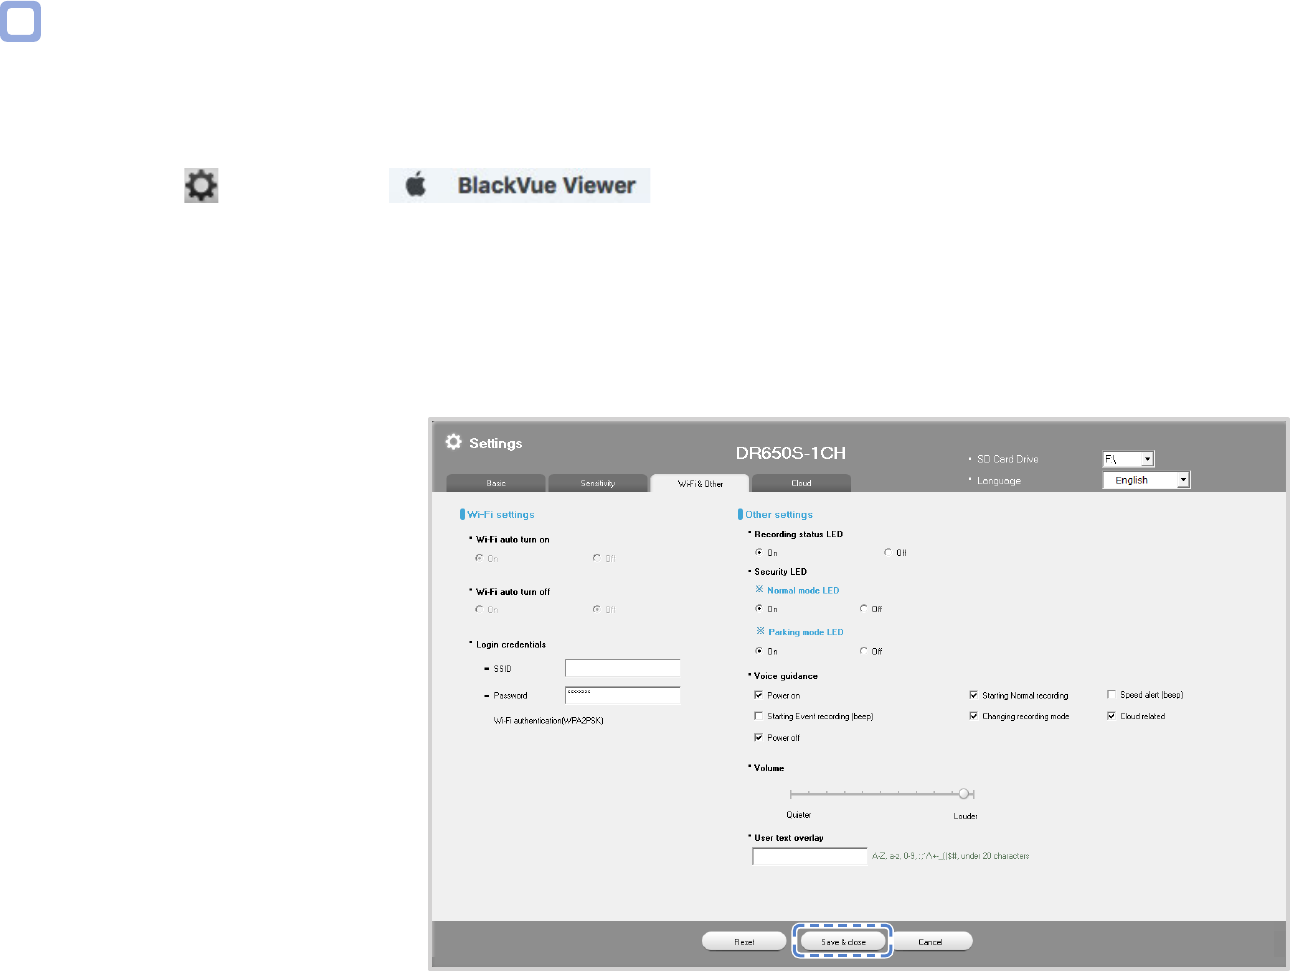
Other settings ..........................................................................................................60
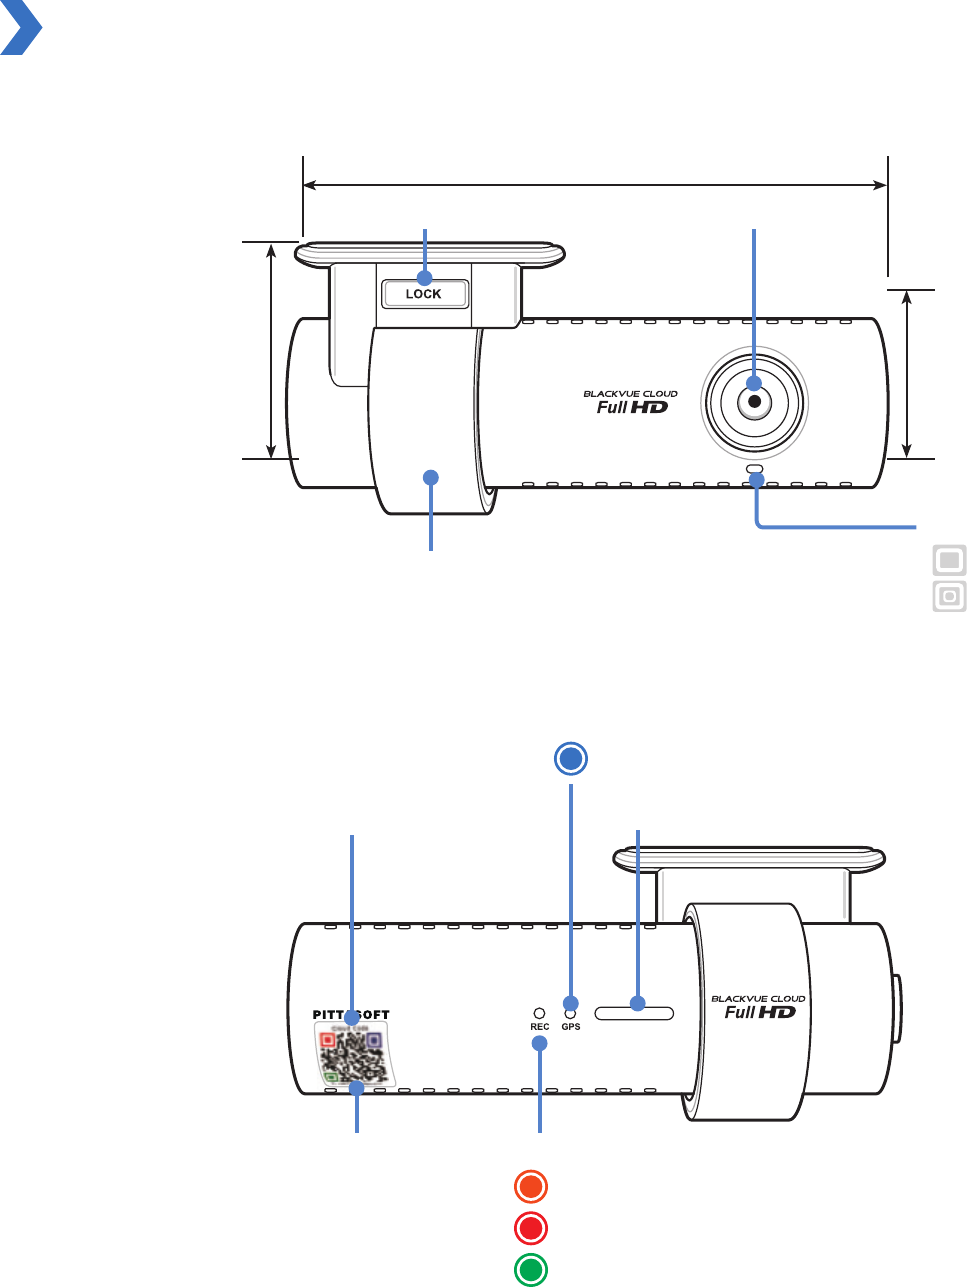
Recording status LED ....................................................................................................................60
Security LED
.................................................................................................................................... 60
Voice guidance
..............................................................................................................................61
Volume
............................................................................................................................................. 61
User text overlay ............................................................................................................................62
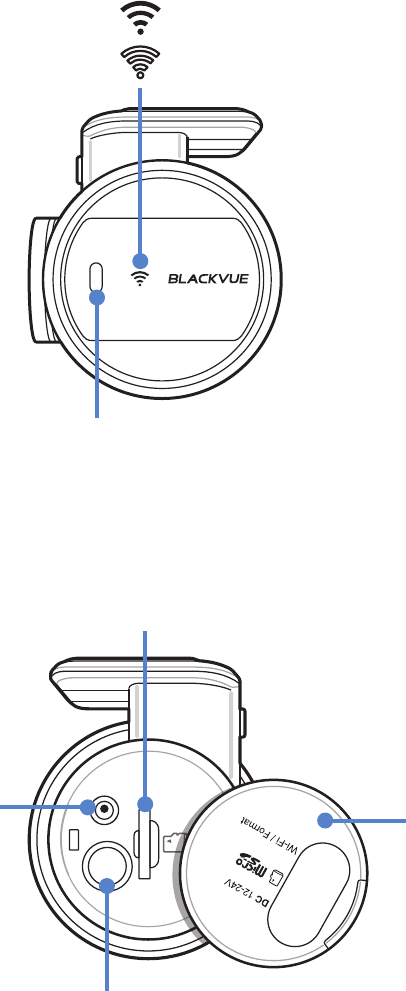
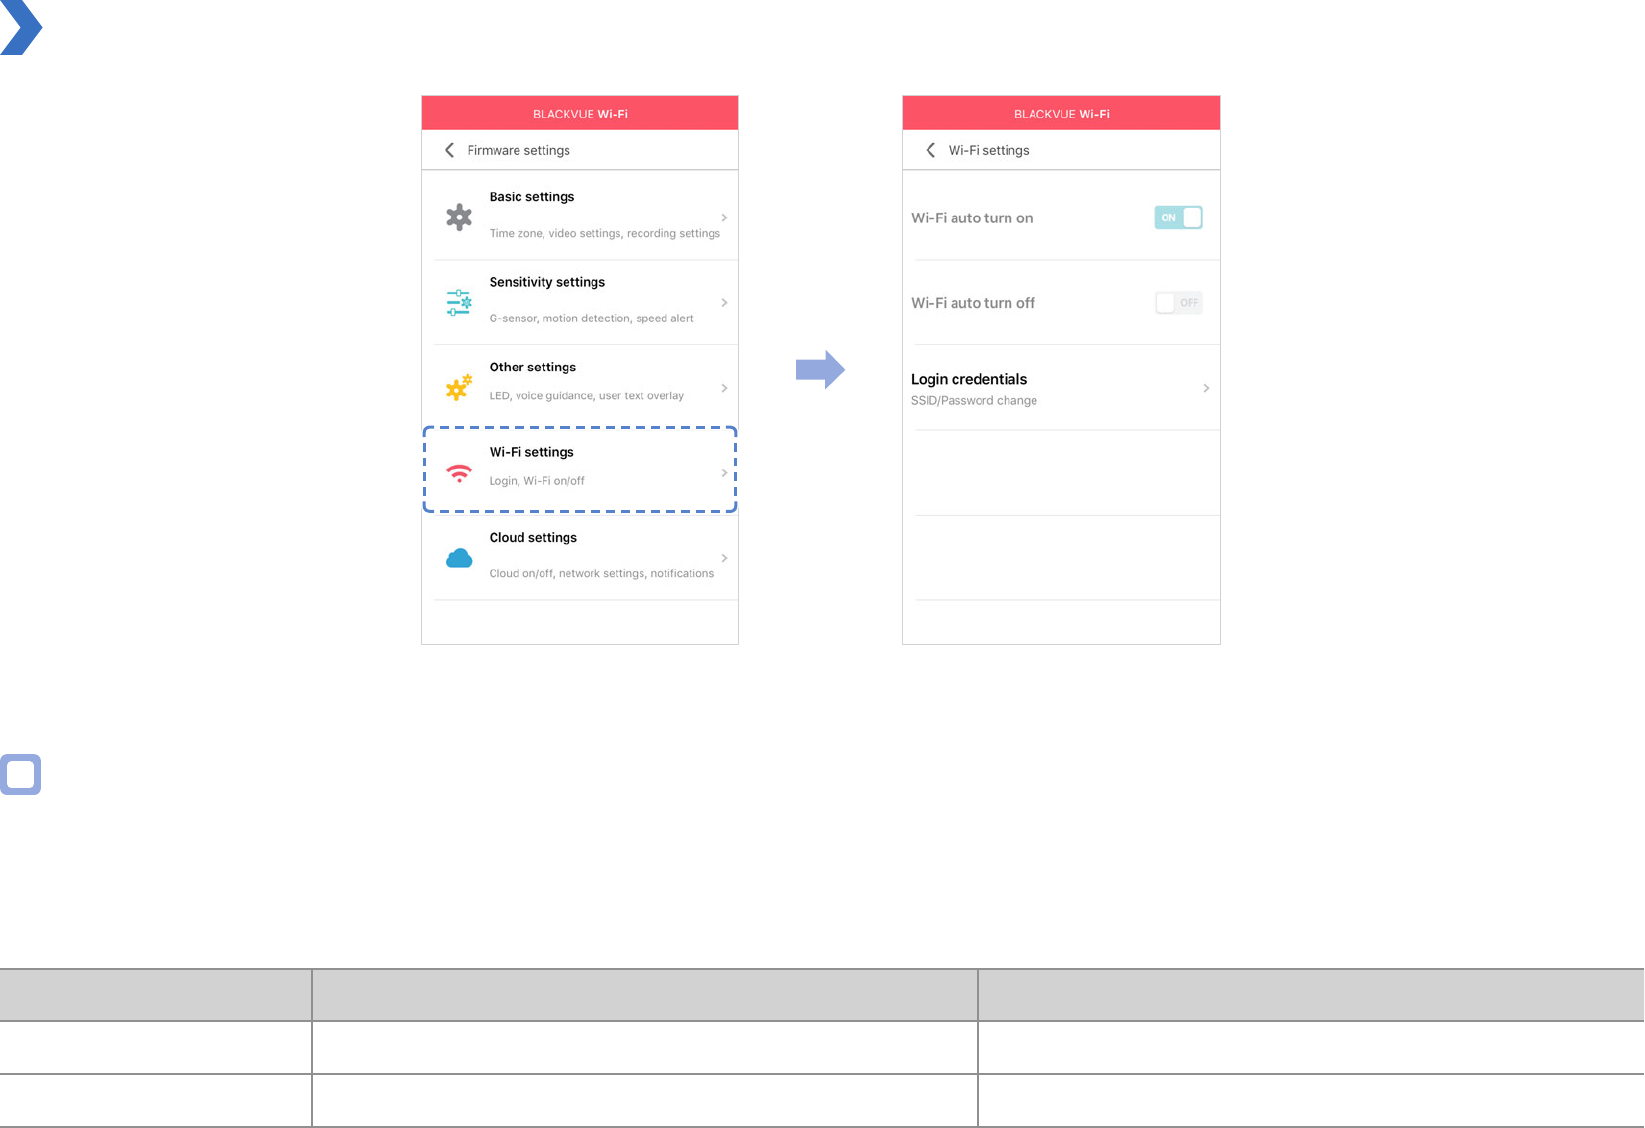
Wi-Fi settings ............................................................................................................63
Wi-Fi auto turn on & o .................................................................................................................63
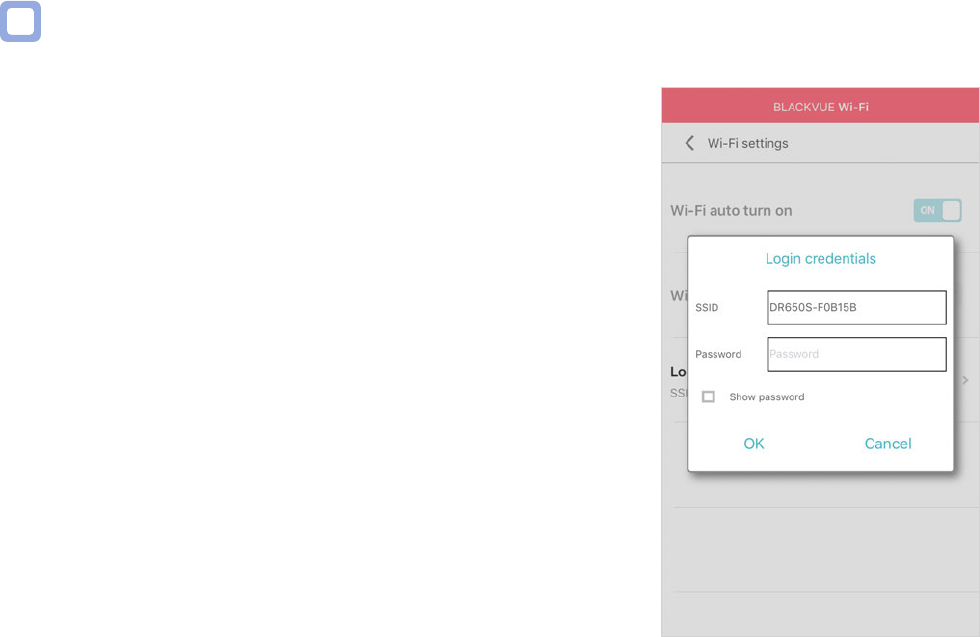
Login credentials
............................................................................................................................64
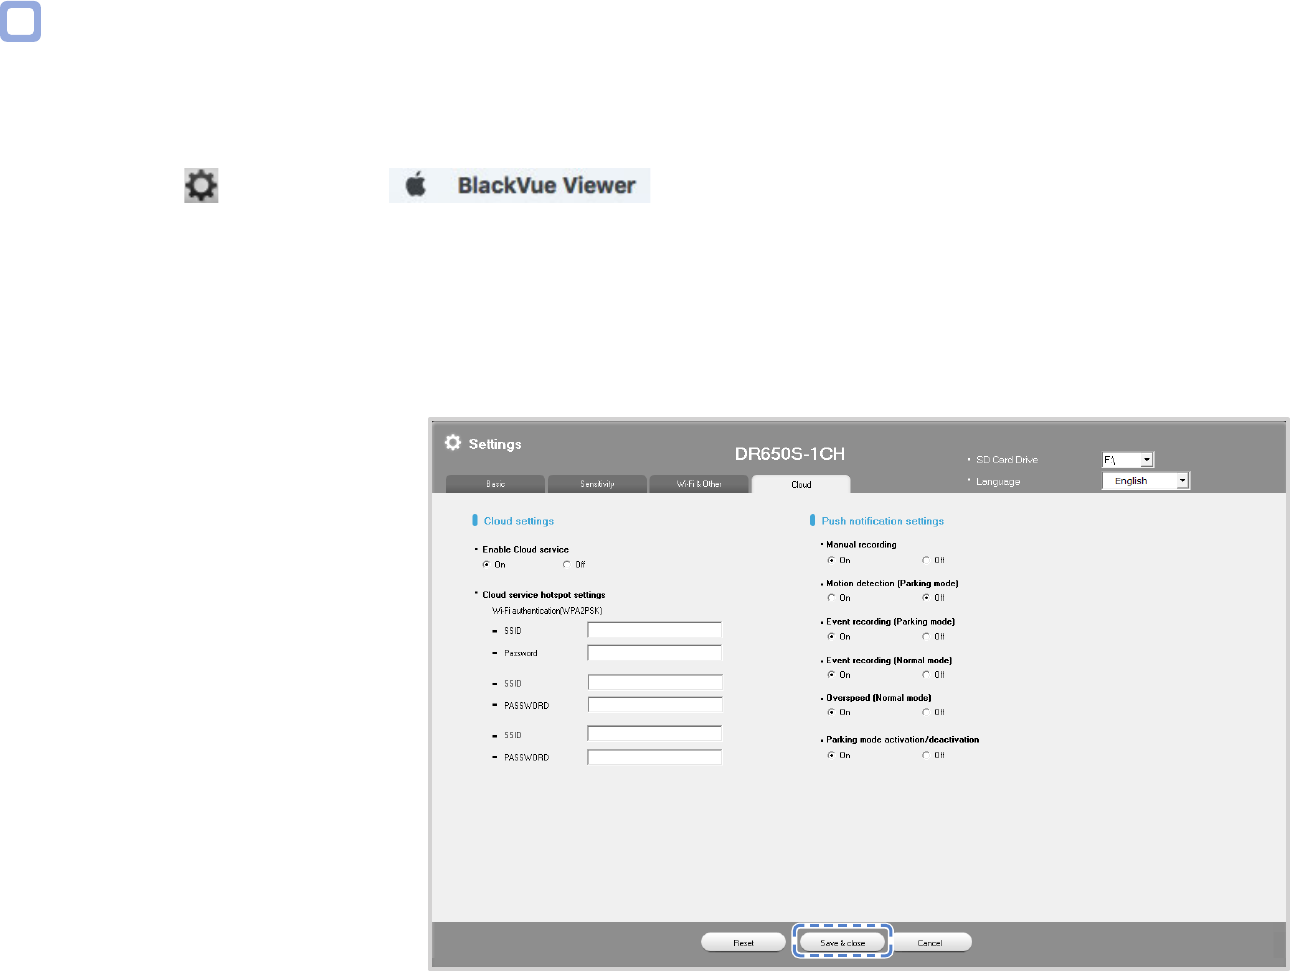
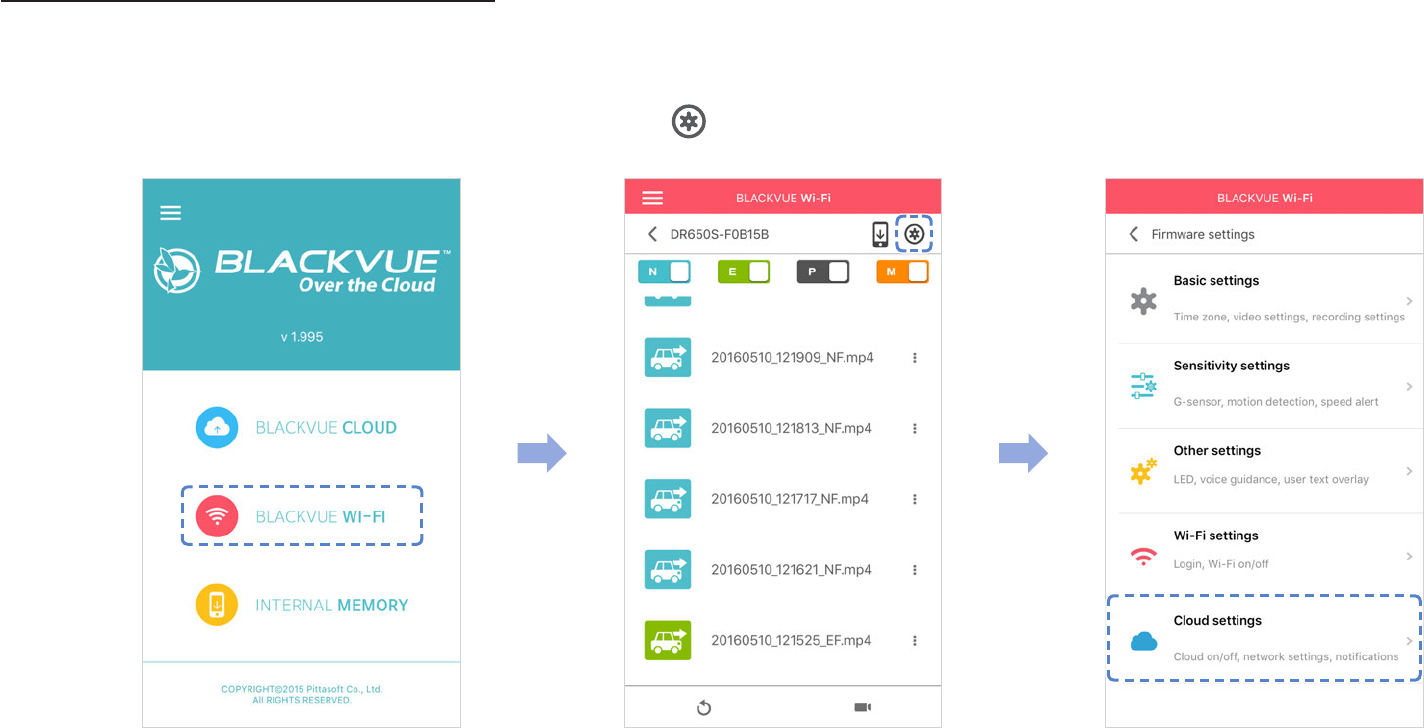
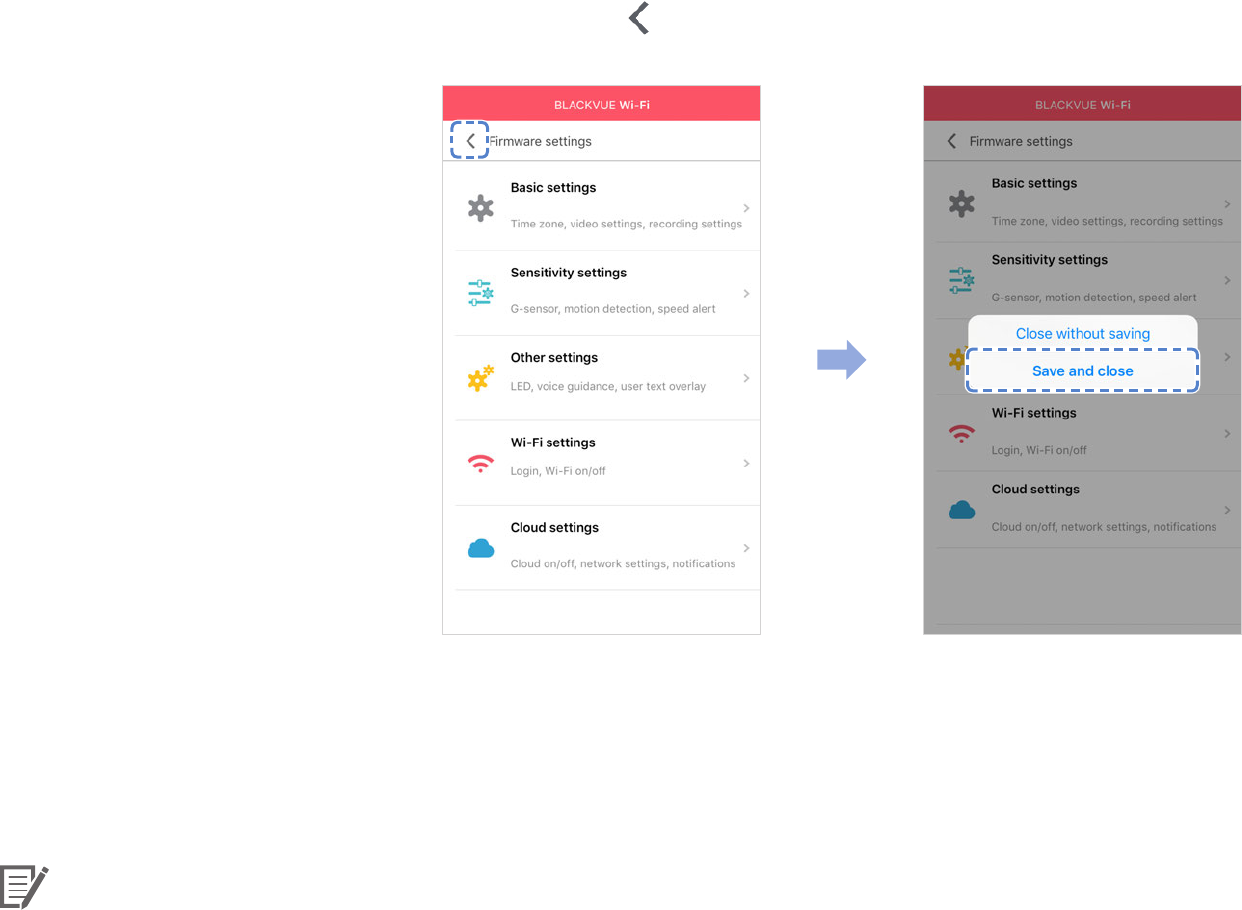
Cloud settings ..........................................................................................................65
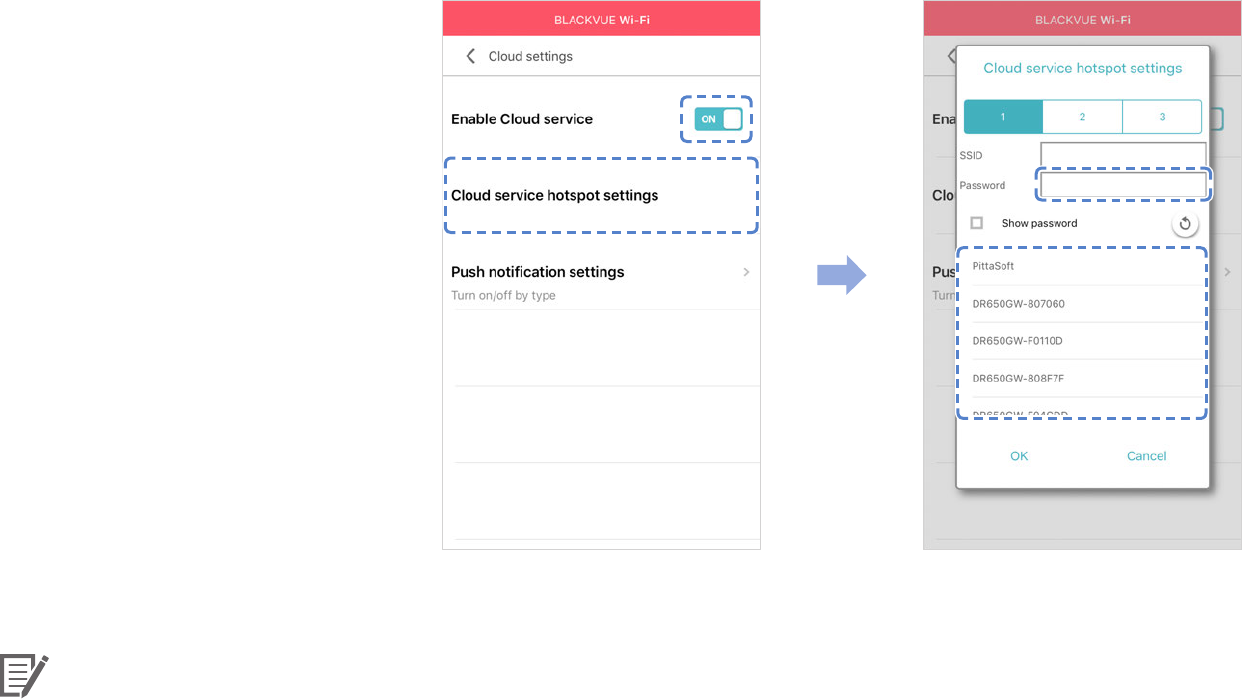
Enable Cloud service ..................................................................................................................... 65
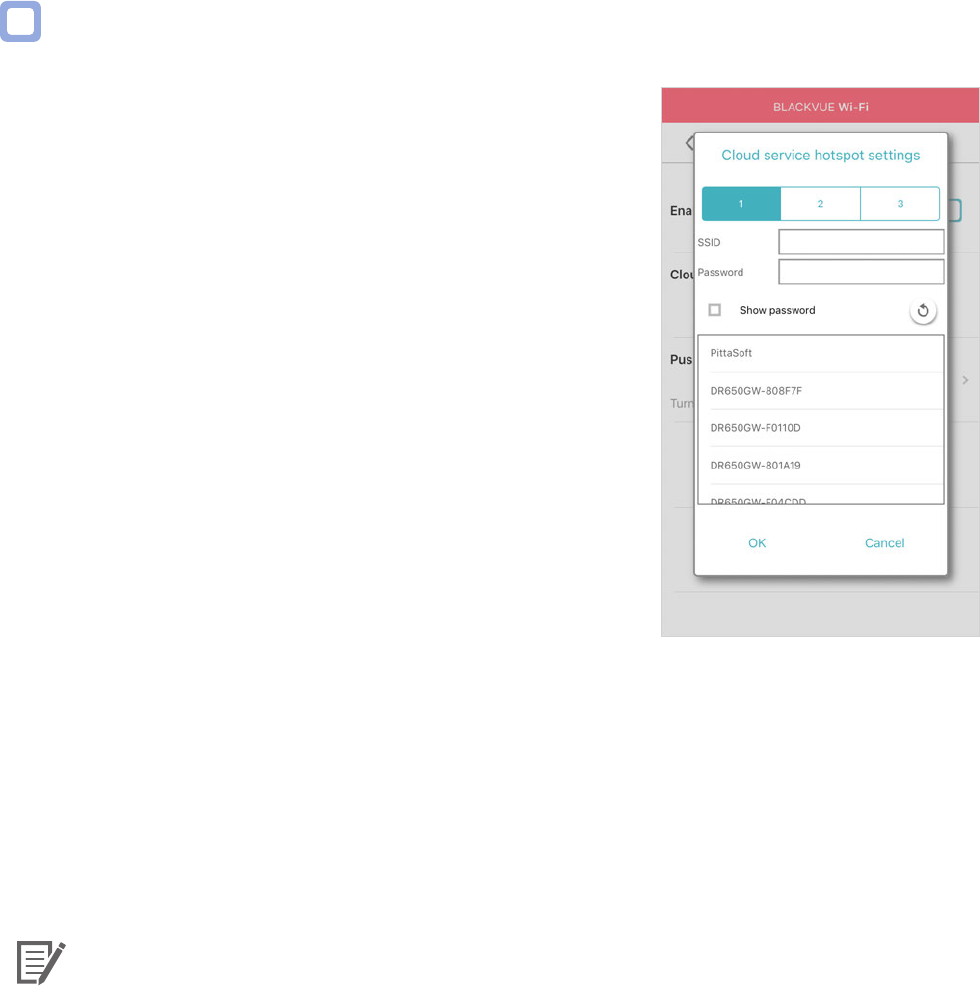
Cloud service hotspot settings
...................................................................................................66
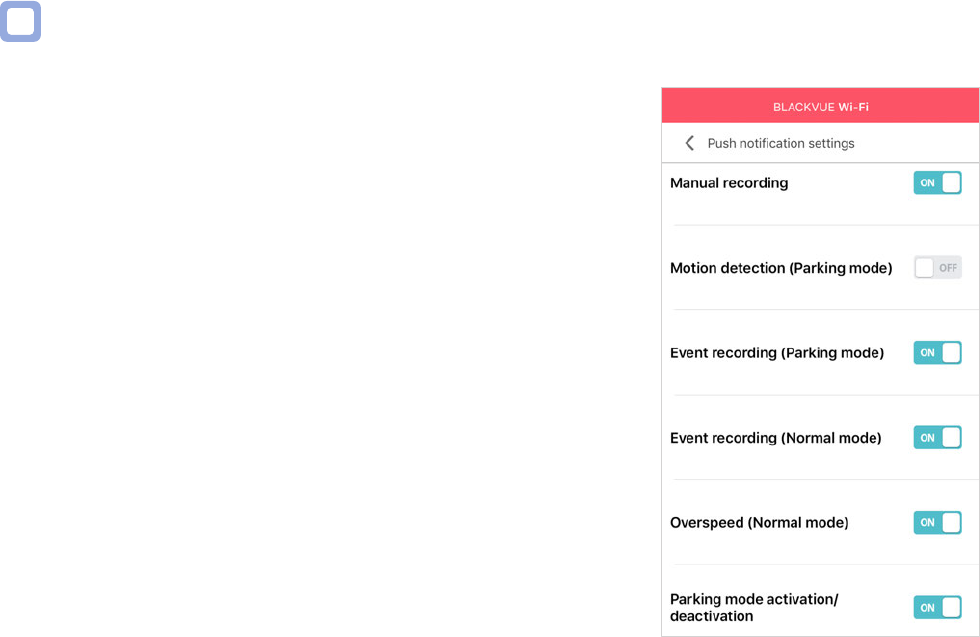
Push notication settings
............................................................................................................67
Changing settings using your computer (Windows/Mac) ... 68
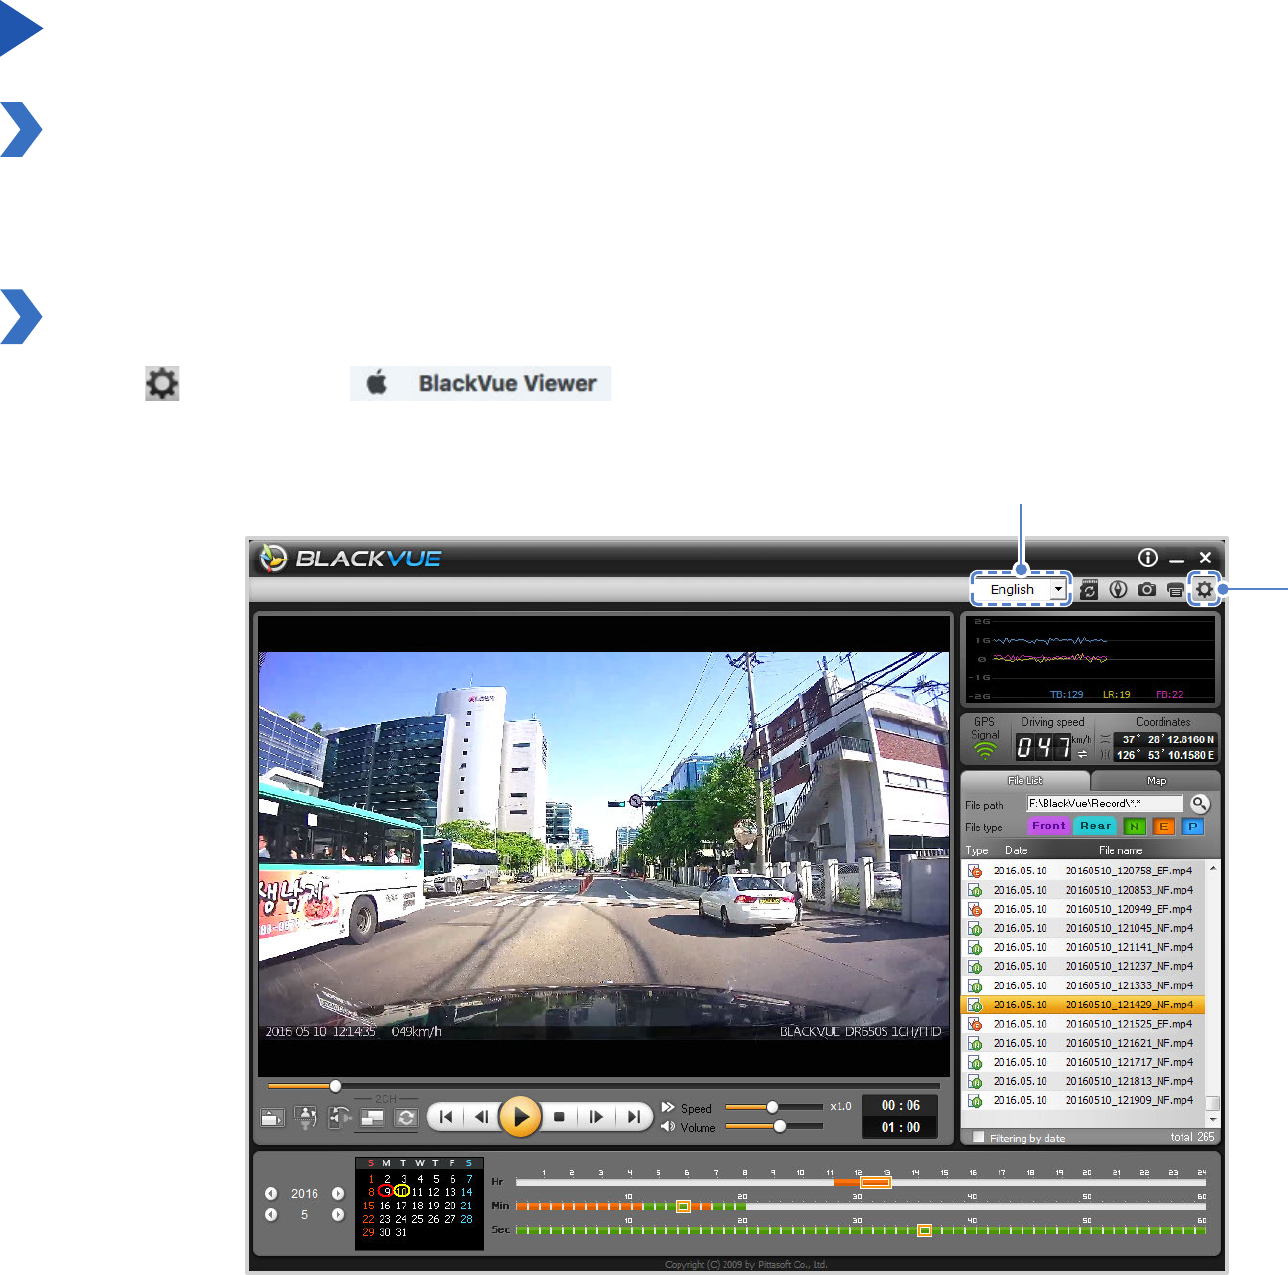
BlackVue Viewer language setting .......................................................................68
BlackVue settings
.....................................................................................................68
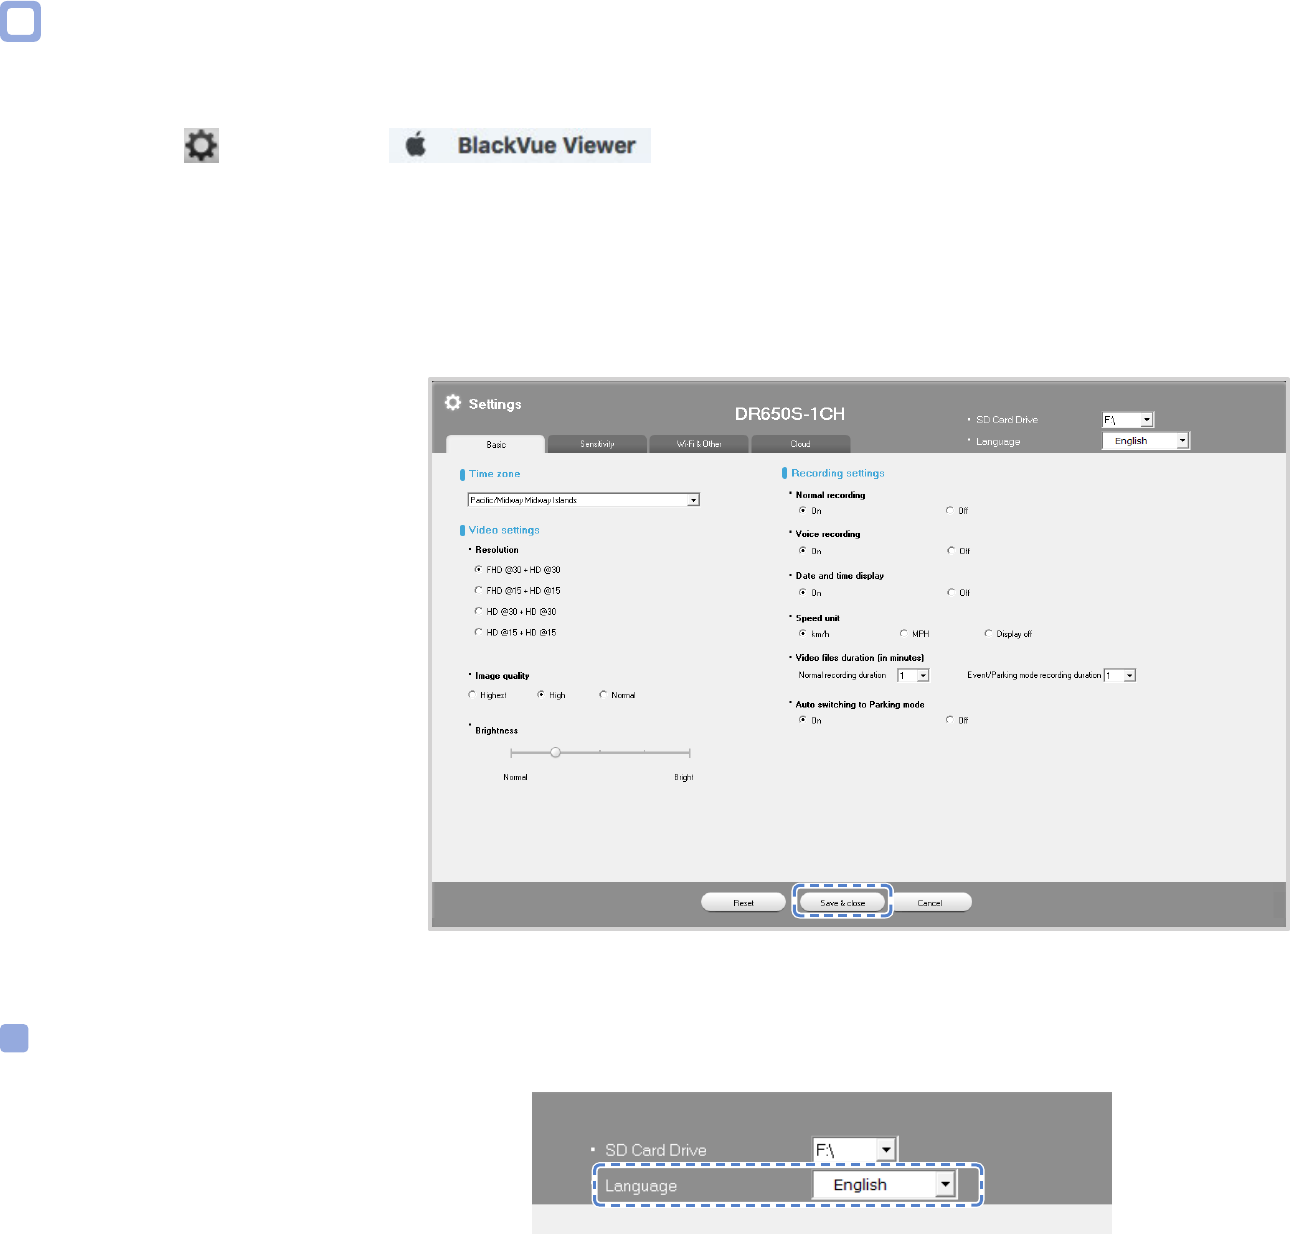
Basic settings ..................................................................................................................................69
Firmware .......................................................................................................................................................................... 69
Setting your time zone.................................................................................................................................................. 70
Video settings
................................................................................................................................................................. 70
Recording settings
......................................................................................................................................................... 71
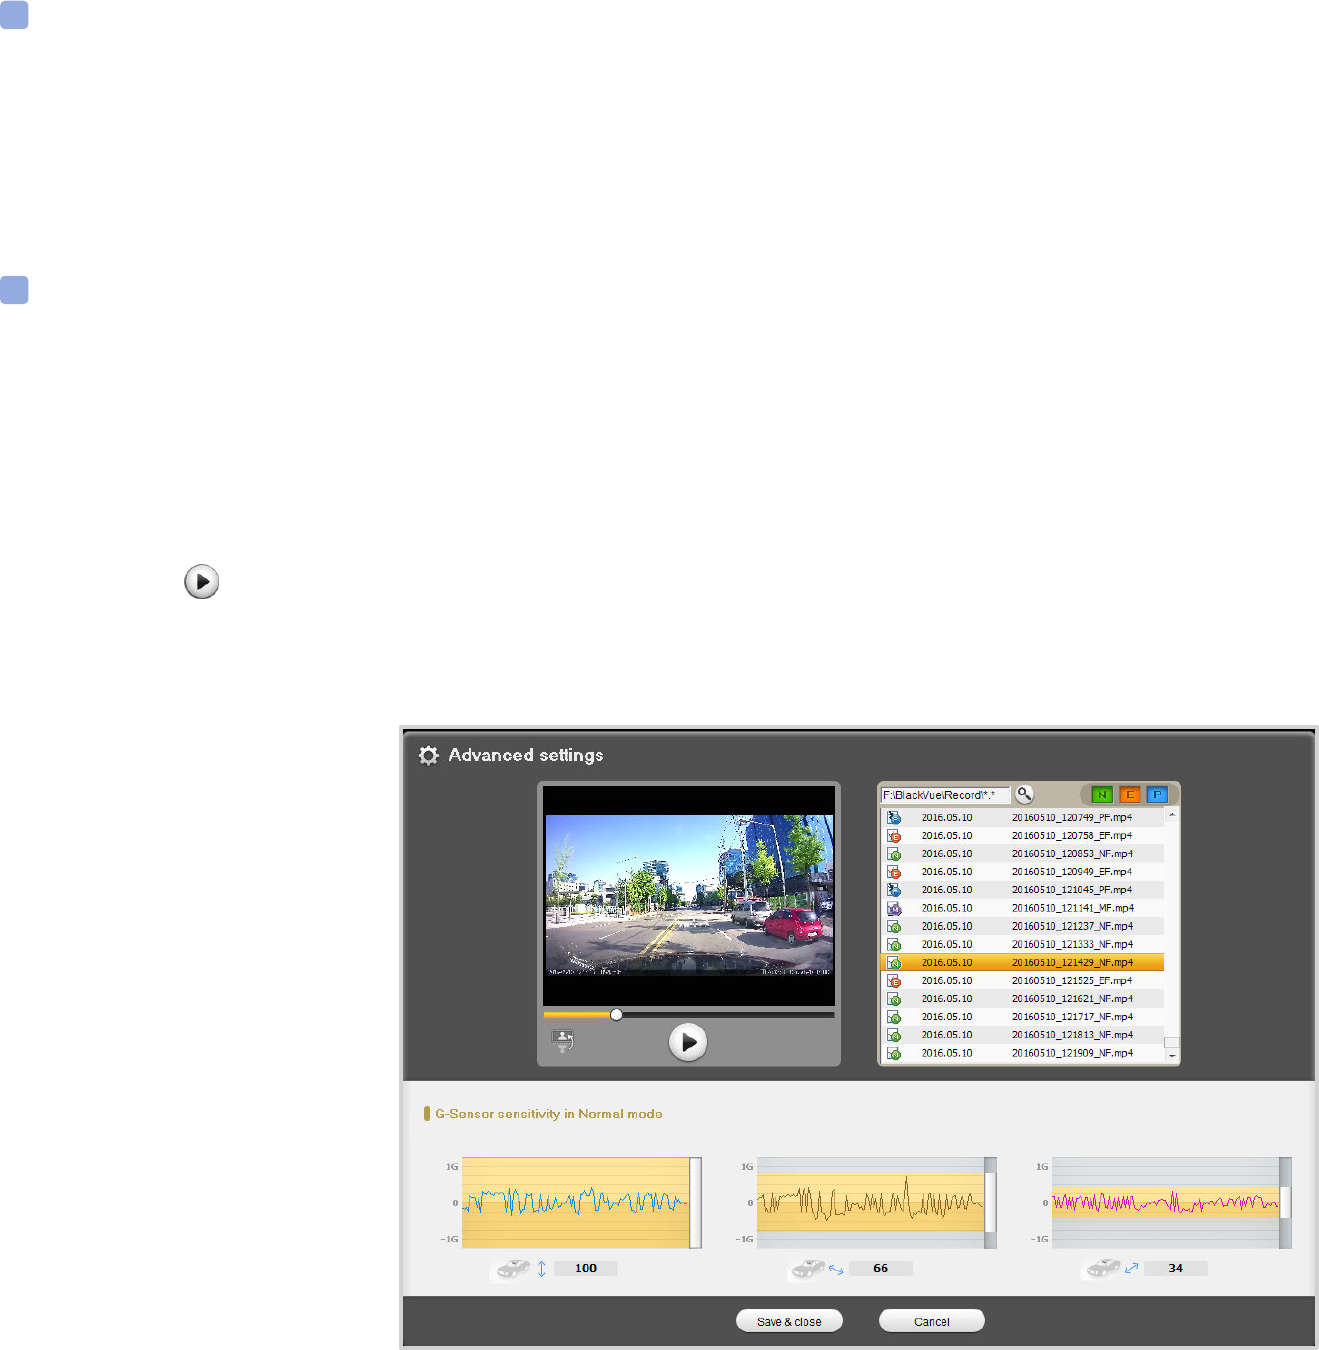
Sensitivity settings ........................................................................................................................ 72
Sensitivity in normal and parking mode ................................................................................................................... 72
Sensitivity of the motion detection (parking mode)
.............................................................................................. 73
Advanced sensitivity settings for normal and parking mode
............................................................................... 73
Speed alert
...................................................................................................................................................................... 74
Wi-Fi & Other settings ...................................................................................................................75
Wi-Fi settings .................................................................................................................................................................. 76
Other settings
................................................................................................................................................................ 76
Cloud settings .................................................................................................................................78
Cloud settings ................................................................................................................................................................. 79
Push notication settings
............................................................................................................................................. 79
Applying the settings ....................................................................................................................79
About the Cloud Service ...........................................80
Connect to BLACKVUE CLOUD (Optional) ............................. 80
Optional accessories .................................................86
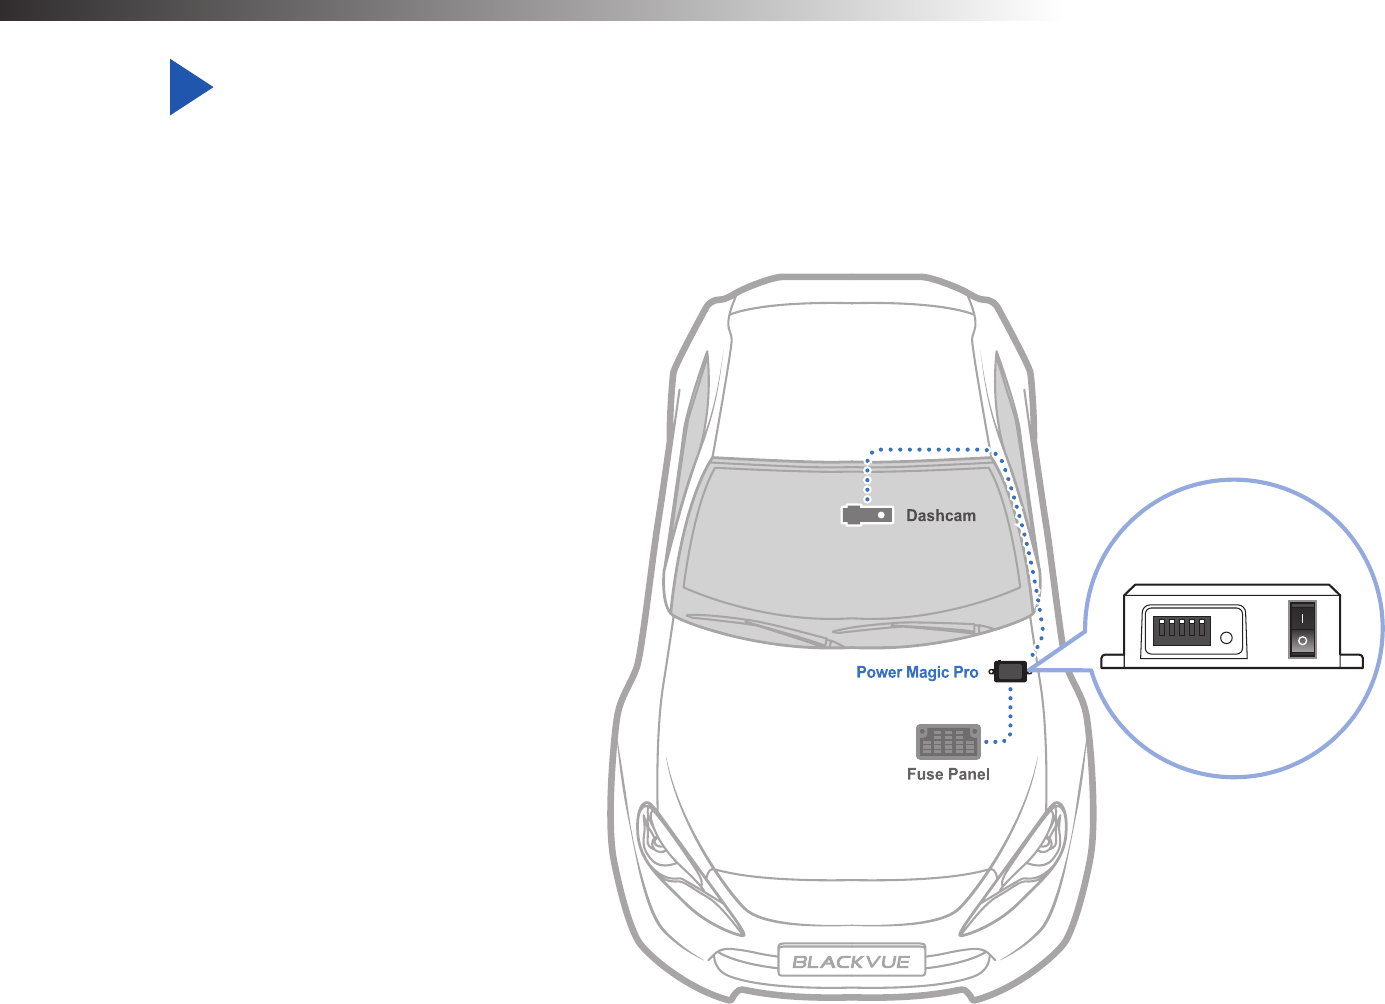
Parking mode hardwiring kit (Optional) .............................. 86
Parking mode battery pack (Optional)
................................. 87