ABOUT THIS CHAPTER .................................................................................................................S. 11
CONTENTS OF THIS CHAPTER ...................................................................................................S. 11
RADIO ..............................................................................................................................................S. 13
MEDIA AUDIO ................................................................................................................................ S. 23
MEDIA VIDEO .................................................................................................................................S. 38
INDEX .............................................................................................................................................S. 92
STATUTORY RIGHTS AND WARRANTY .....................................................................................S. 95
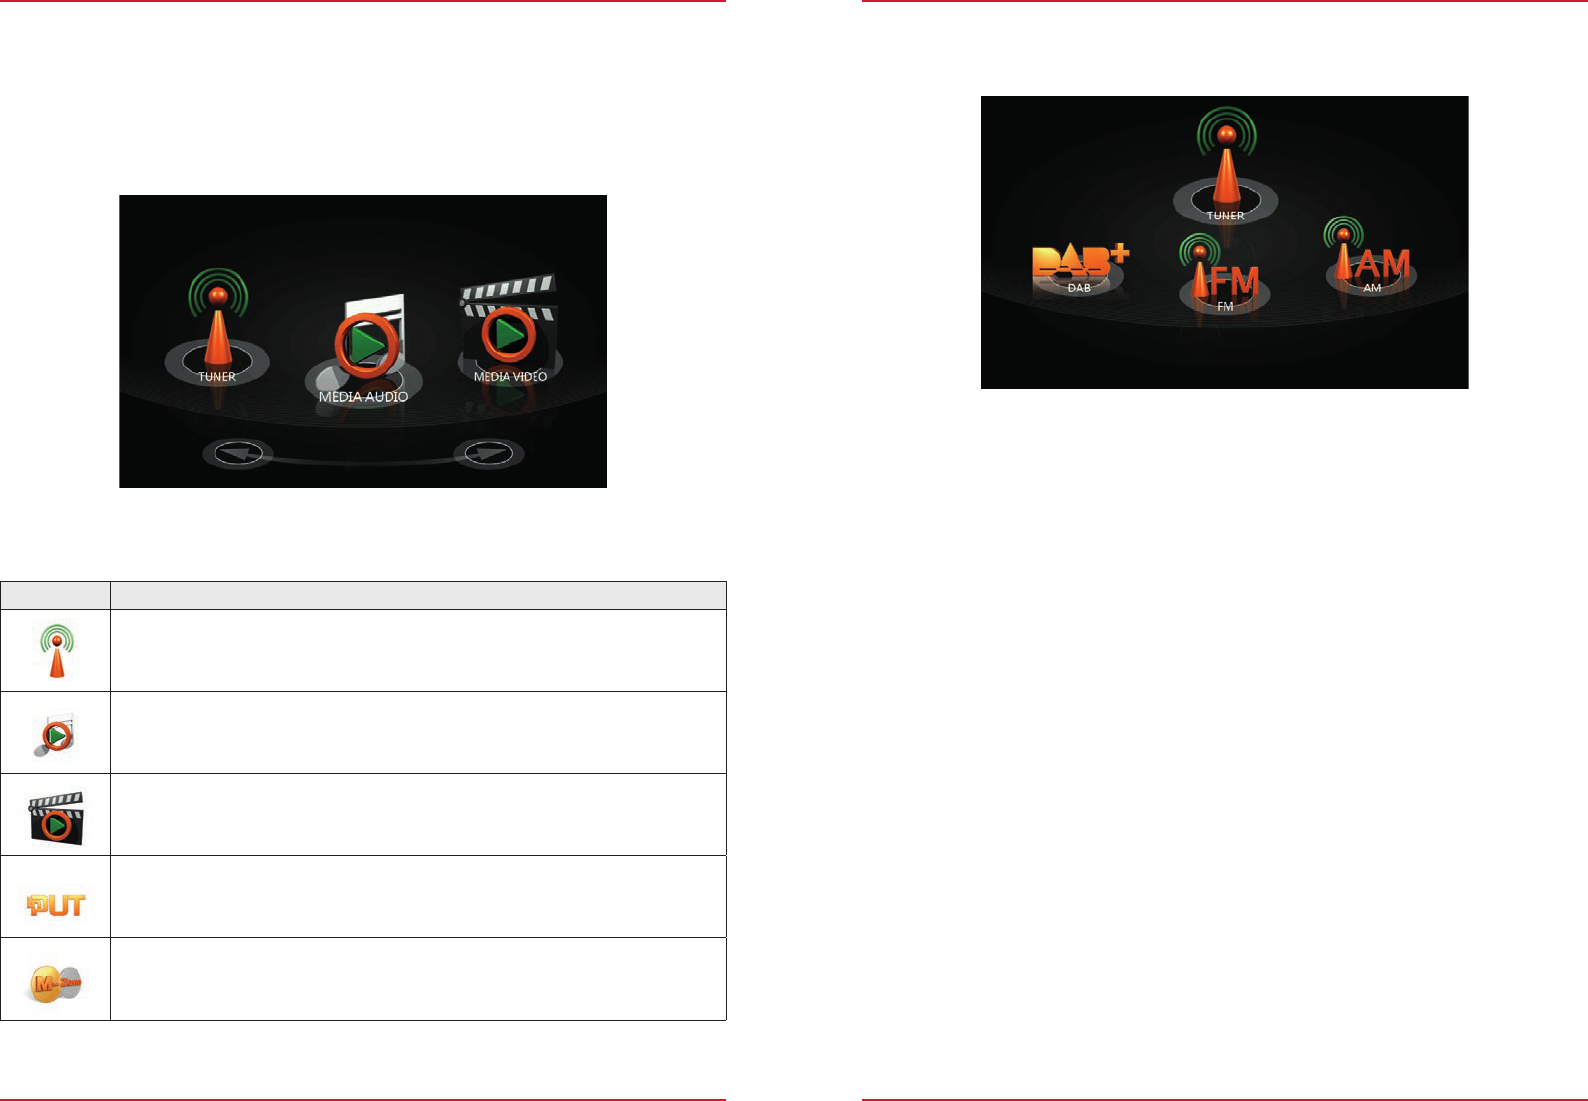
MAIN MENU
MAIN FUNCTIONS
Fig. 1/01
FunctionIconOperation
Slide
Navigate in the main menu by sliding to the left or right
FunctionIconOperation
Move
Press and hold to move an icon to the desired position
Quick access
For quick access you can drag icons that you want
into the header (max. 4 icons).
Recycle bin
By touching and holding, you can move main menu icons
that you no longer require or use into the recycle bin.
Conversely, you can retrieve icons from the recycle bin by
dragging them up into the header.
ADDITIONAL FUNCTIONS
NOTE
*Please pay attention to the Device Quick Start Guide to learn more about the vehicle integration.
89
FunctionIconOperation
Tuner
Touch to select radio playback (FM/AM/DAB+)
Device User Manual → Entertainment → Radio S. 13
Media Audio
Touch to select audio playback
(DVD/USB/SD/A2DP/Apple)
Device User Manual → Entertainment → Media Audio S. 23
Media Video
Touch to select video playback
(DVD/USB/SD/Apple)
Device User Manual → Entertainment → Media Video S. 38
Input
Touch to select external sources
Device User Manual → Entertainment → Input S. 42
M-Zone
Touch to select playback of rear seat entertainment
Device User Manual → Entertainment → M-Zone S. 46
Communication
Touch to select Bluetooth mode
Device User Manual → Hands-free System S. 49
Navi
Touch to select navigation mode
Device User Manual → Navigation S. 58
Settings
Touch to access the system parameter settings
Device User Manual → Settings S. 64
CAR
Touch to select the vehicle-specific settings
Device Quick Start Guide → CAR (separately)
Recycle bin
For icons that are not needed in the main menu
See additional functions S. 7
Main sources
When you are in a source overview, return to the main menu by touching the main icon you require,
or by pressing the HOME button.
When you are in a source overview, return to the main menu by touching the main icon you require,
or by pressing the
HOME
button.
NOTE
Inactive icons that are grayed out cannot be selected.
FunctionIconOperation
List
Touch to display a list in the form of text
Tile
Touch to display a list in the form of tiles (images)
Search
Touch to start a search
Back
Touch to go back one level
Global controls
This list describes global controls and their functions that you will find in different sources of
the ZENEC system. The function will always be the same: only the displayed content changes,
depending on the source.
1011
SEARCH & INPUT
In each of the sources you have the option to make selections using a search function . On this
page we show you how to use the search mask.
NOTE
The functions Security and Upper/Lower are only enabled in the password function.
Fig. 1/02
FunctionIconOperation
Security
Touch to show or hide the input on the display
Select
Touch to display the current selection
(the number of hits will be shown in brackets)
Delete
Touch to delete one character
Hold down to delete the complete input
Back
Touch to end the search or input
Upper/Lower
Touch to write a character in upper or lower case
Double touch to write all the following characters in
upper or lower case.
Keypad
Touch to change the keypad layouts
QWERTY
QWERTZ
ABC
GREEK
H E B R E W
CYRILLIC
Keypad assignments like PC keyboard with Y
Keypad assignments like PC keyboard with Z
Alphabetic keypad assignments
Geek keypad assignments
Hebrew keypad assignments
Cyrillic keypad assignments
ENTERTAINMENT
ABOUT THIS CHAPTER
This chapter describes how to operate and use the audio and video sources. In addition, optional
equipment or features of the vehicle are described that may not be included as standard in your
vehicle. These are not identified for each and every individual case. Therefore equipment or features
will be described that may not be in your ZENEC system or vehicle. More information can be
obtained from your authorized ZENEC dealer.
CAUTION
Only operate the audio playback or radio while driving when the traffic situation allows.
CAUTION
Changing or connecting an audio source can lead to sudden fluctuations in the volume level.
This should be borne in mind before changing or connecting an audio source.
SAFETY INSTRUCTIONS
CAUTION
If the driver of the vehicle is distracted, this may lead to an accident or injury. Operating the
ZENEC system can distract attention from the general traffic situation! Equally, connecting,
changing or inserting data media can distract the driver from the general traffic situation.
CAUTION
Always choose loudspeaker settings such that acoustic signals coming from outside can always
be heard in the vehicle (e.g. signal horns or sirens).
CAUTION
According to the law, the operation of the video playback while driving is not permitted. For this
reason, the picture switches off as soon as the vehicle moves.
CAUTION
The connection and charging leads of external mobile devices can get in the way of the driver.
Please run these so that the driver's freedom of movement is not hindered.
CAUTION
A volume level that is set too high can damage the hearing. This is also true when the volume
level is very high just for a short time.
NOTE
A compatibility overview of useful devices together with memory sizes and formats can be found
at www.zenec.com.
1213
Sources
BEFORE FIRST USE
✓The safety instructions of the vehicle manufacturer, and the instructions given in this operating
manual are all generally applicable.
✓Please pay attention to the safety instructions on the ZENEC system.
✓For the reception of digital radio stations a suitable antenna system must be installed in the
vehicle. If you have questions please contact your authorized ZENEC dealer.
Fig. 2/01
IconFunction
Radio
(FM/AM/DAB+)
Device User Manual → Entertainment → Radio S. 13
Audio playback
(CD/Harddisc/A2DP/Apple interface/Gracenote)
Device User Manual → Entertainment → Media Audio S. 23
Video playback
(DVD/Harddisc)
Device User Manual → Entertainment → Media Video S. 38
External connections
(Smartlink/Camera/AV-IN)
Device User Manual → Entertainment → Input S. 42
Rear seat entertainment
Device User Manual → Entertainment → M-Zone S. 46
Overview
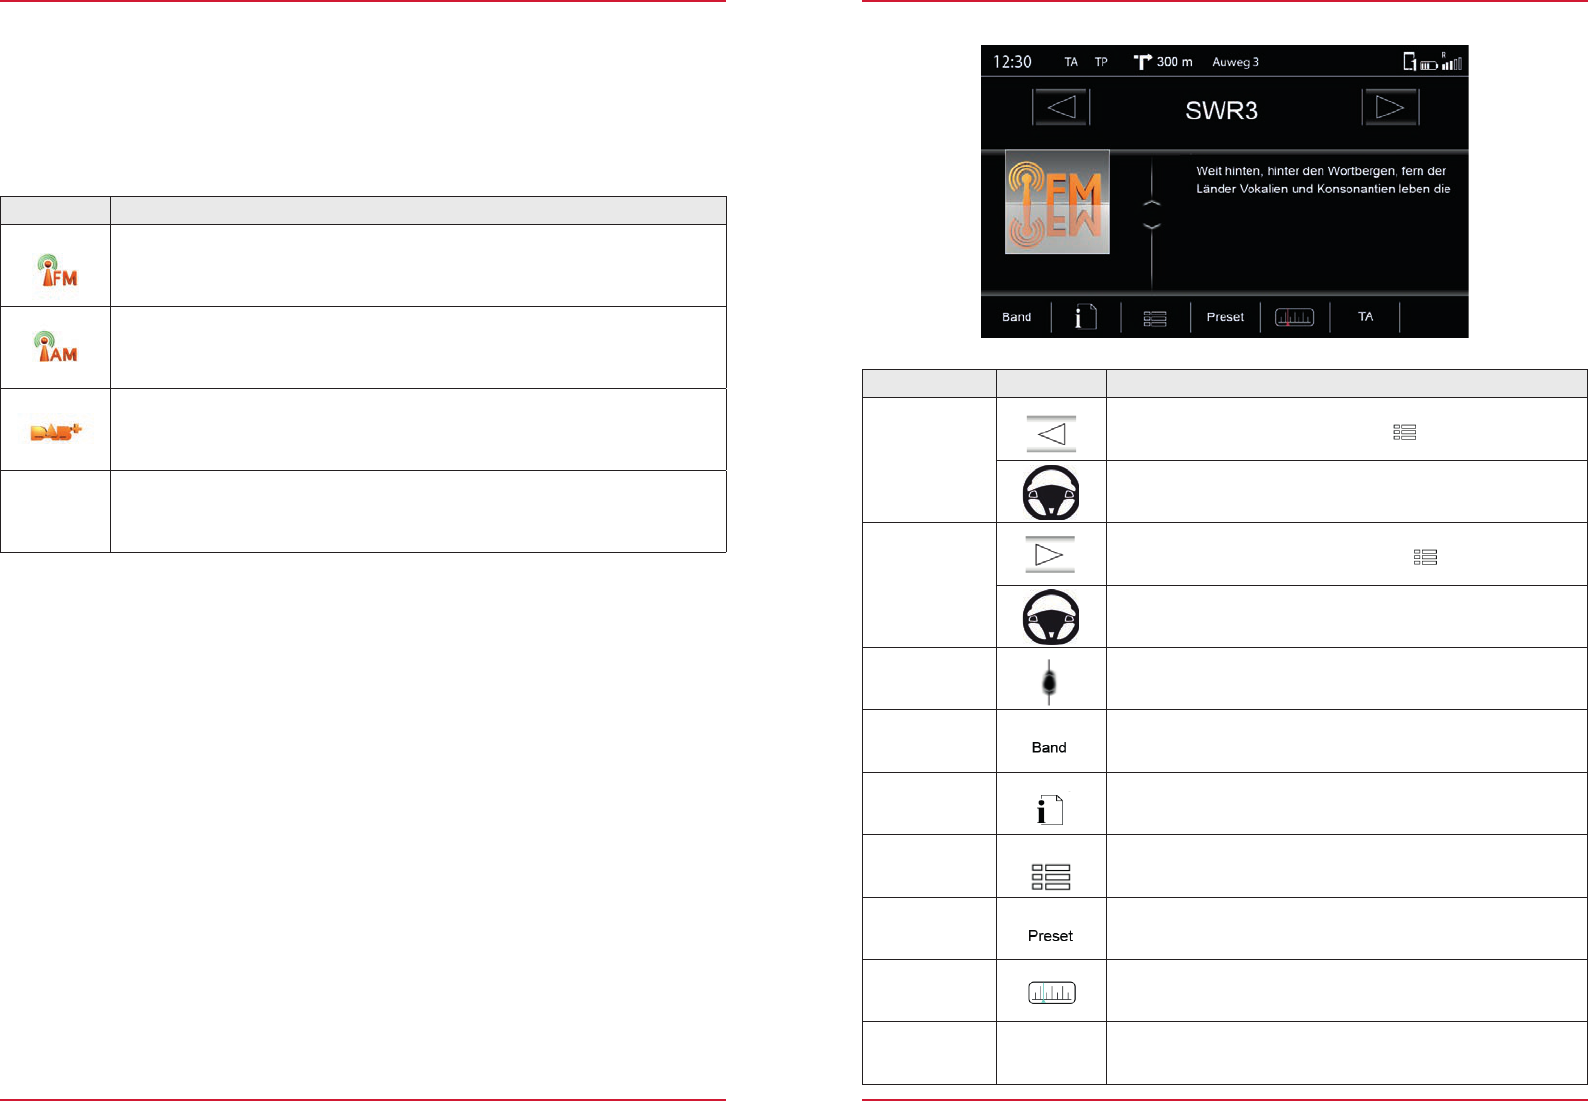
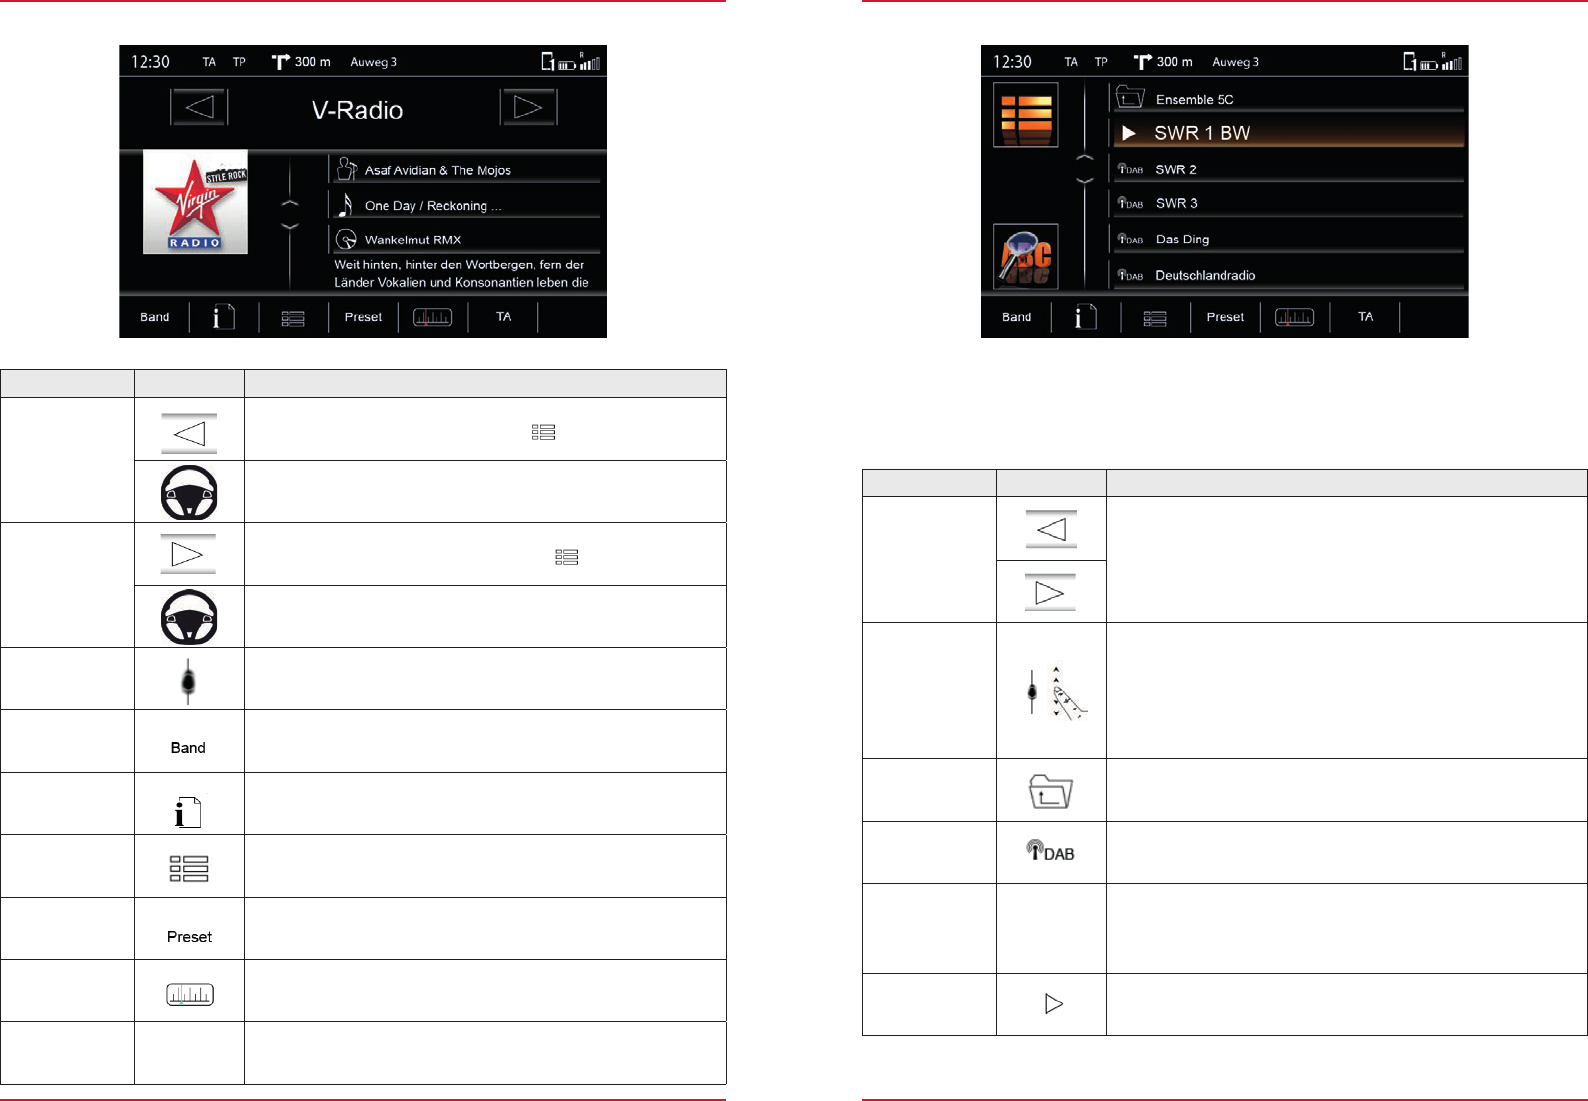
RADIO
Fig. 2/02
Overview
Radio bands .....................................................................................................................................S. 14
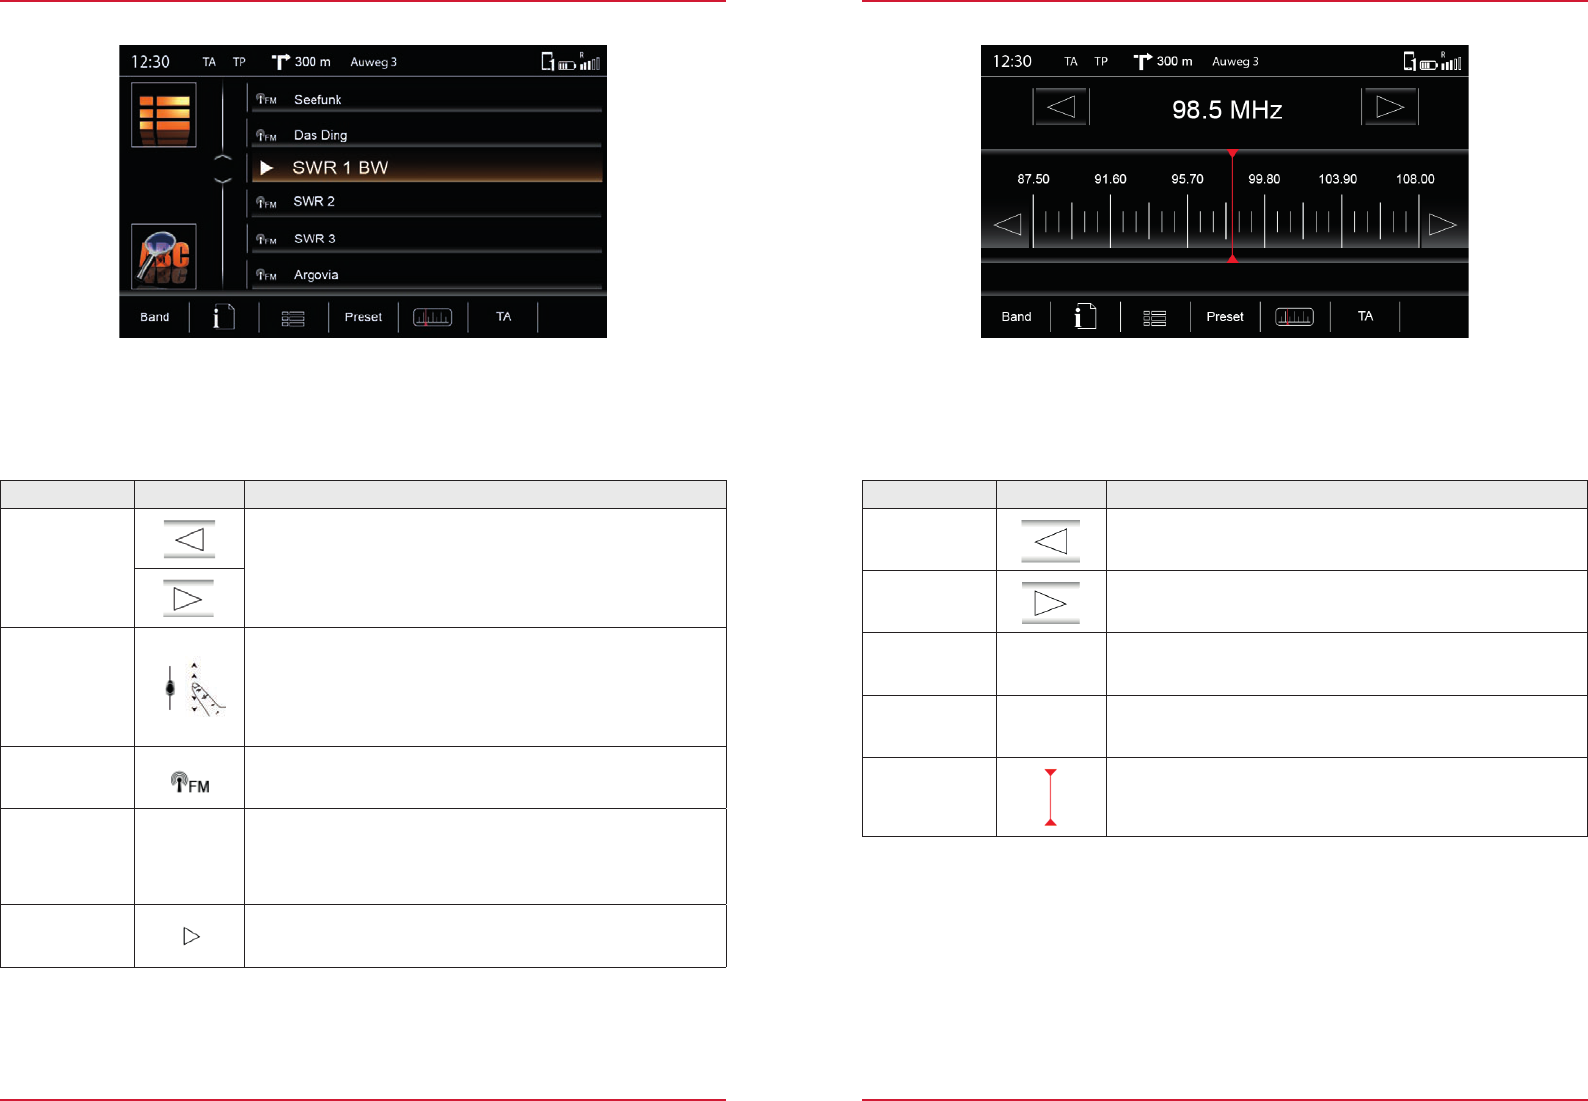
Analoge Radio
Radio operation FM .........................................................................................................................S. 15
Station list FM ..................................................................................................................................S. 16
Manual frequency search FM ..........................................................................................................S. 17
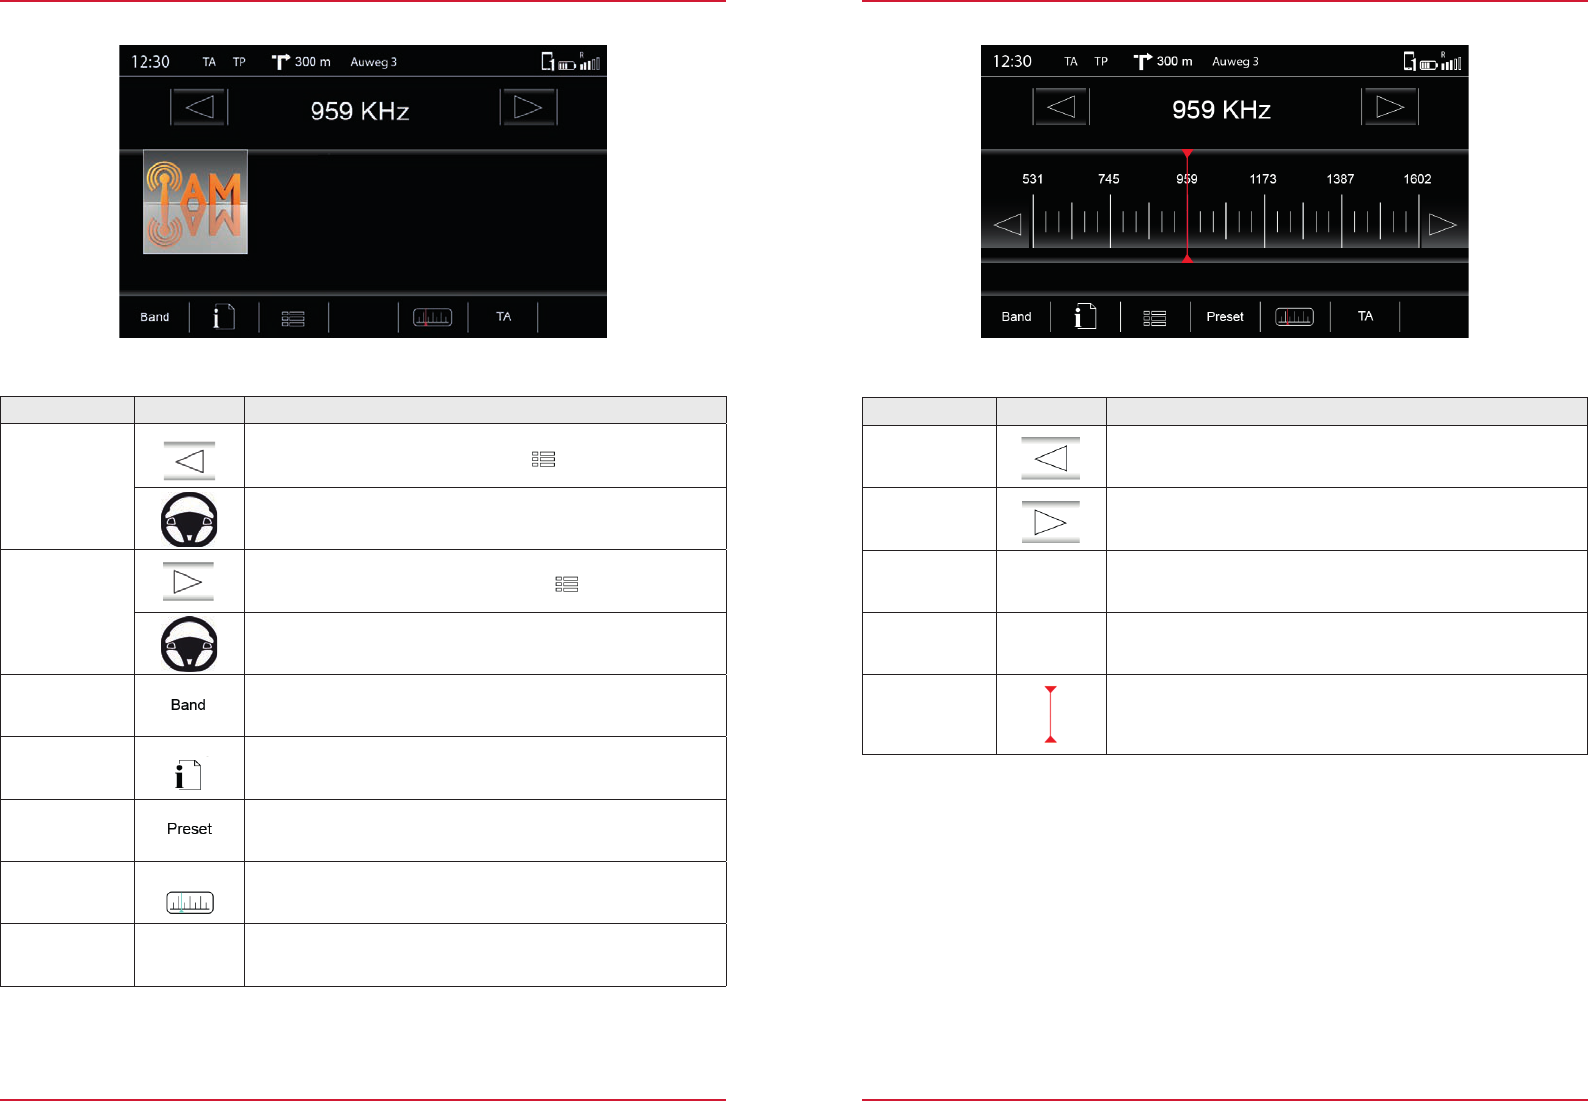
Radio operation AM .........................................................................................................................S. 18
Manual frequency search AM ..........................................................................................................S. 19
Digital Radio
Radio operation DAB ......................................................................................................................S. 20
Station list DAB ................................................................................................................................S. 21
Manual frequency search DAB ........................................................................................................S. 21
Storing stations
Storing stations (DAB/FM/AM) ....................................................................................................... S. 22
Setup
Device User Manual→Settings→Radio Configuration .............................................................. S. 67
1415
Radio bands
The ZENEC system enables you to receive radio stations via FM, AM or DAB+. The reception of
the individual radio bands is dependent on the position of the antenna in your vehicle. Thus not all
vehicles from the factory come with antennas designed for digital radio reception. If your vehicle
antenna is not DAB capable, contact your ZENEC dealer for a retrofit.
IconFunction
Reception of analog radio stations using FM
Entertainment → Radio → FM S. 15
Reception of analog radio stations using AM
Entertainment → Radio → AM S. 18
Reception of digital radio stations using digital audio broadcasting
Operation ........................................................................................................................................ S. 32
Mood ............................................................................................................................................... S. 34
Settings
Device User Manual → Settings → Media Configuration ............................................................. S. 68
Search/Store radio stations
There are various ways for you to store a radio station. Storing depends on the radio band.
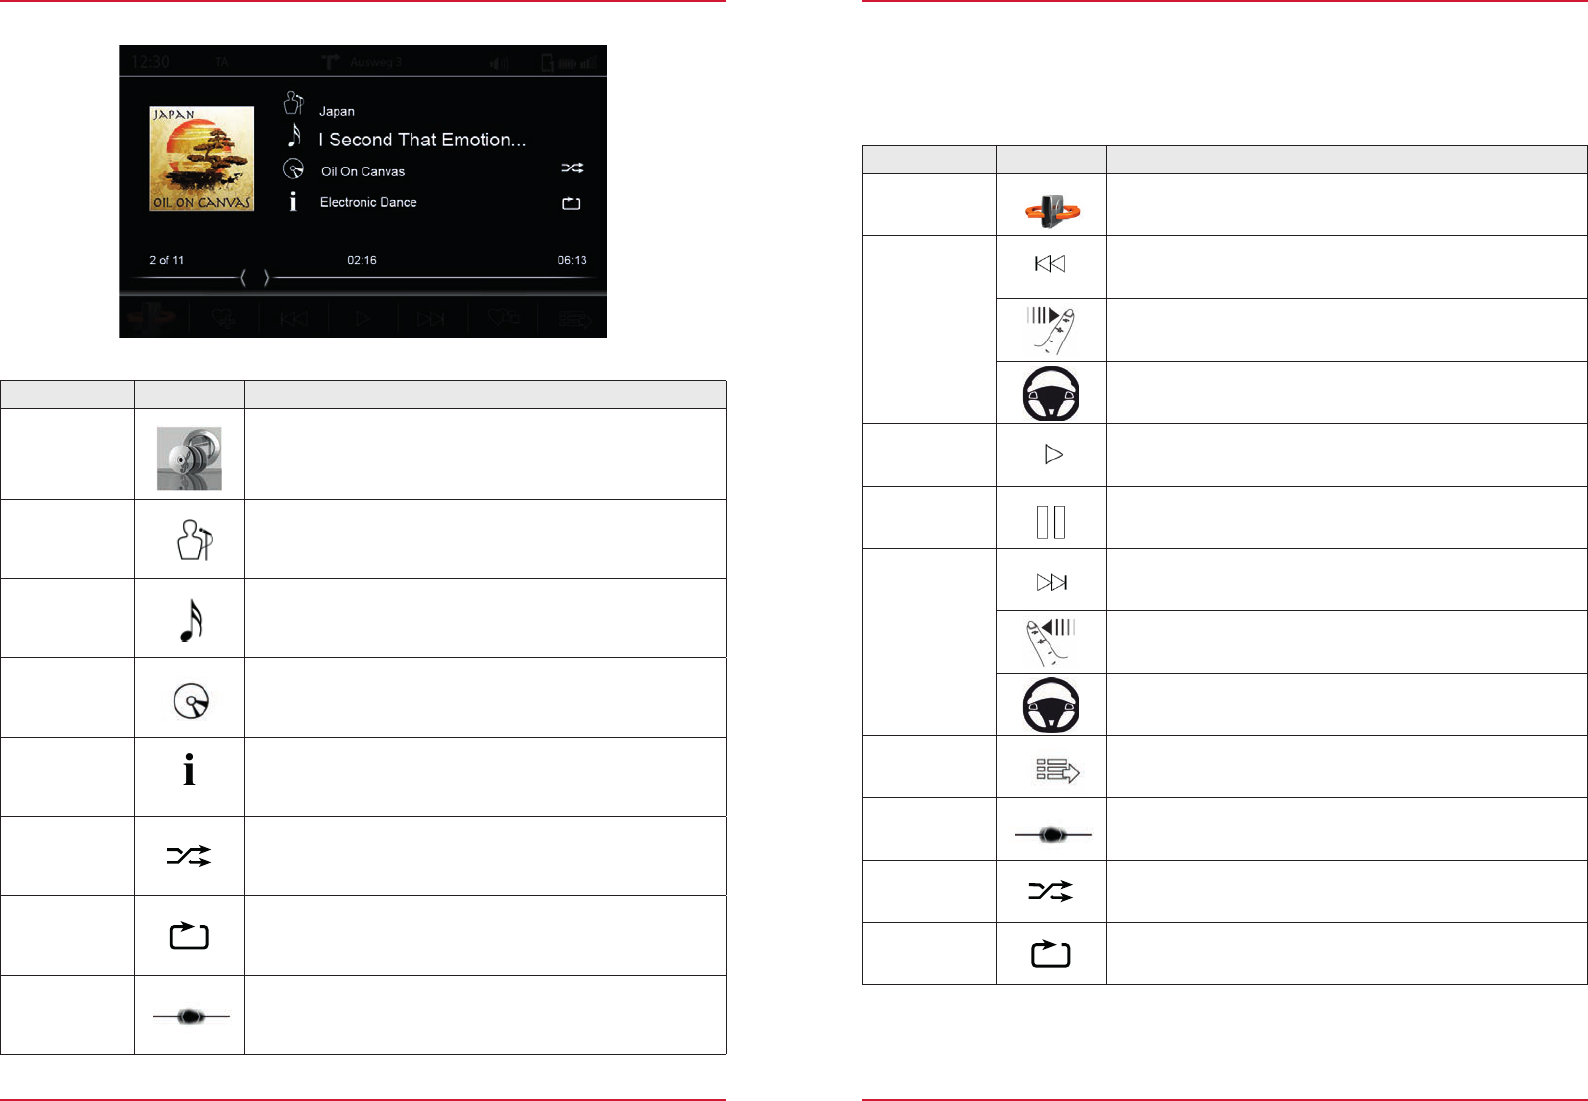
Fig. 2/10
FunctionIconOperation
Station
99.90 MHz
This station is currently playing.
Station back
Touch to skip to previous preset
Station
forward
Touch to skip to next preset
Stores
Touch and hold to store the station at the desired store
Once the station is stored the icon of the radio band and the
frequency or station name appear
Store register
Touch to go to another store register
(3 registers each with 6 stores)
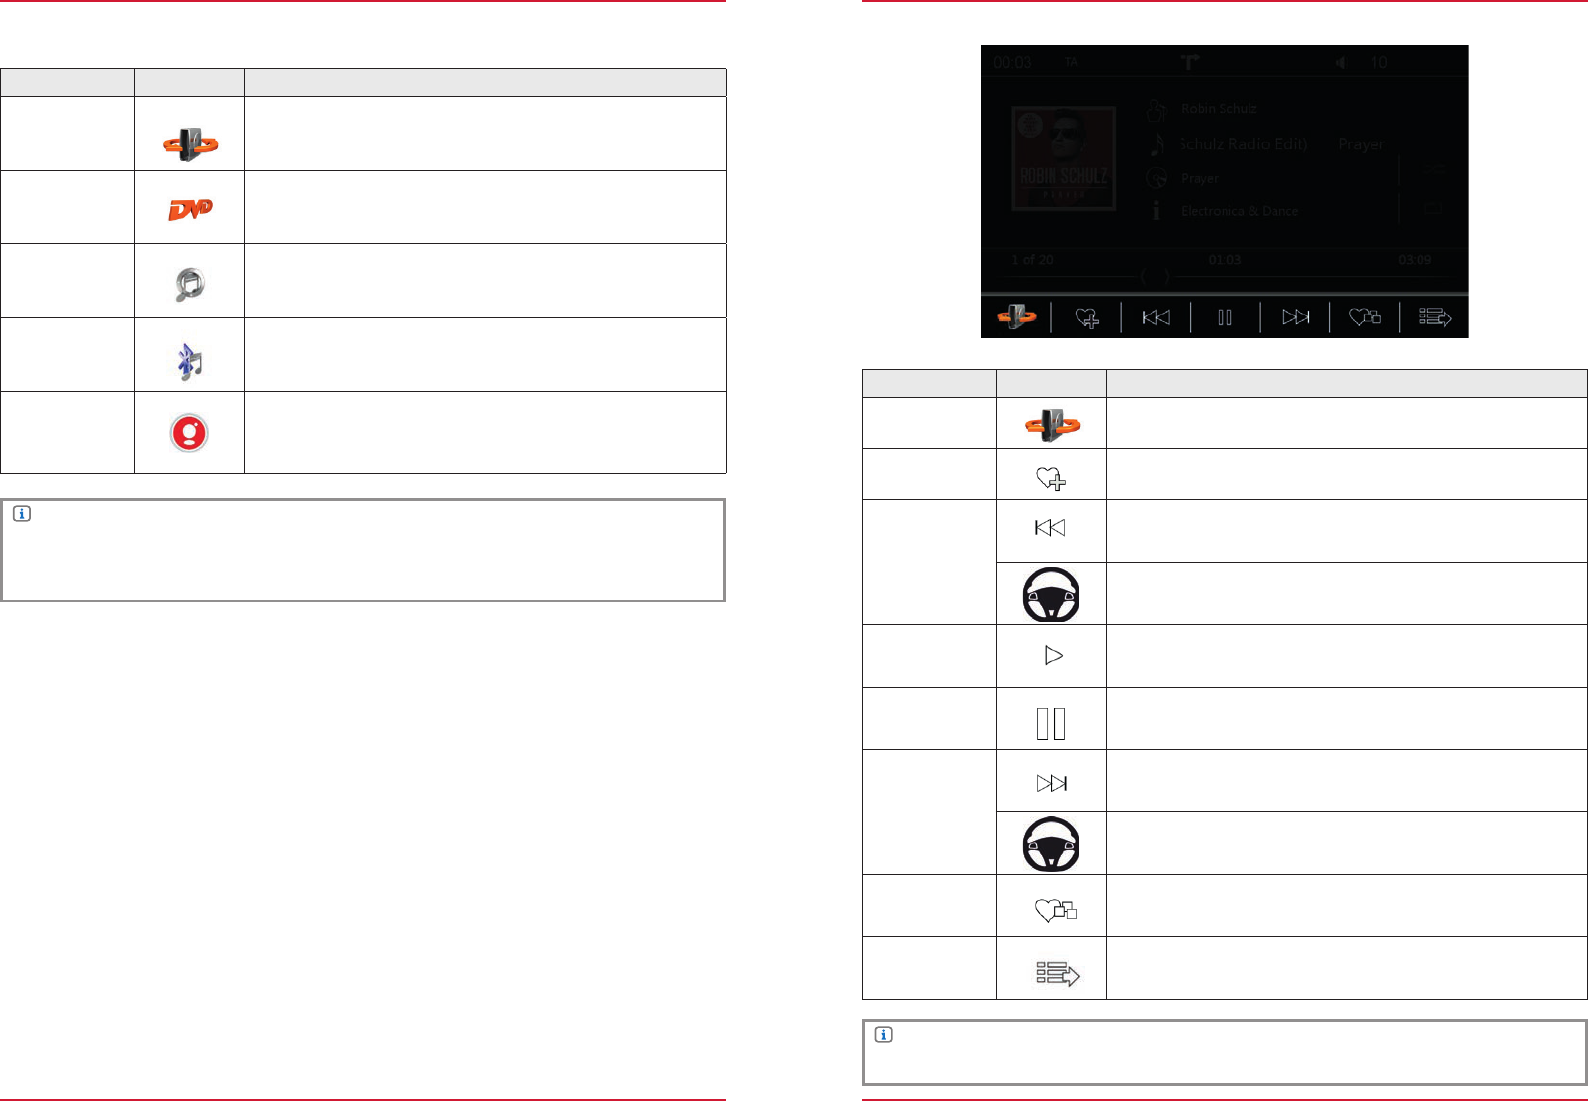
MEDIA AUDIO
Fig. 2/11
2425
NOTE
A wide range of data media can be connected to the ZENEC system. The latest compatibility
overview of useful devices together with memory sizes and formats of the media supported can
Playback ........................................................................................................................................... S. 41
Settings
Device User Manual → Setup → Media Setup ............................................................................. S. 68
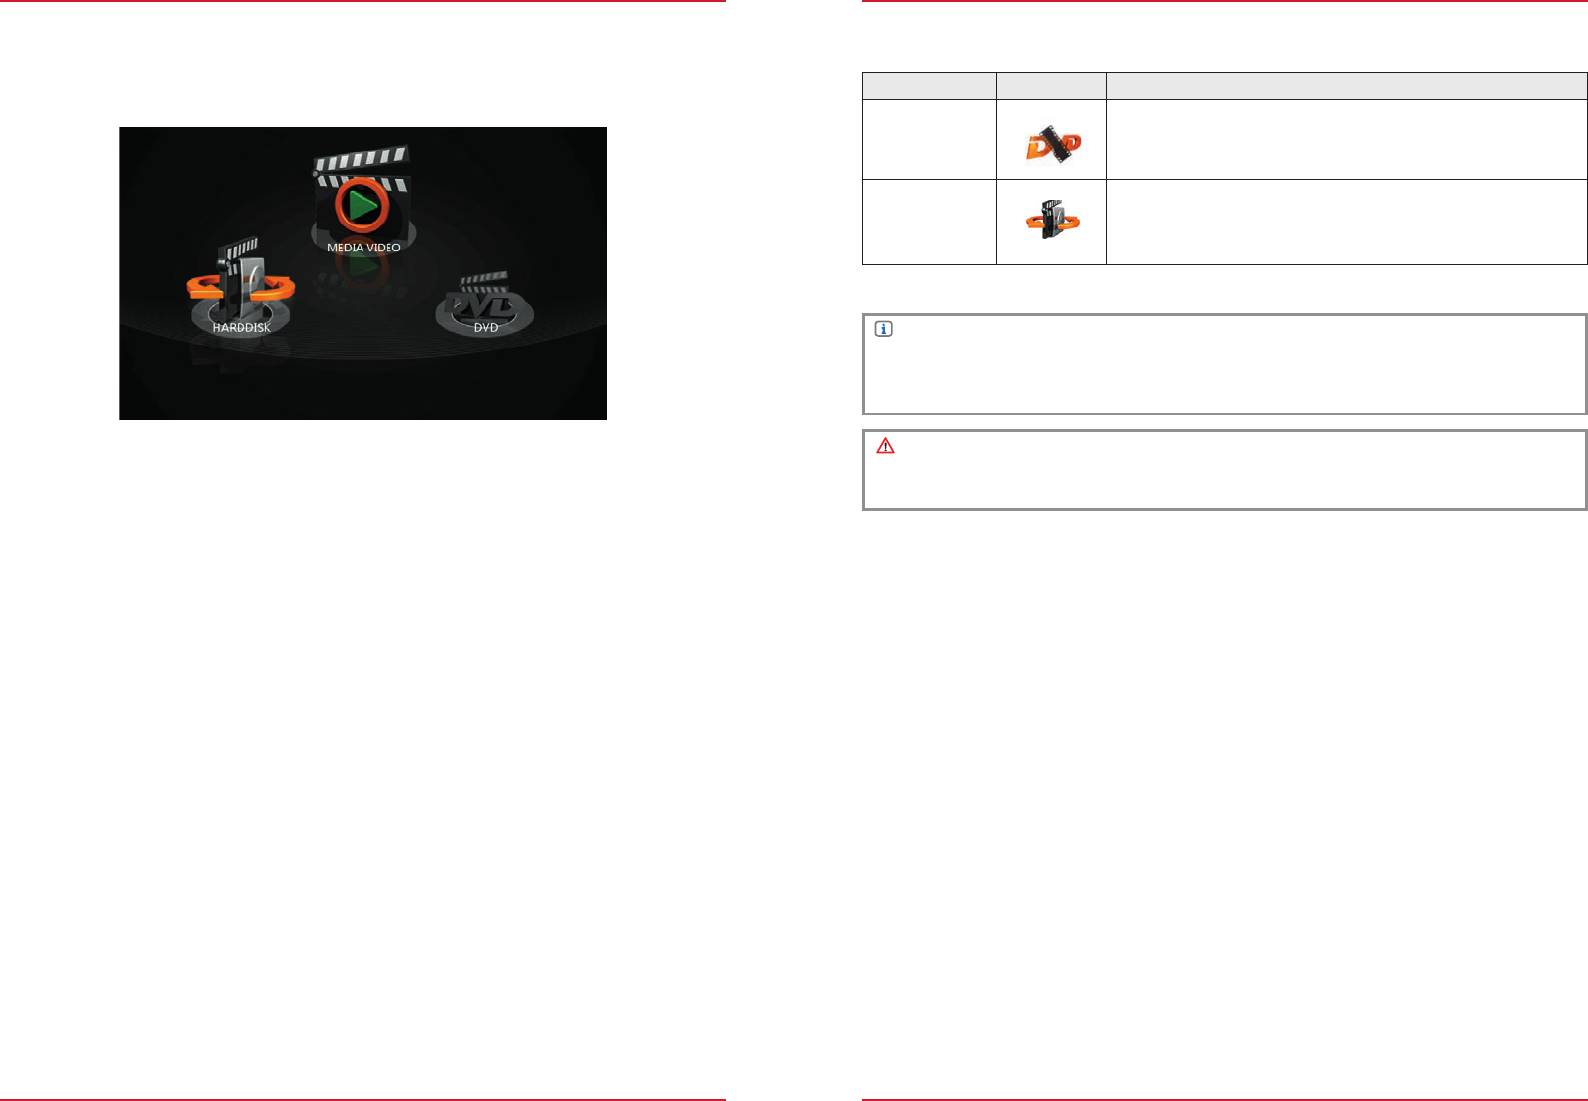
MEDIA VIDEO
Fig. 2/16
Video sources
FunctionIconOperation
CD/DVD
Touch to access the DVD playback
Entertainment → Media Video → DVD S. 40
Hard disk
Touch to access hard disk playback (USB/SD)
Entertainment → Media Video → Hard Disk S. 41
NOTE
A wide range of data media can be connected to the ZENEC system. The latest compatibility
overview of useful devices together with memory sizes and formats of the media supported can
be found at www.zenec.com.
CAUTION
Playing video files while driving is not permitted by the law. For this reason the screen switches
off when the vehicle moves, with only the sound remaining on.
4041
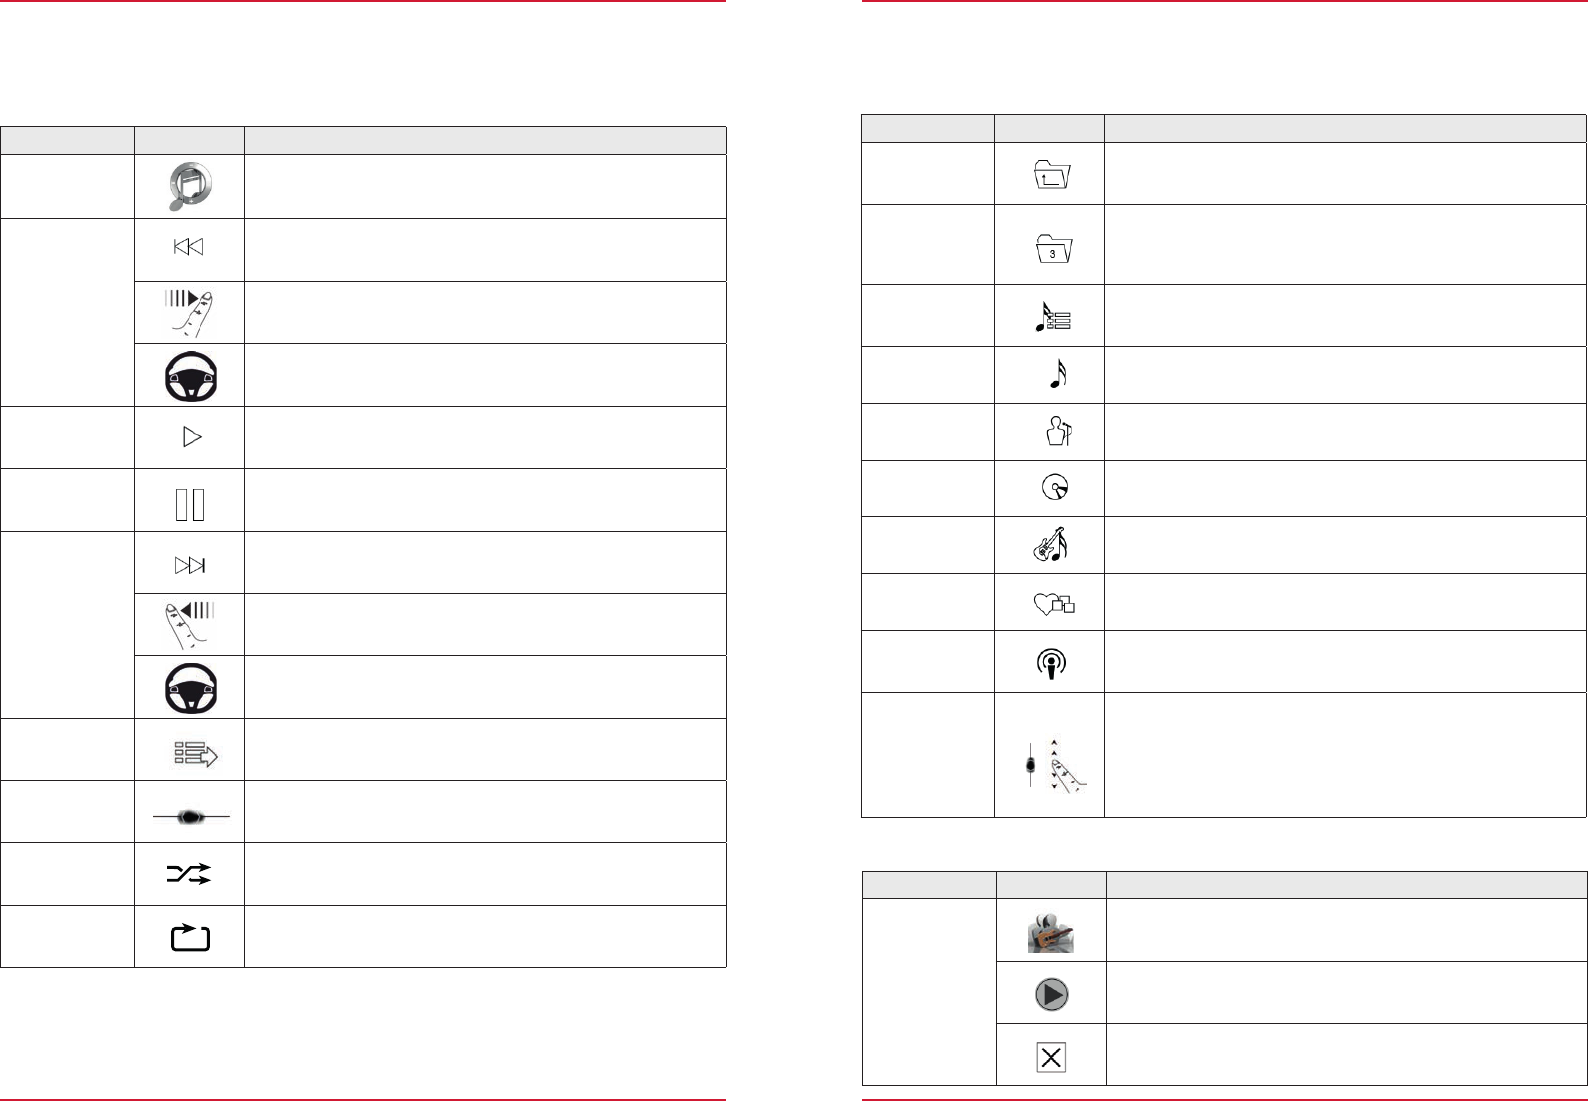
DVD
FunctionIconOperation
Skip
Touch to skip direct to the desired position
Slide to reach the desired position
Source
Touch to go to the available sources
Eject
Touch to eject the DVD
Back
Touch to skip back to the previous section
Play
Touch to play a film
Pause
Touch to pause at a track
Forward
Touch to skip forward to the next section
Info
Touch to get film information
DVD Menu
Touch to display the DVD menu
Further functions in the DVD menu
FunctionIconOperation
Navigation
▲ ◄► ▼
Touch the appropriate arrows to navigate in the video menu
Confirm
OK
Touch to confirm a selection in the video menu
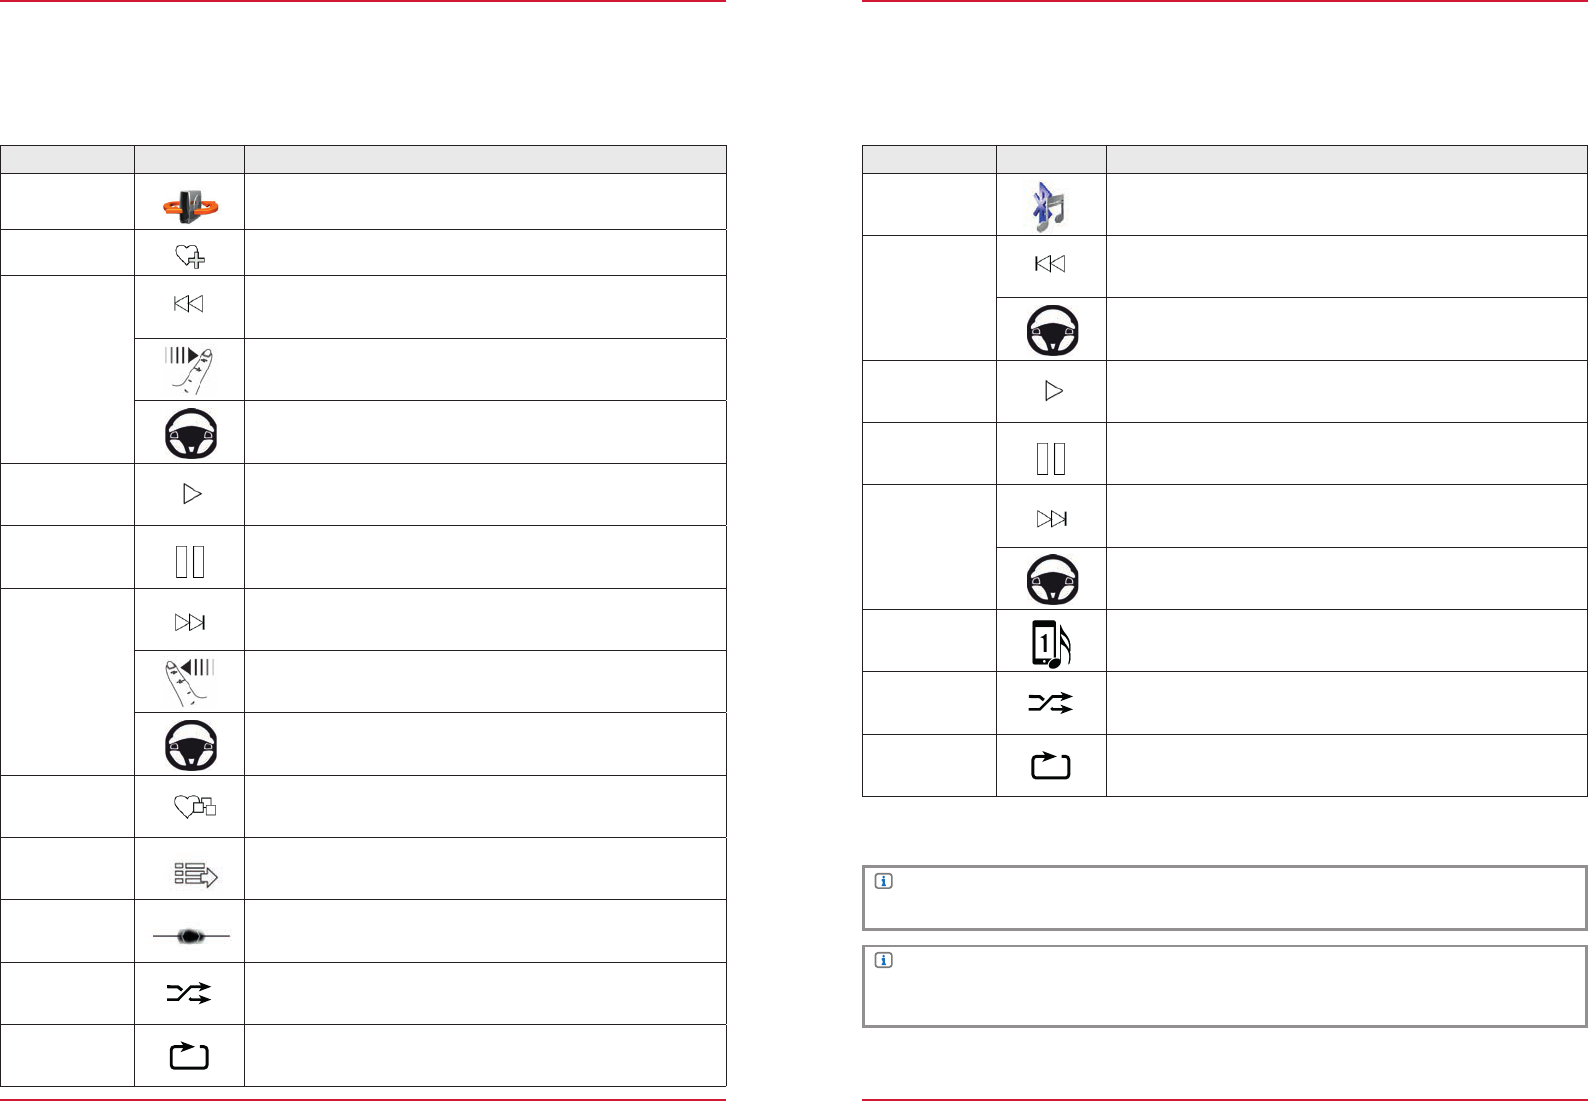
Fig. 2/17
Hard disk
FunctionIconOperation
Skip
Touch to skip direct to the desired position
Slide to reach the desired position
Source
Touch to go to the available sources
Back
Touch to skip back to the previous section
Play
Touch to play a film
Pause
Touch to pause at a track
Forward
Touch to skip forward to the next section
Playlist
Touch to display the folder and list
Further functions in the playlist
FunctionIconOperation
Navigation
▲ ◄► ▼
Touch the appropriate arrows to navigate in the video menu
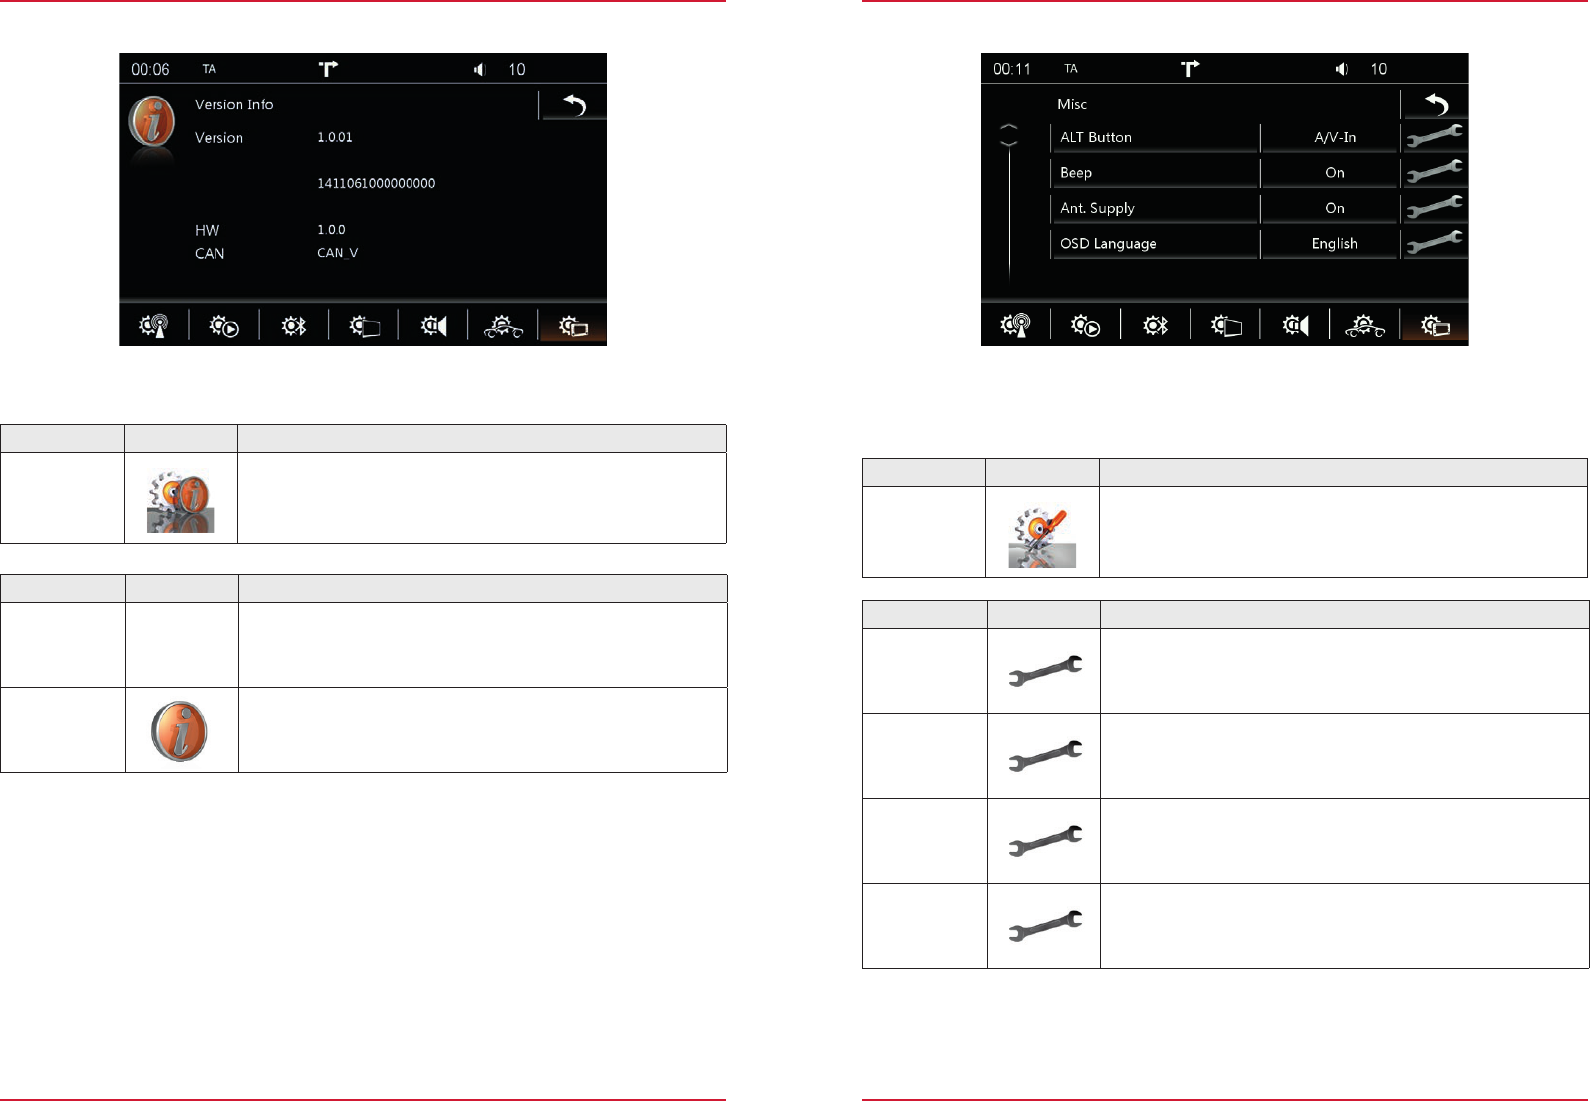
Version info ..................................................................................................................................... S. 86
Diverse .............................................................................................................................................S. 87
Help .................................................................................................................................................S. 89
6667
FunctionIconOperation
Tuner
Touch to access radio settings
Device User Manual → Settings → Radio S. 67
Media
Touch to access sound and image settings
User Manual → Settings → Media S. 68
Bluetooth
Touch to access hands-free system settings
Device User Manual → Settings → Bluetooth S. 69-73
TFT
Touch to access display settings
Device User Manual → Settings → TFT S. 74
Audio
Touch to access sound settings
Device User Manual → Settings → Sound S. 75-84
Vehicle
Touch to access vehicle settings
Device Quick Start Guide → CAR
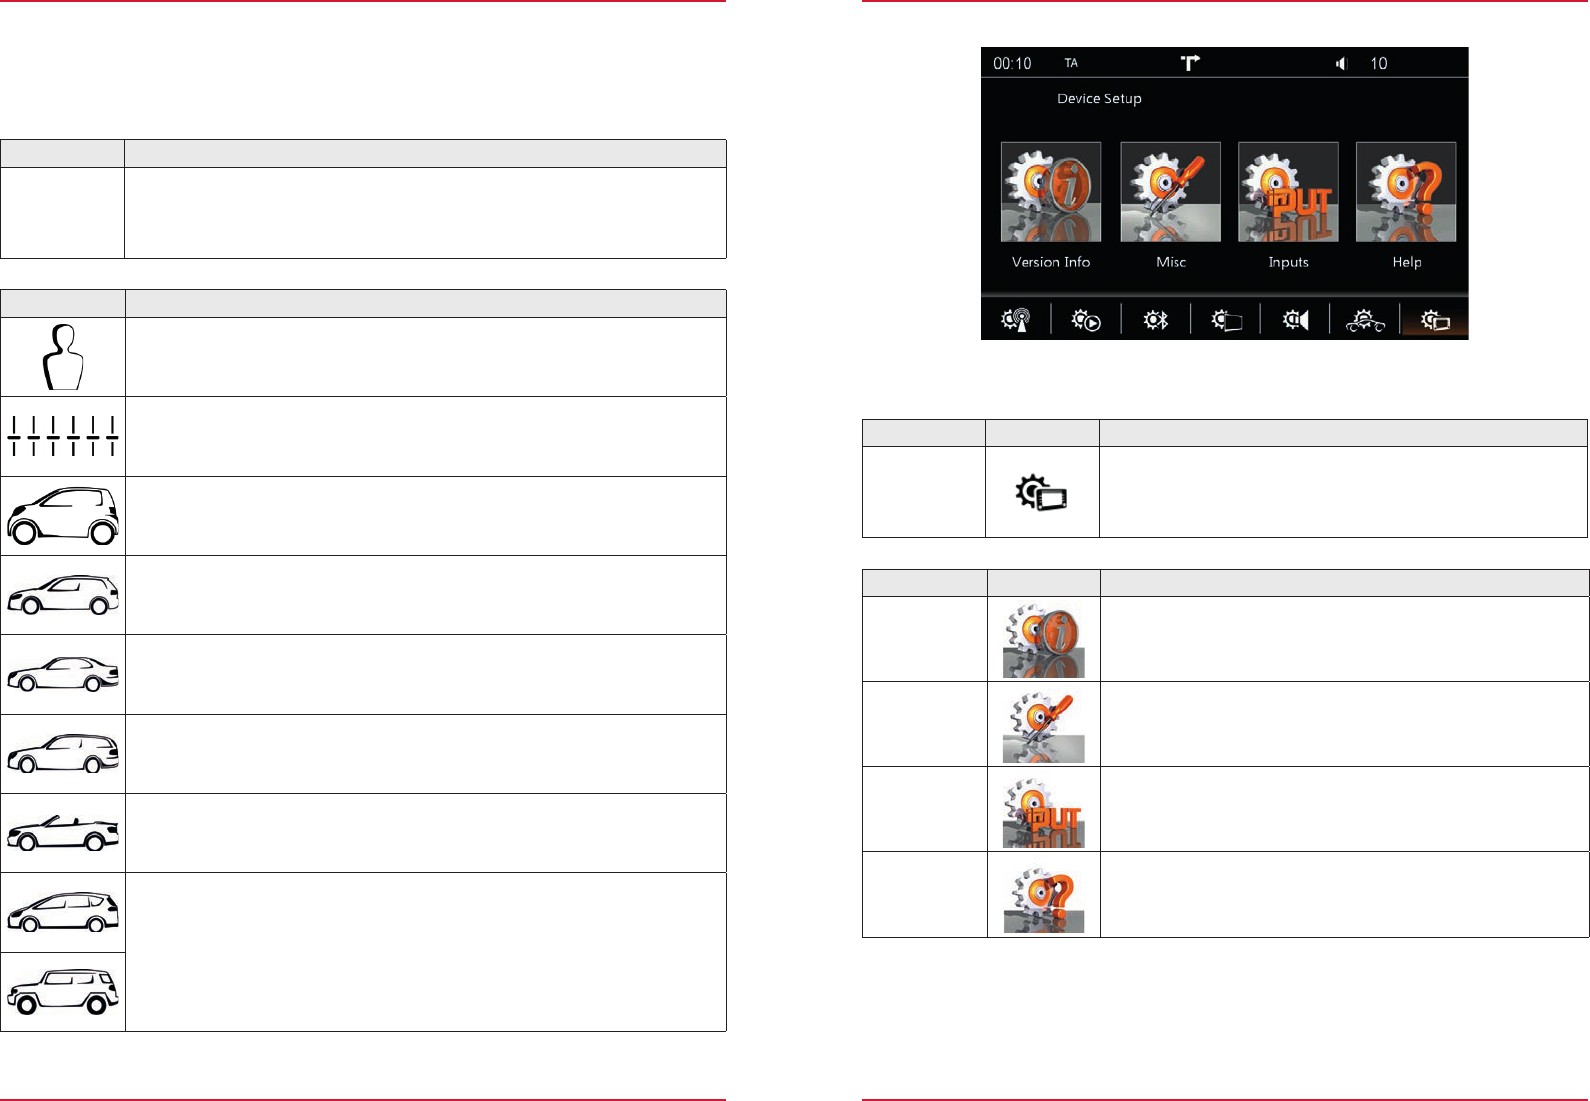
Devices
Touch to access device settings
Device User Manual → Settings → Devices S. 85
Setting sources
Fig. 5/02
RADIO CONFIGURATION
Here you can make the settings for operation of the radio. To make the settings press the
appropriate wrench icon. You will find an explanation of the abbreviations at the end of this user
manual.
FunctionIconOperation
Tuner
configuration
Touch to access this view
FunctionIconOperation
AF
ON/OFF
REG
ON/OFF
Fig. 5/03
Overview
6869
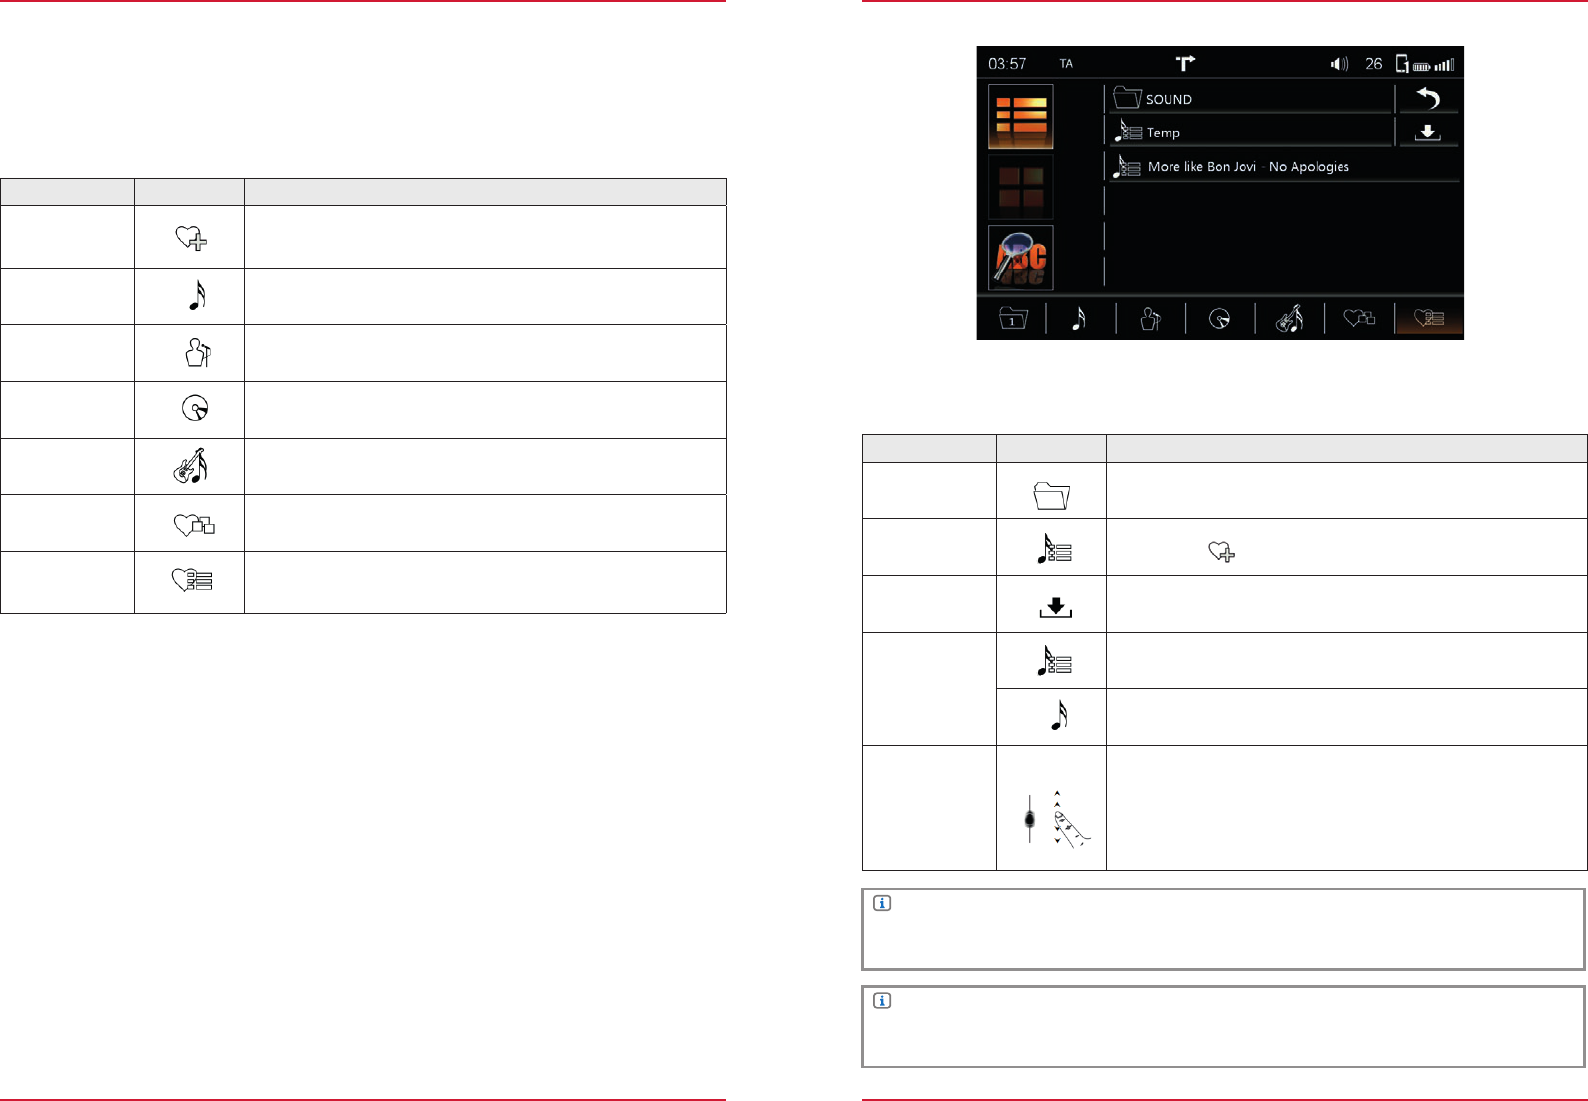
MEDIA CONFIGURATION
Here you can make the settings for operation of the audio playback. To make the settings press the
appropriate wrench icon. You will find an explanation of the abbreviations at the end of this user
manual.
FunctionIconOperation
Media
configuration
Touch to access this view
FunctionIconOperation
Database
ON = Gracenote support enabled
OFF = Gracenote support disabled
ID3
GN = Gracenote sort
ALL = User sort
Cover Art
GN = Gracenote sort
ALL = User sort
Media Icon
Button assignment MEDIA
(Auto/USB/SD/DVD/iPod)
Fig. 5/04
Overview
NOTE
If none or not all the music titles of your external media are displayed, please set the ID3 and
Cover settings to ALL.
BLUETOOTH CONFIGURATION
Here you will find all the options for Bluetooth management and settings. A description is also given on
how to pair and remove Bluetooth devices. You will find an explanation of the abbreviations at the end
of this user manual.
FunctionIconOperation
Bluetooth
configuration
Touch to access this view
FunctionIconOperation
Device
Manager
Touch to pair, disconnect, or manage mobile devices
Settings → BT Configuration → Devive Manager S. 70
BT Settings
Touch to change settings for BT operation
Settings → BT Configuration → BT Settings S. 73
Fig. 5/05
Overview
7071
Device Manager
The pairing process requires the BT function on the end device to be enabled. Please also take note
of the instructions of the device manufacturer on the pairing of devices.
FunctionIconOperation
Device
Manager
Touch to access this view
FunctionIconOperation
Search
Touch to search for a new Bluetooth device
(not possible if two devices are connected)
Pair
Touch to reconnect a paired Bluetooth device
Disconnect
Touch to disconnect a paired Bluetooth device
Delete
Touch to delete a Bluetooth device from the list
(requires the device to be disconnected)
Fig. 5/06
IconMeaning
This icon indicates that the paired Bluetooth device supports HSP/HFP, and can
be used via the hands-free system.
Hands-free SystemS. 49
This icon indicates that the paired Bluetooth device supports A2DP, and can be
used via the audio player.
Settings → BT Configuration → BT Settings S. 73
Pairing
Via the ZENEC system
FunctionIconOperation
Search
Touch the magnifying glass to initiate a search for BT devices.
From the list select the desired mobile device that you want to
synchronize with the ZENEC system.
After selecting follow the instruction of the ZENEC system.
CodeStandard Code*: 1 2 3 4
Fig. 5/07
Via the mobile device
FunctionIconOperation
Search
Make sure that the ZENEC system is in Device Manager view
otherwise the ZENEC system will not be visible to others. Follow
the instructions of the device manufacturer on pairing.
Auto Connect
Once a mobile device has been connected with the ZENEC system, it will be automatically paired
when the ZENEC system is started. On being briefly disconnected the ZENEC system will attempt to
establish a new connection.
NOTE
On pairing for the first time, be sure to permanently enable the connection confirmation on your
mobile device, otherwise malfunctions may occur during the Auto Connect process.
NOTE
*For mobile devices that do not support the SSP standard.
7273
Device names
Fig. 5/08
FunctionIconOperation
Device nameEdit
1. Touch the name to be changed from the list.
2. Touch EDIT to open the keypad.
Edit the name as you wish, and then save. This name is only
changed in the ZENEC system: in the mobile phone the
existing name is not changed.
Change the name of the mobile device displayed in your ZENEC system (e.g. "Mobile phone John
Smith")
NOTE
The original device name of the mobile device is not changed. The name you enter here is only
displayed in the ZENEC system.
BT SETTINGS
Here you can make the settings for Bluetooth operation. To make the settings press the appropriate
wrench icon.
FunctionIconOperation
BT Settings
Touch to access this view
Fig. 5/09
Overview
FunctionIconOperation
Microphone
Internal = inside device
External = only if installed
Microphone
FunctionIconOperation
Name
1: by first name
2: by surname
Sort
FunctionIconOperation
Nickname
Here you can rename the ZENEC system.
The name you enter here is displayed on the mobile devices.
Device name
7475
TFT CONFIGURATION
Here you can make the settings for the display. To make the settings press the appropriate wrench
icon.
FunctionIconOperation
TFT
Configuration
Touch to access this view
FunctionIconOperation
TFT
Settings
Touch to select the brightness control:
Navi = Brightness setting Day/Night is controlled
by the navigation system.
Car = Brightness setting Day/Night is controlled
by the vehicle.
TS
Calibration
OK
Touch to recalibrate the TFT
(follow the instructions on the screen).
TS
Brightness
Day
-10 < > +10
TS
Brightness
Night
-10 < > +10
Fig. 5/10
Overview
NOTE
Using the DISP button you can set the display brightness to three levels
(100% → 50% → 0% ).
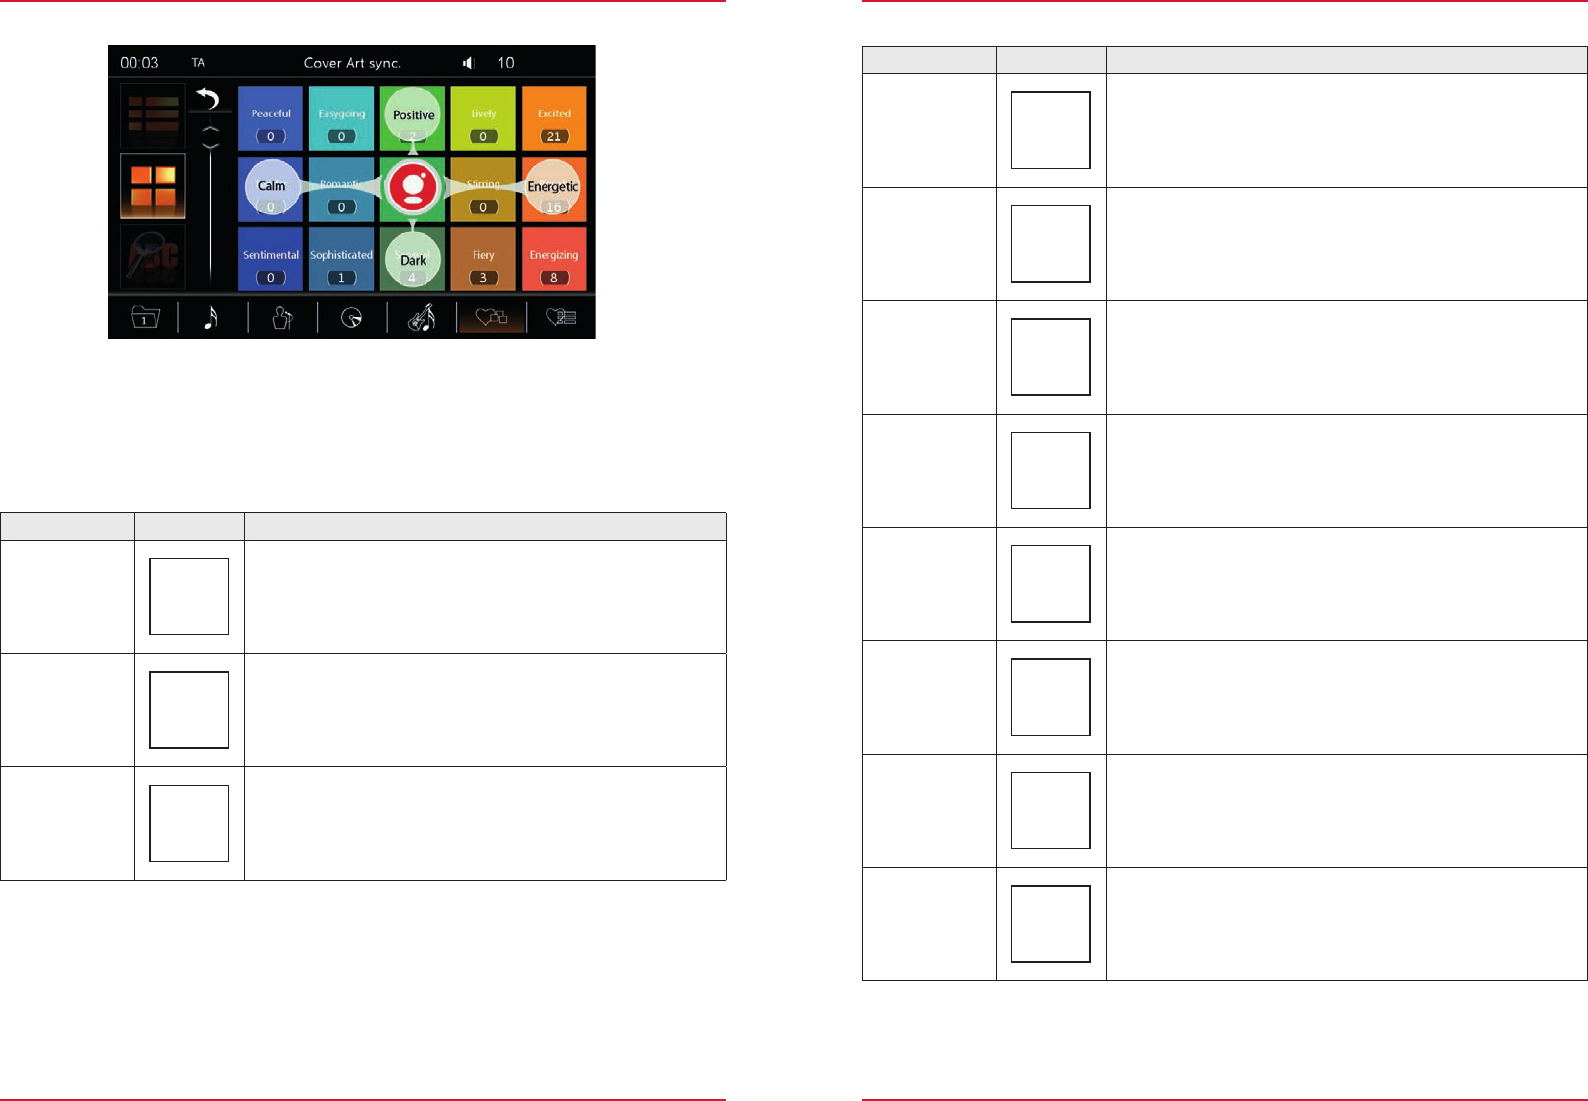
AUDIO CONFIGURATION
In this menu you can make all the settings to do with audio output. Please remember that all the
settings you make here will have a direct influence on the sound in your vehicle.
FunctionIconOperation
Audio
configuration
Touch to access this view
FunctionIconOperation
Loudspeaker
system
Touch to make general audio settings
Settings Audio Configuration Loudspeakers S. 76
Audio
setting
Touch to make audio DSP settings
Settings Audio Configuration/Audio Settings S. 79
Presets
Touch one of the presets to apply this profile
Settings Audio Configuration Profile S. 84
Fig. 5/11
Overview
7677
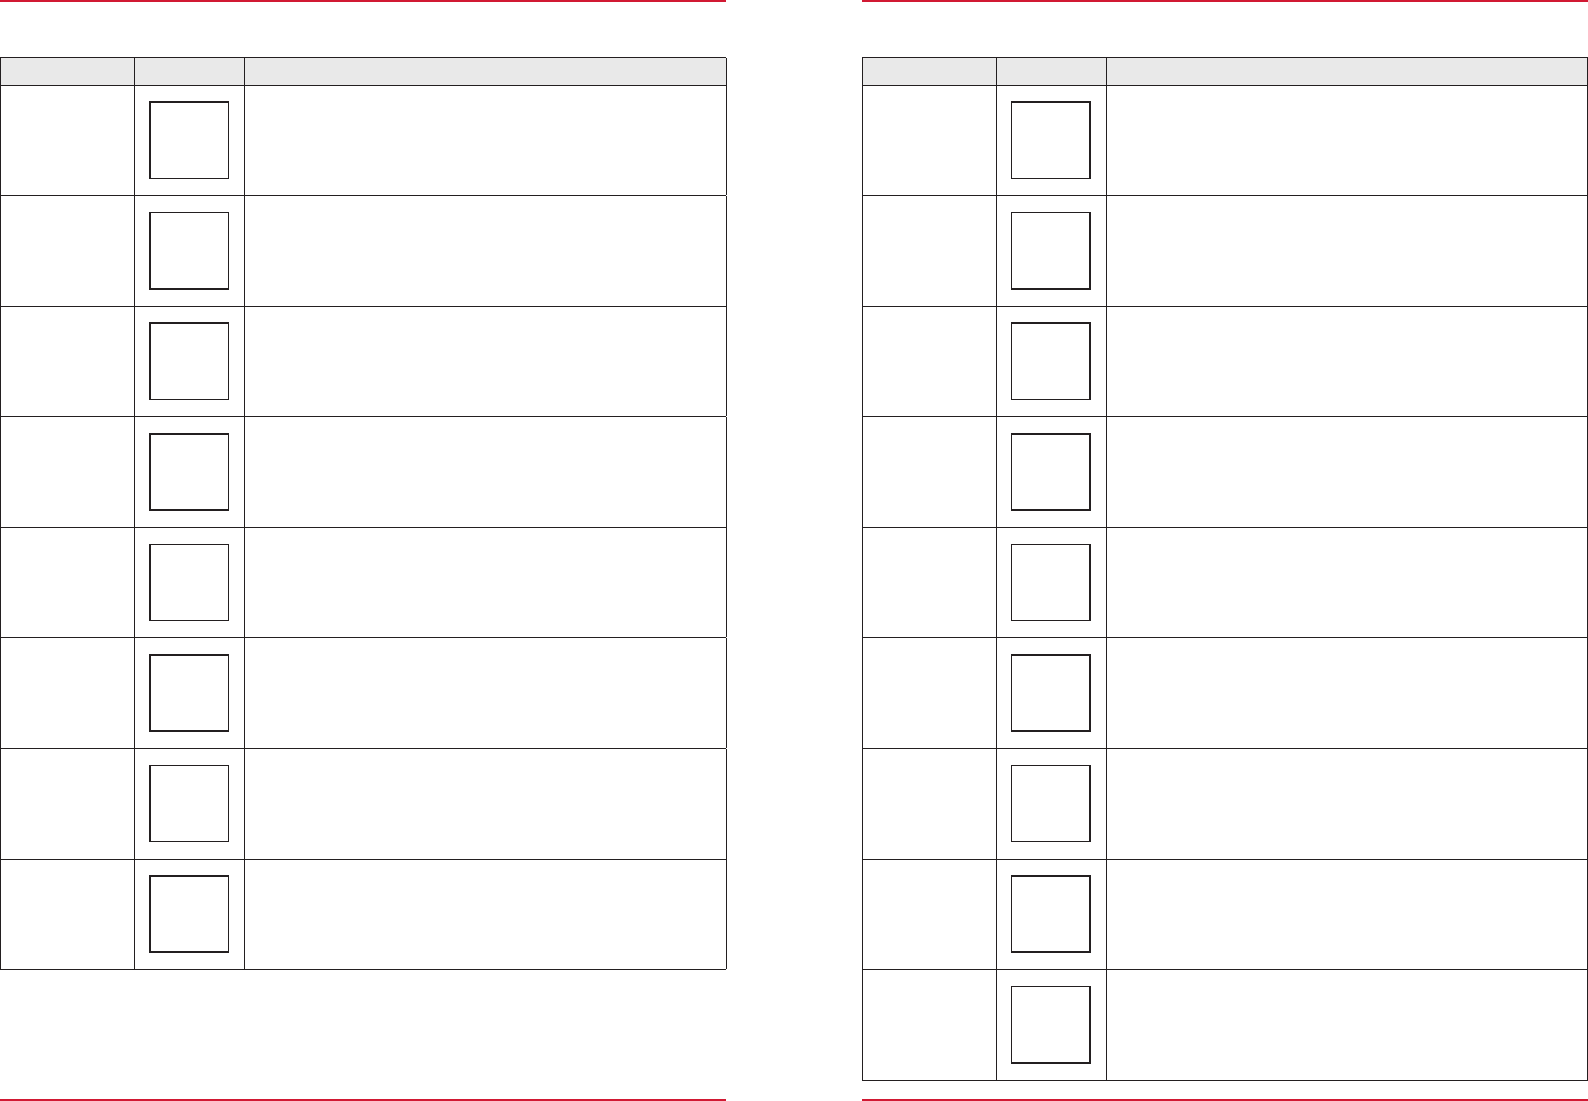
LOUDSPEAKER SYSTEM
FunctionIconOperation
Loudspeaker
system
Touch to access this view
FunctionIconOperation
Volume
Touch to set initial and normal volume levels
Loudspeaker System Volume S. 77
Loudspeaker
setup
Touch to make general loudspeaker system settings
Loudspeaker System Loudspeaker Setup S. 78
Navi mixer
Touch to set the navigation voice outputs
Loudspeaker System Navi-Mixer S. 78
Fig. 5/12
Volume
FunctionIconOperation
Initial Volume
Setting = manually adjusted volume
Last = last volume set before switching off
Adjust Initial
Volume
This setting can only be made if the upper setting is at SET.
0< >+40
TA volume
Setting = manually adjusted volume
Last = last volume set
Adjust
TA Volume
This setting can only be made if the upper setting is at SET.
0< >+40
Navigation
Volume
-9< >+3
Tuner
-9< >+3
CD/DVD
-9< >+3
USB/iPod
-9< >+3
A/V In
-9< >+3
Camera Mic.
-9< >+3
Fig. 5/13
In this menu you can adjust the normal volume of the sources.
7879
Loudspeaker setup
FunctionIconOperation
Sound
system
4.2 = 4 channel speaker system (+ 2 subwoofer)
5.1 = 5-channel speaker system (+ 1 subwoofer)
OE Sound
system
On = Sound system installed by the vehicle manufacturer
(DSP functions are partly disabled)
Off = ZENEC DSP functions fully enabled
Subwoofer
filter
12 dB filter
24 dB filter
Fig. 5/14
In this menu you can make the settings for the loudspeaker system. Please note that the settings you
make here will have an affect on the sound. You can reset them at any time using the preset profile.
Navi-Mixer
(no picture)
In this menu you can make the sound setting of the navigation output. Please note that other settings
can be made in Setup in the navigation system .
Navigation User Manual → Settings
FunctionIconOperation
Mute
ON = Voice output mutes media playback
OFF = Volume of media playback reduced
Audio output
Driver= only at driver's speaker
Front= only at speakers front left and right
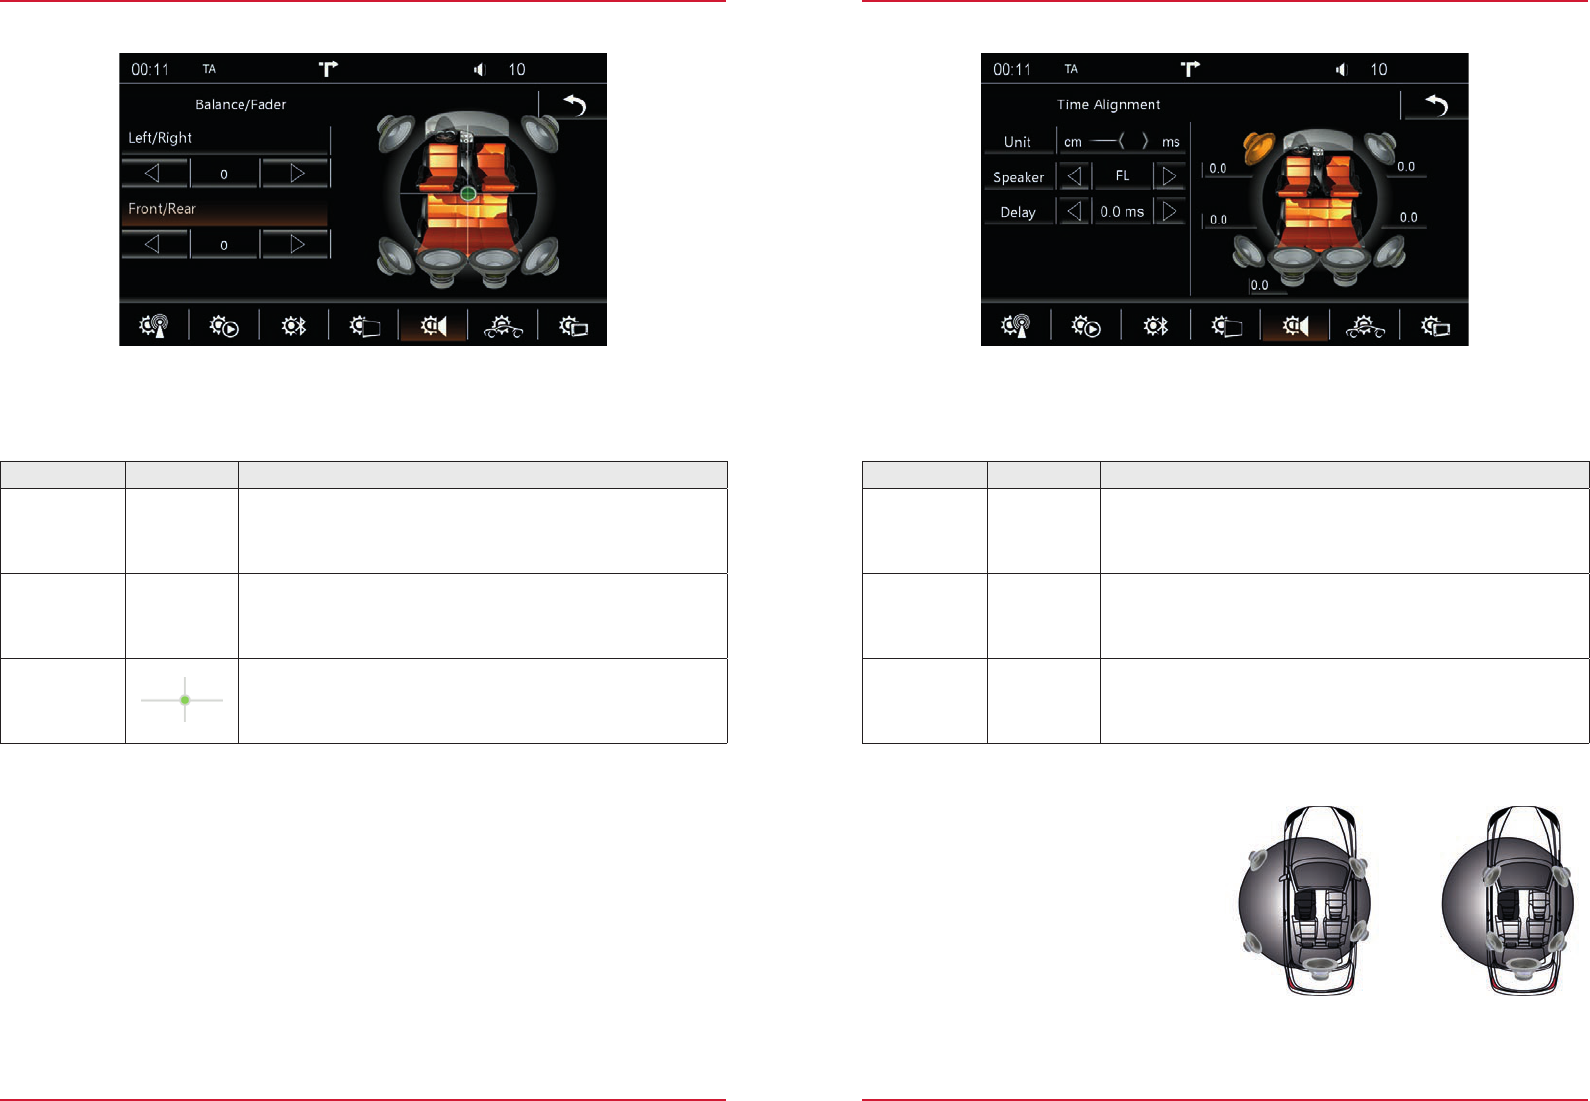
AUDIO SETTINGS
Fig. 5/15
Here you have the option of adjusting the sound profile optimally to your vehicle. The setting options
described in this section for parametric equalizing, crossover setting, and time delay correction have
great influence on the sound in your vehicle. To achieve an improvement in the acoustic playback by
using the correct settings presumes a certain amount of background knowledge. If you do not have
background knowledge about digital signal processors, gain settings, time delay differences, and
Q-factors, you should perhaps avoid making settings yourself. Instead make use of the vehicle presets
to quickly and easily find a suitable standard setting for your vehicle.
FunctionIconOperation
Equalizer
Touch to set the 11-BAND equalizer
Audio Settings → Equalizer S. 80
X-Over
Touch to make settings for the crossover
Audio Settings → X-Over S. 81
Fader/
Balance
Touch to set fader or balance
Audio Settings → Fader/Balance S. 82
Time Delay
Correction
Touch to make the time delay correction for individual speakers
Audio Settings → Time Delay Correction S. 83
8081
Equalizer
Fig. 5/16
In this menu you can make the settings for the playback frequency response.
FunctionIconOperation
Shape
factor Q
Touch to set the quality of the filter for the chosen band
(1= wide, 5 = narrow)
1 < > 5
Frequency
Touch to set a filter frequency for the selected band (each band
adjustable in 7 steps)
Gain
-14 < > +2
Band
Touch to select the desired BAND
Touch and hold to change the setting of the selected band
NOTE
The sound setting options are explained in a user manual included separately.
Libble takes abuse of its services very seriously. We're committed to dealing with such abuse according to the laws in your country of residence. When you submit a report, we'll investigate it and take the appropriate action. We'll get back to you only if we require additional details or have more information to share.
Product:
Forumrules
To achieve meaningful questions, we apply the following rules:
First, read the manual;
Check if your question has been asked previously;
Try to ask your question as clearly as possible;
Did you already try to solve the problem? Please mention this;
Is your problem solved by a visitor then let him/her know in this forum;
To give a response to a question or answer, do not use this form but click on the button 'reply to this question';
Your question will be posted here and emailed to our subscribers. Therefore, avoid filling in personal details.
Register
Register getting emails for Zenec Z-E3726 at:
new questions and answers
new manuals
You will receive an email to register for one or both of the options.
Get your user manual by e-mail
Enter your email address to receive the manual of Zenec Z-E3726 in the language / languages: English as an attachment in your email.
The manual is 3,88 mb in size.
You will receive the manual in your email within minutes. If you have not received an email, then probably have entered the wrong email address or your mailbox is too full. In addition, it may be that your ISP may have a maximum size for emails to receive.
If you have not received an email with the manual within fifteen minutes, it may be that you have a entered a wrong email address or that your ISP has set a maximum size to receive email that is smaller than the size of the manual.
The email address you have provided is not correct.
Please check the email address and correct it.
Your question is posted on this page
Would you like to receive an email when new answers and questions are posted? Please enter your email address.