10
Elektrischer Anschlu§
Bevor Sie den Stecker in die Steckdose einstecken,
ŸberprŸfen Sie bitte, da§ die auf dem Typenschild
des GerŠtes angegebene Spannung sowie
Frequenz mit dem Anschlu§wert des Hauses
Ÿbereinstimmen. Eine Abweichung von ±6% von der
Nominalspannung ist zulŠssig. FŸr die Anpassung
des GerŠtes an andere Spannungen mu§ ein
Spartransformator angemessener Leistung
vorgeschaltet werden.
Das GerŠt mu§ unbedingt vorschriftsmŠ§ig geerdet
werden. Zu diesem Zweck ist der Stecker des
Speisekabels mit dem dafŸr vorgesehenen Kontakt
versehen. Sollte die Netzleitung im Haus nicht mit
einer Erdleitung versehen sein, so mu§ das GerŠt
an eine getrennte Erdleitung vorschriftsmŠ§ig und
unter Hinzuziehung eines Fachmanns
angeschlossen werden.
Die Erzeugerfirma lehnt jede Verantwortung ab,
falls diese UnfallverhŸtungsvorschrift nicht
beachtet wird.
Dieses GerŠt entspricht der folgende
EWG Richtlinie:
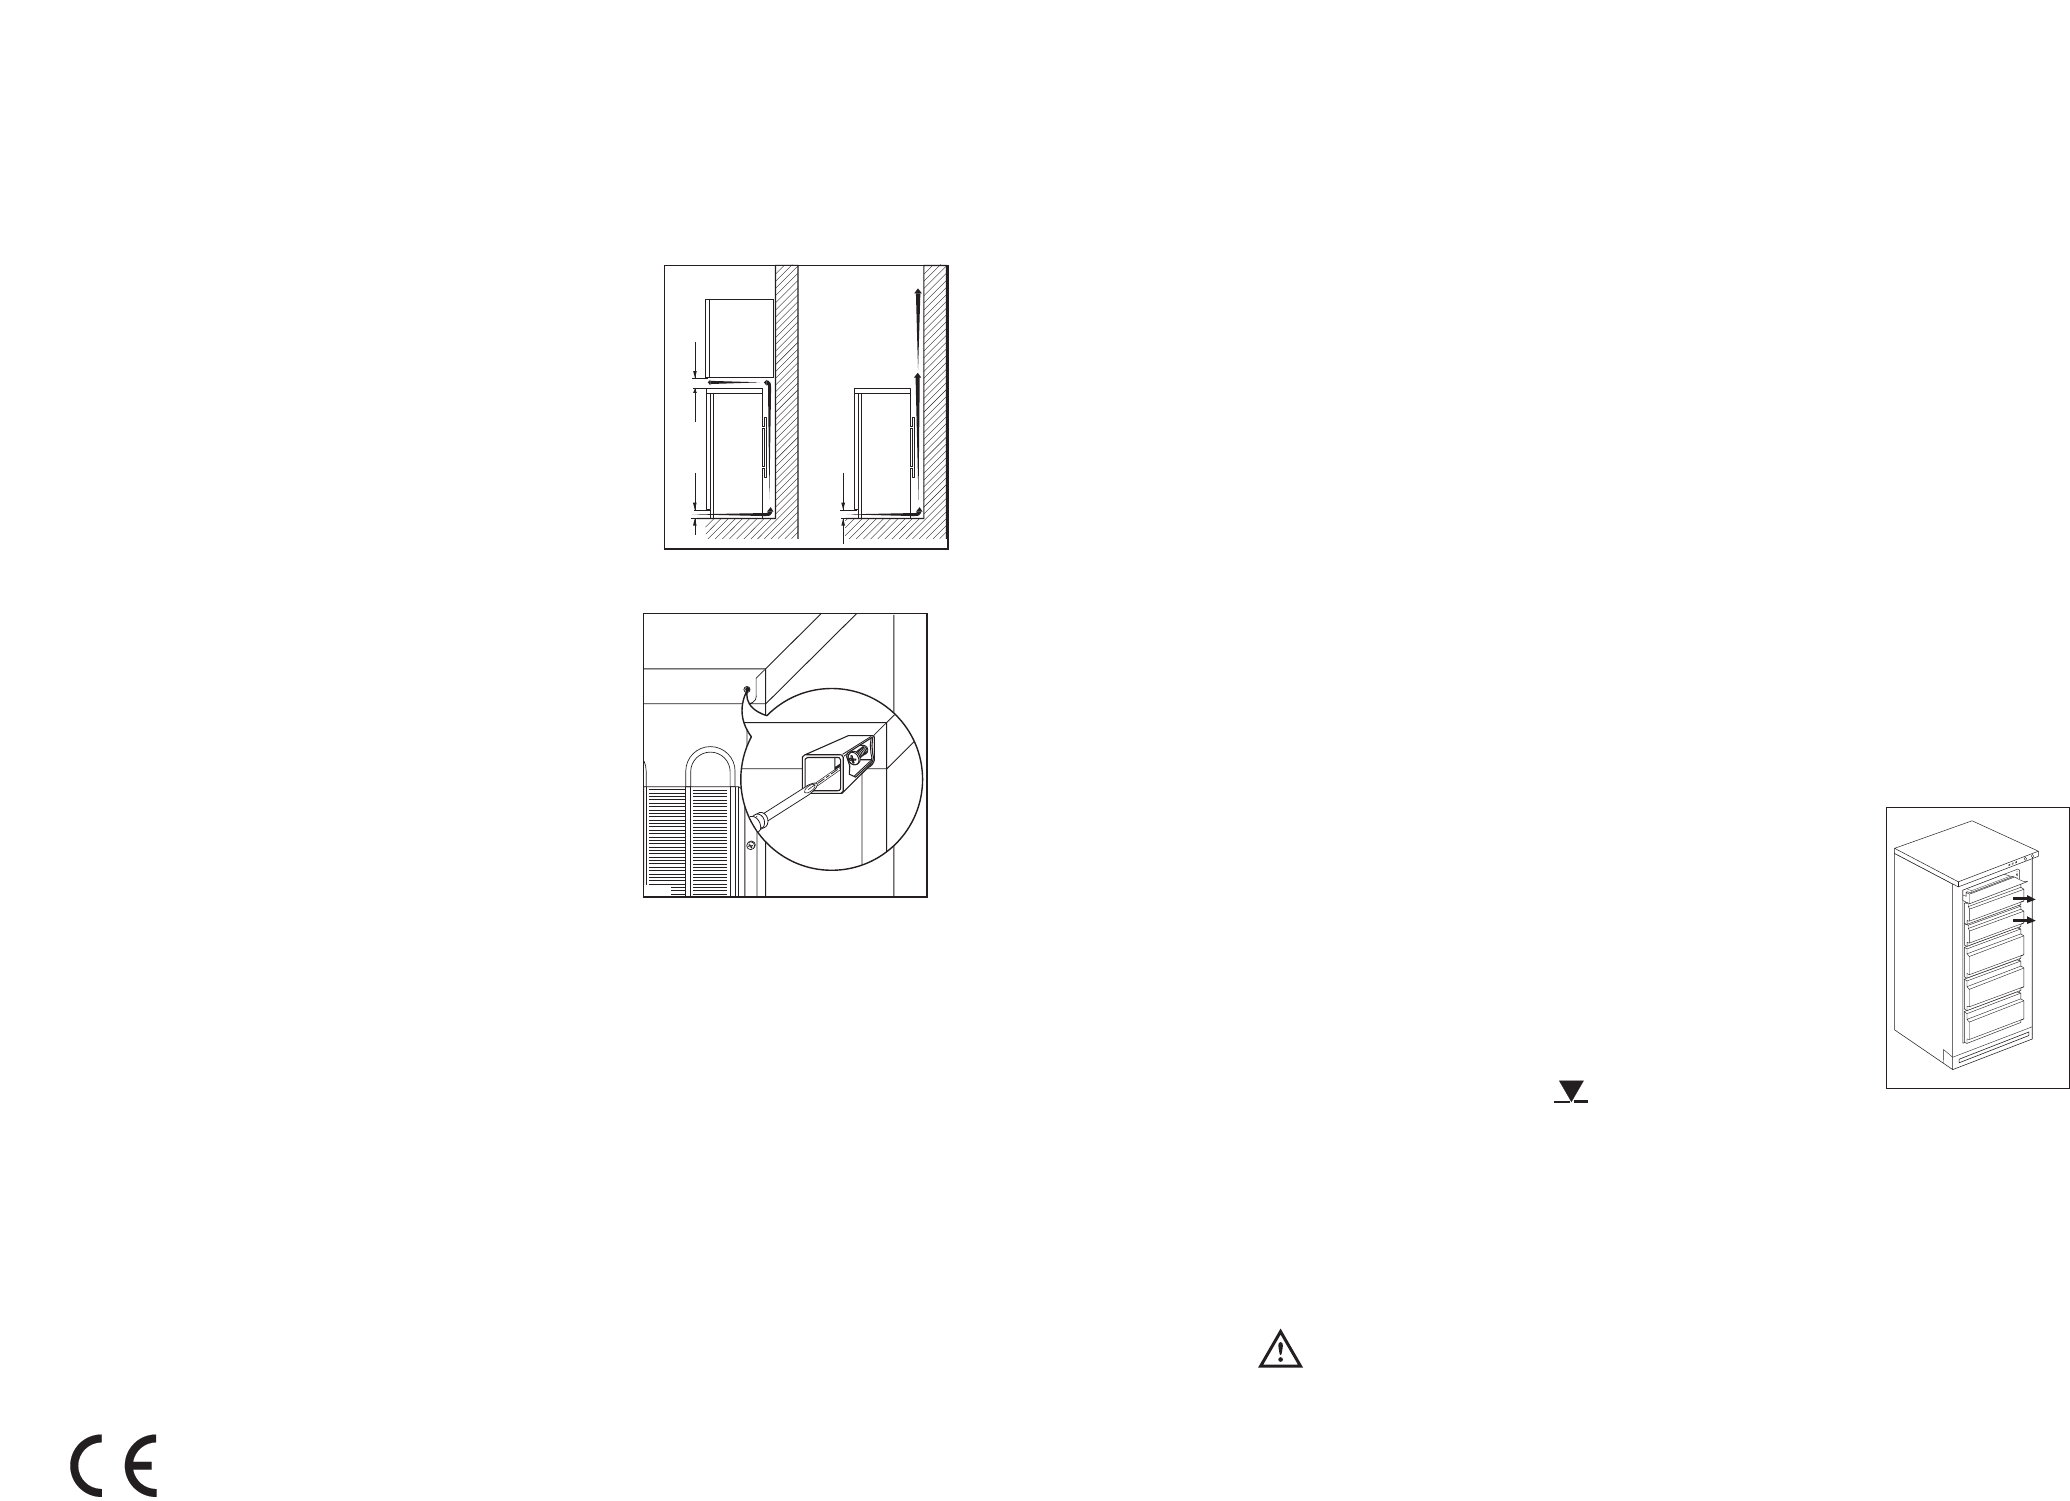
Hintere AbstandsstŸcke
Im Beipack sind 2 DistanzstŸcke enthalten, die an
der GerŠte-RŸckseite montiert werden mŸssen.
Lšsen Sie dazu etwas die Schrauben der
GehŠuseabdeckung. Schieben Sie das DistanzstŸck
unter den Schraubenkopf und ziehen Sie die
Schraube wieder fest.
43
Storage of frozen food
When the freezer is being turned on for the first
time, or after a prolonged period of disuse, turn the
N/S knob to the Quick-freezing position and then
wait at least two hours before introducing the food to
be conserved. You may then return the knob to the
ÇNÈ position. This two-hour waiting period may be
avoided if the freezer has already been in operation.
Important
In the event of accidental defrosting, for example
due to a power failure, if the power has been off
for longer that the value shown in the technical
characteristics chart under Òrising timeÓ, the
defrosted food must be consumed quickly or
cooked immediately and then refrozen (after
cooling).
Thawing
Deep-frozen or frozen food, prior to being used, can
be thawed in the refrigerator compartment or at
room temperature, depending on the time available
for this operation.
Small pieces may even be cooked still frozen,
directly from the freezer: in this case, cooking will
take longer.
Ice-cube production
This appliance is equipped with one or more trays
for the production of ice-cubes. Fill these trays with
water, then put them in the freezer compartment.
Do not use metallic instruments to remove the
trays from the freezer.
Freezing fresh food
Set the freezer to quick-freezing operational status.
Wait at least 3 hours before introducing fresie foods
into the freezer if it has only recently been turned on.
If the freezer has already been working for some
time, turn the respective knob to the ÇSÈ position at
least 24 hours before introducing the food into the
freezer in order to ensure better freezing results.
This period of time may be shortened according to
the quantity of food. When quick-freezing is being
performed, the compressor works continuously,
employing all of its refrigerating power to the
maximum. Keep the knob as it is for another 24
hours after the introduction of the food into the
freezer and then return the knob to the ÇNÈ position.
Bear in mind the freezing capacity of your freezer;
that is, the maximum quantity of food that may be
frozen in 24 hours. This freezing capacity is 22 kg.
Distribute the packages as shown in Figure.
Arrange the foods to be frozen in the upper
compartments.
When the necessary freezing time has elapsed,
distribute the newly-frozen foods into the drawers to
free the compartments for new foods to be frozen.
To make the most of the freezerÕs storage capacity,
remove drawer (A) and baskets (B) and (C); piace
frozen and deep-frozen products directly on the
compartment shelves, making sure they are not
stacked above the loading line
The temperature alarm light (C)
The temperature alarm light turns on automatically
whenever the temperature within the freezer rises
above a certain value which might endanger
satisfactory long-term conservation.
It is perfectly normal for the temperature alarm light
to remain lit up for a short time after the freezer is
initially turned on. It will remain lit up until the
optimum temperature for the conservation of frozen
food is attained.
Cold accumulator
A cold accumulator is supplied in the freezer; this
increases the length of time for which food will keep
in the event of a power failure or breakdown. It must
be placed in the top drawer.