9
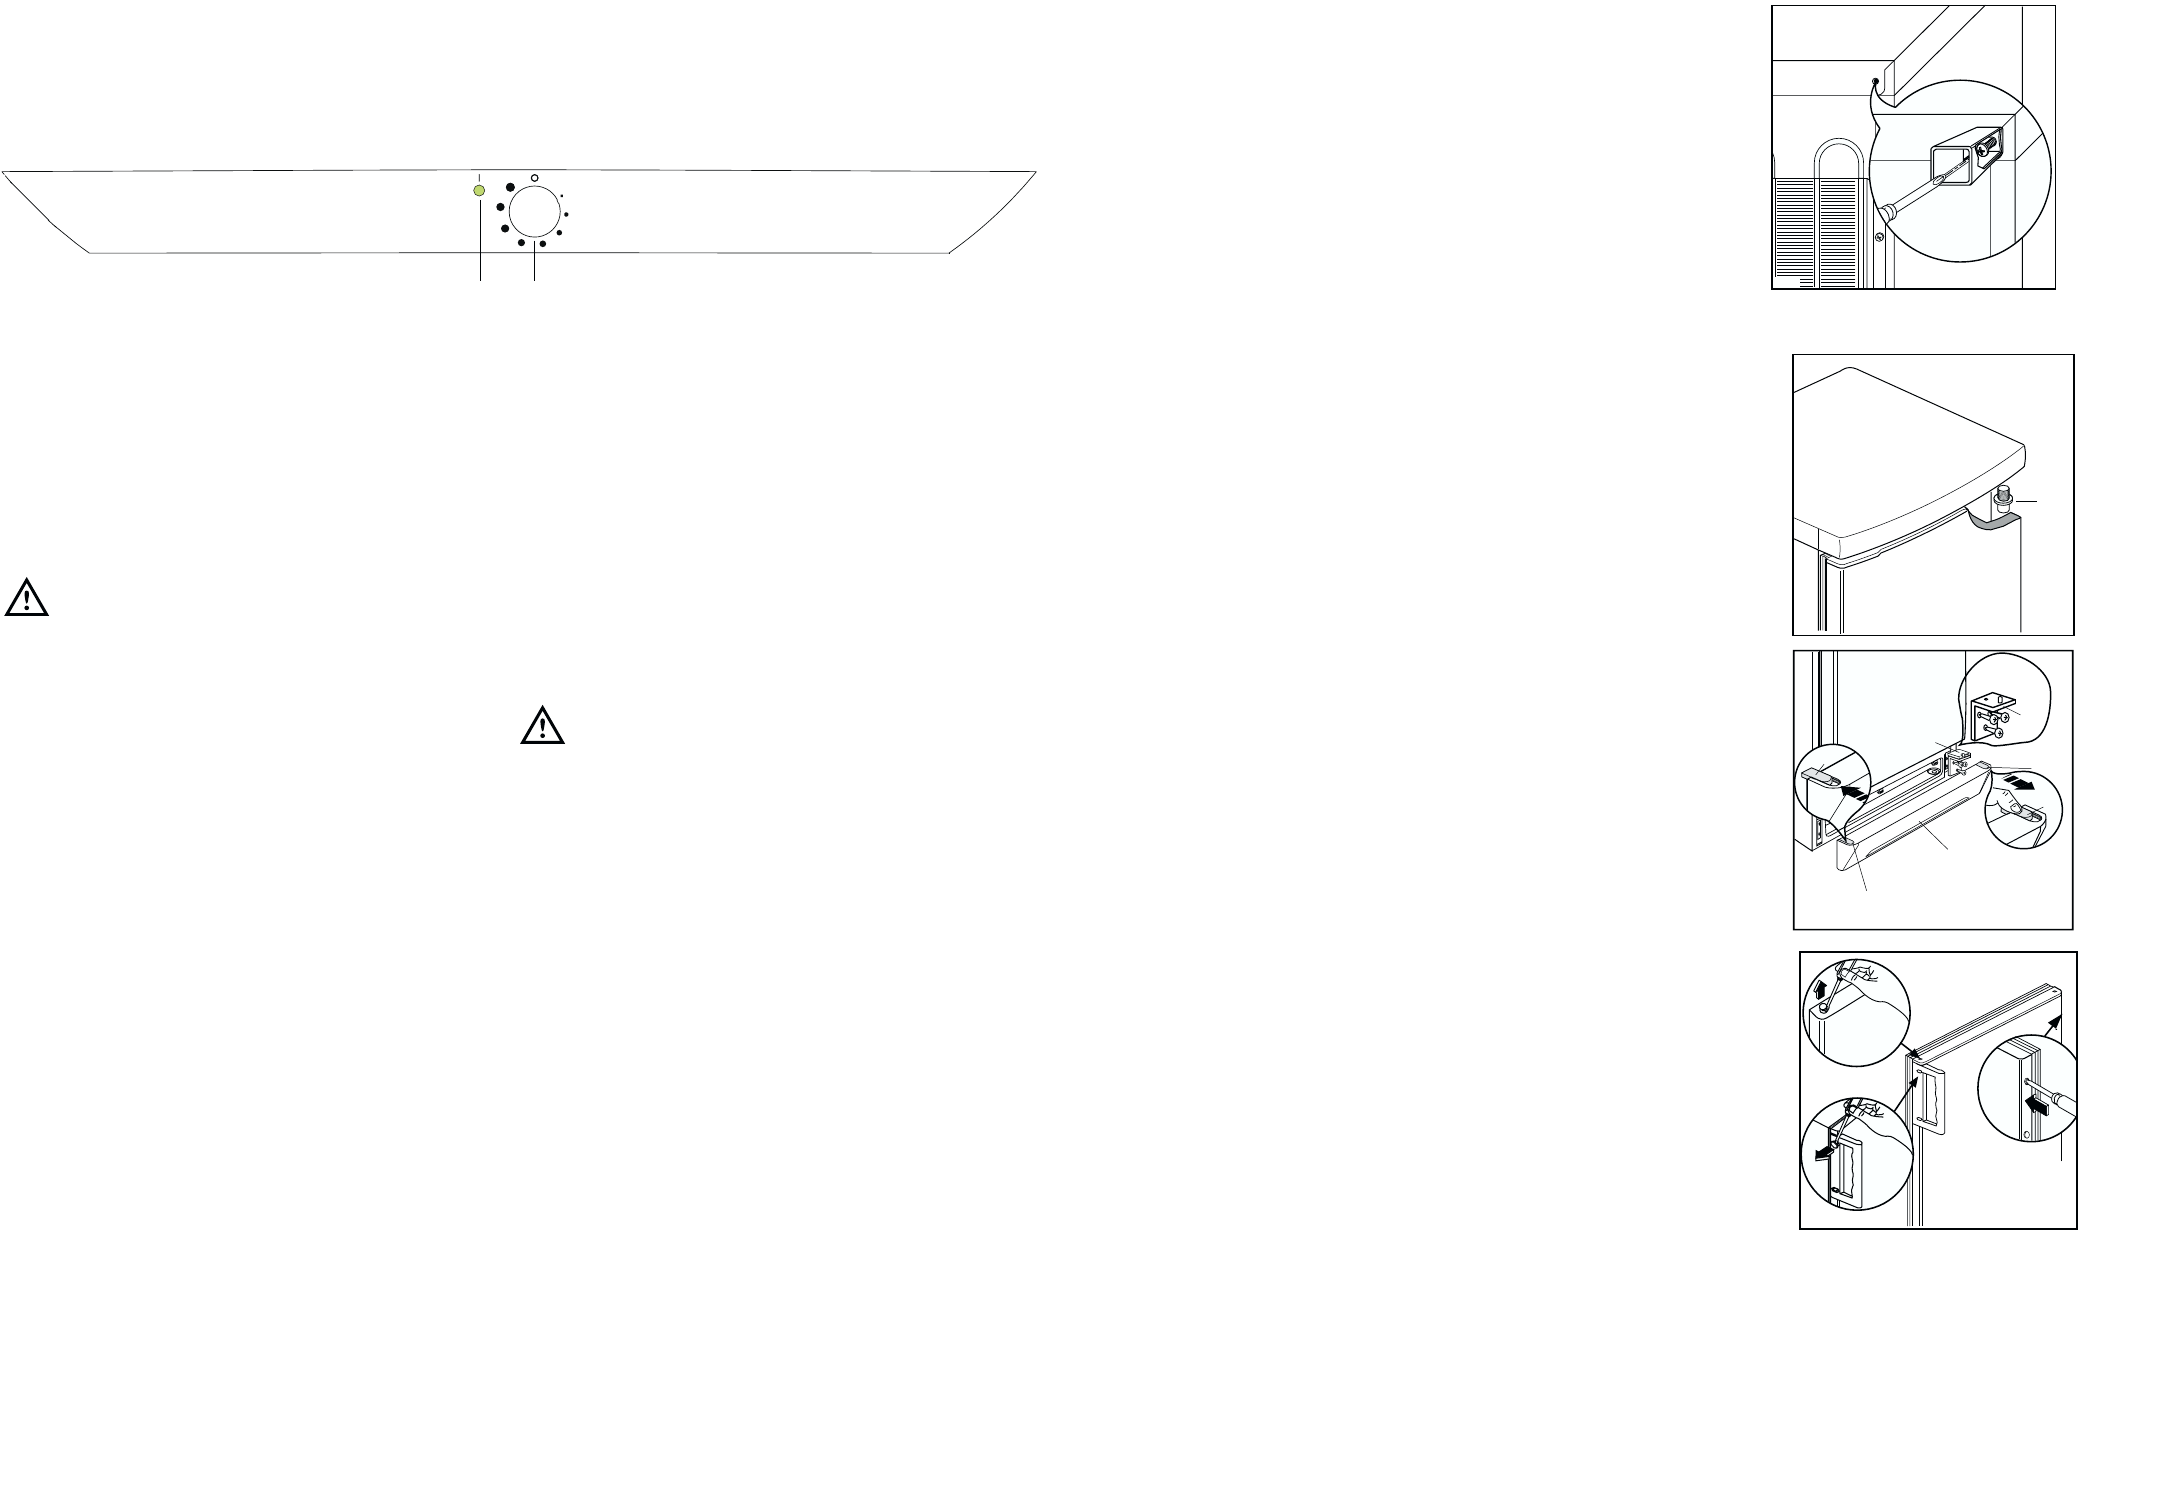
Türanschlagwechsel
Bevor Sie nachstehende Arbeitsvorgänge
durchführen, Netzstecker unbedingt aus der
Steckdose ziehen!
Den Wechsel auf folgende Weise ausführen:
1. Entlüftungsgitter (D) abnehmen.
2. Unteres Scharnier (E) abnehmen.
3. Tür vom oberen Stift (G) abnehmen.
4. Nachdem Sie die Stöpsel entternt haben, die auf
der gegenüberliegenden Seite wieder
einzusetzen sind, nehmen Sie den oberen Stift
ab und montieren Sie ihn an der
gegenüberliegenden Seite.
5. Mit Hilfe eines 10 mm Schlüssel den unteren
Scharnierstift abschrauben und auf
gegenüberliegenden Scharnierseite wieder
anschrauben.
6. Tür wieder einsetzen.
7. Unteres Scharnier (E) auf gegenüberliegende
Türseite montieren und mittels der vorher
entnommenen Schrauben befestigen. Abdeckung
(F) vom Entlüftungsgitter (D) herausschieben und
auf gegenüberliegende Seite montieren.
8. Entlüftungsgitter wieder einsetzen.
9. Griffe abnehmen und auf gegeüberliegenden
Seite befestigen. Mit einem Senkstift die
Plastikstöpsel auf der gegenüberliegenden Seite
des Griffes durchlöchern. Mit dem im Beipack
enthaltenen Plastikstöpseln, die freibliebenen
Löcher abdeckenAchtung
Vergewissern Sie sich nach Ausführung des An-
schlagwechsels der Türen, daß alle Schrauben
fest angezogen sind und überprüfen Sie auch,
ob die Magnetdichtung am Möbel perfekt anliegt.
Bei einer niedrigen Raumtemperatur (z.B. im
Winter) kann es vorkommen, dass die Dichtung
nicht perfekt am Schrank haftet. Die Wiederher-
stellung der Dichtung erfolgt automatisch nach
gewisser Zeit. Wollen Sie aber diesen Prozess
beschleunige, so genögt es die Dichtung mit
einem Fön zu erwärmen.
36
Cleaning the interior
Before using the appliance for the first time, wash
the interior and all internal accessories with luke-
warm water and some neutral soap so as to remove
the typical smell of a brand-new product, then dry
thoroughly.
Do not use detergents or abrasive
powders, as these will damage the finish.
Temperature regulation
The temperature is automatically regulated and can
be increased to achieve a higher temperature
(warmer) by rotating the thermostat knob toward
lower
● settings or reduced (colder) rotating the knob
towards higher ● settings.
However, the exact setting should be chosen
keeping in mind that the temperature inside the
refrigerator depends on:
• room temperature;
• how often the door is opened;
• the quantity of food stored;
• location of appliance.
USE
Important
If the ambient temperature is high or the
appliance is fully loaded, and the appliance is
set to the lowest temperatures, it may run
continuously causing frost to form on the rear
wall. In this case the dial must be set to a higher
temperature to allow automatic defrosting and
therefore reduced energy consumption.
Fresh food refrigeration
To obtain the best performance:
• do not store warm food or evaporating liquids in
the refrigerator;
• do cover or wrap the food, particularly if it has a
strong flavour.
• Position food so that air can circulate freely round
it.
Operation
Insert the plug into the wall socket.
Turn the thermostat knob (B) to the right to a
medium setting (the function indicator light (A) will
light up .
Control panel